RADEMACHER DuoFern Installation And Commissioning Manual
Window/door contact
Source: rademacher.de
Hide thumbs
Also See for DuoFern:
- Instruction manual (120 pages) ,
- Installation and operating instrictions (48 pages) ,
- Instruction manual for the electrical connection and for commissioning (48 pages)

Subscribe to Our Youtube Channel
Related Manuals for RADEMACHER DuoFern


Summary of Contents for RADEMACHER DuoFern
- Page 1 DuoFern Window/Door Contact Translation of the original Installation and Commissioning Manual Item no. 3200 31 64 VBD 673-2-1 (09.18)
-
Page 2: Table Of Contents
Installation instructions ..........13 Installation examples ...........15 Temporary installation ..........17 Teaching in the window or door positions ....18 Check the taught-in positions ........20 Final installation of the DuoFern Window/Door Contact ................21 10. DuoFern devices (logging on / logging off / clearing) ......22 10.1 Logging on DuoFern devices ........23 10.2 ... -
Page 3: This Manual
◆ This manual is part of the product. Please store it in an easily accessible place. ◆ When passing the DuoFern Window/Door Contact on to a third party, this manual must be passed on as well. ◆ Damage resulting from non-compliance with these in- structions and safety instructions will void the warranty. -
Page 4: Hazard Symbols
2.1 Symbols and depictions used Depiction Description Further useful information Please read the respective manual. 2.2 Glossary - definition DuoFern ◆ RADEMACHER radio system for controlling compatible products. HomePilot ® ◆ The HomePilot is a central controller unit for ® RADEMACHER radio products. -
Page 5: Included In Delivery
3. Included in delivery 1 x Sensor part (housing incl. sensor and electronics) 1 x Cover for sensor part 1 x 3 V lithium battery, type CR2032 1 x Magnet 4 x Double-sided round adhesive pads for the temporary fixing of the sensor part and magnet 2 x Double-sided rectangular-shaped adhesive tape for ... -
Page 6: General View / Operating Elements
4. General view / operating elements Sensor part Magnet Signal transducer Sensor Set button (S) Indicator light (multicoloured LED) Battery compartment Battery (3 V lithium, CR2032) DuoFern log-on button 10) DuoFern log-off button ... -
Page 7: Product Description
18. Integration into the DuoFern radio system The DuoFern Window/Door Contact emits different control signals depending on the type of DuoFern device that is logged on. You can obtain further information in the service centre on our website at “www.rademacher.de”. -
Page 8: Technical Specifications
Dimensions (L x W x D): Sensor part: 78 x 26 x 8.5 mm Magnet: 17 x 26 x 8.5 mm DuoFern radio technology Transmission frequency: 434.5 MHz Transmission power: max. 10 mW approx. 20 m, Radio range within a building:... -
Page 9: Safety Instructions
The use of defective devices and improper use can lead to property damage. ◆ Never use defective or damaged devices. ◆ Check the DuoFern Window/Door Contact for damage. ◆ Consult our customer service department in the event that you discover damage, see page 32. -
Page 10: Inserting / Changing The Battery
8. Inserting / changing the battery The use of incorrect batteries can damage the DuoFern Window/Door Contact. ◆ Only use type CR2032 batteries. ◆ Pay attention to the correct polarity when inserting the battery, see page 11. Signals in the case of an empty battery a short audible signal when opening/ tilting ◆... - Page 11 8. Inserting / changing the battery Carefully open the cover on both sides by gently turning the screwdriver. Slide the battery provided into the battery compartment with the plus pole (+) pointing upwards. A flat, non-metallic object can be used to slide the old battery out of the battery compartment when changing a battery.
- Page 12 ◆ Frequent status changes (e.g. opening / closing a door). ◆ Number of logged-on DuoFern devices. Recommendation: ◆ Do not install the DuoFern Window/Door Contact in the window frame in unheated rooms, but on the inside of the window frame.
-
Page 13: Installation
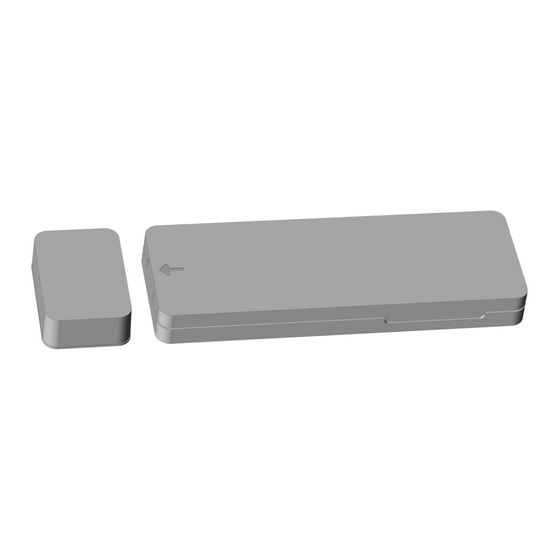
We recommend that you initially fix the elements temporarily with the round adhesive pads in order to carry out the teach-in process and then a function test prior to the final installation. The DuoFern Window/Door Contact is not suitable for use in aluminium window frames. However, if the installation is to take place, we recommend installing it on the window frame. - Page 14 9.1 Installation instructions The distance between the sensor (arrow on the housing) and magnet must be a maximum of 20 mm in all directions. The direction from which the magnet is led to the sensor does not matter.
-
Page 15: Installation Examples
9.2 Installation examples Check that the sensor part and magnet fit into the window frame. You can find the dimensions in the technical specifi- cations on page 8. Alternatively, we recommend an installation on the window frame. As a window contact in the window frame Recommendation to protect against condensation Install the sensor part in the side jamb of the window frame and never on the bottom rail as water may accumulate there from time to time. - Page 16 9.2 Installation examples As a window contact on the window frame If an installation in the window frame is not possible. As a door contact on As a door contact in the door the frame...
-
Page 17: Temporary Installation
9.2 Installation examples The installation of the magnet and sensor part may be different to the illustrations. The radio range may be reduced if the sensor part is installed on metal. 9.3 Temporary installation Select the installation position based on the above-men- tioned criteria and installation examples. Fix the sensor part and the magnet at the selected installation position with the round adhesive pads provided. -
Page 18: Teaching In The Window Or Door Positions
9.4 Teaching in the window or door positions The DuoFern Window/Door Contact has three operating modes. The teach-in processes are carried out in the re- spective mode: ◆ Window mode (open / closed / tilted), LED flashes green ◆ Door mode (open / closed), LED flashes blue ◆ Inverted door mode (open = closed / closed = open), LED flashes red... - Page 19 9.4 Teaching in the window or door positions Open the window or door. Activate the desired mode: 3 sec. = Window mode > LED flashes green 6 sec. = Door mode > LED flashes blue 9 sec. = Inverted door mode > LED flashes red Then two short acoustic signals confirm that the first position is stored. Close the window or door. After approx. 3 seconds, two short ...
-
Page 20: Check The Taught-In Positions
Each detected position is acknowledged by acoustic signals: = Open = Tilted = Closed The DuoFern Window/Door Contact is ready for operation if the teach-in process has been fully completed. If the installation position of the window or door changes over time and the teach-in positions... -
Page 21: Final Installation Of The Duofern Window/Door Contact
9.6 Final installation of the DuoFern Window/Door Contact Mark the installation positions of the sensor part and mag- net, e.g. with a pencil. Detach the fixed sensor part and magnet. Remove the round adhesive pads and clean the adhesive points thoroughly with the cleaning cloth provided. -
Page 22: Duofern Devices (Logging On / Logging Off / Clearing)
(logging on / logging off / clearing) In order for your DuoFern Window/Door Contact to send control signals in the DuoFern network, it is necessary to log any desired DuoFern device (e.g. DuoFern actuator etc.) on to the DuoFern Window/Door Contact. Please read the instruction manual for the re- spective DuoFern device. -
Page 23: Logging On Duofern Devices
◆ Lights up green for 5 seconds: after a successful login ◆ Lights up red: if the maximum number of participants has already been reached or an attempt has been made to log on a battery-operated DuoFern device The log-on process can be cancelled prematurely by pressing the log-on or log-off button. -
Page 24: Logging Off Duofern Devices
10.2 Logging off DuoFern devices Switch the respective DuoFern device to log-off mode. Press the log-off button on the DuoFern Window/Door Contact. 60 sec. The log-off mode remains active for 60 seconds. LED signals when logging off ◆ Flashes red: during the log-off ◆ Lights up green for 5 seconds: after a successful log-off ◆ Lights up red: if the log-off was not successful The log-off process can be cancelled prematurely by pressing the log-on or log-off button. -
Page 25: Clearing The Duofern Network
10.3 Clearing the DuoFern network A DuoFern device that is no longer available by radio can be logged off the DuoFern Window/Door Contact. Press the log-on button for five seconds until the LED lights up green. All unavailable DuoFern devices are logged off. LED signals during the clearing process ◆... -
Page 26: Logging On To The Homepilot
[ + Logging on devices ]. Press the log-on button on the DuoFern Window/Door Contact. After the log-in is successfully completed, the LED lights up green for 5 seconds. The DuoFern Window/Door Contact appears in the log-on dialogue in the HomePilot user ®... -
Page 27: Deleting All Settings
As soon as the LED lights up red continuously, all settings are deleted and the DuoFern Window/Door Contact returns to its original default condition. 13. Closing the housing cover Press the cover carefully onto the sensor part after com- pleting all the settings. -
Page 28: Cleaning / Maintenance
◆ Use only a soft, slightly damp cloth to clean the device. 15. Simplified EU declaration of conformity RADEMACHER Geräte-Elektronik GmbH, hereby declares that the DuoFern Window/Door Contact complies with the Directive 2014/53/EU (Radio Equipment Directive). The full text of the declaration of conformity is available at the following website: www.rademacher.de/ce... -
Page 29: Information About Environmental Protection
16. Information about environmental protection Removal of the batteries prior to the final disposal The batteries must be removed again prior to disposal. Disposal of used batteries Batteries may not be disposed of in domestic waste and must be disposed of separately. -
Page 30: Warranty Terms And Conditions
Proof of this must be provided by presenting a copy of the invoice. RADEMACHER will remedy any defects that occur within the warranty period free of charge either by repair or replacement of the affected parts or by supplying a new replacement unit ... - Page 32 RADEMACHER Geräte-Elektronik GmbH Buschkamp 7 46414 Rhede (Germany) info@rademacher.de www.rademacher.de Service: * 30 seconds free of charge, subsequently Hotline 01807 933-171* 14 cents/minute from German fixed line Fax +49 2872 933-253 networks and max. 42 cents / minute service@rademacher.de from German cellular networks.
Need help?
Do you have a question about the DuoFern and is the answer not in the manual?
Questions and answers