Advertisement
Quick Links
Installation instructions / user´s manual
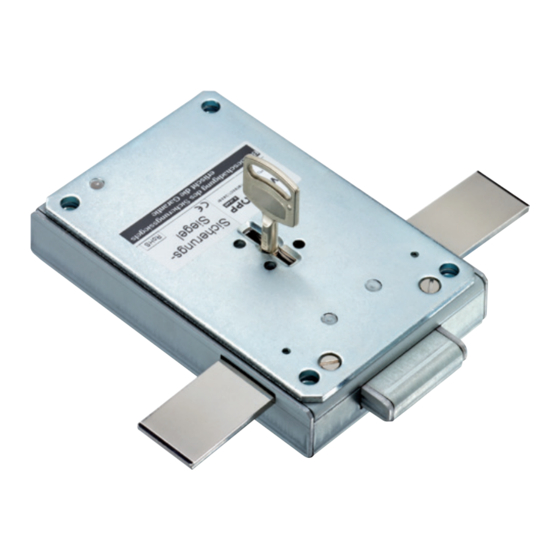
Key locks 1609 / 1619 / 1629 / 1639
1609 / 1619
1 General instructions
• Please read the installation instructions carefully, before activating the lock.
1.1 Liability notes
• The mounting of the lock has to be carried out according to the installation instruction.
• We point out that this installation instruction is part of the VdS-certification and of other testing institutes and non-compliance
leads to the loss of this certification.
• We don't assume liability for malfunctions due to incorrect operation, use of force or inappropriate handling. In cases of
damage to property or valuables, which are due to incorrect locking of the safe, we also don't assume liability.
• By opening the lock cover warranty of the manufacturer will be void.
• The lock can be installed in all conventional safes.
• The lock has to be protected against external attacks.
• It is recommended to protect all security relevant components of the high-security lock against tempering even when the
door is opened.
• Do not insert any lubricants or other substances into the lock (i.e. filler material, detergents or other fouling).
• Take care that the lock, battery compartment and the optional cables should not be damaged.
• If your safe, however, does not open correctly with the following instructions, please contact the manufacturer of the safe.
1.2 Security notes
• Due to security reasons it is recommended not to leave the key unattended in the lock.
• The keys have to be stored at a safe place and may only be accessible by authorized persons.
• When losing the key exchange the lock immediately.
• Make sure after each locking if the safe is locked.
Rel. 1.5
1629
09.12.2015
1639
© Carl Wittkopp GmbH - Errors and omissions excepted
Installation instructions / user´s manual no. 9999-153-0
Advertisement

Related Manuals for Wittkopp 1619


Summary of Contents for Wittkopp 1619
- Page 1 Installation instructions / user´s manual Key locks 1609 / 1619 / 1629 / 1639 1609 / 1619 1629 1639 1 General instructions • Please read the installation instructions carefully, before activating the lock. 1.1 Liability notes • The mounting of the lock has to be carried out according to the installation instruction.
-
Page 2: Installation Lock
25,4 Hub/Stroke 12 2.1 Drill pattern lock 1609 / 1619 / 1629 / 1639 2.2 Keyhole (of the lock) 1609 / 1619 / 1629 / 1639 58,3 11,5 Ø 7 Ø... - Page 3 Basküle in dieser Lage in Pfeilrichtung ins Schloss einrasten • The locks 1609 / 1619 / 1629 / 1639 optionally are delivered with extension latches. • Depending on the version, the extension latches are built in factory-provided. • Please make sure that the lock’s function is not affected by the use of extension latches. When mounting the lock make sure that the extension latches are not bent or twisted.
- Page 4 Key locks 1609 / 1619 / 1629 / 1639 4 Dimensions lock 1609 / 1619 / 1629 / 1639 4.1 Key lock 1609 with square bolt Hub / Stroke 10 Hub / Stroke 12 Hub / Stroke 10 4.2 Key lock 1619 with flat bolt...
- Page 5 Key locks 1609 / 1619 / 1629 / 1639 4.3 Key lock 1629 with square bolt Hub / Stroke 12 Hub / Stroke 10 Hub / Stroke 10 5 Operating notes lock 1609 / 1619 / 1629 • The lock may only be operated with the according keys. The insertion and opening attempts with other keys can lead to internal damage.
- Page 6 Opening by turning clockwise until the stop. • Control mechanism removable: Remove the master key. • Control mechanism not removable: The master remains inside the lock • Open the lock with standard mechanism (see lock 1609 / 1619).
- Page 7 Key locks 1609 / 1619 / 1629 / 1639 6 Einbaumaße Schloss 1639 6.1 Key lock 1639 with square bolt Hub / Stroke 10 Hub / Stroke 10 Hub / Stroke 12 7 Dimensions battery compartment 7.1 Dimensions battery compartment of lock 1639 7.2 Drill pattern of lock 1639...
-
Page 8: Power Supply And Battery Change
Key locks 1609 / 1619 / 1629 / 1639 7.3 Plug positions LED red LED green Button • Connect the lock and the battery compartment with the cable. 8 Power supply and battery change • Insert 2 mignon AA batteries into the battery compartment (no rechargeable batteries!) and pay attention to the polarity! •... - Page 9 Key locks 1609 / 1619 / 1629 / 1639 9 Operating notes lock 1639 • The lock may only be operated with the according keys. The insertion and opening attempts with other keys can lead to internal damage. • Never use force.
-
Page 10: Opening Window
Key locks 1609 / 1619 / 1629 / 1639 10 Einstellen Öffnungsverzögerungs-/freigabezeit • The switches are on the back of the lock. 10.1 Coding switch Beginning of the time delay Wait during the time delay Opening window Plug position of battery compartment 3.4 Opening window... - Page 11 Key locks 1609 / 1619 / 1629 / 1639...
- Page 12 Key locks 1609 / 1619 / 1629 / 1639...
Need help?
Do you have a question about the 1619 and is the answer not in the manual?
Questions and answers