Festo CPX Series Manual
Manual electronics, analogue i/o modules, sub-bases
Hide thumbs
Also See for CPX Series:
- Manual (446 pages) ,
- Electronic manual (232 pages) ,
- Description (156 pages)

Related Manuals for Festo CPX Series


Summary of Contents for Festo CPX Series
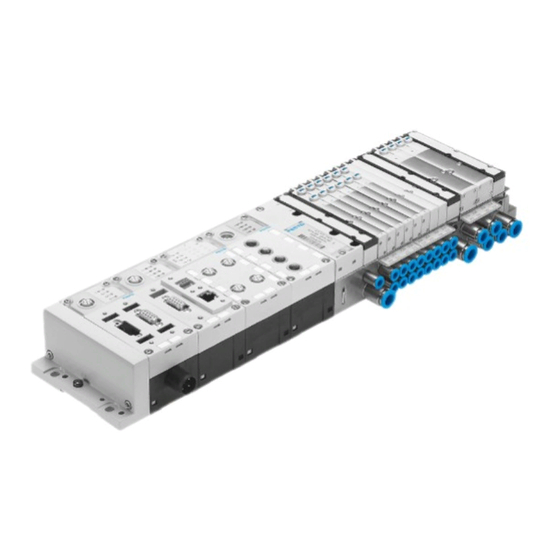
- Page 1 CPX Terminal Manual Electronics CPX analogue I/O modules I/O modules CPX−2AE−U−I CPX−4AE−I CPX−4AE−T CPX−4AE−TC CPX−4AE−P CPX−2AA−U−I Sub−bases CPX−AB−... CPX−M−... Manual 526 416 en 0906e [746 679]...
- Page 3 ....... . . 526 416 © (Festo AG & Co. KG, D 73726 Esslingen, Germany, 2009) Internet: http://www.festo.com E−Mail:...
- Page 4 Contents and general instructions ® ® ® HARAX , SPEEDCON , TORX are registered trademarks of their respective trademark holders in certain countries. Festo P.BE−CPX−AX−EN en 0906e...
-
Page 5: Table Of Contents
....2−28 2.4.6 Channel−specific module parameters Filter measured value ..2−31 2.4.7 Channel−specific module parameters Monitor of wire fracture 2−31 Festo P.BE−CPX−AX−EN en 0906e... - Page 6 ..........3−36 3.5.3 Fault treatment and parametrizing ......3−38 Festo P.BE−CPX−AX−EN en 0906e...
- Page 7 ..........4−31 4.5.3 Error treatment and parametrizing ......4−33 Festo P.BE−CPX−AX−EN en 0906e...
- Page 8 ......6−25 6.5.3 Error handling and parameterisation ......6−27 Festo P.BE−CPX−AX−EN en 0906e...
- Page 9 ..........7−37 7.5.3 Fault treatment and parametrizing ......7−39 Festo P.BE−CPX−AX−EN en 0906e...
- Page 10 ............B−1 VIII Festo P.BE−CPX−AX−EN en 0906e...
-
Page 11: Intended Use
Intended use The CPX analogue I/O modules described in this manual have been designed exclusively for use in conjunction with CPX terminals from Festo. The analogue I/O modules must only be used as follows: as intended in perfect technical condition without any modifications by the user. -
Page 12: Target Group
This manual is intended exclusively for technicians trained in control and automation technology, who have experience in installing, commissioning, programming and diagnosing programmable logic controllers (PLC) and field bus systems. Service Please consult your local Festo Service agent if you have any technical problems. Festo P.BE−CPX−AX−EN en 0906e... -
Page 13: Important User Instructions
This means that failure to observe this instruction may result in damage to property. The following pictogram marks passages in the text which describe activities with electrostatically sensitive compo nents. Electrostatically sensitive components may be damaged if they are not handled correctly. Festo P.BE−CPX−AX−EN en 0906e... - Page 14 Accessories: Information on necessary or sensible accessories for the Festo product. Environment: Information on environment−friendly use of Festo products. Text markings The bullet indicates activities which may be carried out in · any order. 1. Figures denote activities which must be carried out in the numerical order specified.
-
Page 15: Cpx Analogue I/O Modules
CPX terminal. 0 ... 10 bar Relative pressure measurement on up to 4 channels Differential pressure measurement between any 2 channels is possible Tab. 0/1: Overview of analogue input modules XIII Festo P.BE−CPX−AX−EN en 0906e... - Page 16 0 ... 10 V 0 ... 20 mA 4 ... 20 mA Modules with various connection blocks are shown Tab. 0/2: Overview of analogue output modules Information about the interlinking blocks can be found in the CPX system manual. Festo P.BE−CPX−AX−EN en 0906e...
-
Page 17: Diagnosis Via The Field Bus
These can be evaluated via the: status bits (system status) I/O diagnostic interface (system diagnosis) module diagnosis error numbers. Further information about the diagnosis can be found in the CPX system manual or in the manual for the field bus node. Festo P.BE−CPX−AX−EN en 0906e... - Page 18 Instructions for fitting, installing and CPA pneumatics" commissioning CPA pneumatics (type 12) type P.BE−CPA−... Valve terminals with Instructions for fitting, installing and Midi/Maxi pneumatics" commissioning Midi/Maxi pneumatics (type 03) type P.BE−MIDI/MAXI−03−... Tab. 0/3: Manuals for the CPX terminal Festo P.BE−CPX−AX−EN en 0906e...
- Page 19 Common term for the CPX modules which provide inputs and outputs (CPX input modules and CPX output modules) IU / II Analogue voltage input / analogue current input OU / OI Analogue voltage output / analogue current output Tab. 0/4: Product−specific abbreviations part 1 XVII Festo P.BE−CPX−AX−EN en 0906e...
- Page 20 PLC / IPC Programmable Logic Controller / Industrial PC Resistance Temperature Device Status bits Internal inputs which supply coded common diagnostic messages Thermocouple Tab. 0/5: Product−specific abbreviations part 2 XVIII Festo P.BE−CPX−AX−EN en 0906e...
-
Page 21: Overview And Connection Technology I/O Modules
Overview and connection technology I/O modules Chapter 1 1−1 Festo P.BE−CPX−AX−EN en 0906e... - Page 22 ........1−21 1.3.2 Fitting the screening/shield plates ......1−24 1−2 Festo P.BE−CPX−AX−EN en 0906e...
- Page 23 CPX system manual. Information on the address assignment as well as on com missioning can be found in the appropriate field bus node manual or function module manual. 1−3 Festo P.BE−CPX−AX−EN en 0906e...
-
Page 24: Components Of An I/O Module
The manifold sub−base as the lower part of the housing provides the mechanical and electrical link between the module and the CPX terminal. Sub−base with specific connections Electronics module Manifold base Fig. 1/1: Components of an I/O module 1−4 Festo P.BE−CPX−AX−EN en 0906e... -
Page 25: Connection Technology
With plug connector inserted or with protective cap ISK−M12 With plug connector inserted or with protective cap ISK−M12; when using quick connectors, follow the manufacturer’s instructions Tab. 1/1: Connection technology part 1 1−5 Festo P.BE−CPX−AX−EN en 0906e... - Page 26 With plug connector inserted or with protective cap ISK−M12; when using quick connectors, follow the manufacturer’s instructions With cover AK−8KL and screw connector set VG−K−M9: IP65 / IP67 With plug SD−SUB−D−ST25: IP65 Tab. 1/2: Connection technology part 2 1−6 Festo P.BE−CPX−AX−EN en 0906e...
-
Page 27: Display And Connecting Elements
Electrical connections (example) Inscription fields for addresses Fault LED (red) Module fault Channel−related error LEDs (only CPX−4AE−T and CPX−4AE−TC) Fig. 1/2: Display and connecting elements Use identity labels type IBS 6x10 for marking the addresses. 1−7 Festo P.BE−CPX−AX−EN en 0906e... -
Page 28: Combinations Of Analogue I/O Modules And Sub−Bases
(2 terminal strips, 16−pin) −AB−1−SUB−BU−25POL · · · (1 SUB−D socket, 25−pin) −AB−4−HAR−4POL · (4 M12 sockets, 4−pin) −AB−4−M12−8POL (4 M12 sockets, 8−pin) Can be combined · Cannot be combined Tab. 1/3: Combinations of I/O modules and sub−bases 1−8 Festo P.BE−CPX−AX−EN en 0906e... -
Page 29: Connecting The Cables And Plugs To The Sub−Bases
Instructions can be found on the following pages and in the appendix A.7. Use plugs and cables from the Festo range for connecting sensors and actuators (see appendix A.10). If you wish to use your own cables, use only screened/ shielded cables for transmitting analogue signals. - Page 30 FE, it should be connected to the signal receiver side:" analogue inputs (CPX−2AE−U−I): connect the cable screening/shield on the CPX side analogue outputs (CPX−2AA−U−I): connect the cable screening/shield on the actuator side. 1−10 Festo P.BE−CPX−AX−EN en 0906e...
- Page 31 In order that the completely fitted modules with sub−base CPX−M−4−M12x2−5POL... comply with protection class IP65/IP67: Use plugs and cables specified from the Festo range for · connecting sensors and actuators (see appendix A.10) Tighten the union nuts of the plugs at first by hand.
- Page 32 In order that the completely fitted modules with sub−base CPX−AB−4−M12x2−5POL (−R) comply with protection class IP65/IP67: Use plugs and cables specified from the Festo range for · connecting sensors and actuators (see appendix A.10) Tighten the union nuts of the plugs at first by hand.
- Page 33 A.10), the plug housing will be connected to functional earth via the screening/shield plate by means of the spring contacts. Before fitting the plugs screw the spring contacts as far as · possible onto the thread of the plug. 1−13 Festo P.BE−CPX−AX−EN en 0906e...
- Page 34 The completely fitted sub−base CPX−AB−8−KL−4POL complies with protection class IP20. Screening Use a cable as short as possible to connect the cable · screening/shield to the FE terminal of the sub−base. Use suitable core end sleeves for the connection. 1−14 Festo P.BE−CPX−AX−EN en 0906e...
- Page 35 When connecting and disconnecting the cables: 1. Press the screwdriver with a light rotary movement to wards the centre of the unlocking opening (see Fig. 1/4). The cable terminal will then be unlocked. 1−15 Festo P.BE−CPX−AX−EN en 0906e...
- Page 36 You will then comply with protection class IP65/IP67 In order that sub−base CPX−AB−8−KL−4POL complies with protection class IP65/IP67, use cover type AK−8KL and the screw connector set type VG−K−M9 from Festo. Note the relevant fitting instructions. 1−16 Festo P.BE−CPX−AX−EN en 0906e...
- Page 37 Use a cable as short as possible to connect the cable · screening/shield to the FE pin of the Festo sub−D plug. If other screened plugs are used, the metal flange (housing) of the sub−D plug can also be used for connecting the cable screening/shield.
- Page 38 Note In order that the completely fitted modules with sub−base CPX−AB−4−HAR−4POL comply with protection class IP65/IP67: Use plugs type SEA−GS−HAR−4POL from the Festo range · (consisting of union nut, strain relief and splicing ring) for connecting sensors and actuators. Tighten the union nuts of the plugs at first by hand.
- Page 39 The cores can be connected up to 10 times if the contact ends are cut away each time (if the same core diameter is used). Cut off the used cable ends and repeat steps 2 to 4. 1−19 Festo P.BE−CPX−AX−EN en 0906e...
-
Page 40: Assembly
CPX system manual. The CPX terminal does not need to be dismantled when sub− bases or electronic modules are fitted or removed. This also applies to the plugs and cables on the sub−base. 1−20 Festo P.BE−CPX−AX−EN en 0906e... -
Page 41: Fitting The Sub−Bases
It may be necessary to fit or remove the electronic modules for the following reasons: for modifying the function of the I/O module (e.g. CPX−2AE−U−I instead of CPX−2AA−U−I). for replacing defective electronic modules. 1−21 Festo P.BE−CPX−AX−EN en 0906e... - Page 42 Pull the electronic module carefully and without tilting · away from the contact rails of the manifold sub−base. Sub−base Screws Electrical plug connector Electronics module Contact rails Manifold base Fig. 1/7: Fitting/removing the I/O module 1−22 Festo P.BE−CPX−AX−EN en 0906e...
- Page 43 2. Tighten the screws at first only by hand. Place the screws so that the self−cutting threads can be used. Tighten the screws with a TORX screwdriver size T10 with torque 0.9 1.1 Nm. 1−23 Festo P.BE−CPX−AX−EN en 0906e...
-
Page 44: Fitting The Screening/Shield Plates
3. Fit the sub−base. Instructions on earthing the screening/shield plate can be found in section 1.2.3. Dismantling The screening/shield plate must be removed in the opposite sequence to the fitting procedure. 1−24 Festo P.BE−CPX−AX−EN en 0906e... - Page 45 1. Overview and connection technology I/O modules Spring contact Screening plate Spring clip Sub−base type CPX−AB−4− M12x2−5POL CPX Terminal Fig. 1/8: Fitting screening/shield plate type CPX−AB−S−4−12 1−25 Festo P.BE−CPX−AX−EN en 0906e...
- Page 46 1. Overview and connection technology I/O modules 1−26 Festo P.BE−CPX−AX−EN en 0906e...
-
Page 47: Analogue Input Module Cpx−2Ae−U−I
Analogue input module CPX−2AE−U−I Chapter 2 2−1 Festo P.BE−CPX−AX−EN en 0906e... -
Page 48: Analogue Input Module Cpx−2Ae−U
..........2−35 2.5.3 Fault treatment and parametrizing ......2−37 2−2 Festo P.BE−CPX−AX−EN en 0906e... - Page 49 CPX system manual. Information on the address assignment as well as on com missioning can be found in the appropriate field bus node manual or function module manual. 2−3 Festo P.BE−CPX−AX−EN en 0906e...
-
Page 50: Function Of The Analogue Input Modules
10 V 20 mA 20 mA Sensor supply 24 V / 0.7 A per module. Tab. 2/1: Overview of analogue input modules 2AE−U−I Fitting See section 1.3. 2−4 Festo P.BE−CPX−AX−EN en 0906e... -
Page 51: Installation
The 24 V sensor supply for the inputs as well as the power supply for the electronics of the input modules is provided via the operating voltage supply for the electronics/sensors EL/SEN The sensors can also be supplied externally (electrical isola tion, see section 2.3.3, Fig. 2/2). 2−5 Festo P.BE−CPX−AX−EN en 0906e... -
Page 52: Dil Switch Settings
2. Remove if necessary the fitted sub−base (see Fitting" section 1.3). 3. Set the DIL switch elements in accordance with the instructions on the following pages. 4. Refit if necessary the sub−base (see Fitting" section 1.3, tightening torque 0.9 1.1 Nm). 2−6 Festo P.BE−CPX−AX−EN en 0906e... - Page 53 DIL switches of the analogue input module 2AE−U−I Please note The setting of the signal range with the DIL switches can be modified by parametrizing (see section 2.4). Parame trizing has precedence over the DIL switch setting. 2−7 Festo P.BE−CPX−AX−EN en 0906e...
-
Page 54: Pin Assignment
With CPX−AB−4−M12x2−5POL−R the metal thread is connected to FE Tab. 2/3: Pin assignment of analogue input module type CPX−2AE−U−I with sub−base CPX−AB−4−M12x2−5POL(−R) CPX−AB−4−M12x2−5POL−R The metal thread (...−R") of this sub−base is connected internally with pin 5 (Functional earth FE). 2−8 Festo P.BE−CPX−AX−EN en 0906e... - Page 55 Assignment depends on the DIL switch setting and on parametrizing (see section 2.3.1), a total of 2 input channels are available per module (I...0 and I...1, connection X1/X2 or X3/X4 as well as connection X5/X6 or X7/X8). Tab. 2/4: Pin assignment of analogue input module type CPX−2AE−U−I with sub−base CPX−AB−8−KL−4POL 2−9 Festo P.BE−CPX−AX−EN en 0906e...
- Page 56 Assignment depends on the DIL switch setting and on parametrizing (see section 2.3.1), a total of 2 input channels are available per module (I...0 and I...1) Tab. 2/5: Pin assignment of analogue input module type CPX−2AE−U−I with sub−base CPX−AB−1−SUB−BU−25POL 2−10 Festo P.BE−CPX−AX−EN en 0906e...
-
Page 57: Connecting The Analogue Intputs
Make sure that cables which are not used, but which are connected to the sub−base, are short−circuited by voltage inputs at the unused end of the cable. Further connection examples can be found in appendix A.9.1. 2−11 Festo P.BE−CPX−AX−EN en 0906e... -
Page 58: Instructions On Commissioning
Instructions on this can be found in the sections 2.4.2 and 2.4.3. The reaction with the default settings is described below. 2−12 Festo P.BE−CPX−AX−EN en 0906e... - Page 59 The channel−specific parameters Lower limit" and Upper limit" possess the following default settings: Lower limit = 0 Upper limit = 4095 These correspond to the scaling end values (data range) of the default data format. 2−13 Festo P.BE−CPX−AX−EN en 0906e...
- Page 60 20 mA range Physical measuring variables 2389 4095 Assigned analogue signal Digital value range after A−D conversion (linear scaling) Digital input value (example) Fig. 2/3: Example of default data format VZ + 12 bits right−justified" 2−14 Festo P.BE−CPX−AX−EN en 0906e...
- Page 61 < 0 V < 0 mA < 4 mA Less than rated Limiting to the lower range scaling end value Tab. 2/7: Scaling end values of the analogue input modules with default settings 2−15 Festo P.BE−CPX−AX−EN en 0906e...
-
Page 62: General Information On Parametrizing
30 ms after a value modification. Special instructions on avoiding parametrizing faults In order to avoid parametrizing faults, note the sequence described below when modifying the following parameters: Input analogue−value data format Lower limit channel x Upper limit channel x 2−16 Festo P.BE−CPX−AX−EN en 0906e... - Page 63 If the new upper limit is negative (only in the case of data format VZ + 15 bits linear scaled"), set first the lower limit, then the upper limit. 2−17 Festo P.BE−CPX−AX−EN en 0906e...
-
Page 64: Parameters Of The Analogue Input Module Type Cpx−2Ae−U−I
Force channel x (see also CPX system manual) m = module number (counting from left to right, beginning with 0) Access is protocol−specific (see manual for field bus node) Tab. 2/9: Overview channel−specific module parameters 2−18 Festo P.BE−CPX−AX−EN en 0906e... - Page 65 Upper limit The setting of the module parameter Monitoring parametrizing faults" is only effective for channel−specific parametrizings if the corresponding channel parameter Monitoring parametrizing faults" is set to active". Tab. 2/10: Monitoring the CPX module 2−19 Festo P.BE−CPX−AX−EN en 0906e...
-
Page 66: Module Parameter Input Analogue−Value Data Format
If the module parameter Monitoring parametrizing faults" is set to active", the relevant fault will be displayed. Further information on this parameter can be found in section 2.4.4. Tab. 2/12: Input analogue−value data format 2−20 Festo P.BE−CPX−AX−EN en 0906e... - Page 67 Filter measured value Lower limit Upper limit The setting of the channel parameter Monitoring parametrizing faults" is only effective if the module parameter Monitoring parametrizing faults" is set to active". Tab. 2/13: Monitoring channel x 2−21 Festo P.BE−CPX−AX−EN en 0906e...
- Page 68 Modified parameter settings have precedence over the DIL switch settings. The setting of the DIL switches is carried out with the presetting (bit 2/3 = 0; bit 6/7 = 0). Tab. 2/14: Signal range channel x 2−22 Festo P.BE−CPX−AX−EN en 0906e...
- Page 69 If the module parameter Monitoring parametrizing faults" as well as the relevant channel parameter Monitoring parametrizing faults" is set to active", the relevant fault will be displayed. Tab. 2/15: Filter measured value channel x 2−23 Festo P.BE−CPX−AX−EN en 0906e...
- Page 70 2.4.5). If the module parameter Monitoring parametrizing faults" as well as the relevant channel parameter Monitoring parametrizing faults" is set to active", the relevant fault will be displayed. Tab. 2/16: Lower and upper limits channel x 2−24 Festo P.BE−CPX−AX−EN en 0906e...
- Page 71 Force state inputs channel x". The enabling of the Force function for the complete CPX terminal is made by means of the system parameter Force mode" (see CPX system manual). Tab. 2/17: Force channel x (channel−specific) 2−25 Festo P.BE−CPX−AX−EN en 0906e...
-
Page 72: Module Parameter Input Analogue−Value Data Format"
Most significant bit / least significant bit Wire fracture monitoring with signal range 4 20 mA: F = 1 wire fracture exists F = 0 no wire fracture exists Not relevant Tab. 2/18: Supported data formats of the analogue input modules 2−26 Festo P.BE−CPX−AX−EN en 0906e... - Page 73 20 mA Digital signals after 4 mA 20 mA A−D conversion Available digital 4095 signals scaled to the end value of the data range 32760 Fig. 2/4: Example of data format VZ + 15 bits left−justified" 2−27 Festo P.BE−CPX−AX−EN en 0906e...
-
Page 74: Channel−Specific Module Parameters Limits
The lower limit/scaling end value must always be less than the upper limit/scaling end value. If the max. voltage or current values are exceeded, values greater than 4095 will also be output. Tab. 2/19: Limits or scaling end values of the analogue input modules 2−28 Festo P.BE−CPX−AX−EN en 0906e... - Page 75 Digital input signal after scaling 6.000 Limits Less than or exceeding the limits Fig. 2/6: Limit monitoring with data format VZ + 15 bits linear scaled" 2−29 Festo P.BE−CPX−AX−EN en 0906e...
- Page 76 VZ + 15 bits left−justified" and VZ + 12 bits left−justified + diagnosis". End values of the data range 3500 4095 Lower limit Upper limit Less than or exceeding the limits Fig. 2/7: Monitoring of limits with the Fixed value" data formats 2−30 Festo P.BE−CPX−AX−EN en 0906e...
-
Page 77: Channel−Specific Module Parameters Filter Measured Value
2.0 mA). If the value drops below the lower limit, the module will send an appropriate fault message to the field bus node . 2−31 Festo P.BE−CPX−AX−EN en 0906e... -
Page 78: Diagnosis
Representation of the faults in the various field bus nodes depends on the field bus protocol (see manual for the field bus node). 2−32 Festo P.BE−CPX−AX−EN en 0906e... -
Page 79: Fault Messages Of The Analogue Input Modules
The module displays the relevant fault depending on the parametrizing. The analogue input signals, however, will be processed further. Tab. 2/20: Fault messages of the input modules part 1 2−33 Festo P.BE−CPX−AX−EN en 0906e... - Page 80 If there is a short circuit, all sensor supplies of the module will be switched off together. If not parametrized otherwise, the sensor supply voltage will be switched on again automatically when the short circuit is eliminated. 2−34 Festo P.BE−CPX−AX−EN en 0906e...
-
Page 81: Led Display
2. Analogue input module CPX−2AE−U−I 2.5.2 LED display There is an LED under the transparent cover of the module for diagnosing the input modules. CPX−2AE−U−I Error LED (red) Fig. 2/8: LED display of the analogue input modules 2−35 Festo P.BE−CPX−AX−EN en 0906e... - Page 82 Parameter lower limit Parameter upper limit The number of flash pulses indicates the input channel concerned. 1 flash = channel 0 (or both channels) 2 flashes = channel 1 Tab. 2/22: Error LED of analogue input modules 2−36 Festo P.BE−CPX−AX−EN en 0906e...
-
Page 83: Fault Treatment And Parametrizing
0 channel 1 Module parameters (switch position represented = default setting) Module−specific faults Channel−specific faults Fig. 2/9: Principle of fault treatment and parametrizing of the analogue input modules part 1 2−37 Festo P.BE−CPX−AX−EN en 0906e... - Page 84 0 channel 1 fault channel 0 fault channel 1 Module parameters (switch position represented = default setting) Channel−specific faults Fig. 2/10: Principle of fault treatment and parametrizing of the analogue input modules part 2 2−38 Festo P.BE−CPX−AX−EN en 0906e...
- Page 85 Analogue input module CPX−4AE−I Chapter 3 3−1 Festo P.BE−CPX−AX−EN en 0906e...
- Page 86 ..........3−36 3.5.3 Fault treatment and parametrizing ......3−38 3−2 Festo P.BE−CPX−AX−EN en 0906e...
-
Page 87: Analogue Input Module Cpx−4Ae−I
CPX system manual. Information on the address assignment as well as on commis sioning can be found in the appropriate field bus node man ual or function module manual. 3−3 Festo P.BE−CPX−AX−EN en 0906e... -
Page 88: Function Of The Analogue Input Modules
20 mA 20 mA Sensor supply 24 V / 0.7 A per module. Tab. 3/1: Overview of analogue input modules CPX−4AE−I Fitting See section 1.3. 3−4 Festo P.BE−CPX−AX−EN en 0906e... -
Page 89: Installation
The 24 V sensor supply for the inputs as well as the power supply for the electronics of the input modules is provided via the operating voltage supply for the electronics/sensors EL/SEN The sensors can also be supplied externally (electrical isola tion, see section 3.3.3, Fig. 3/2). 3−5 Festo P.BE−CPX−AX−EN en 0906e... -
Page 90: Dil Switch Settings
2. Remove if necessary the fitted sub−base (see Fitting" section 1.3). 3. Set the DIL switch elements in accordance with the instructions on the following pages. 4. Refit if necessary the sub−base (see Fitting" section 1.3, tightening torque 0.9 1.1 Nm). 3−6 Festo P.BE−CPX−AX−EN en 0906e... - Page 91 DIL switches of the analogue input module 4AE−I Please note The setting of the signal range with the DIL switches can be modified by parametrizing (see section 3.4). Parametrizing has precedence over the DIL switch setting. 3−7 Festo P.BE−CPX−AX−EN en 0906e...
-
Page 92: Pin Assignment
With CPX−AB−4−M12x2−5POL−R the metal thread is connected to FE Tab. 3/3: Pin assignment of analogue input module type CPX−4AE−I with sub−base CPX−AB−4−M12x2−5POL(−R) CPX−AB−4−M12x2−5POL−R The metal thread (...−R") of this sub−base is connected internally with pin 5 (Functional earth FE). 3−8 Festo P.BE−CPX−AX−EN en 0906e... - Page 93 X8.3: FE (screening) IIx+ = Positive current input signal IIx− = Negative current input signal n.c. = Not connected = Functional earth Tab. 3/4: Pin assignment of analogue input module type CPX−4AE−I with sub−base CPX−AB−8−KL−4POL 3−9 Festo P.BE−CPX−AX−EN en 0906e...
- Page 94 Housing: FE (screening) IIx+ = Positive current input signal IIx− = Negative current input signal n.c. = Not connected = Functional earth Tab. 3/5: Pin assignment of analogue input module type CPX−4AE−I with sub−base CPX−AB−1−SUB−BU−25POL 3−10 Festo P.BE−CPX−AX−EN en 0906e...
-
Page 95: Connecting The Analogue Intputs
IIx+ IIx− isolation: If an external sensor supply is used 0/ 4...20 External sensor supply Fig. 3/2: Examples of analogue input connections (screening connection on FE pin) Further connection examples can be found in appendix A.7.1. 3−11 Festo P.BE−CPX−AX−EN en 0906e... -
Page 96: Instructions On Commissioning
Instructions on this can be found in the sections 3.4.2 and 3.4.3. The reaction with the default settings is described below. 3−12 Festo P.BE−CPX−AX−EN en 0906e... - Page 97 The channel−specific parameters Lower limit" and Upper limit" possess the following default settings: Lower limit = 0 Upper limit = 4095 These correspond to the scaling end values (data range) of the default data format. 3−13 Festo P.BE−CPX−AX−EN en 0906e...
- Page 98 Upper limit of rated range Physical measuring variables 2389 4095 Assigned analogue signal Digital value range after A−D conversion (linear scaling) Digital input value (example) Fig. 3/3: Example of default data format VZ + 12 bits right−justified" 3−14 Festo P.BE−CPX−AX−EN en 0906e...
- Page 99 Lower limit of rated range < 0 mA < 4 mA Less than rated Limiting to the lower range scaling end value Tab. 3/7: Scaling end values of the analogue input modules with default settings 3−15 Festo P.BE−CPX−AX−EN en 0906e...
-
Page 100: General Information On Parametrizing
30 ms after a value modification. Special instructions on avoiding parametrizing faults In order to avoid parametrizing faults, note the sequence described below when modifying the following parameters: Input analogue−value data format Lower limit channel x Upper limit channel x 3−16 Festo P.BE−CPX−AX−EN en 0906e... - Page 101 If the new upper limit is negative (only in the case of data format VZ + 15 bits linear scaled"), set first the lower limit, then the upper limit. 3−17 Festo P.BE−CPX−AX−EN en 0906e...
-
Page 102: Parameters Of The Analogue Input Module Type Cpx−4Ae−I
Force channel x (see also CPX system manual) m = module number (counting from left to right, beginning with 0) Access is protocol−specific (see manual for field bus node) Tab. 3/9: Overview channel−specific module parameters 3−18 Festo P.BE−CPX−AX−EN en 0906e... - Page 103 Upper limit The setting of the module parameter Monitoring parametrizing faults" is only effective for channel−specific parametrizings if the corresponding channel parameter Monitoring parametrizing faults" is set to active". Tab. 3/10: Monitoring the CPX module 3−19 Festo P.BE−CPX−AX−EN en 0906e...
-
Page 104: Module Parameter Input Analogue−Value Data Format
If the module parameter Monitoring parametrizing faults" is set to active", the relevant fault will be displayed. Further information on this parameter can be found in section 3.4.4. Tab. 3/12: Input analogue−value data format 3−20 Festo P.BE−CPX−AX−EN en 0906e... - Page 105 Some channel−specific parameters are checked for non−permitted values during parametrizing: Lower limit Upper limit The setting of the channel parameter Monitoring parametrizing faults" is only effective if the module parameter Monitoring parametrizing faults" is set to active". Tab. 3/13: Monitoring channel x 3−21 Festo P.BE−CPX−AX−EN en 0906e...
- Page 106 Reserved Remark Modified parameter settings have precedence over the DIL switch settings. The setting of the DIL switches (bit 0 7 = 0) is carried out with the presetting. Tab. 3/14: Signal range channel x 3−22 Festo P.BE−CPX−AX−EN en 0906e...
- Page 107 Faults can be suppressed with the Filter measured value (see section 3.5.1). If the module parameter Monitoring parametrizing faults" as well as the relevant channel parameter Monitoring parametrizing faults" is set to active", the relevant fault will be displayed. Tab. 3/15: Filter measured value channel x 3−23 Festo P.BE−CPX−AX−EN en 0906e...
- Page 108 7: high byte or low byte of the limit value Values Presettings: Lower limit = 0 (low byte = 0; high byte: 0) Upper limit = 4095 (low byte = 255; high byte: 15) Low byte: High byte: 3−24 Festo P.BE−CPX−AX−EN en 0906e...
- Page 109 3.4.5). If the module parameter Monitoring parametrizing faults" as well as the relevant channel parameter Monitoring parametrizing faults" is set to active", the relevant fault will be displayed. Tab. 3/16: Lower and upper limits channel x 3−25 Festo P.BE−CPX−AX−EN en 0906e...
- Page 110 Force state inputs channel x". The enabling of the Force function for the complete CPX terminal is made by means of the system parameter Force mode" (see CPX system manual). Tab. 3/17: Force channel x (channel−specific) 3−26 Festo P.BE−CPX−AX−EN en 0906e...
-
Page 111: Module Parameter Input Analogue−Value Data Format"
Most significant bit / least significant bit Wire fracture monitoring with signal range 4 20 mA: F = 1 wire fracture exists F = 0 no wire fracture exists Not relevant Tab. 3/18: Supported data formats of the analogue input modules 3−27 Festo P.BE−CPX−AX−EN en 0906e... - Page 112 20 mA 4 mA 20 mA Digital signals after A−D conversion Available digital 4095 signals scaled to the end value of the data range 32760 Fig. 3/4: Example of data format VZ + 15 bits left−justified" 3−28 Festo P.BE−CPX−AX−EN en 0906e...
-
Page 113: Channel−Specific Module Parameters Limits
The lower limit/scaling end value must always be less than the upper limit/scaling end value. If the max. current values are exceeded, values greater than 4095 will also be output. Tab. 3/19: Limits or scaling end values of the analogue input modules 3−29 Festo P.BE−CPX−AX−EN en 0906e... - Page 114 Digital input signal after scaling 6.000 Limits Less than or exceeding the limits Fig. 3/6: Limit monitoring with data format VZ + 15 bits linear scaled" 3−30 Festo P.BE−CPX−AX−EN en 0906e...
- Page 115 VZ + 15 bits left−justified" and VZ + 12 bits left−justified + diagnosis". End values of the data range 3500 4095 Lower limit Upper limit Less than or exceeding the limits Fig. 3/7: Monitoring of limits with the Fixed value" data formats 3−31 Festo P.BE−CPX−AX−EN en 0906e...
-
Page 116: Channel−Specific Module Parameters Filter Measured Value
2.0 mA). If the value drops below the lower limit, the module will send an appropriate fault message to the field bus node . 3−32 Festo P.BE−CPX−AX−EN en 0906e... -
Page 117: Diagnosis
Representation of the faults in the various field bus nodes depends on the field bus protocol (see manual for the field bus node). 3−33 Festo P.BE−CPX−AX−EN en 0906e... -
Page 118: Fault Messages Of The Analogue Input Modules
The module displays the relevant fault depending on the parametrizing. The analogue input signals, however, will be processed further. Tab. 3/20: Fault messages of the input modules part 1 3−34 Festo P.BE−CPX−AX−EN en 0906e... - Page 119 If there is a short circuit, all sensor supplies of the module will be switched off together. If not parametrized otherwise, the sensor supply voltage will be switched on again automatically when the short circuit is eliminated. 3−35 Festo P.BE−CPX−AX−EN en 0906e...
-
Page 120: Led Display
3. Analogue input module CPX−4AE−I 3.5.2 LED display There is an LED under the transparent cover of the module for diagnosing the input modules. CPX−4AE−I Error LED (red) AI−I Fig. 3/8: LED display of the analogue input modules 3−36 Festo P.BE−CPX−AX−EN en 0906e... - Page 121 The number of flash pulses indicates the input channel concerned (1 flash = channel 0, 2 flashes = channel 1 ...). In the case of several channels with error messages, the channel which first had the fault will be shown. Tab. 3/22: Error LED of analogue input modules 3−37 Festo P.BE−CPX−AX−EN en 0906e...
-
Page 122: Fault Treatment And Parametrizing
0 ..channel 3 Module parameters (switch position represented = default setting) Module−specific faults Channel−specific faults Fig. 3/9: Principle of fault treatment and parametrizing of the analogue input modules part 1 3−38 Festo P.BE−CPX−AX−EN en 0906e... - Page 123 ... channel 3 fault fault channel 0 ..channel 3 Module parameters (switch position represented = default setting) Channel−specific faults Fig. 3/10: Principle of fault treatment and parametrizing of the analogue input modules part 2 3−39 Festo P.BE−CPX−AX−EN en 0906e...
- Page 124 3. Analogue input module CPX−4AE−I 3−40 Festo P.BE−CPX−AX−EN en 0906e...
- Page 125 Analogue input module CPX−4AE−T Chapter 4 4−1 Festo P.BE−CPX−AX−EN en 0906e...
- Page 126 ..........4−31 4.5.3 Error treatment and parametrizing ......4−33 4−2 Festo P.BE−CPX−AX−EN en 0906e...
-
Page 127: Analogue Input Module Cpx−4Ae−T
CPX system manual. Information on the address assignment as well as on commis sioning can be found in the appropriate field bus node man ual or function module manual. 4−3 Festo P.BE−CPX−AX−EN en 0906e... -
Page 128: Function Of Analogue Input Module Cpx−4Ae
Pt 100, Pt 200, Pt 500, Pt 1000 Temperature coefficients TK = 0.00385 or 0.00391 Supported nickel sensors: Ni 100, Ni 120, Ni 500, Ni 1000 Tab. 4/1: Overview of analogue input module CPX−4AE−T Fitting See section 1.3. 4−4 Festo P.BE−CPX−AX−EN en 0906e... -
Page 129: Installation
Instructions on connecting the cables and plugs to the sub− bases can be found in section 1.2.3. Note in particular the instructions on connecting the cable screening to functional earth (FE). 4−5 Festo P.BE−CPX−AX−EN en 0906e... -
Page 130: Dil Switch Settings
2. Remove if necessary the fitted sub−base (see Fitting" section 1.3). 3. Set the DIL switch in accordance with the instructions on the following pages. 4. Refit if necessary the sub−base (see Fitting" section 1.3), tightening torque 0.9 1.1 Nm). 4−6 Festo P.BE−CPX−AX−EN en 0906e... - Page 131 DIL 1.1: ON DIL 1.2: OFF Tab. 4/2: DIL switch for analogue input module 4AE−T Please note In the case of input module 4AE−T, the setting of the DIL switch cannot be modified by parametrizing. 4−7 Festo P.BE−CPX−AX−EN en 0906e...
-
Page 132: Pin Assignment
With CPX−AB−4−M12x2−5POL−R the metal thread is connected to FE Tab. 4/3: Pin assignment of analogue input module type CPX−4AE−T with sub−base CPX−AB−4−M12x2−5POL(−R) CPX−AB−4−M12x2−5POL−R The metal thread (...−R") of this sub−base is connected internally with pin 5 (Functional earth FE). 4−8 Festo P.BE−CPX−AX−EN en 0906e... - Page 133 IIx+ = Positive current input signal IIx− = Negative current input signal IUx+ = Positive voltage input signal IUx− = Negative voltage input signal Tab. 4/4: Pin assignment of analogue input module type CPX−4AE−T with sub−base CPX−AB−4−HAR−4POL 4−9 Festo P.BE−CPX−AX−EN en 0906e...
- Page 134 IIx+ = Positive current input signal IIx− = Negative current input signal IUx+ = Positive voltage input signal IUx− = Negative voltage input signal = Functional earth Tab. 4/5: Pin assignment of analogue input module type CPX−4AE−T with sub−base CPX−AB−8KL−4POL 4−10 Festo P.BE−CPX−AX−EN en 0906e...
-
Page 135: Connecting Temperature Sensors To The Analogue Inputs
Constant source of current in the module Connecting pin of the CPX module Current supply for sensor Separate voltage cable Ux− Temperature Ix− sensor Fig. 4/2: Connection in 4−cable design 4−11 Festo P.BE−CPX−AX−EN en 0906e... - Page 136 Constant source of current in the module Connecting pin of the CPX module Linked current/ voltage connection l Combined Ux− current/voltage cable Ix− Temperature sensor Separate voltage cable Fig. 4/3: Connection in 3−cable design 4−12 Festo P.BE−CPX−AX−EN en 0906e...
- Page 137 Connecting pin of CPX module Linked current/ voltage connection Combined Ux− current/voltage cable Ix− Temperature sensor Fig. 4/4: Connection in 2−cable design Usually only screened/shielded cables are permitted for the transmission of analogue signals (see section 1.2.3). 4−13 Festo P.BE−CPX−AX−EN en 0906e...
-
Page 138: Instructions On Commissioning
In addition, the unit of measurement, the diagnostic reaction, limit value monitoring, etc. can be adapted by means of parametrizing. Instructions on this can be found in the sec tions 4.4.2 and 4.4.3. 4−14 Festo P.BE−CPX−AX−EN en 0906e... - Page 139 B14: Input value D15: 16 bits input data field MSB/LSB: Most significant bit / least significant bit Tab. 4/6: Data format of temperature module CPX−4AE−T The complete parameter settings can be found in section 4.4.3. 4−15 Festo P.BE−CPX−AX−EN en 0906e...
- Page 140 Upper limit of rated range Physical measuring variables − 2000 + 8500 Resistance of the sensor Digital value range after A−D conversion Digital input value (example) Fig. 4/5: Example: Representing the temperaturesfor a Pt 100 sensor 4−16 Festo P.BE−CPX−AX−EN en 0906e...
-
Page 141: General Information On Parametrizing
30 ms after a value modification. Special instructions on avoiding parametrizing faults Parametrize in this sequence: 1. set the temperature sensor and the temperature coefficients 2. set limit values 3. activate limit value monitoring. 4−17 Festo P.BE−CPX−AX−EN en 0906e... -
Page 142: Parameters Of The Analogue Input Module Type Cpx−4Ae−T
Force channel x (see also CPX system manual) m = module number (counting from left to right, beginning with 0) Access is protocol−specific (see manual for the field bus node) Tab. 4/8: Overview channel−specific module parameters 4−18 Festo P.BE−CPX−AX−EN en 0906e... - Page 143 Bit 3: 0 = °C (presetting); 1 = °Fahrenheit Bit 4: 0 = 50 Hz (presetting); 1 = 60 Hz Remark Converting temperature units: °F = (°C * 9/5) + 32 °C = (°F − 32) * 5/9 Tab. 4/9: Module parameters 4−19 Festo P.BE−CPX−AX−EN en 0906e...
- Page 144 Bit 7 Bit 6 Bit 5 Bit 4 Bit 3 Bit 2 Bit 1 Bit 0 No diagnostic message (presetting) Diagnostic message in the event of wire fracture or short circuit Remark Tab. 4/10: Diagnostic message channel x 4−20 Festo P.BE−CPX−AX−EN en 0906e...
- Page 145 22 (see Tab. 4/15). The limit value monitoring of the sensor temperature range is activated as soon as the diagnosis for the set limit value becomes active. Tab. 4/11: Activating the limit value monitoring channel x 4−21 Festo P.BE−CPX−AX−EN en 0906e...
- Page 146 Bit 7 Bit 6 Bit 5 Bit 4 Bit 3 Bit 2 Bit 1 Bit 0 2−cable (presetting) 3−cable 4−cable Remark For sensor connection designs see section 4.3.3 Tab. 4/13: Sensor connection designs channel x 4−22 Festo P.BE−CPX−AX−EN en 0906e...
- Page 147 The temperature range can only be set for Pt sensors: Temperature range standard: −200 +850 °C (−328 1562 °Fahrenheit) Temperature range climate: −120 +130 °C (−184 266 °Fahrenheit) Tab. 4/14: Sensor type/temperature coefficient, temperature range channel x 4−23 Festo P.BE−CPX−AX−EN en 0906e...
- Page 148 With parameter 8 you can set whether a diagnostic message is to be displayed when the limit value is exceeded or not reached (see Tab. 4/11 and section 4.4.5). Tab. 4/15: Definition limit value for channel x 4−24 Festo P.BE−CPX−AX−EN en 0906e...
- Page 149 Force state inputs channel x". The enabling of the Force function for the complete CPX terminal is carried out with the system parameter Force mode" (see CPX system manual). Tab. 4/16: Force channel x (channel−specific) 4−25 Festo P.BE−CPX−AX−EN en 0906e...
-
Page 150: Monitoring Wire Fracture/Short Circuit
Message if limit value is No message Diagnostic message If limit value is exceeded" fault no. 10 exceeded 10 See Tab. 4/11 See Tab. 4/15 Tab. 4/17: Effect of limit value monitoring on the diagnostic messages 4−26 Festo P.BE−CPX−AX−EN en 0906e... -
Page 151: Measured Value Smoothing By Parametrizing
Smoothing is carried out as follows: by forming the sum of n values, by subtracting an average value, by adding the current input value. The following applies here: the greater n, the more the signal will be smoothed. 4−27 Festo P.BE−CPX−AX−EN en 0906e... -
Page 152: Diagnosis
Representation of the faults in the various field bus nodes depends on the field bus protocol (see manual for the field bus node). 4−28 Festo P.BE−CPX−AX−EN en 0906e... -
Page 153: Error Messages Of The Analogue Input Modules
If necessary, deactivate monitoring · channel x") The module will register the appropriate fault depending on the parametrizing. The analogue input signals will, however, be processed further. Tab. 4/19: Error messages of the input modules part 1 4−29 Festo P.BE−CPX−AX−EN en 0906e... - Page 154 Please note the following when using the input modules: If there is a short circuit, all sensor supplies of the module will be switched off together. The sensor power supply will be switched on again automatically when the short circuit is eliminated. 4−30 Festo P.BE−CPX−AX−EN en 0906e...
-
Page 155: Led Display
4.5.2 LED display LEDs are situated under the transparent cover of the module for diagnosing the input modules. Channel fault LEDs (red) Module fault LED CPX−4AE−T (red) AE−T Fig. 4/6: LED displays of the temperature module 4−31 Festo P.BE−CPX−AX−EN en 0906e... - Page 156 Parametrizing faults See section 4.5.1, Tab. 4/20 LED lights up LED flashes Servicing required Replace module LED flashes LED is out One LED per channel Tab. 4/21: Error LEDs of the temperature module CPX−4AE−T 4−32 Festo P.BE−CPX−AX−EN en 0906e...
-
Page 157: Error Treatment And Parametrizing
Fault no. 2 Fault no. 3 Short circuit Wire fracture channel x channel x Channel−specific parameter (switch position represented = default setting) Channel−specific faults Fig. 4/7: Principle of fault treatment and parametrizing CPX−4AE−T part 1 4−33 Festo P.BE−CPX−AX−EN en 0906e... - Page 158 Channel−specific parameter (switch position represented = default setting) Module−specific parameter Channel−specific faults Module fault Fig. 4/8: Principle of fault treatment and parametrizing CPX−4AE−T part 2 4−34 Festo P.BE−CPX−AX−EN en 0906e...
- Page 159 Analogue input module CPX−4AE−TC Chapter 5 5−1 Festo P.BE−CPX−AX−EN en 0906e...
- Page 160 ..........5−33 5.5.3 Fault treatment and parametrizing ......5−35 5−2 Festo P.BE−CPX−AX−EN en 0906e...
-
Page 161: Analogue Input Module Cpx−4Ae−Tc
CPX system manual. Information on the address assignment as well as on commis sioning can be found in the appropriate field bus node man ual or function module manual. 5−3 Festo P.BE−CPX−AX−EN en 0906e... -
Page 162: Function Of The Analogue Input Module Cpx−4Ae−Tc
−200 1370 °C 40 V/°C 0 1300 °C 38 V/°C 0 1760 °C 11 V/°C 400 1820 °C 8 V/°C 0 1760 °C 12 V/°C Tab. 5/1: Overview of analogue input module CPX−4AE−TC Assembly See section 1.3. 5−4 Festo P.BE−CPX−AX−EN en 0906e... -
Page 163: Installation
Instructions on connecting the cables and plugs to the sub− bases can be found in section 1.2.3. Note in particular the instructions on connecting the cable screening to functional earth (FE). 5−5 Festo P.BE−CPX−AX−EN en 0906e... -
Page 164: Pin Allocation
With CPX−AB−4−M12x2−5POL−R the metal thread is connected to FE Tab. 5/2: Pin assignment for analogue input module type CPX−4AE−TC with sub−base CPX−AB−4−M12x2−5POL (−R) CPX−AB−4−M12x2−5POL−R The metal thread (...−R") of this sub−base is connected internally with pin 5 (Functional earth FE). 5−6 Festo P.BE−CPX−AX−EN en 0906e... - Page 165 RTD temperature sensor Pt 1000) Ux+ = input signal (TC sensor, cable 1) Ux− = input signal (TC sensor, cable 2) = functional Earth Tab. 5/3: Pin assignment for analogue input module type CPX−4AE−TC with sub−base CPX−AB−8−KL−4POL 5−7 Festo P.BE−CPX−AX−EN en 0906e...
-
Page 166: Introduction To Temperature Measurement By Means Of Thermocouples
1, e.g. iron Thermocouple cable 2 of material 2, e.g. copper/nickel Together cables 1 and 2 form a thermocouple (TC) Measuring junction" (sensor tip) Reference junction (Cold junction") Fig. 5/1: Fundamental principle of a thermocouple (TC) 5−8 Festo P.BE−CPX−AX−EN en 0906e... - Page 167 (of metal 1) Thermocouple cable 2 (of metal 2) Measuring junction (sensor tip) Reference junction (connection point) Measurement device (e.g. voltmeter or CPX−4AE−TC) Standard connecting cable Fig. 5/2: Fundamental principle of temperature measurement by means of thermocouples 5−9 Festo P.BE−CPX−AX−EN en 0906e...
- Page 168 Quick registering of temperature changes (response time) Simple mechanical installation Ability to be used at high temperatures and in harsh environments (if necessary in a sheathed thermocouple design or with the use of protective tubes). 5−10 Festo P.BE−CPX−AX−EN en 0906e...
- Page 169 Connection point (connecting pins of CPX module) CJCx’ Temperature sensor (RTD, Pt 1000, Class A) for cold junction compensation (CJC) Fig. 5/3: Connecting a thermocouple (TC) with cold junction compensation (CJC) to temperature module CPX−4AE−TC 5−11 Festo P.BE−CPX−AX−EN en 0906e...
-
Page 170: Cold Junction Compensation
Please note that any deviation from this reference value is reflected 1:1 in the measurement results. 1 °C (or 1 °F) of difference leads to a 1 °C (or 1 °F) shift in the measured temperature values! 5−12 Festo P.BE−CPX−AX−EN en 0906e... - Page 171 For external cold junction compensation, all inputs must be provided with their own Pt 1000. Pt 1000 resistance temperature devices (RTDs) can be obtained from Festo as an individual sales item (see appendix A.10). Fit the Pt 1000 temperature sensors in the immediate vicinity of the connection point of the thermocoupler (in the plug or on the terminal;...
-
Page 172: Connecting Temperature Sensors To The Analogue Inputs
Tab. 5/7 and Tab. 5/8 provide an overview of the available parameters. Monitoring open load/ If desired, parametrizing can be used to activate the open short circuit load (OL) monitoring and short circuit (SC) monitoring for each channel (see Tab. 5/13). 5−14 Festo P.BE−CPX−AX−EN en 0906e... -
Page 173: Processing The Input Signals Of Temperature Sensors
4 input words for this pro cedure in the address range. The position of the input words in the address range depends on the field bus used (see manual for the field bus node, P.BE−CPX−SYS−...). 5−15 Festo P.BE−CPX−AX−EN en 0906e... - Page 174 This means that measured data from −32767 to +32767 and measured values from −3276.7 °C/°F to +3276.7 °C/°F can be depicted (possible range of values, see Tab. 5/6). The per mitted range of values depends on the sensor being used (see Tab. 5/1). 5−16 Festo P.BE−CPX−AX−EN en 0906e...
- Page 175 +1370 °C Temperature at the measuring junction (example) −2000 +420 +13700 Signal representation after the A−D con verter and measured value acquisition Digital input word (in decimal notation, example) Fig. 5/4: Representation of measured values (example) 5−17 Festo P.BE−CPX−AX−EN en 0906e...
-
Page 176: General Information On Parametrizing
Depending on the parameter, no valid analogue values are available a max. of 30 ms after a value modification. Special instructions on avoiding parametrizing faults Parametrize in this sequence: 1. Set temperature sensor. 2. Set limit value. 3. Activate limit value monitoring. 5−18 Festo P.BE−CPX−AX−EN en 0906e... -
Page 177: Parameters Of Analogue Input Module Type Cpx−4Ae−Tc
Cold junction compensation (external, (Pt 1000) by means of Pt 1000−RTD, or internal, fixed to reference temperature 25 °C) m = module number (counting mode: from left to right, beginning with 0) Tab. 5/7: Module parameters overview 5−19 Festo P.BE−CPX−AX−EN en 0906e... - Page 178 = module number (counting mode: from left to right, beginning with 0) Access is protocol−specific (see manual for the field bus node, P.BE−CPX−FB..., and CPX system manual, P.BE−CPX−SYS...) Tab. 5/8: Channel−specific module parameters overview 5−20 Festo P.BE−CPX−AX−EN en 0906e...
- Page 179 The following parameters are checked for invalid values when the parameter settings are made: Sensor type channel x Unit of measurement for temperature Interference frequency suppression Cold junction compensation Tab. 5/9: Monitoring the CPX module, here parametrizing faults 5−21 Festo P.BE−CPX−AX−EN en 0906e...
- Page 180 Select the appropriate value: 50 Hz 60 Hz Bit 4: Interference frequency suppression [Noise rejection] Values 0 = 50 Hz (presetting) [50 Hz] 1 = 60 Hz [60 Hz] Tab. 5/11: Interference frequency suppression 5−22 Festo P.BE−CPX−AX−EN en 0906e...
- Page 181 Accessories: appendix A.10 Installation instructions and connection examples: appendix A.9.3 Explanation of cold junction compensation: section 5.3.3 Introduction to temperature measurement by means of thermocouples: section 5.3.2 Tab. 5/12: Cold junction compensation 5−23 Festo P.BE−CPX−AX−EN en 0906e...
- Page 182 Bit 7 Bit 6 Bit 5 Bit 4 Bit 3 Bit 2 Bit 1 Bit 0 No diagnostic message (presetting) Diagnostic message in the event of open load or short circuit 00 = disabled (presetting) [Disabled] 01 = enabled [Enabled] Tab. 5/13: Monitoring open load/short circuit (channel−specific) 5−24 Festo P.BE−CPX−AX−EN en 0906e...
- Page 183 The limit value is set separately for each channel with parameters 14 (see Tab. 5/17). The limit value monitoring of the sensor temperature range is activated as soon as the diagnosis for the set limit value becomes active. Tab. 5/14: Monitoring limit values (channel−specific) 5−25 Festo P.BE−CPX−AX−EN en 0906e...
- Page 184 The following applies here: the greater the number of measured values, the more the signal will be smoothed. The measured value smoothing has no effect on the continuous transmission of the measured data or the module cycle time. Tab. 5/15: Measured value smoothing (channel−specific) 5−26 Festo P.BE−CPX−AX−EN en 0906e...
- Page 185 Type T Type K Type N Type S Type B Type R Note Type indication on handheld Further information on the individual sensor types can be found in Tab. 5/1. Tab. 5/16: Sensor type (channel−specific) 5−27 Festo P.BE−CPX−AX−EN en 0906e...
- Page 186 Tab. 5/17: Limit value (channel−specific) The temperature unit (°Celsius or °Fahrenheit) is dependent on the setting for the parameter Unit of measure for temperature" (see Tab. 5/10). Make sure that the necessary setting has been saved in the module. 5−28 Festo P.BE−CPX−AX−EN en 0906e...
- Page 187 Tab. 5/18: Example 1: Parametrizing of limit values for channel x Setting of limit value = −30° = −30 * 10 = −300 Channel x, low byte Channel x, high byte Tab. 5/19: Example 2: Parametrizing of limit values for channel x 5−29 Festo P.BE−CPX−AX−EN en 0906e...
- Page 188 (in accordance with the field bus protocol see description for field bus node P.BE−CPX−FB...). For parametrizing the Force state, the desired input word must be mapped in the parameter bits Force state inputs channel x." Tab. 5/20: Force channel x (channel−specific) 5−30 Festo P.BE−CPX−AX−EN en 0906e...
-
Page 189: Diagnostics
Representation of the faults in the various field bus nodes depends on the field bus protocol (see manual for the field bus node). 5−31 Festo P.BE−CPX−AX−EN en 0906e... -
Page 190: Fault Messages Of The Analogue Input Modules
The module will register the appropriate fault depending on the parametrizing. The analogue input signals will, however, be processed further. The analogue input signals is set to the value 32767 (Overflow"). Tab. 5/21: Fault messages of the input modules part 1 5−32 Festo P.BE−CPX−AX−EN en 0906e... -
Page 191: Led Displays
5.5.2 LED displays Various LEDs are situated under the transparent cover of the device for diagnosing the input modules. Channel fault LEDs (red) Module fault LED CPX−4AE−TC (red) Fig. 5/5: LED displays of the temperature module 5−33 Festo P.BE−CPX−AX−EN en 0906e... - Page 192 Parametrizing faults See section 5.5.1, Tab. 5/22 LED lights LED flashes Servicing required Replace module LED is off LED flashes One LED per channel Tab. 5/23: Fault LEDs of the temperature module CPX−4AE−TC 5−34 Festo P.BE−CPX−AX−EN en 0906e...
-
Page 193: Fault Treatment And Parametrizing
Fault no. 2 Fault no. 3 Short circuit Open load channel x channel x Channel−specific module parameters (switch position represented = default setting) Channel−specific module faults Fig. 5/6: Principle of fault treatment and parametrizing CPX−4AE−TC part 1 5−35 Festo P.BE−CPX−AX−EN en 0906e... - Page 194 Channel−specific module parameters (switch position represented = default setting) Module−specific parameter Channel−specific module faults Module fault Fig. 5/7: Principle of fault treatment and parametrizing CPX−4AE−TC part 2 5−36 Festo P.BE−CPX−AX−EN en 0906e...
- Page 195 Pressure sensor module CPX−4AE−P Chapter 6 6−1 Festo P.BE−CPX−AX−EN en 0906e...
- Page 196 ......6−25 6.5.3 Error handling and parameterisation ......6−27 6−2 Festo P.BE−CPX−AX−EN en 0906e...
-
Page 197: Function Of The Pressure Sensor Module Cpx−4Ae−P
Extreme pneumatic conditions (rapid pressure change with large pressure amplitudes) can damage the pressure sensors of the module. Example: Pressure changes at one second intervals with pressure amplitudes of 10 bar result in a temperature increase of 50 K. 6−3 Festo P.BE−CPX−AX−EN en 0906e... -
Page 198: Pressure Sensor Module Cpx−4Ae−P
Fig. 6/1: Connections and indicators of the pressure sensor module CPX−4AE−P Assembly The pressure sensor module does not have a separate electrical connection block. Information about installing a CPX terminal can be found in the CPX system manual. 6−4 Festo P.BE−CPX−AX−EN en 0906e... -
Page 199: Installation
2. Press the hose into the QS connector as far as the stop (see Fig. 6/2). 3. Group the tubing together with tube ties or a tube holder for a better overview of the system. Fig. 6/2: Fitting the pneumatic hoses 6−5 Festo P.BE−CPX−AX−EN en 0906e... - Page 200 1. Mark all pneumatic tubing. 2. Press the locking ring of the QS connector 1, e. g. using a screwdriver or the QSO releasing tool from Festo. 3. Remove the tubing from the QS connector. 4. Close all connections not needed with blanking plugs (type QSC−4H, part number 153267) 2.
-
Page 201: Commissioning
1. Connect the pneumatic hoses and close the unused connections with blanking plugs. 2. Settings for the pressure sensor module can be made via the Handheld (CPX−MMI), a PC (with the Festo Maintenance Tool CPX−FMT) or via the field bus or the network:... - Page 202 If pressure diagnosis is activated, limit value overruns or underruns (dependent on the parameterisation) are shown on the LCD display with v or V and notified via the field bus or the network (see section 6.5.1). 6−8 Festo P.BE−CPX−AX−EN en 0906e...
-
Page 203: Parameters Of The Pressure Sensor Module Type Cpx−4Ae−P
Channel 3: Upper limit value Low Byte 4828 + m * 64 + 27 Channel 3: Upper limit value High Byte m = module number (0 Tab. 6/2: Overview of the parameters of the pressure sensor module CPX−4AE−P 6−9 Festo P.BE−CPX−AX−EN en 0906e... - Page 204 Hysteresis < 0 or > (upper limit value lower limit value) Bit 7 [Monitor parameters] Values Bit 7 Setting: 0 inactive 1 active (default) Process value (corresponds to −10000 mbar) Process value (corresponds to −2000 mbar) Tab. 6/3: Monitoring parameterisation faults 6−10 Festo P.BE−CPX−AX−EN en 0906e...
- Page 205 Process value for field bus; the pressure is shown in bar on the display Tab. 6/4: Parameterising the unit for pressure specifications, differential pressure calculation and sensor limit diagnostics settings 6−11 Festo P.BE−CPX−AX−EN en 0906e...
- Page 206 2nd value is larger. The result is then negative. Tab. 6/5: Display of the differential pressure calculation Note Take account of the overload pressure of the sensors for the differential pressure calculation. 6−12 Festo P.BE−CPX−AX−EN en 0906e...
- Page 207 The measured value must be greater than the upper limit value plus the hysteresis before a diagnostic signal occurs. The hysteresis behaviour provides you with more flexibility in setting the limit values. The hysteresis applies to all channels simultaneously. 6−13 Festo P.BE−CPX−AX−EN en 0906e...
- Page 208 Pressure is less than lower limit value" diagnostic message occurs The actual pressure, defined by the hysteresis setting, at which the Pressure is greater than upper limit value" diagnostic message occurs Fig. 6/4: Hysteresis behaviour of the pressure sensor module CPX−4AE−P 6−14 Festo P.BE−CPX−AX−EN en 0906e...
- Page 209 1 1 x x smoothing over 8 values, channel 1 Setting corresponding to bits 4.5 and 6,7 for the channels 2 and 3 Tab. 6/7: Setting the measured value smoothing channel by channel 6−15 Festo P.BE−CPX−AX−EN en 0906e...
- Page 210 1 1 x x 640 ms, channel 1 Setting corresponding to bits 4.5 and 6,7 for the channels 2 and 3 Tab. 6/8: Setting the delay for pressure diagnosis channel by channel 6−16 Festo P.BE−CPX−AX−EN en 0906e...
- Page 211 Setting corresponding to bits 4.5 and 6,7 for the channels 2 and 3 Note The limit value monitoring of the channels 0 3 is performed independently from any specified differential pressure calculation. Tab. 6/9: Activate and set limit value monitoring channel by channel 6−17 Festo P.BE−CPX−AX−EN en 0906e...
- Page 212 Check the parameterisation! If the Monitoring of parameterisation faults" module parameter is active, then a corresponding fault is signaled. Tab. 6/3 shows the possible parameterisation faults. Tab. 6/10: Setting lower and upper limit values channel by channel 6−18 Festo P.BE−CPX−AX−EN en 0906e...
- Page 213 When changing the unit for pressure specifications, the parameters for the limit values and hysteresis are not automatically converted. When changing the unit, you must therefore also change the parameters for the upper and lower limit values and the hysteresis. 6−19 Festo P.BE−CPX−AX−EN en 0906e...
-
Page 214: Parameterisation Example
An example parameterisation of the pressure sensor module CPX−4AE−P−D10 is shown in the following. Module no.: Pressure sensor module CPX−4AE−P, with module number 2 in the example Fig. 6/5: Parameterisation example for pressure sensor module CPX−4AE−P−D10 6−20 Festo P.BE−CPX−AX−EN en 0906e... - Page 215 Hexadecimal, can be useful with numerical values as an intermediate step for calculating the binary values Binary values Process values are transmitted in mbar; bar values are shown on the LCD display Tab. 6/12: Example: Setting parameters for pressure sensor module CPX−4AE−P using function numbers 6−21 Festo P.BE−CPX−AX−EN en 0906e...
- Page 216 V of the corresponding channel below 6.5 bar (because the hysteresis is set to 0.5 bar). The indicator V goes out as soon as the pressure rises above 7 bar. 6−22 Festo P.BE−CPX−AX−EN en 0906e...
-
Page 217: Diagnosis
The representation of the faults in the various bus nodes depends on the protocol (see manual for the bus node). 6−23 Festo P.BE−CPX−AX−EN en 0906e... -
Page 218: Error Messages Of The Pressure Sensor Module Cpx−4Ae−P
The module will register the appropriate fault depending on the parameterisation. However, the input signals will be processed further. The (faulty) parameters entered will be ignored; the module operates with the last valid parameters. Tab. 6/13: Error messages of the pressure sensor module CPX−4AE−P 6−24 Festo P.BE−CPX−AX−EN en 0906e... -
Page 219: Lcd Display And Led Indicators
6.5.2 LCD display and LED indicators The local diagnostics are performed using the LED indicators and the LCD display. Module fault LED (red) CPX−4AE−P LCD display (blue) Arrows for limit value overrun/underrun Fig. 6/6: Indicators of the CPX−4AE−P 6−25 Festo P.BE−CPX−AX−EN en 0906e... - Page 220 Check module; replace if necessary In the case of sensor limit diagnostics, the corresponding channel in the display flashes alternately between Err" and 1_._" Tab. 6/14: Module fault LED of the pressure sensor module CPX−4AE−P 6−26 Festo P.BE−CPX−AX−EN en 0906e...
-
Page 221: Error Handling And Parameterisation
Parameteri− underrun overrun diagnostics sation error channel x channel x channel x Parameterisation (switch position shown = default setting) Channel−specific module faults Module fault Fig. 6/7: Principle of error handling and parameterisation of the CPX−4AE−P 6−27 Festo P.BE−CPX−AX−EN en 0906e... - Page 222 6. Pressure sensor module CPX−4AE−P 6−28 Festo P.BE−CPX−AX−EN en 0906e...
- Page 223 Analogue output module CPX−2AA−U−I Chapter 7 7−1 Festo P.BE−CPX−AX−EN en 0906e...
- Page 224 ..........7−37 7.5.3 Fault treatment and parametrizing ......7−39 7−2 Festo P.BE−CPX−AX−EN en 0906e...
-
Page 225: Analogue Output Module Cpx−2Aa−U−I
CPX system manual. Information on the address assignment as well as on com missioning can be found in the appropriate field bus node manual or function module manual. 7−3 Festo P.BE−CPX−AX−EN en 0906e... -
Page 226: Function Of The Analogue Output Modules
10 V 20 mA 20 mA Actuator supply 24 V / 2.8 A per module. Tab. 7/1: Overview of analogue output modules CPX−2AA−U−I Fitting See section 1.3. 7−4 Festo P.BE−CPX−AX−EN en 0906e... -
Page 227: Installation
The 24 V supply for the actuators is provided via the load voltage supply for the outputs of the CPX terminal (V The actuators can also be supplied externally (electrical isolation, see section 7.3.3, Fig. 7/2). 7−5 Festo P.BE−CPX−AX−EN en 0906e... -
Page 228: Dil Switch Settings
2. Remove if necessary the fitted sub−base (see Fitting" section 1.3). 3. Set the DIL switch elements in accordance with the instructions on the following pages. 4. Refit the sub−base if necessary (see Fitting" section 1.3, tightening torque 0.9 1.1 Nm). 7−6 Festo P.BE−CPX−AX−EN en 0906e... - Page 229 DIL switches of the analogue output module Please note The setting of the signal range with the DIL switches can be modified by parametrizing (see section 7.4). Parame trizing has precedence over the DIL switch setting. 7−7 Festo P.BE−CPX−AX−EN en 0906e...
-
Page 230: Pin Assignment
With CPX−AB−4−M12x2−5POL−R the metal thread is connected to FE Tab. 7/3: Pin assignment of analogue output module type CPX−2AA−U−I with sub−base CPX−AB−4−M12x2−5POL(−R) CPX−AB−4−M12x2−5POL−R The metal thread (...−R") of this sub−base is connected internally with pin 5 (Functional earth FE). 7−8 Festo P.BE−CPX−AX−EN en 0906e... - Page 231 Assignment depends on the DIL switch setting and on parametrizing (see section 7.3.1), a total of 2 output channels are available per module (O...0 and O...1, connection X1/X2 or X3/X4 as well as connection X5/X6 or X7/X8). Tab. 7/4: Pin assignment of analogue output module type CPX−2AA−U−I with sub−base CPX−AB−8−KL−4POL 7−9 Festo P.BE−CPX−AX−EN en 0906e...
- Page 232 Assignment depends on the DIL switch setting and on parametrizing (see section 7.3.1), a total of 2 output channels are available per module (O...0 and O...1). Tab. 7/5: Pin assignment of analogue output module type CPX−2AA−U−I with sub−base CPX−AB−1−SUB−BU−25POL 7−10 Festo P.BE−CPX−AX−EN en 0906e...
-
Page 233: Connecting The Analogue Outputs
0...10 0/4...20 OIx+ OGND OUx+ OGND 0...10 0/4...20 External actuator supply Fig. 7/2: Examples of analogue output connections (screening connection on FE pin) Further connection examples can be found in appendix A.7.1. 7−11 Festo P.BE−CPX−AX−EN en 0906e... -
Page 234: Instructions On Commissioning
Instructions on this can be found in the sections 7.4.2 and 7.4.3. The reaction with the default settings is described below. 7−12 Festo P.BE−CPX−AX−EN en 0906e... - Page 235 The channel−specific parameters Lower limit" and Upper limit" possess the following default settings: Lower limit = 0 Upper limit = 4095 These correspond to the scaling end values (data range) of the default data format. 7−13 Festo P.BE−CPX−AX−EN en 0906e...
- Page 236 Linear value range Output value 0 0 mA 4 mA Output value < 0 Value less than rated range Output of last valid value Tab. 7/7: Output signals of the analogue output modules with default settings 7−14 Festo P.BE−CPX−AX−EN en 0906e...
-
Page 237: General Information On Parametrizing
30 ms after a value modification. Special instructions on avoiding parametrizing faults In order to avoid parametrizing faults, note the sequence described below for modifying the following parameters: Output analogue−value data format Lower limit channel x Upper limit channel x 7−15 Festo P.BE−CPX−AX−EN en 0906e... - Page 238 If the new upper limit is negative (only in the case of data format VZ + 15 bits linear scaled"), set first the lower limit, then the upper limit. 7−16 Festo P.BE−CPX−AX−EN en 0906e...
-
Page 239: Parameter With Analogue Output Module Type Cpx−2Aa−U−I
Force channel x (see also CPX system manual) m = module number (counting from left to right, beginning with 0) Access is protocol−specific (see manual for field bus node) Tab. 7/9: Overview Channel−specific module parameters 7−17 Festo P.BE−CPX−AX−EN en 0906e... - Page 240 With the exception of the parameter Data format", the setting of the module parameter Monitoring parametrizing faults" is only effective if the appropri ate channel parameter Monitoring parametrizing faults" is set to active". Tab. 7/10: Monitoring the CPX module 7−18 Festo P.BE−CPX−AX−EN en 0906e...
- Page 241 With the setting Leave voltage/current switched off", Power off/on is necessary for switching the power on again. Ascertain which setting is necessary for reli able operation of your machine or system. Further information can be found in section 7.5.1. Tab. 7/11: Behaviour after short circuit/overload 7−19 Festo P.BE−CPX−AX−EN en 0906e...
- Page 242 If the module parameter Monitoring parametrizing faults" is set to active", the relevant fault will be displayed. Further information on this parameter can be found in section 7.4.4. Tab. 7/12: Output analogue−value data format 7−20 Festo P.BE−CPX−AX−EN en 0906e...
- Page 243 The channel specific parameters Lower limit" and Upper limit" are checked for non−permitted values during parametrizing. The setting of the channel parameter Monitoring parametrizing faults" is only effective if the module parameter Monitoring parametrizing faults" is set to active". Tab. 7/13: Monitoring channel x 7−21 Festo P.BE−CPX−AX−EN en 0906e...
- Page 244 Modified parameter settings have precedence over the DIL switch settings. The setting of the DIL switches is carried out with the presetting (bit 2/3 = 0; bit 6/7 = 0). Tab. 7/14: Signal range channel x 7−22 Festo P.BE−CPX−AX−EN en 0906e...
- Page 245 7.4.5). If the module parameter Monitoring parametrizing faults" as well as the relevant channel parameter Monitoring parametrizing faults" is set to active", the relevant fault will be displayed. Tab. 7/15: Lower and upper limits channel x 7−23 Festo P.BE−CPX−AX−EN en 0906e...
- Page 246 Fault state channel x". The Fail safe reaction is determined for the complete CPX terminal by means of the system parameter Fail safe" (see CPX system manual). Tab. 7/16: Fail safe channel x (channel−specific) 7−24 Festo P.BE−CPX−AX−EN en 0906e...
- Page 247 Idle state channel x". The Idle mode reaction is determined for the complete CPX terminal by means of the system parameter System Idle mode" (see CPX system manual). Tab. 7/17: Idle mode channel x (channel specific) 7−25 Festo P.BE−CPX−AX−EN en 0906e...
- Page 248 Force state outputs channel x". The enabling of the Force function for the complete CPX terminal is made by means of the system parameter Force mode" (see CPX system manual). Tab. 7/18: Force channel x (channel−specific) 7−26 Festo P.BE−CPX−AX−EN en 0906e...
-
Page 249: Module Parameter Output Analogue−Value Data Format
Sign (0 = positive value, 1 = negative value) B14: Output value D15: 16 bits output data field MSB/LSB: Most significant bit / least significant bit Not relevant Tab. 7/19: Data format analogue output modules 7−27 Festo P.BE−CPX−AX−EN en 0906e... - Page 250 Digital output values 12−bit (without three zeros at the end) 4095 Analogue output signals 10 V 0 mA 20 mA 4 mA 20 mA Fig. 7/4: Example of data format VZ + 15 bits left−justified" 7−28 Festo P.BE−CPX−AX−EN en 0906e...
-
Page 251: Channel−Specific Module Parameters Limits
VZ + 12 bits left−justified", the sign bit with these formats is always 0. The lower limit/scaling end value must always be less than the upper limit/scaling end value. Tab. 7/20: Limits or scaling end values of the analogue output modules 7−29 Festo P.BE−CPX−AX−EN en 0906e... - Page 252 Digital output signal after scaling 2000 Limits Less than or exceeding the limits Fig. 7/6: Limit monitoring with data format VZ + 15 bits linear scaled" 7−30 Festo P.BE−CPX−AX−EN en 0906e...
-
Page 253: Channel−Specific Module Parameters Monitor Wire Fracture
7.4.6 Channel−specific module parameters Monitor wire fracture A wire fracture/open load monitoring can be activated with appropriate parametrizing for the signal range 0/ 4 20 mA. The messages are made available as diagnostic information (see section 7.5.1). 7−31 Festo P.BE−CPX−AX−EN en 0906e... -
Page 254: Diagnosis
Representation of the faults in the various field bus nodes depends on the field bus protocol (see manual for the field bus node). 7−32 Festo P.BE−CPX−AX−EN en 0906e... -
Page 255: Fault Messages Of The Anaolgue Output Modules
15 mA. The module displays the relevant fault depending on the parametrizing. The analogue output signals, however, will be processed further. Tab. 7/21: Fault messages of the output modules part 1 7−33 Festo P.BE−CPX−AX−EN en 0906e... - Page 256 The module displays the relevant fault depending on the parametrizing. The analogue output signals, however, will be processed further. Processing of the analogue output signals will be stopped. Tab. 7/22: Fault messages of the output modules part 2 7−34 Festo P.BE−CPX−AX−EN en 0906e...
- Page 257 The module displays the relevant fault depending on the parametrizing. The analogue output signals, however, will be processed further. The parameters entered will be ignored, the module operates with the last valid parameters. Tab. 7/23: Fault messages of the output modules part 3 7−35 Festo P.BE−CPX−AX−EN en 0906e...
- Page 258 If there is a short circuit, all actuator supplies of the module will be switched off together. If not parametrized otherwise, the actuator supply voltage will be switched on again automatically when the short circuit is eliminated. 7−36 Festo P.BE−CPX−AX−EN en 0906e...
-
Page 259: Led Display
Fault in actuator supply See section Short circuit/overload or under− 7.5.1, Tab. 7/23 voltage in actuator supply (V LED lights up Component defective Check and, if necessary, replace component Tab. 7/24: Error LED analogue output modules part 1 7−37 Festo P.BE−CPX−AX−EN en 0906e... - Page 260 Parameter upper limit The number of flash pulses indicates the output channel concerned. 1 flash = channel 0 (or both channels) 2 flashes = channel 1 Tab. 7/25: Error LED analogue output modules part 2 7−38 Festo P.BE−CPX−AX−EN en 0906e...
-
Page 261: Fault Treatment And Parametrizing
Fault no. 15 Fault in Module actuator supply defective Module parameters (switch position represented = default setting) Module−specific faults Channel−specific faults Fig. 7/9: Principle of fault treatment and parametrizing of the analogue output modules part 1 7−39 Festo P.BE−CPX−AX−EN en 0906e... - Page 262 Current output channel 0 channel 1 channel 0 channel 1 Module parameters (switch position represented = default setting) Channel−specific faults Fig. 7/10: Principle of fault treatment and parametrizing of the analogue output modules part 2 7−40 Festo P.BE−CPX−AX−EN en 0906e...
- Page 263 0 channel 1 fault fault channel 0 channel 1 Module parameters (switch position represented = default setting) Channel−specific faults Fig. 7/11: Principle of fault treatment and parametrizing of the analogue output modules part 3 7−41 Festo P.BE−CPX−AX−EN en 0906e...
- Page 264 7. Analogue output module CPX−2AA−U−I 7−42 Festo P.BE−CPX−AX−EN en 0906e...
- Page 265 Technical appendix Appendix A A−1 Festo P.BE−CPX−AX−EN en 0906e...
-
Page 266: A. Technical Appendix
........... . A−29 A−2 Festo P.BE−CPX−AX−EN en 0906e... -
Page 267: Technical Appendix
Interference suppression Common−mode interference (Vpp) Min. 70 dB Crosstalk between inputs Min. −50 dB Permitted potential differences between input channels AC 1 Vpp AC 0 V between inputs and FE DC 30 V DC 30 V A−3 Festo P.BE−CPX−AX−EN en 0906e... - Page 268 DC−DC converter from the 24 V EL/SEN between channel and 24 V Yes (no potential isolation if internal sensor supply is used) between the channels Module code (internal identifier in CPX terminal) A−4 Festo P.BE−CPX−AX−EN en 0906e...
-
Page 269: Technical Specifications Of Analogue Input Module Cpx−Ae−U−I
Module cycle time 10 ms Interference suppression Common−mode interference (Vpp) Min. 70 dB Crosstalk between inputs Min. −50 dB Permitted potential differences between input channels AC 0 V between inputs and FE DC 30 V A−5 Festo P.BE−CPX−AX−EN en 0906e... - Page 270 DC−DC converter from the 24 V EL/SEN between channel and 24 V Yes (no potential isolation if internal sensor supply is used) between the channels Module code (CPX−specific) Module identification (Handheld) 4AI−I A−6 Festo P.BE−CPX−AX−EN en 0906e...
-
Page 271: Technical Specifications Of Analogue Input Module Cpx−4Ae−T (Temperature Module
Module cycle time 250 ms Interference suppression Common−mode interference (Vpp) Min. 70 dB Crosstalk between inputs Min. −50 dB Permitted potential differences between input channels AC 0 V between inputs and FE DC 30 V A−7 Festo P.BE−CPX−AX−EN en 0906e... - Page 272 ±0.2 K Pt climate ± 0.2 K Temp. errors relative to input range ±0.001 % Linearity fault (without scaling) ±0.02 % Repetition accuracy at 25 °C ±0.05 % Module code (CPX−specific) Module identification (Handheld) 4AI−T A−8 Festo P.BE−CPX−AX−EN en 0906e...
-
Page 273: Technical Specifications Of Analogue Input Module Cpx−4Ae−Tc (Temperature Module
Analogue value formation Measuring principle Register. of the thermoelectric voltage (Seebeck effect) Module cycle time 250 ms Interference suppression Common mode attenuation Min. −70 dB Crosstalk attenuation Min. −50 dB (between inputs) A−9 Festo P.BE−CPX−AX−EN en 0906e... - Page 274 RTD auxiliary sensor Pt 1000 Class A is used for cold junction compensation) Compensation fault < ±0.5 K Linearity fault ±0.02 % (without scaling) Repeatability < ±0.05 % (at 25 °C, relative to input range) Module code (CPX−specific) Module identification (Handheld) 4AI−TC A−10 Festo P.BE−CPX−AX−EN en 0906e...
-
Page 275: Technical Specifications Of Analogue Input Module Cpx−4Ae−P (Pressure Input Module
Maximum permitted gauge pressure range 15 bar 5 bar of the pressure sensors 1500 kPa 500 kPa 217.5 psi 72.5 psi Pressure for sensor limit diagnostic 10.30 bar 1.051 bar 1030 kPa 105 kPa 149.4 psi 15.24 psi A−11 Festo P.BE−CPX−AX−EN en 0906e... - Page 276 ±3 % of the maximum measured value Internal cycle time 5 ms Data format of the process values VZ + 15 Bit, negative values represented as twos−complement Module identification (Handheld) 4AI−P−D10 4AI−P−B2 Module code / sub−module code (CPX−specific) 133/1 133/2 A−12 Festo P.BE−CPX−AX−EN en 0906e...
-
Page 277: Technical Specifications Of Analogue Output Module Cpx−2Aa−U−I
Cycle time 4 ms Response time for ohmic load 0.1 ms (min. 1 k ) 0.1 ms (max. 600 ) for capacitive load 0.7 ms (max. 1 F) for inductive load 0.5 ms (max. 1 mH) A−13 Festo P.BE−CPX−AX−EN en 0906e... - Page 278 DC−DC converter from the 24 V EL/SEN between channel and 24 V Yes (no potential isolation if internal actuator supply is used) between the channels Module code (CPX−specific) Module identification (Handheld) A−14 Festo P.BE−CPX−AX−EN en 0906e...
-
Page 279: A.7 Technical Specifications Of The Sub−Bases
With plug connector inserted or with protective cap ISK−M12 With plug connector inserted or with protective cap ISK−M12; when using quick connectors, follow the manufacturer’s instructions With cover AK−8KL and screw connector set VG−K−M9: IP65/IP67 With plug SD−SUB−D−ST25: IP65 A−15 Festo P.BE−CPX−AX−EN en 0906e... -
Page 280: Internal Structure Of The Cpx Modules
CPX−2AE−U−I (data transfer 0 V (V between module and EL/SEN PLC/IPC via field bus) Logic Power supply unit A−D converter Module fault LED Connections on the sub−base Fig. A/1: Internal structure of CPX−2AE−U−I and CPX−4AE−I A−16 Festo P.BE−CPX−AX−EN en 0906e... - Page 281 (see EL/SEN section A.9.2). (data transfer between module and PLC/IPC via field bus) Logic Power supply unit A−D converter Channel and module error LEDs Connections on the sub−base Fig. A/2: Internal structure of CPX−4AE−T A−17 Festo P.BE−CPX−AX−EN en 0906e...
- Page 282 (Pt 1000; see section A.9.3) (data transfer between module and PLC/IPC via field bus) Logic Power supply unit A−D converter Channel and module error LEDs Connections on the sub−base Fig. A/3: Internal structure of CPX−4AE−TC A−18 Festo P.BE−CPX−AX−EN en 0906e...
- Page 283 0 V (V Idling (open load) Logic, D−A conversion Power supply unit, monitoring actuator supply Output driver Monitoring output Limiting inductive voltage peaks Module fault LED Connections on the sub−base Fig. A/4: Internal structure of CPX−2AA−U−I A−19 Festo P.BE−CPX−AX−EN en 0906e...
-
Page 284: Connection Examples
Connections to analogue CPX module Fig. A/6: Connecting 4 20 mA sensors with external 24 V power supply (CPX−2AE−U−I, CPX−4AE−I) Note Interference on the 24 V cable can influence the analogue signal of the sensor. A−20 Festo P.BE−CPX−AX−EN en 0906e... - Page 285 Sensor 4 20 mA IUxz Positive sensor voltage IU(x+1) IU(x+1)z Negative sensor voltage Connections to analogue CPX module Fig. A/7: Connecting 4 20 mA sensors for registering of bipolar voltage signals with 2 inputs (CPX−2AE−UI, CPX−4AE−I) A−21 Festo P.BE−CPX−AX−EN en 0906e...
- Page 286 / IUxz 24 V Pressure sensor type IIx+ SDE, current output / IIxz 24 V IUx+ Pressure sensor type SDE1−...−PU−... or SDE1−...−NU−... 24 V Connections to analogue CPX module Fig. A/8: Connecting pressure sensors (CPX−2AE−U−I, CPX−4AE−I) A−22 Festo P.BE−CPX−AX−EN en 0906e...
- Page 287 Proportional 5/3−way 24 V directional control valve type MPYE OUx+ / OIx+ 24 V Proportional pressure regulator type MPPE or type MPPES OUx+ / OIx+ Connections to analogue CPX module Fig. A/9: Connection proportional valves (CPX−2AA−U−I) A−23 Festo P.BE−CPX−AX−EN en 0906e...
-
Page 288: Connecting Temperature Sensors To The Module Cpx−4Ae−T
(see section 1.2.3). Constant source of current in the module Connecting pin of CPX module Sensor power supply Separate voltage cable Temperature sensor Fig. A/10: Connecting temperature sensors in 4−cable design (CPX−4AE−T) A−24 Festo P.BE−CPX−AX−EN en 0906e... - Page 289 Fig. A/11: Connecting temperature sensors in 3−cable design (CPX−4AE−T) Constant source of current in the module Connecting pin of CPX module Linked current/voltage connection Combined current/voltage cable Temperature sensor Fig. A/12: Connecting temperature sensors in 2−cable design (CPX−4AE−T) A−25 Festo P.BE−CPX−AX−EN en 0906e...
-
Page 290: Connecting Temperature Sensors To The Module Cpx−4Ae−Tc
Sensor cable 2 (of metal 2) CJCx Temperature sensor (RTD, Pt 1000, Class A) CJCx’ for cold junction compensation (CJC) Measuring point (sensor tip) Fig. A/13: Connecting a thermocouple (TC) with cold junction compensation (CJC); CPX−4AE−TC) A−26 Festo P.BE−CPX−AX−EN en 0906e... - Page 291 (connecting pins CJCx, CJCx’). For each input you will need a Pt 1000 in the design Class A, which you can obtain as an individual sales item via Festo (part number 553596). For external cold junction compensation, all inputs must be provided with their own Pt 1000.
- Page 292 Resistor (RTD) for cold junction compensation (Pt 1000, Class A) Fig. A/15: Connecting thermocouples and Pt−1000−RTDs for cold junction compensation by means of a terminal strip (spring clip terminals) to the module CPX−4AE−TC (with sub−base CPX−AB−8−KL−4POL) A−28 Festo P.BE−CPX−AX−EN en 0906e...
-
Page 293: Accessories
You will nee a Pt 1000 resistance temperature device (RTD) for each module input. The Pt 1000 resistor must be fitted in the immediate vicinity of the input (in the plug or on the terminal). A−29 Festo P.BE−CPX−AX−EN en 0906e... - Page 294 DIN 46247 B2, 8−1 (2.8 x 1 mm) is also required for connecting the functional earth (FE). NEBU−... Modular kit for Connecting cables of various lengths connecting cables and designs for M8 and M12 connections (as from 2005) A−30 Festo P.BE−CPX−AX−EN en 0906e...
- Page 295 Cable plug, can be 6 mm 99−1437−814−05 screened (5 pin) screened (5−pin) 8 mm 99−1437−812−05 Order address: Franz Binder GmbH & Co. Elektrische Bauelemente KG Rötelstraße 27 D 74172 Neckarsulm, Germany E−mail: vk@binder−connector.de Internet: www.binder−connector.de A−31 Festo P.BE−CPX−AX−EN en 0906e...
- Page 296 IP65. Description Harting order number Sealing caps SAB passive, M12 21010000003 Order address: HARTING Vertrieb für Steckverbinder und Systemtechnik GmbH & Co. KG Postfach 2451 D 32381 Minden, Germany E−mail: de.sales@HARTING.com Internet: http://www.HARTING.com A−32 Festo P.BE−CPX−AX−EN en 0906e...
- Page 297 Index Appendix B B−1 Festo P.BE−CPX−AX−EN en 0906e...
-
Page 298: B. Index
............B−1 B−2 Festo P.BE−CPX−AX−EN en 0906e... - Page 299 ....2−22, 3−22, 7−22 Upper limit channel x ....2−24, 3−24, 7−23 B−3 Festo P.BE−CPX−AX−EN en 0906e...
- Page 300 With sub−base CPX−AB−4−M12x2−5POL(−R) ... 3−8 With sub−base CPX−AB−8−KL−4POL ....3−9 B−4 Festo P.BE−CPX−AX−EN en 0906e...
- Page 301 ....1−11 CPX−AB−8−KL−4POL Connecting the cables and plugs ....1−14 B−5 Festo P.BE−CPX−AX−EN en 0906e...
- Page 302 ....2−23, 3−23 Force ..... . 2−25, 3−26, 4−25, 5−30, 7−26 B−6 Festo P.BE−CPX−AX−EN en 0906e...
- Page 303 ........A−18 B−7 Festo P.BE−CPX−AX−EN en 0906e...
- Page 304 ........5−21 B−8 Festo P.BE−CPX−AX−EN en 0906e...
- Page 305 ....5−13, 5−23 Reaction after short circuit ..... . . 4−20 B−9 Festo P.BE−CPX−AX−EN en 0906e...
- Page 306 ........1−4, 1−5 B−10 Festo P.BE−CPX−AX−EN en 0906e...
- Page 307 ......5−21, 5−22 Upper limit channel x ....2−24, 3−24, 7−23 B−11 Festo P.BE−CPX−AX−EN en 0906e...
- Page 308 B. Index B−12 Festo P.BE−CPX−AX−EN en 0906e...
Need help?
Do you have a question about the CPX Series and is the answer not in the manual?
Questions and answers