Table of Contents
Advertisement
Quick Links
Advertisement
Table of Contents

Related Manuals for Moxa Technologies Industio CI-134 Series


Summary of Contents for Moxa Technologies Industio CI-134 Series
- Page 1 Industio CI-134 Series User’ s Manual Industrial 4 Port RS-422/RS-485 Serial Board Mar. 1999 (1st Edition) The content of this manual is also available at Moxa Web Site. Moxa Technologies Co., Ltd. Tel: +866-2-8665-6373 Fax: +886-2-8665-6372 www.moxa.com support@moxa.com.tw...
- Page 2 Information provided in this manual is intended to be accurate and reliable. However, Moxa Technologies assumes no responsibility for its use, or for any infringements of rights of the fourth parties which may result from its use.
- Page 3 MOXA Internet Services Customer’s satisfaction is always our number one concern. To ensure that customers get the full benefit of our services, Moxa Internet Services have been built for technical support, product inquiry, new driver update, user’s manual update, etc. The followings are the services we provide.
-
Page 4: About This Manual
If you encounter any problem during the installation, please refer to the “Troubleshooting” chapter. Chapter 1 Introduction Overview and features of the Industio CI-134 Series boards, list of items and overall installation guide. Chapter 2 Hardware Installation Hardware installation for the Industio CI-134 Series boards and connection cable. Hardware configuration utility, Io-irq.exe, is detailed. -
Page 5: Table Of Contents
Table of Contents Introduction ..............1-1 Overview ...........................1-1 Features ..........................1-4 Check List..........................1-5 Installation Guide.......................1-6 Hardware Installation ............2-1 First Thing to Do: Interface Settings...................2-1 Quick Hardware Installation ....................2-2 How to Do Quick Hardware Installation ..................2-3 Hardware Installation with IO-IRQ Utility ................2-4 IO-IRQ Utility and Hardware Configuration................2-5 Software Installation ............ - Page 6 Windows NT and Windows 95/98 ..................4-1 PComm Installation ........................4-1 PComm Programming Library.....................4-2 Utilities............................4-2 DOS ..........................4-5 Installing API-232 ........................4-5 DOS API-232 Library ........................4-5 Utilities............................4-5 Windows 3.x ........................4-8 Windows COMM API Library (Win16)..................4-8 Utility ............................4-8 Existing Applications .........................4-9 RS-485 Programming ......................4-10 Automatic Data Direction Control Mode (Recommended)............4-10 By RTS Mode (For back-compatibility)..................
-
Page 7: Introduction
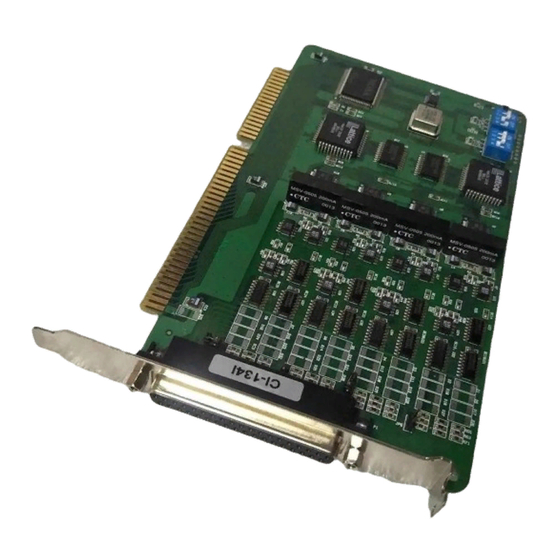
Termination Resistor Jumper for Port 2 CAP Jumper Termination Resistor Jumper for Port 4 Interface Switch Termination Resistor Jumper for Port 3 Data Mode Switch 1 2 3 1 2 3 4 Industio CI-134 Series Board Industio CI-134 Series User’ s Manual... - Page 8 ASIC Design, Compact Size The Industio CI-134 Series is equipped with MOXA customer-designed ASIC chip, which replaces lots of conventional IC and hence reduces the board to half-size, increase the operation performance, and lower the failure rate of the board. Full range of I/O addresses and IRQ numbers are available.
- Page 9 Microsoft C, Turbo C, Assembly, QuickBASIC, Turbo Pascal, Clipper, Visual Basic, Visual C++, Borland Delphi, etc. Utilities, such as Data Scope, Monitor, Terminal Emulator, Diagnostics, etc., are included for debugging or monitoring the communication status or terminal emulation or even file transferring. Industio CI-134 Series User’ s Manual...
-
Page 10: Features
CI-134I 4 RS-422/RS-485 ports, isolation protection, TI550C UART CI-134IS 4 RS-422/RS-485 ports, surge and isolation protection, TI550C UART The following are the outstanding features of Industio CI-134 Series Support 4 independent RS-422 or RS-485 serial ports Standard COM port compatible... -
Page 11: Check List
Driver shipped by request Driver supported by OS Note: Download the newest drivers from the MOXA FTP service Check List Upon unpacking the Industio CI-134 Series package, you can find the following items: Industio CI-134 Series 4 port serial board Device driver diskettes: Windows NT and Windows 95/98¡Ñ... -
Page 12: Installation Guide
Installation Guide This section gives a brief summary of how to install the Industio CI-134 Series under each supported operating system. The installation is simple and involves the following stages: Configure CI-134 Series with Io-irq.exe See chapter 2 Install the CI-134 Series board Install the software from the diskette See respective O.S. -
Page 13: Hardware Installation
Hardware Installation The installation of the Industio CI-134 Series consists of hardware and software installation. The hardware installation is detailed in this chapter. The next chapter deals with the software installation for various operating systems. Termination Resistor Jumper for Port 1... -
Page 14: Quick Hardware Installation
Quick Hardware Installation To fully utilize the superior feature of flexible hardware configuration design of the Industio CI-134 Series, a quick and easy method of installation is designed, which absolutely saves you from hardware configuration effort, i.e., installation WITHOUT r unning configur ation pr ogr am: Io-ir q.exe. Simply always shor t the... -
Page 15: How To Do Quick Hardware Installation
This saves the trouble doing hardware configuration. However, remember to cold star t the system ever y time the configur ation changed. Industio CI-134 Series User’ s Manual... -
Page 16: Hardware Installation With Io-Irq Utility
“Io-ir q.exe”, detailed in the next section. Remember to keep the hardware settings in mind for the software installation. Because the ASIC-designed Industio CI-134 Series has no switch and no jumper for manually configuring the I/O address, IRQ, INT Vector, etc. of the boards, you must run the software utility, Io-ir q.exe, in the driver diskette under DOS system to... -
Page 17: Io-Irq Utility And Hardware Configuration
IRQ and INT vector of the board. Please refer to the next section, “IO-IRQ Utility and Hardware Configuration” for more details. Or follow the on-line help to configure the Industio CI-134 Series board. After completing the hardware configuration, the board is ready for use under operating systems, such as Windows NT, 95/98, 3.x, DOS, etc. - Page 18 2. Enter the CAP addr ess of the Industio CI-134 Series board to be configured in the following dialog box and press Enter . 3. In the configuration dialog box, configure the following parameters as necessary. Industio CI-134 Series User’ s Manual...
- Page 19 This field specifies the use of nor mal or high speed capability. Normal speed ranges from 50 bps to 115.2 Kbps. High speed ranges from 50 bps to 921.6 Kbps. Industio CI-134 Series supported both normal and high speed spectra.
- Page 20 I/O address, in which each bit is used to indicate the occurrence of interrupt for corresponding port. There are two modes for the Industio CI-134 Series driver. One is using interrupt vector, the other is not. To use interrupt vector, type in the hardware interrupt vector I/O address.
- Page 21 Hardware Installation 4. Press F10 to save the configuration and exit the utility. Industio CI-134 Series User’ s Manual...
- Page 22 Industio CI-134 Series User’ s Manual 2-10...
-
Page 23: Software Installation
Windows NT supports up to 256 serial ports, from COM1 to COM256. To fully integrate the advanced features of Windows NT, multi-process and multi-thread, pure 32-bit Windows NT device drivers are developed for the Industio CI-134 Series multiport boards. The driver conforms to Win32 COMM API standard. -
Page 24: Installing Driver
Installing Driver Following is the procedure for installing the Industio CI-134 Series driver for the fir st time under Windows NT 4.0. Note ! Make sure the board has already been plugged in the system slot if you are doing quick installation. - Page 25 6. In the “MOXA Configur ation Panel” dialog box, click [Add] to enter “Pr oper ty” dialog box to add the Industio CI-134 Series board. Select the “CI- 134 Ser ies” in the “Board Type” field. If necessary, type the desired interrupt vector address, in the “INT Vector”...
- Page 26 7. In the “Pr oper ty” dialog box, select the desired port in the port list and click [Por t Setting] to enter the individual “Por t #” setting dialog box to change the port number mappings or FIFO settings. Industio CI-134 Series User’ s Manual...
- Page 27 If you need to install more than one board, click [Add] and repeat steps 6 to 8 to configure another board. Up to four Industio CI-134 Series boards can be installed in a system. Click [OK] to finish the configuration. Industio CI-134 Series User’ s Manual...
- Page 28 134, with fir st ser ial por t COM3, has been enabled” for each configured board. If an error message similar to “Cannot find any configur ed MOXA CI- 134 boar d!” appears, refer to the “Troubleshooting” chapter for solutions. Industio CI-134 Series User’ s Manual...
-
Page 29: Configuring Board And Port
If you already have installed the driver and want to re-configure the ports, please follow this procedure. 1. In the [Contr ol Panel], click on the [Networ k] icon and select the [Adapter s] tab. 2. Select “MOXA Smar tio/Industio Family Adapter ” in “Network Adapters”. Industio CI-134 Series User’ s Manual... - Page 30 Please see steps 6 to 8 in the previous section, “Installing Driver”, for more details. Click [Remove] to remove the board currently selected from the configured board list. Click [OK] to confirm the configuration changes you made. Click [Cancel] to leave the dialog with the configuration unchanged. Industio CI-134 Series User’ s Manual...
-
Page 31: Updating Driver
Software Installation Updating Driver To update the driver for the Industio CI-134 Series board, simply remove the driver, as described in the next section, and reinstall it as detailed in section, “Installing Dr iver ”. Removing Driver To remove the driver for the Industio CI-134 Series board, 1. -
Page 32: Windows 95/98
“Removing Driver”. Installing Driver Up to 4 Industio CI-134 Series boards can be installed together as long as the I/O addresses and IRQ number resources are sufficient and available in a system. The following is the procedure for installing Industio CI-134 Series for the fir st time under Windows 95/98: 1. - Page 33 5. In the “MOXA Configur ation Panel” dialog box, click [Add] to enter “Pr oper ty” dialog box to add the Industio CI-134 Series board. Select the “CI- 134 Ser ies” in the “Board Type” field. If necessary, type the desired interrupt vector address, in the “INT Vector”...
- Page 34 If “Auto Enumerating COM Number” is not checked, specify the COM number for individual port. For instance, the second port can be out of sequence, say COM10, while the first port is mapped to COM3. Industio CI-134 Series User’ s Manual 3-12...
- Page 35 If you need to install more than one board, click [Add] and repeat steps 5 to 7 to configure another board. Up to four Industio CI-134 Series boards can be installed in a system. Click [OK] to finish the configuration. 8. Restart Windows 95/98 system. Industio CI-134 Series User’ s Manual 3-13...
-
Page 36: Configuring Board And Port
1. Click on the Taskbar [Star t] button, then select [Pr ogr ams] menu, then [MOXA Utilities] menu and then [MOXA Configur ation Panel] icon. 2. The configuration panel will be popped up. Please see steps 4-7 in the previous Section “Installing Driver” for more details. Industio CI-134 Series User’ s Manual 3-14... -
Page 37: Updating Driver
Manager ] tab. Then select and open the “MOXA Smar tio/Industio Family” option and then select the “CI-134 Ser ies”. Click on [Pr oper ties] button and then select [Device Dr iver ] tab and then click on [Update Dr iver ] button. Industio CI-134 Series User’ s Manual 3-15... -
Page 38: Removing Driver
Open [Contr ol Panel] icon, and then [Add/Remove Pr ogr ams] icon, and then select [Install/Uninstall] tab. Then select and open the “MOXA Smar tio/Industio Dr iver ” option and then enter [OK] to remove the driver. Industio CI-134 Series User’ s Manual 3-16... -
Page 39: Dos
“Serial Programming Tools”. Installing Driver Run the installation program, DOSINST.EXE, in the DOS/Windows. 3.x driver diskette. Specify the target API-232 directory (e.g. C:\MOXA) where software driver will be copied. Press F2 to start the installation. Industio CI-134 Series User’ s Manual 3-17... -
Page 40: Driver Setup
It is strongly recommended to do so. Driver Setup The following are steps for setting up the Industio CI-134 Series driver. Note that it is not intended to illustrate all the convenient functions of the setup programs when configuring the boards. Please refer to the F1 on-line help instructions as running setup program. - Page 41 2. Press Enter to pop up the SETUP dialog box. In the SETUP dialog box, Press F8 to specify the CAP Addr ess and press ENTER and then type Y (YES) to load the configuration of the board to be setup. Industio CI-134 Series User’ s Manual 3-19...
- Page 42 3. Now the configuration of the desired Industio CI-134 Series board will be shown along with other default settings, such as port number, buffer size, etc. Note ! Up to now you have completed the setup for Industio CI-134 Series board.
- Page 43 The receive (input) buffer allocated in the system for each port. F5: Gr oup edit: This is a convenient function that helps you edit the configuration of several ports at one time as a group. Industio CI-134 Series User’ s Manual 3-21...
- Page 44 “Yes” (default) and gain best performance for the board. 4. To setup more boards, please follow the same instructions 2 to 3 described above. 5. Press F10 to save the latest configuration and exit the SETUP program. Industio CI-134 Series User’ s Manual 3-22...
-
Page 45: Loading Driver
Universal 2/4/8 serial ports Communication Driver Setup driver … Device driver setup O.K. It means the Industio CI-134 Series driver is installed properly. At this point, you are ready to execute application that supports API-232 functions, or start developing applications using API-232 library. -
Page 46: Windows 3.X
2. When installation completed the program group “MOXA Standard COMM Driver” and “Board Configuration” dialog boxes appear. If the default settings are what you desired, click [Save] to save the configuration and exit. Industio CI-134 Series User’ s Manual 3-24... - Page 47 “Address” field, select the desired IRQ and COM number. Then click [OK] and [Save] to save the new configuration and exit. 3. When configuration completed, you have to quit and restart Windows so that the changes you made will take effect. Industio CI-134 Series User’ s Manual 3-25...
-
Page 48: Configuring Driver
COM6 is recommended. In this case, the original COM1 and COM2 on PC will be still available. For example, if 4 ports are configured and starting from COM3, then the mapping of serial port numbers will be as depicted. Industio CI-134 Series User’ s Manual 3-26... -
Page 49: Removing Driver
High Speed Spectrum with shown speed 38.4 Kbps, will actually work at 307.2 Kbps (38.4 Kbps¡Ñ 8 ). This is applicable to Moxa-provided utility, such as CONFIG and TTY, existing applications and programming, which are described in later chapter. Industio CI-134 Series User’ s Manual 3-27... - Page 50 Industio CI-134 Series User’ s Manual 3-28...
-
Page 51: Serial Programming Tools
MOXA boards only. MOXA Windows NT or Windows 95/98 device drivers, as well as MOXA boards are required. The drivers are installed separately and detailed in the “Software Installation” chapter. Industio CI-134 Series User’ s Manual... -
Page 52: Pcomm Programming Library
A convenient diagnostic program that provides internal and external testing, such as IRQ, TxD/RxD, UART, CTS/RTS, DTR/DSR, DTR/DCD testing, etc., for the MOXA boards and ports to verify correct operations of both the software and hardware. Industio CI-134 Series User’ s Manual... - Page 53 You can also click on one of the specific displayed port in order to visualize the current communication parameters and status of that port. Industio CI-134 Series User’ s Manual...
- Page 54 Terminal Emulator The Terminal Emulator features multi-windows and supports terminal types of VT100 and ANSI. You can transfer data interactively, send pattern periodically or transfer file using ASCII, XMODEM, YMODEM, ZMODEM and KERMIT protocols. Industio CI-134 Series User’ s Manual...
-
Page 55: Dos
There are two utilities available for DOS: Data Scope and Diagnose, which are detailed below. Data Scope The Data Scope, BIN\SCOPE.EXE, is a suite of utility programs that can help users with system troubleshooting and serial communication debugging. Industio CI-134 Series User’ s Manual... - Page 56 ZMODEM and KERMIT protocols. 3. The Diagnostic test utility provides port connection test with two MOXA ports connected via a properly wired cable. Please see on-line help as running BIN\SCOPE.EXE for more usage and capability information. Industio CI-134 Series User’ s Manual...
- Page 57 Serial Programming Tools Diagnose The Diagnose, BIN\DIAGNOSE.EXE, is a utility that can help users to diagnose the hardware condition of each port of the selected board. See on-line help for more details. Industio CI-134 Series User’ s Manual...
-
Page 58: Windows 3.X
Multiple windows for ports simultaneously are available for a demonstration of multitasking feature of Windows 3.x. The Windows-provided application, Ter minal, can only make use of COM1 to COM4 which is obviously a restriction. Industio CI-134 Series User’ s Manual... -
Page 59: Existing Applications
Existing Applications Many Windows software packages, such as pcANYWHERE, LabView, FIX, WinFax Pro, Fax Server, PROCOMM PLUS, LapLink, etc. can access Industio CI-134 COM ports directly since these applications follow the Microsoft Windows COMM API. Industio CI-134 Series User’ s Manual... -
Page 60: Rs-485 Programming
RS-485 applications. How to transmit and receive data for Windows NT, 95/98 & DOS We recommend you to configure Industio CI-134 Series ports as follows in order to acquire precise timing control in RS-485 2-wire transmission. Industio CI-134 Series User’ s Manual... - Page 61 4. Tur n off RTS and r eady for r eceiving data. */ For more information on these functions, please refer to PComm library on-line Help file for Windows NT and Windows 95/98 or API-232.txt file for DOS, respectively. Industio CI-134 Series User’ s Manual 4-11...
- Page 62 Industio CI-134 Series User’ s Manual 4-12...
-
Page 63: Connection Cable And Cable Wiring
The RS-422 standard uses a balanced voltage digital interface to allow communications of 10M bps on cable length of 4000 feet. Ten receivers can be connected to any one driver for broadcasting systems. RS-422 pin outs for Industio CI-134 Series: CI-134 TxD-(A) - Page 64 RxD-(A) RxD-(A) TxD-(A) RxD-(A) TxD-(A) RS-422 Device N RxD+(B) TxD+(B) RxD-(A) TxD-(A) RS-422 with Handshaking CI-134 RS-422 Device TxD+(B) RxD+(B) TxD-(A) RxD-(A) RxD+(B) TxD+(B) RxD-(A) TxD-(A) RTS+(B) CTS+(B) RTS-(A) CTS-(A) CTS+(B) RTS+(B) CTS-(A) RTS-(A) Industio CI-134 Series User’ s Manual...
-
Page 65: Rs-485 Cable Wiring
RS-485 Device 1 Master Slave Data+(B) Data+(B) Data-(A) Data-(A) RS-485 Device N Slave Data+(B) Data-(A) See the section “RS-485 Pr ogr amming” of the chapter “Ser ial Pr ogr amming Tools” for more RS-485 programming details. Industio CI-134 Series User’ s Manual... -
Page 66: Impedance Matching And Termination Resistors
Termination Resistor Jumper for Port 2 Termination Resistor Jumper for Port 4 Interface Switch Termination Resistor Jumper for Port 3 Data Mode Switch 2 3 4 1 2 3 4 Industio CI-134 Series Board Industio CI-134 Series User’ s Manual... -
Page 67: Db-37 Connector Pin Outs
Connection Cable and Cable Wiring DB-37 Connector Pin Outs The following lists pin assignment of the Industio CI-134 Series DB37 connector on the bracket. For RS-422 Mode Pin no. Signal Pin no. Signal CTS2-(A) TxD2-(A) RxD2-(A) GND/VEE2 RTS2-(A) CTS2+(B) RTS2+(B) - Page 68 Industio CI-134 Series User’ s Manual...
-
Page 69: Troubleshooting
Troubleshooting Common Industio CI-134 Series problems and possible solutions are listed below. If you still have problems, contact your dealer or Moxa for help. Or use the “Pr oblem Repor t For m” at the end of this manual to report problems to your dealer at once for faster technical support. - Page 70 Software Causes and Solutions: a. For RS-422 mode, Industio CI-134 Series checks the line status (CTS) before it sends data out if the RTS/CTS flow control feature is set to “Enable” in the configuration or application program. Please refer to the “Connection Cable and Cable Wiring”...
- Page 71 Enter the “Configuration Access Port” in HEX: A700 Step 6. The previous hardware configuration will be shown. Modify them if necessary. Remember the CAP address this time. Step 7. Exit the IO-IRQ. Step 8. Power off the PC. Industio CI-134 Series User’ s Manual...
-
Page 72: Windows Nt
Some partial decoded network board may interfere with our board. Please avoid from using 0x300 as I/O address for those network boards. b. Check hardware configuration of Industio CI-134 Series board by IO- IRQ.EXE. Then make sure the hardware configuration, including I/O addresses for each port, Interrupt Vector, IRQ, is identical to that of the driver. -
Page 73: Windows 95/98
The board(s) is not plugged properly. Please make sure the board is seated firmly in the expansion slot. e. The slot for plugging the board is defective. In this case, please try other slots until you find a good one. f. The board might be defective. Industio CI-134 Series User’ s Manual... -
Page 74: Dos
Make sure you’re using the right driver. b. Check if the board is properly plugged into ISA/EISA bus slot. c. Check if the I/O address and IRQ settings in SETUP program are same as the settings on board. Industio CI-134 Series User’ s Manual... -
Page 75: Technical Reference
CI-134I¡Ð 6 10mA max. (+5V) CI-134IS¡Ð 7 23mA max. (+5V) Dimensions: CI-134¡Ð 1 60mm¡Ñ 8 5mm CI-134I¡Ð 1 80mm¡Ñ 1 10mm CI-134IS¡Ð 1 80mm¡Ñ 1 10mm Operating Systems: See the driver support list below. Industio CI-134 Series User’ s Manual... -
Page 76: Uart Ti550C
To increase the overall data throughput, special features such as on-chip FIFO and on-chip hardware flow control are used to reduce the number of interrupts to the host CPU and to prevent any loss of valuable data. Industio CI-134 Series User’ s Manual... -
Page 77: Pc I/O Port Address Map
Technical Reference PC I/O Port Address Map The following is the list of the I/O port addresses commonly used, which is good for preventing I/O address conflict when configuring Industio CI-134 Series. IO/ Addr ess Device 000-01F DMA controller 1... - Page 78 Problem Report Form Industio CI-134 Series Customer name: Company: Tel: Fax: Email: Date: 1. Moxa Pr oduct: CI-134 Series Model : oCI-134 oCI-134I oCI-134IS Ser ial Number : ____________ 2. Moxa Dr iver Ver sion: ________________ 3. Moxa har dwar e settings: 3.1 Please check the hardware configuration for I/O, IRQ, and speed, via running IO-IRQ.EXE from DOS or...
- Page 79 Return Procedure For product repair, exchange or refund, you must: Provide evidence of original purchase. Fill out the Problem Report Form (PRF) as detailed as possible for shorter product repair time. Obtain a Return Merchandise Authorization (RMA) number from the sales representative or dealer. Carefully pack the product in an anti-static package, and send it, pre-paid, to the dealer.
Need help?
Do you have a question about the Industio CI-134 Series and is the answer not in the manual?
Questions and answers