Advertisement
Quick Links
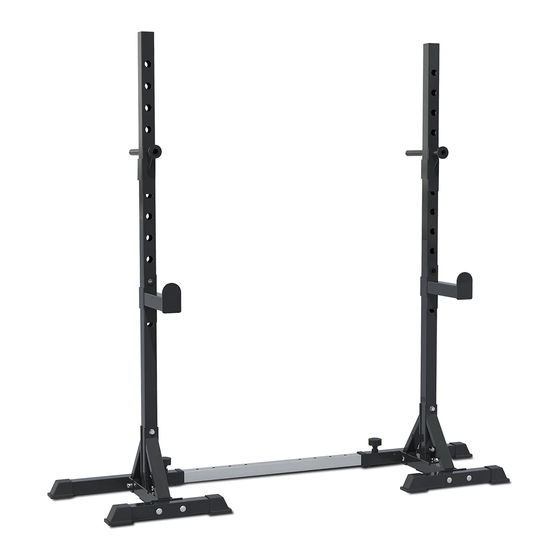
SR-1 SQUAT RACK
Product may vary slightly from the item pictured due to model upgrades
Read all instructions carefully before using this product. Retain this owner's manual for future
reference.
NOTE: This manual may be subject to updates or changes. Up to date manuals are available through our website at
www.lifespanfitness.com.au
Advertisement

Summary of Contents for LifeSpan CORTEX SR-1
- Page 1 SR-1 SQUAT RACK Product may vary slightly from the item pictured due to model upgrades Read all instructions carefully before using this product. Retain this owner’s manual for future reference. NOTE: This manual may be subject to updates or changes. Up to date manuals are available through our website at www.lifespanfitness.com.au...
- Page 2 TABLE OF CONTENTS IMPORTANT SAFETY INSTRUCTIONS PARTS LIST ASSEMBLY INSTRUCTIONS WARRANTY SR-1...
-
Page 3: Important Safety Instructions
1. IMPORTANT SAFETY INSTRUCTIONS WARNING - Read all instructions before using this machine. Please take caution when re-racking your weights. Re-racking with excess forward momentum may cause the rack to topple over Please keep this manual with you at all times It is important to read this entire manual before assembling and using the equipment. - Page 4 This equipment is designed for indoor and family use only Care must be taken when lifting or moving the equipment so as not to injure your back. Always keep this instruction manual and assembly tools at hand for reference. The equipment is not suitable for therapeutic use. SR-1...
- Page 5 2. PARTS LIST SR-1...
- Page 6 Name Model Quantity Tube A Tube B Connecting tube Supporting tube Incline supporting tube Knob Adjustable tube Plates tube Long tube Bushing 50*45 M10*70 bolt M10x70 Φ10 Washer Upright tube Foot strap Connector SR-1...
- Page 7 3. ASSEMBLY INSTRUCTIONS STEP 1 1. Secure the tube (#3) to the tube (#4) with one connector (#15), two carriage bolts M10x70 (#11), two washers Φ10 (#12) and two M10 nuts (#16). 2. Attach the tube (#13) to the tube (#3), using carriage bolt M10x70 (#11), washer Φ10 (#12) and nut M10 (#16).
- Page 8 STEP 2 1. Attach tube A (#1) to tube (#3), and connect the two incline tubes (#5) to tubes (#1), (#3) and (#13). 2. Secure with carriage bolt M10x70 (#11), Φ10washer (#12) and M10 nut (#16). SR-1...
- Page 9 STEP 3 1. Attach tube B (#2) to tube (#3), and connect the two incline tubes (#5) to tubes (#1), (#3) and (#13). 2. Secure with carriage bolt M10x70 (#11), Φ10washer (#12) and M10 nut (#16). SR-1...
- Page 10 STEP 4 1. Connect part A with part B through the long tube (#9) 2. Put the (#7) and (#8) to the holes like following picture. SR-1...
- Page 11 4. WARRANTY AUSTRALIAN CONSUMER LAW Many of our products come with a guarantee or warranty from the manufacturer. In addition, they come with guarantees that cannot be excluded under the Australian Consumer Law. You are entitled to a replacement or refund for a major failure and compensation for any other reasonably foreseeable loss or damage.


Need help?
Do you have a question about the CORTEX SR-1 and is the answer not in the manual?
Questions and answers