
Related Manuals for Beckman Coulter TQ-Prep


Summary of Contents for Beckman Coulter TQ-Prep
- Page 1 ® COULTER TQ-Prep™ Workstation Reference PN 4237395AA (June 2010) Beckman Coulter, Inc. 250 S. Kraemer Blvd. Brea, CA 92821...
- Page 2 This equipment is used in a manner other than specified. Operate the instrument as instructed in the Product Manuals. r You introduce software that is not authorized by Beckman Coulter into your computer. Only operate your system’s computer with software authorized by Beckman Coulter.
- Page 3 This document applies to the latest software listed and higher versions. When a subsequent software version changes the information in this document, a new issue will be released to the Beckman Coulter website. For labeling updates, go to www.beckmancoulter.com and download the most recent manual or system help for your instrument.
- Page 4 REVISION STATUS PN 4237395AA...
-
Page 5: Table Of Contents
Carousel Home and Tube Loading Positions, 3-1 LEGAL NOTICES, 2 REVISION STATUS, iii CONTENTS, v INTRODUCTION, ix HOW TO USE YOUR COULTER TQ-PREP WORKSTATION MANUALS, ix ABOUT THE REFERENCE MANUAL, x CONVENTIONS, x USE AND FUNCTION, 1-1 INTENDED USE, 1-1... - Page 6 CONTENTS INSTALLATION, 2-1 SPECIAL REQUIREMENTS, 2-1 Space and Accessibility, 2-1 Electrical Input, 2-1 Ambient Temperature and Humidity, 2-1 Ventilation, 2-1 COULTER REPRESENTATIVE, 2-2 Delivery Inspection, 2-2 Operator Certification, 2-2 CUSTOMER INSTALLATION, 2-2 Inspecting After Delivery, 2-2 Unpacking and Checking Instrument, 2-3 Connecting the OPTION Reagent Container, 2-6 Connecting the Reagent A, B, and C Containers, 2-9 Connecting the WASTE Container, 2-14...
- Page 7 PURPOSE AND SCOPE, B-1 OPERATOR CERTIFICATION PROCEDURE, B-1 PIPET CALIBRATION PROCEDURE, B-1 With Air-Displacement Pipet (Reverse Mode), B-2 With Positive-Displacement Pipet, B-6 TQ-PREP WORKSTATION PRECISION PROCEDURE, B-10 REFERENCES, REFERENCES-1 GLOSSARY, GLOSSARY-1 TRADEMARKS, 7 COULTER TQ-Prep Workstation Documentation, 8 PN 4237395AA...
- Page 8 CONTENTS -viii PN 4237395AA...
-
Page 9: Coulter Tq-Prep Workstation
COULTER TQ-Prep Workstation, 1-1 Sample Processing Area, 1-2 Reagent Storage Area with OPTION Reagent, 1-4 Carousel Home and Tube Loading Positions, 3-1 PN 4237395AA... -
Page 10: Introduction
® How to use your COULTER TQ-Prep™ Workstation manuals About the Reference manual Conventions HOW TO USE YOUR COULTER TQ-PREP WORKSTATION MANUALS Use the Reference manual for in-depth information about: What the instrument does The methods it uses Its specifications Information about installation. -
Page 11: About The Reference Manual
INTRODUCTION ABOUT THE REFERENCE MANUAL ABOUT THE REFERENCE MANUAL Your TQ-Prep Workstation Reference manual is a source of information on what the system does. This information is organized as follows: S Chapter 1, Use and Function Contains the intended use of the instrument, a brief history of the methods used, the reagents used and a short description of the major components and options. -
Page 12: Use And Function
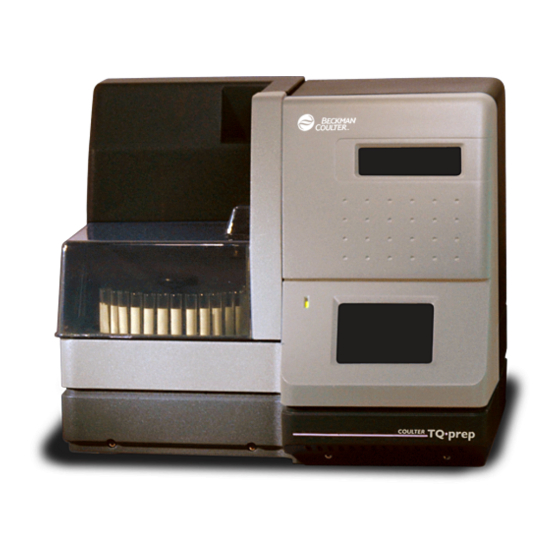
USE AND FUNCTION INTENDED USE The COULTER TQ-Prep Workstation, Figure 1.1, is a general purpose laboratory instrument used with the COULTER ImmunoPrep Reagent System to prepare leukocytes from whole blood for quantitative immunofluorescence measurements on optical flow cytometers. The system is intended For In Vitro Diagnostic Use. -
Page 13: System Components
USE AND FUNCTION SYSTEM COMPONENTS SYSTEM COMPONENTS The system has three main work areas: Sample processing area Reagent storage and dispense area Touch screen. Sample Processing Area See Figure 1.2. The sample processing area consists of a 32-tube capacity removable carousel, an indexing base, dispensing head with tube detector, sensing and sequencing devices, a tube lifter/vortex mixer, a reagent delivery system and electronics. -
Page 14: Tube Detector
USE AND FUNCTION SYSTEM COMPONENTS Tube Detector The tube detector is an optical flag switch located within the dispensing head that senses the presence of a test tube in a carousel at the reagent dispense position. Tube Lifter/Vortex Mixer The tube lifter/vortex mixer uniformly first lifts the tube up into the dispensing head, then mixes reagents in the sample. -
Page 15: Touch Screen
Workstation is designed for use with the ImmunoPrep Reagent System. All stated performance characteristics in this manual are based on the use of the TQ-Prep Workstation with these reagents. Refer to the reagents’ package insert for detailed information before using the reagents. -
Page 16: Reagent C
This reagent is for use on flow cytometers to allow the measurement of a low angle of forward scatter light. MATERIAL SAFETY DATA SHEETS (MSDS) To obtain an MSDS for Coulter reagents used on the TQ-Prep Workstation: In the USA, either call Coulter Customer Operations (800-526-7694) or write to: Coulter Corporation Attn: MSDS Requests P .O. - Page 17 USE AND FUNCTION MATERIAL SAFETY DATA SHEETS (MSDS) PN 4237395AA...
-
Page 18: Installation
INSTALLATION Your Coulter Representative will install the system; however, in some cases, you will be instructed to install your system. SPECIAL REQUIREMENTS The system is intended for installation and operation in a conventional clinical laboratory setting. Determine the system location before installation of the system. Consider the following special requirements. -
Page 19: Coulter Representative
INSTALLATION COULTER REPRESENTATIVE COULTER REPRESENTATIVE Delivery Inspection CAUTION Possible instrument damage could occur if you improperly uncrate the instrument, install it or set it up. If you have not been directed to install the instrument, keep the instrument in its packaging until your Coulter Representative uncrates it for installation and set up. -
Page 20: Unpacking And Checking Instrument
INSTALLATION CUSTOMER INSTALLATION Unpacking and Checking Instrument Open the carton and remove the instrument. Note: It is easier if two people lift the instrument out of the carton. Remove the foam packing material, unwrap the plastic packing and set the instrument on a flat surface. - Page 21 INSTALLATION CUSTOMER INSTALLATION Lift the sample processing area lid. Remove the foam packing material. Close the sample processing area lid. PN 4237395AA...
- Page 22 INSTALLATION CUSTOMER INSTALLATION Check the fittings at the top of the syringes for visible damage. The connections should be finger tight. See the Replacing the Syringe procedure in Chapter 7 in the Operator’ s Guide for more details. PN 4237395AA...
-
Page 23: Connecting The Option Reagent Container
INSTALLATION CUSTOMER INSTALLATION Connecting the OPTION Reagent Container If your instrument has the LALS OPTION, perform steps 1 through 6 to connect the OPTION reagent container. If your instrument does not have the LALS OPTION, proceed to Connecting Reagent A, B, and C Containers. - Page 24 INSTALLATION CUSTOMER INSTALLATION Fill the OPTION reagent container with distilled or deionized water. Screw the cap assembly with the white fitting onto the OPTION reagent container. PN 4237395AA...
- Page 25 INSTALLATION CUSTOMER INSTALLATION Place the OPTION reagent container in the instrument. Screw the tubing connector from the OPTION reagent onto the side fitting of the OPTION syringe. PN 4237395AA...
-
Page 26: Connecting The Reagent A, B, And C Containers
INSTALLATION CUSTOMER INSTALLATION Connecting the Reagent A, B, and C Containers Open a new ImmunoPrep Reagent °C °F System. COULTER® IMMUNOPREP Note: Store and use the reagents at room temperature. Make sure the reagents are at room temperature before they are placed in the instrument. - Page 27 INSTALLATION CUSTOMER INSTALLATION Remove the empty corresponding reagent container and cap assembly from its packaging. Unscrew the cap assembly from the empty reagent container. Save the empty container for step 11. Note: The cap assembly fittings are color coded: Green - Reagent A Blue - Reagent B Yellow - Reagent C Red - WASTE...
- Page 28 INSTALLATION CUSTOMER INSTALLATION Place the full reagent container in the instrument. Screw the tubing connector from the reagent container onto the side fitting of the corresponding syringe. 2-11 PN 4237395AA...
- Page 29 INSTALLATION CUSTOMER INSTALLATION Locate the opening for the level sense connector. Note: The level sense fittings are color coded to match the cap assemblies: WASTE Red - WASTE Green - Reagent A Blue - Reagent B Yellow - Reagent C Connect the level sense connector from the cap assembly to the instrument by: Lining up the two red dots:...
- Page 30 INSTALLATION CUSTOMER INSTALLATION Screw the saved cap onto the empty reagent container. Save this container for future use, such as in the long-term shutdown procedure. Repeat steps 2 through 11 for the other two ImmunoPrep reagents. ImmunoPrep Leukocyte Preparation System 2-13 PN 4237395AA...
-
Page 31: Connecting The Waste Container
INSTALLATION CUSTOMER INSTALLATION Connecting the WASTE Container Remove the WASTE container and its cap assembly from its packaging. Check that the cap assembly is on tight. Locate the tubing taped to the instrument. 2-14 PN 4237395AA... - Page 32 INSTALLATION CUSTOMER INSTALLATION Insert the tubing into the opening on the WASTE container. Screw in the red connector. Place the WASTE container in the instrument. 2-15 PN 4237395AA...
- Page 33 INSTALLATION CUSTOMER INSTALLATION Connect the level sense connector from the WASTE container’ s cap assembly to the instrument by: Lining up the two red dots: Red dot on the level sense connector Red dot on the corresponding color-coded opening. Pushing the level sense connector into the opening.
-
Page 34: Powering On The Instrument
INSTALLATION CUSTOMER INSTALLATION Powering On the Instrument Plug the power cord into the electrical receptacle at the back of the instrument and then into the wall receptacle. Turn on the power switch. Check that the front power indicator light is on. 2-17 PN 4237395AA... - Page 35 INSTALLATION CUSTOMER INSTALLATION After system initialization, the Power Up screen appears briefly on the touch screen. Check that: Main screen appears. No troubleshooting icon appears on the screen. If a Main troubleshooting icon does appear, go to Chapter 8 in the Operator’ s Guide to correct the problem.
-
Page 36: Checking Carousel Alignment
INSTALLATION CUSTOMER INSTALLATION Checking Carousel Alignment Open the sample processing area lid. Place an empty carousel onto the indexing base: Note: To correctly secure the carousel, line up the arrow on the carousel above the hub key on the indexing base before placement. - Page 37 INSTALLATION CUSTOMER INSTALLATION Press When the carousel completes processing, if any of these conditions occur, then you need to align the carousel as described in Chapter 7 of the Operator’ s Guide: appears on the touch screen. The instrument pauses and beeps.
-
Page 38: Priming And Preparing The Instrument For Use
INSTALLATION CUSTOMER INSTALLATION Priming and Preparing the Instrument for Use If your system has the LALS OPTION, select the correct reagent mode (3 or 4 reagents). Note: The displayed mode is the active mode. Press Press to prime the instrument with reagents and to set the reagent counter to 300. - Page 39 INSTALLATION CUSTOMER INSTALLATION Perform the Gravimetric Validation test listed in Chapter 5, Calibration, of the Operator’ s Guide. Note: If your test tubes meet the specification criteria in Chapter 4 and none of these three troubleshooting icons appears on the touch screen during this test, then your tubes are compatible with the instrument.
-
Page 40: Operation Principles
Automation further provides reproducible standardized sample preparation. NORMAL SAMPLE FLOW At power up, startup diagnostics are run on the TQ-Prep Workstation. This includes: Moving all of the syringe plungers up and then down, to fill the syringes Moving the carousel to its home position (only if it is not at the home position... -
Page 41: Types Of Priming
OPERATION PRINCIPLES TYPES OF PRIMING After you press , the carousel is indexed sequentially until tube position 1 is located at the sample processing position under the dispensing head. The carousel is then in the tube loading position, Figure 3.1. Note: If you pressed , the carousel indexes when the run cycle starts after the preincubation. -
Page 42: New Reagent
OPERATION PRINCIPLES TYPES OF PRIMING New Reagent This prime dispenses enough reagent to replace the reagent currently in all the syringes, in the tubing from the syringes to the dispensing head and in the tubing from the syringes to the reagent containers. See Chapter 4, Specifications/Characteristics, for amounts of dispensed reagent. - Page 43 OPERATION PRINCIPLES TYPES OF PRIMING PN 4237395AA...
-
Page 44: Specifications/Characteristics
SPECIFICATIONS/CHARACTERISTICS PHYSICAL SPECIFICATIONS Dimensions Height Width Depth Weight 39.1 cm (15.4 in.) 44.7 cm (17.6 in.) 44.2 cm (17.4 in.) 18.7 kg (41.5 lb) Power Installation Category II (per IEC 1010-1 standard) Input 100 to 240 Vac, 50-60 Hz Consumption Approximately 430 W Noise <70 decibels... -
Page 45: Reagent Usage
® CYTO-STAT /COULTER CLONE monoclonal antibody reagents Tube Size 12 x 75 (+1/-2) mm test tube, round bottom, glass or plastic, that fits in the TQ-Prep Workstation’ s carousel. Plastic tubes are recommended. Mixing Speed 1,200-1,800 rpm Throughput Three-reagent mode - 80 tubes per hour... -
Page 46: Performance Specifications
ImmunoPrep B is 1.04 g/mL PERFORMANCE CHARACTERISTICS The TQ-Prep system was tested with normal and abnormal specimens in comparison to the COULTER Multi-Q-Prep system and substantially equivalent results were observed. The precision (reproducibility) of the unit based on 32 replicate samples tested for CD4 have a coefficient of variation (CV) of 1.2%. - Page 47 SPECIFICATIONS/CHARACTERISTICS PERFORMANCE CHARACTERISTICS PN 4237395AA...
-
Page 48: Log Sheets
LOG SHEETS This Appendix contains these log sheets: Page Reagent Log Maintenance and Operational Checks Log Action Log Make photocopies as needed. PN 4237395AA... - Page 49 LOG SHEETS PN 4237395AA...
- Page 50 LOG SHEETS ® COULTER TQ-PREP™ WORKSTATION REAGENT LOG TQ-Prep/ImmunoPrep Reagent System Date Opened Lot Number Expiration Date Technician SERIAL NO. ___________________________ LAB. _________________________________ ® S C I E N C E S E R V I N G H U M A N I T Y...
- Page 51 LOG SHEETS PN 4237395AA...
- Page 52 LOG SHEETS ® COULTER TQ-PREP™ WORKSTATION MAINTENANCE AND OPERATIONAL CHECKS LOG Every 6 Months or Daily As Needed As Needed Gravimetric Startup/QC Check Shutdown/Clean Validation Indicate Procedure Date Tech Date Tech Date Tech Procedure Date Tech SERIAL NO. _________________________________ LAB. ___________________________________ ____ ®...
- Page 53 LOG SHEETS PN 4237395AA...
- Page 54 LOG SHEETS ® COULTER TQ-PREP™ WORKSTATION ACTION LOG Tech Tech Date Condition Noted (Initials) Date Action Taken (Initials) SERIAL NO. _______________________________ LAB. ___________________________________ ® S C I E N C E S E R V I N G H U M A N I T Y...
- Page 55 LOG SHEETS PN 4237395AA...
-
Page 56: Operator Certification Procedure
Use the Operator Certification form at the end of this appendix to record your results. Calibrate a pipet using the appropriate Pipet Calibration Procedure (air-displacement or positive-displacement) listed below. Use the pipet calibrated in step 2 above to perform the TQ-Prep Workstation Precision Procedure. PIPET CALIBRATION PROCEDURE Use the pipet calibration procedure corresponding to the type of pipet used in your laboratory to prepare samples. -
Page 57: With Air-Displacement Pipet (Reverse Mode
OPERATOR CERTIFICATION PROCEDURE PIPET CALIBRATION PROCEDURE With Air-Displacement Pipet (Reverse Mode) Securely fasten a new tip to the pipet. Adjust the volume to 100 µL if it is not a fixed volume pipet. Tare a weigh boat on a microbalance. PN 4237395AA... - Page 58 OPERATOR CERTIFICATION PROCEDURE PIPET CALIBRATION PROCEDURE Press the plunger down to the first stop. Place the tip 2 to 3 mm below the surface of a container of deionized or distilled water. Continue to press the plunger down 2 to 3 mm more. PN 4237395AA...
- Page 59 OPERATOR CERTIFICATION PROCEDURE PIPET CALIBRATION PROCEDURE Slowly release the plunger to overdraw the required volume. Remove the tip from the deionized or distilled water while touching the tip to an inside wall to remove any adhering liquid. While touching the tip to the tared weigh boat, slowly dispense the water by depressing the plunger to the first stop only.
- Page 60 PIPET CALIBRATION PROCEDURE Record the weight in milligrams (mg) ® COULTER TQ-PREP™ Workstation Operator Certification Form on the Operator Certification form at Part I - Pipet Precision (Weight in milligrams of water dispensed) the end of this appendix. Pipet Type:...
-
Page 61: With Positive-Displacement Pipet
OPERATOR CERTIFICATION PROCEDURE PIPET CALIBRATION PROCEDURE With Positive-Displacement Pipet Securely fasten a new tip to the pipet. Adjust the volume to 100 µL if it is not a fixed volume pipet. Tare a weigh boat on a microbalance. PN 4237395AA... - Page 62 OPERATOR CERTIFICATION PROCEDURE PIPET CALIBRATION PROCEDURE Press the plunger all the way down. Place the tip 2 to 3 mm below the surface of a container of deionized or distilled water. Slowly release the plunger to draw the required volume. PN 4237395AA...
- Page 63 Record the weight in milligrams on the ® ™ COULTER TQ-PREP Workstation Operator Certification Form Operator Certification form at the end of Part I - Pipet Precision (Weight of water dispensed) this appendix. Type:...
- Page 64 OPERATOR CERTIFICATION PROCEDURE PIPET CALIBRATION PROCEDURE Repeat steps 3 through 9 until 10 results ® ™ COULTER TQ-PREP Workstation Operator Certification Form are listed. Part I - Pipet Precision (Weight of water dispensed) Pipet Type: ____ Air Displacement ____ Positive Displacement 1.
-
Page 65: Tq-Prep Workstation Precision Procedure
OPERATOR CERTIFICATION PROCEDURE TQ-PREP WORKSTATION PRECISION PROCEDURE TQ-PREP WORKSTATION PRECISION PROCEDURE Use the pipet calibrated above to perform this procedure. Completely mix a tube of normal donor blood by inversion. Pipet 100 µL of blood into a 12 x 75 mm test tube. - Page 66 OPERATOR CERTIFICATION PROCEDURE TQ-PREP WORKSTATION PRECISION PROCEDURE Place the test tube into the TQ-Prep Workstation carousel. Repeat steps 2 through 4 until all 32 positions of the carousel are filled. 1 2 3 4 25 24 18 17 Open the sample processing area lid.
- Page 67 OPERATOR CERTIFICATION PROCEDURE TQ-PREP WORKSTATION PRECISION PROCEDURE Load the carousel. Note: To correctly secure the carousel, line up and place the arrow on the carousel over the hub key on the indexing base. Close the sample processing area lid. Press...
- Page 68 OPERATOR CERTIFICATION PROCEDURE TQ-PREP WORKSTATION PRECISION PROCEDURE When processing is done, remove the carousel and assay the samples for lymphocytes on a flow cytometer per the instrument’ s manual. Acceptable results: The histograms must not show unlysed erythrocytes. All 32 tubes must recover the same percent lymphocytes ±2% of the mean using the...
- Page 69 OPERATOR CERTIFICATION PROCEDURE TQ-PREP WORKSTATION PRECISION PROCEDURE B-14 PN 4237395AA...
- Page 70 Mean ______________ mg Mean ______________ mg Mean ______________ mg SD ________________ mg SD ________________ mg SD ________________ mg Part II - COULTER TQ-Prep Workstation Precision (Percent Lymphocytes from FS vs. SS Histogram) 1. __________________ 13. __________________ 25. __________________ 2. __________________ 14. __________________ 26.
- Page 71 OPERATOR CERTIFICATION PROCEDURE TQ-PREP WORKSTATION PRECISION PROCEDURE B-16 PN 4237395AA...
- Page 72 REFERENCES Rose NR and Friedman H, eds. 1980. Manual of clinical immunology, 2d edition. American Society for Microbiology. Washington, DC. Guidelines for prophylaxis against pneumocystis carinii pneumonia for persons infected with human immunodeficiency virus. Centers for Disease Control Morbidity and Mortality Weekly Report.
- Page 73 REFERENCES PN 4237395AA...
- Page 74 GLOSSARY Ampere, a unit of electric current. Accuracy Ability of an instrument to agree with a predetermined reference value. Automotive glass. Air-displacement pipet A pipet that entraps a measured quantity of liquid then delivers the liquid by a piston stroke mechanism.
- Page 75 GLOSSARY LALS OPTION This option is for use on flow cytometers that measure a low angle of forward scatter (FALS) light. Laminar flow hood Also called: safety cabinet. Pound, a unit of weight. Leukocyte White blood cell. Lot number A manufacturer’s code that identifies when a reagent was manufactured. Lysing/Lysis Disruption of the cellular membrane.
- Page 76 GLOSSARY Volt, a unit of electrical potential difference measurement. Volts of alternating current. Vortex A whirling motion of liquid. Watt, a unit of power. PN 4237395AA...
- Page 77 GLOSSARY PN 4237395AA...
- Page 78 INDEX Symbols tube loading position, definition, GLOSSARY-2 µL tube loading position, description, 3-2 definition, GLOSSARY-2 tube loading position, figure, 3-1 definition, GLOSSARY-1 centrifugation definition, GLOSSARY-1 definition, GLOSSARY-1 characteristics, performance, 4-3 accessibility, instrument checking installation requirements, 2-1 alignment, at installation, 2-19 accuracy definition, GLOSSARY-1 definition, GLOSSARY-1...
-
Page 79: Options, 1-4
density definition, GLOSSARY-1 hardware reagents, 4-3 options, 1-4 water, 4-3 special requirements, 2-1 dimensions, 4-1 histogram, light-scatter direct current definition, GLOSSARY-1 definition, GLOSSARY-1 history of methods, 1-1 dispensing head home position, carousel description, 1-2 definition, GLOSSARY-1 location on system, 1-2 description, 3-1 distilled water figure, 3-1... - Page 80 components, description, 1-2 location, reagents, 2-12 components, location on system, 1-2 location, WASTE, 2-12 delivery inspection, 2-2 dimensions, 4-1 See sample processing area lid electrical input requirements, 4-1 See also reagent cover installation special requirements, 2-1 log sheets intended use, 1-1 action, A-7 layout, 2-1 maintenance and operational checks, A-5...
- Page 81 operator certification procedure, B-10 specifications, 4-3 noise, specifications, 4-1 preincubation normal sample flow, 3-1 definition, GLOSSARY-2 preventive maintenance and operational checks log sheet, A-5 priming operation principles, 3-1 amount of reagent used, 4-2 operational checks, and maintenance, log at installation, 2-21 sheet, A-5 automatic, 3-3 operator certification...
- Page 82 2-1, 4-1 throughput, 4-2 definition, GLOSSARY-2 touch screen adjust contrast, 2-18 description, 1-4 safety cabinet TQ-Prep Workstation accessibility requirements, 2-1 components, description, 1-2 definition, GLOSSARY-2 installation requirements, 2-1 reagent cover not needed, 2-1 intended use, 1-1 space requirements, 2-1...
- Page 83 tube lifter description, 1-3 location on system, 1-2 unpacking of instrument, 2-3 use and function, instrument, 1-1 definition, GLOSSARY-3 definition, GLOSSARY-3 ventilation requirements, 2-1 vortex definition, GLOSSARY-3 vortex mixer description, 1-3 location on system, 1-2 definition, GLOSSARY-3 WASTE container location in system, 2-15 water, deionized definition, GLOSSARY-1 for use as OPTION reagent, 1-5...
- Page 84 BECKMAN COULTER, INC. CUSTOMER END USER LICENSE AGREEMENT This Product contains software that is owned by Beckman Coulter, Inc. or its suppliers and is protected by United States and international copyright laws and international trade provisions. You must treat the software contained in this Product like any other copyrighted material.
-
Page 86: Trademarks
TRADEMARKS COULTER, COULTER CLONE, the "CC" logo, CYTO-STAT, ImmunoPrep, Multi-Q-Prep, Q-Prep and TQ-Prep are trademarks of Coulter International Corp. Teflon is a registered trademark of E. I. duPont de Nemours & Co. All other trademarks, service marks, products, or services are trademarks or registered trademarks of their respective holders. - Page 87 Overview of daily procedures and description of screen buttons and icons. PN 4237389 Come visit us at www.beckmancoulter.com Beckman Coulter Ireland, Inc. Mervue Business Park, Mervue Galway, Ireland 353 91 774068 Printed on Recycled Paper Copyright © Beckman Coulter, Inc. 1997, 2010 All Rights Reserved...
Need help?
Do you have a question about the TQ-Prep and is the answer not in the manual?
Questions and answers