
Related Manuals for Huawei VP9660


Summary of Contents for Huawei VP9660
- Page 1 HUAWEI VP9660 V200R001 Quick Start Guide Issue Date 2013-12-30 HUAWEI TECHNOLOGIES CO., LTD.
- Page 2 Notice The purchased products, services and features are stipulated by the contract made between Huawei and the customer. All or part of the products, services and features described in this document may not be within the purchase scope or the usage scope. Unless otherwise specified in the contract, all statements, information, and recommendations in this document are provided "AS IS"...
-
Page 3: Table Of Contents
HUAWEI VP9660 Quick Start Guide Contents Contents 1 Safety Precautions ......................... 1 2 Installing the VP9660........................4 2.1 Installation Process ............................... 4 2.2 Preparing for Installation .............................. 4 2.3 Unpacking ..................................5 2.4 Plugging In the Ground Cable ............................ 14 2.5 Plugging In Power Cables............................ - Page 4 6 Troubleshooting .......................... 62 6.1 Failure to Register with a GK ............................. 62 6.2 Conference Fails to Start as Scheduled ........................63 6.3 Failure to Access the VP9660 by Dialing the IVR Conference ID ................63 Issue 04 (2013-12-30) Huawei Proprietary and Confidential...
-
Page 5: Safety Precautions
Do not attempt to dismantle the device. Should any fault develop requiring technical assistance, contact an authorized maintenance center. Without Huawei's prior written consent, no organization or individual is permitted to make any changes to the structure or design of the device. ... - Page 6 Do not clean the device shell with any cleaning solution or cleanser spray. Use a piece of soft cloth to gently wipe down the device shell if dusty or smudged. Issue 04 (2013-12-30) Huawei Proprietary and Confidential Copyright © Huawei Technologies Co., Ltd.
- Page 7 This is a class A product. In a household or other environment, this product may cause radio interference. If such interference is detected, the user may be required to take adequate corrective measures. and may cause radio interference in a living environment. Issue 04 (2013-12-30) Huawei Proprietary and Confidential Copyright © Huawei Technologies Co., Ltd.
-
Page 8: Installing The Vp9660
Check the package for damage and check the devices against the packing list. 2.4 Plugging In the Ground Connect the provided ground cable from the Cable VP9660 ground screw to a ground bar. 2.5 Plugging In Power Connect the provided power cables to the Cables VP9660. -
Page 9: Unpacking
Illustrations listed in Table 2-2 are for your reference only. 2.3 Unpacking To ensure that you have received all the components of the VP9660 in good condition, perform the following steps for acceptance: Issue 04 (2013-12-30) Huawei Proprietary and Confidential... - Page 10 Wooden crates are usually used to package heavy components such as chassis and bases. A wooden crate consists of wooden boards, steel sheets, tongues, and foam wrap angles. Issue 04 (2013-12-30) Huawei Proprietary and Confidential Copyright © Huawei Technologies Co., Ltd.
- Page 11 Wooden board b. Steel sheet c. Tongue d. Wrench Step 2 Pull straight all the tongues on the cover and remove the cover, as shown in Figure 2-2. Issue 04 (2013-12-30) Huawei Proprietary and Confidential Copyright © Huawei Technologies Co., Ltd.
- Page 12 Check the cartons one by one. Confirm that cartons are empty before throwing them away. The following procedure uses a carton for packing boards as an example. Issue 04 (2013-12-30) Huawei Proprietary and Confidential Copyright © Huawei Technologies Co., Ltd.
- Page 13 If the items are consistent with the packing list, accept the items. If the items are not consistent with the packing list, contact the device supplier. ----End Issue 04 (2013-12-30) Huawei Proprietary and Confidential Copyright © Huawei Technologies Co., Ltd.
- Page 14 Connects to RS-232 serial 04042967 Serial cable ports. Connects to a DC power Accessories 14170016 Bare crimp terminal cable. Connects to a ground Issue 04 (2013-12-30) Huawei Proprietary and Confidential Copyright © Huawei Technologies Co., Ltd.
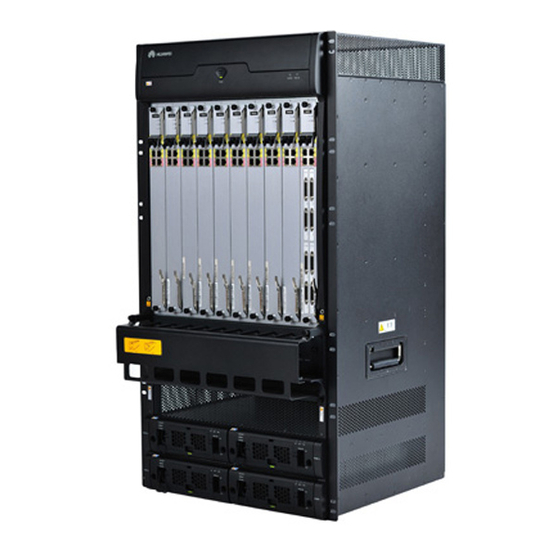
- Page 15 The VP9660 supports AC and DC power supplies. The cables delivered vary according to the power modules specified in the purchase contract. Hardware Structure The VP9660 is 20 U (890 mm or 35.04 in.) high. The VP9660 integrates the chassis, power modules, fan assemblies, boards, and dust filter, as shown in Figure 2-4.
- Page 16 HUAWEI VP9660 Quick Start Guide 2 Installing the VP9660 Figure 2-4 VP9660 hardware structure 1 Front panel of the air 2 Upper fan assembly 3 Boards outlet trough 4 ESD holes 5 Cable trough panel 6 Air intake trough Issue 04 (2013-12-30) Huawei Proprietary and Confidential Copyright ©...
- Page 17 AC power supply mode. The power modules, fan assemblies, and dust filter are preinstalled on the chassis before the delivery of the VP9660. You only need to install boards and connect the ground, power, and network cables to the VP9660.
-
Page 18: Plugging In The Ground Cable
10 RS-232 serial port Each GWBB subboard supports 16-port PRI access, and the ISDN board supports a maximum of 64-port PRI access. 2.4 Plugging In the Ground Cable Issue 04 (2013-12-30) Huawei Proprietary and Confidential Copyright © Huawei Technologies Co., Ltd. - Page 19 Before plugging in the power cable, ensure that the ground cable is properly connected to the VP9660. At the lower right corner of the VP9660 chassis' rear panel, you will find two M6 ground screws. Choose either of the screws to connect the ground cable.
-
Page 20: Plugging In Power Cables
----End 2.5 Plugging In Power Cables The VP9660 supports AC and DC power supplies. It comes with four AC or DC power modules. An AC power module requires one power cable, and a DC power module requires Issue 04 (2013-12-30) Huawei Proprietary and Confidential Copyright ©... - Page 21 DC power module: -36~-72V AC power module: 90~280 V, 50 or 60 Hz To protect other equipment in the equipment room from being affected when the VP9660 experiences a power supply fault, the following specifications are recommended: DC power module: 50A ...
- Page 22 International Electrotechnical Commission (IEC) C14 inlet and has a power plug lock. Step 1 Pull upward on the power plug lock on the left of the power socket, as shown in Figure 2-10. Issue 04 (2013-12-30) Huawei Proprietary and Confidential Copyright © Huawei Technologies Co., Ltd.
-
Page 23: Installing Boards
Step 4 Insert the power cable into the power socket of the power supply device. ----End 2.6 Installing Boards Before installing boards into the VP9660 chassis, set the switches on the power modules to OFF. Mount a filler panel on each empty slot in the chassis. Doing so improves the electromagnetic compatibility and cooling of the VP9660 and protects the system air channels. - Page 24 Boards are susceptible to ESD damage. To protect the boards, observe the following rules: − Ground the VP9660 correctly in accordance with the grounding requirements. − Always wear an ESD wrist strap to protect the boards against ESD during operation.
- Page 25 Slots 0 and 1 are used to accommodate ECCB boards. If there is only one ECCB board, insert it into slot 0. Each slot in the VP9660 chassis is provided with a filler panel. To insert boards into slots, loosen the screws counterclockwise in the filler panels, remove the filler panels, and insert the boards from left to right.
- Page 26 2 Installing the VP9660 Figure 2-13 Inserting the board Step 2 Press the ejector levers inward until the ejector levers are locked in place, as shown in Figure 2-14. Issue 04 (2013-12-30) Huawei Proprietary and Confidential Copyright © Huawei Technologies Co., Ltd.
- Page 27 Quick Start Guide 2 Installing the VP9660 Figure 2-14 Pressing the ejector lever inward Step 3 Tighten the screws clockwise to secure the board, as shown in Figure 2-15. Issue 04 (2013-12-30) Huawei Proprietary and Confidential Copyright © Huawei Technologies Co., Ltd.
- Page 28 Figure 2-15 Tightening the board screws ----End If a slot has no board inserted, mount a filler panel on the slot. Otherwise, the heat dissipation and electromagnetic shielding of the VP9660 will be affected. Issue 04 (2013-12-30) Huawei Proprietary and Confidential...
-
Page 29: Plugging In Network Cables
2 Installing the VP9660 2.7 Plugging In Network Cables To enable the VP9660 to function correctly, connect all GE0 ports in the board front panels to a gigabit switch. For service provision, do not connect GE0 or GE1 ports to a hub or a 10 Mbit/s switch. - Page 30 DB-36 port in the front panel of the ISDN board and the DB-68 port in the rear panel of the PRI cable box respectively, as shown in Figure 2-20. Issue 04 (2013-12-30) Huawei Proprietary and Confidential Copyright © Huawei Technologies Co., Ltd.
- Page 31 Rx interface and the receiving cable connector is connected to the Tx interface. Issue 04 (2013-12-30) Huawei Proprietary and Confidential Copyright © Huawei Technologies Co., Ltd.
- Page 32 Step 3 Repeat Step 2 to connect other PRI cables to the PRI cable box and the switch. ----End Issue 04 (2013-12-30) Huawei Proprietary and Confidential Copyright © Huawei Technologies Co., Ltd.
- Page 33 HUAWEI VP9660 Quick Start Guide 2 Installing the VP9660 Follow-up Procedure For details of Configuring the ISDN Service, see the HUAWEI VP9660&VP9650&VP9630 V200R001 Configuration Guide. You can contact Huawei technical support engineers or visit http://enterprise.huawei.com/support to obtain this document. Issue 04 (2013-12-30) Huawei Proprietary and Confidential Copyright ©...
-
Page 34: First Time Use
3.1 Powering On Power on the device only after you have completed the installation. 3.1.1 Verification Before Power-On After you install the VP9660, verify device installation and cable connection before powering it on. Verifying Device Installation Before verifying device installation, set the switches of power modules to OFF. -
Page 35: Powering On The Device
VP9660 to prevent injuries and device damage. The VP9660 is shipped with four DC or AC power modules. If DC power modules are provided, the VP9660 requires two power modules to be fully powered. The other two power modules serve as backups. - Page 36 DC power module. Figure 3-2 Power switch in a DC power module Step 2 Set the four power switches to ON. ----End Issue 04 (2013-12-30) Huawei Proprietary and Confidential Copyright © Huawei Technologies Co., Ltd.
-
Page 37: Verification After Power-On
The ECCB board is operating correctly, which can be ascertained by checking the ECCB board indicators listed in Table 3-3. Table 3-3 ECCB board indicators Indicator Status Description Steady green The board is the active board. Issue 04 (2013-12-30) Huawei Proprietary and Confidential Copyright © Huawei Technologies Co., Ltd. -
Page 38: Logging In To The Web Interface
The VP9660 provides web-based management. Using a computer with an Internet browser, you can log in to the VP9660 web interface for configuration. Default Settings During your first login to the VP9660 web interface, use the default settings listed in Table 3-4. - Page 39 Change_Me Context To log in to the VP9660 web interface, prepare an Internet browser-enabled computer and connect the computer to the Internet. If the default IP address of the ECCB board GE0 port is in a different network segment from the computer IP address, add a secondary IP address to the computer to ensure that the two IP addresses are in the same network segment.
- Page 40 The Advanced TCP/IP settings dialog box is displayed. Select IP settings and click Add. The window shown in Figure 3-4 is displayed. Figure 3-4 Advanced TCP/IP settings Issue 04 (2013-12-30) Huawei Proprietary and Confidential Copyright © Huawei Technologies Co., Ltd.
-
Page 41: Changing The Administrator Password
The account is locked out for five minutes by default if you enter incorrect passwords (empty passwords excluded) three consecutive times when attempting to log in to the MCU. The admin account can be used to perform all operations on the VP9660. ----End 3.3 Changing the Administrator Password... -
Page 42: Configuration For The First Time
Keep record of the new administrator user name and password. ----End 3.4 Configuration for the First Time When you log in to the VP9660 web interface for the first time, set the IP address, system time, and gatekeeper (GK) parameters. 3.4.1 Setting the IP Address Based on the actual network, change the IP addresses of the board GE0 ports in all slots. - Page 43 Example: 255.255.0.0 Gateway address 192.168.2.254 Example: 200.54.0.1 Procedure Step 1 Log in to the VP9660 web interface. Step 2 Choose Settings > Network. The Network page is displayed. Step 3 Click the Network Interface tab. Step 4 Set Slot. The Network page is displayed, as shown in Figure 3-7.
-
Page 44: Setting The System Time
Quick Start Guide 3 First Time Use ----End The IP address of the GE0 port on the ECCB board front panel is used to log in to the VP9660 web interface. Keep record of this IP address. 3.4.2 Setting the System Time The default time zone of the VP9660 is set to the Greenwich Mean Time. - Page 45 IP addresses. GK ID ID of the GK on the VP9660 web interface. Example: GK1 H.323 ID Alias used by the VP9660 to register with a GK. Example: MCU1 Password Password used by the VP9660 to register with a Example: 123456...
- Page 46 3 First Time Use Parameter Description Setting GK address IP address of an online standalone GK. Example: 200.54.11.111 (IP address of the SMC2.0 embedded Step 4 Click OK. ----End Issue 04 (2013-12-30) Huawei Proprietary and Confidential Copyright © Huawei Technologies Co., Ltd.
-
Page 47: Using The Smc2.0
This section describes the network and its key components, using an enterprise network as an example. An enterprise network is an IP network where the SMC2.0, VP9660, and endpoints (telepresence systems) are deployed. You can select the required endpoints and use the SMC2.0 to manage all connected devices and registrations, initiate conferences, and perform... - Page 48 (OA) integration, and management on resources, registration information, users, and conferences. Bridge to transfer call information between endpoints and the VP9660, translates the addresses of the endpoints and VP9660, and controls calls and bandwidth. In an enterprise network, you can use the embedded GK of the SMC2.0.
-
Page 49: Planning Data
Component Description system to realize virtual presence and immersive experience. To know more about other network schemes and configuration cases, see the HUAWEI VP9660&VP9650&VP9630 V200R001 Configuration Guide. You can contact Huawei technical support engineers or visit http://enterprise.huawei.com/support to obtain this document. -
Page 50: Setting The Connection Type
4.1.2 Setting the Connection Type Before you use the SMC2.0 to initiate a conference, set the connection type to SMC2.0. Step 1 Log in to the VP9660 web interface. Step 2 Choose Settings > System > Connection Management. The Connection Management page is displayed, as shown in Figure 4-2. -
Page 51: Setting Gk Parameters
----End 4.1.3 Setting GK Parameters The VP9660 cooperates with the SMC2.0 to initiate conferences. Before using the VP9660 to initiate a conference, you must set GK parameters. This section describes how to set GK parameters, using the SMC2.0 embedded GK as an example. - Page 52 Select the newly added service area. At the lower left corner of the page, set Add Prefix to Add Prefix. The Add Prefix dialog box is displayed, as shown in Figure 4-7. Issue 04 (2013-12-30) Huawei Proprietary and Confidential Copyright © Huawei Technologies Co., Ltd.
- Page 53 Choose Devices > GK. The GK page is displayed. Select Embedded GK and click Edit GK. The Edit GK dialog box is displayed, as shown in Figure 4-8. Issue 04 (2013-12-30) Huawei Proprietary and Confidential Copyright © Huawei Technologies Co., Ltd.
-
Page 54: Adding An Mcu
Step 1 Log in to the SMC2.0 web interface. Step 2 Choose Devices > MCU. Step 3 Click Add MCU. The MCU search page is displayed, as shown in Figure 4-9. Issue 04 (2013-12-30) Huawei Proprietary and Confidential Copyright © Huawei Technologies Co., Ltd. - Page 55 SNMP settings on the MCU, a search for the MCU will fail. If the search fails, modify the displayed SNMP settings based on your modifications on the MCU. For details, see the HUAWEI VP9660&VP9650&VP9630 V200R001 Configuration Guide. You can contact Huawei technical support engineers or visit http://enterprise.huawei.com/support...
-
Page 56: Adding A Participant
Figure 4-11 Participant search page Step 4 Enter the participant IP address in Device Address and click Next. The participant's configuration information is displayed, as shown in Figure 4-12. Issue 04 (2013-12-30) Huawei Proprietary and Confidential Copyright © Huawei Technologies Co., Ltd. - Page 57 SNMP settings on the participant, a search for the participant will fail. If the search fails, modify the displayed SNMP settings based on your modifications on the participant. For details, see the HUAWEI VP9660&VP9650&VP9630 V200R001 Configuration Guide. You can contact Huawei technical support engineers or visit http://enterprise.huawei.com/support...
-
Page 58: Scheduling A Conference
Step 4 Click Add Participant. The Add Participant page is displayed. Step 5 Select participants and click Add. Step 6 Click Close. Step 7 From Participant Advanced Settings, select the added VP9660. Step 8 Click Schedule Conference. Issue 04 (2013-12-30) Huawei Proprietary and Confidential... -
Page 59: Initiating An Ad Hoc Conference
You can create an Ad hoc conference from the SMC2.0. A participant can then call the conference ID and enter the activation password to activate the conference. Prerequisites You have configured a GK on the SMC2.0 and added the VP9660 and participants to the SMC2.0. ... -
Page 60: Joining A Conference
Context To join a predefined Ad hoc conference, you can call the IVR conference ID to display the video IVR screen of the VP9660. For details about how to create an Ad hoc conference, see 4.3.1 Creating an Ad hoc Conference. - Page 61 HUAWEI VP9660 Quick Start Guide 4 Using the SMC2.0 Step 1 Log in to the VP9660 web interface. Step 2 Choose Settings > Conference. The Policy for Scheduling and Controlling a Conference page is displayed. Step 3 Set IVR language to the desired language.
- Page 62 HUAWEI VP9660 Quick Start Guide 4 Using the SMC2.0 Figure 4-16 IVR screen Step 2 Press 1. The screen shown in Figure 4-17 is displayed. Issue 04 (2013-12-30) Huawei Proprietary and Confidential Copyright © Huawei Technologies Co., Ltd.
- Page 63 (6 key). You can also press *, enter the conference ID in the text box, and press #. The screen shown in Figure 4-18 is displayed. Issue 04 (2013-12-30) Huawei Proprietary and Confidential Copyright © Huawei Technologies Co., Ltd.
- Page 64 The participant joins the conference after password verification. If no password is set for the conference, the endpoint can join the conference without entering a password. ----End Issue 04 (2013-12-30) Huawei Proprietary and Confidential Copyright © Huawei Technologies Co., Ltd.
-
Page 65: Controlling A Conference
Quick Start Guide 5 Controlling a Conference Controlling a Conference The VP9660 provides a variety of conference control functions. You can use these functions on the SMC2.0 web interface or by operating the endpoint remote control. Conference Control Functions on the SMC2.0 To use conference control functions on the SMC2.0 web interface:... -
Page 66: Troubleshooting
HUAWEI VP9660 Quick Start Guide 6 Troubleshooting Troubleshooting 6.1 Failure to Register with a GK Symptom The VP9660 fails to register with a GK. Possible Causes The following lists the possible causes: Network error Inconsistent GK registration settings Procedure ... -
Page 67: Conference Fails To Start As Scheduled
For example, the system time on the VP9660 is 9:30, January 18, 2013 while the current time is 14:00, January 18, 2013. If you start a conference on the VP9660, the conference is added to the scheduled conferences list and will start when the system time on the VP9660 reaches 14:00, January 18, 2013. - Page 68 Click OK. Step 2 Register the participant endpoint with a GK. Log in to the web interface of the participant endpoint. Register the endpoint with the GK to which the VP9660 connects. ----End Issue 04 (2013-12-30) Huawei Proprietary and Confidential...
Need help?
Do you have a question about the VP9660 and is the answer not in the manual?
Questions and answers