Table of Contents
Advertisement
Quick Links
Advertisement
Table of Contents

Related Manuals for Kichler Lighting 52 inch Colerne LED


Summary of Contents for Kichler Lighting 52 inch Colerne LED
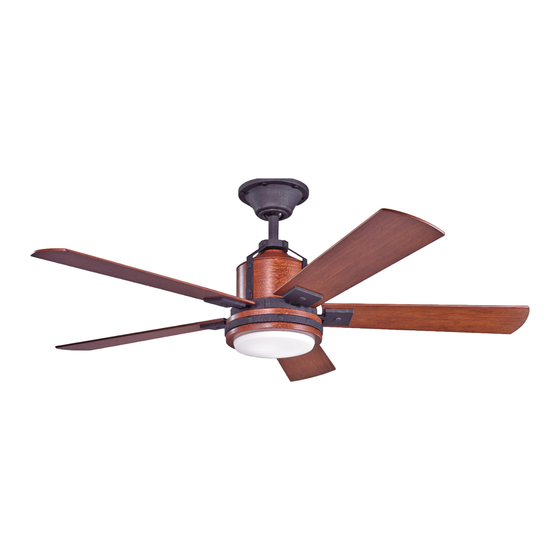
- Page 1 52" Colerne LED...
-
Page 3: Table Of Contents
TABLE OF CONTENTS SAFETY RULES ………………………………………………………. 4 ATTACHING THE FAN BLADES …………………………… 12 TOOLS REQUIRED ……………………………………………… 5 INSTALLING THE SWITCH HOUSING ………………… 13 PACKAGE CONTENTS …………………………………………. 5 INSTALLING THE LIGHT KIT AND GLASS ………… 14 MOUNTING OPTIONS ………………………………………… 6 INSTALLING THE WALL CONTROL …………………… 15 HANGING THE FAN ……………………………………….. -
Page 4: Safety Rules
SAFETY RULES To reduce the risk of electric shock, insure electricity has Do not use water or detergents when cleaning the fan or fan been turned o at the circuit breaker or fuse box before blades. A dry dust cloth or lightly dampened cloth will be suitable beginning. -
Page 5: Tools Required
TOOLS REQUIRED Phillips screwdriver Blade screwdriver 11 mm wrench Step ladder Wire cutters PACKAGE CONTENTS Unpack your fan and check the contents . You should have the following items: A. Mounting bracket N. Package hardware B. Ball / downrod assembly 1) Mounting hardware : C. -
Page 6: Mounting Options
MOUNTING OPTIONS If there isn’t an existing UL (cUL for Canadian Installation) listed mounting box, then read the following instructions. Disconnect the Secure the outlet box directly to the building structure. Use appropriate fasteners and building materials. The outlet box and its Outlet box support must be able to fully support the moving weight of the fan (at least 50 lbs). -
Page 7: Hanging The Fan
HANGING THE FAN REMEMBER to turn o the power before you begin installation. This is necessary Outlet Box for your safety and also the proper programming of the control system.To properly Ceiling Mounting Bracket install your ceiling fan, follow the steps below. Flat Washer Screw Step 1... - Page 8 HANGING THE FAN Clip Cross Pin Set Screw Clip Step 3. Loosen the two set screws and remove the cross pin and chip from the top Set Screw Cross Pin coupling of the motor body.Carefully feed the fan wires and safety cable up through Motor Body the downrod.
-
Page 9: Installation Of Safety Support
INSTALLATION OF SAFETY SUPPORT (required for Canadian installation ONLY) Flat Washer Wood Screw Support Brace Spring Washer A safety support cable is provided to help prevent the ceiling fan from faIling, please Ceiling Outlet Box install it as follows. Step 1. Drive a wood screw and washers into the side of the brace that holds the outlet box. -
Page 10: Electric Connections
MAKE THE ELECTRIC CONNECTIONS Mounting Bracket Receiver WARNING: To avoid possible electrical shock,be sure you have turned o the power at the main circuit panel before wiring. Follow the steps below to connect the fan to your household wiring. Use the wire connecting nuts supplied with your fan. Secure the connector with electrical tape. -
Page 11: Finishing The Installation
MAKE THE ELECTRIC CONNECTIONS Step 4. If your outlet box has a ground wire ( green or bare copper ) connect it to the fan ground wires : otherwise connect the fan ground wire to the Mounting Bracket mounting bracket. Secure the wire connection with a plastic nut provided. After connecting the wires, spread them apart so that the green and white wires are on one side of the outlet box and black and blue wires are on the Shoulder Screw... -
Page 12: Attaching The Fan Blades
FINISHING THE INSTALLATION Step 3. Securely attach and tighten the canopy hole cover over the shoulder Shoulder Screw Canopy Hole Cover screws in the mounting bracket utilizing the keyslot twist-lock feature. (Fig. 16) ATTACHING THE FAN BLADES Fig. 16 NOTE: Before continuing , make sure the power is disconnected by turning o the circuit breaker of removing the fuse at the circuit box. -
Page 13: Installing The Switch Housing
ATTACHING THE FAN BLADES Step 2. Fasten blade assembly to the holes located on the bottom of the flywheel. Tighten the two "pre- installed" motor screws in the blade arm. Repeat steps for the remaining Motor Body blades assemblies.(Fig. 18) Blade Assembly Fig. -
Page 14: Installing The Light Kit And Glass
INSTALLING THE LIGHT KIT AND GLASS NOTE: Before continuing installation, confirm that the power is still turned o at the main circuit breaker or by removing the correct fuse. Turning the power o using a wall switch is not su cient to prevent electrical stock. Step 1. -
Page 15: Installing The Wall Control
INSTALLING THE WALL CONTROL Outlet Box Switch All wiring must be in accordance with the National Electrical Code and local electrical codes. Wall Plate Electrical installation should be performed by a qualified licensed electrician. Select a location to install your wall control. You can replace an existing wall switch, or install the wall control on ANY flat surface. -
Page 16: Control System Set-Up
CONTROL SYSTEM SET-UP Step 1. After installation is complete, press the LEARN button for 3 seconds within 30 seconds of AC power is turned on. Fan will turn on at medium speed and light (if installed) will turn on. This confirms that the SMART SYNC setting is active and ok. (Fig. 24) Step 2. - Page 17 TROUBLESHOOTING Problem Solution Fan will not start. 1.Check circuit fuses or breakers. 2.Check all electrical connections to insure proper contact. CAUTION: Make sure the main power is OFF when checking any electrical connection. 3.Make sure the transmitter batteries are installed properly. Positive (+) side facing out. 4.Insure the batteries have a good charge.
-
Page 18: Troubleshooting
TROUBLESHOOTING Problem Solution Remote control 1.Ceiling Fans with remote control systems CAN NOT be operated in conjunction with any other control malfunction. system EXCEPT a basic On/O wall switch, if desired. FCC WARNING This device complies with part 15 of the FCC Rules. Operation is subject to the following two conditions: (1) This device may not cause harmful interference,and (2) this device must accept any interference received, including interference that may cause undesired operation. - Page 19 52" Colerne...
Need help?
Do you have a question about the 52 inch Colerne LED and is the answer not in the manual?
Questions and answers