
Related Manuals for Kichler Lighting Renew Select


Summary of Contents for Kichler Lighting Renew Select
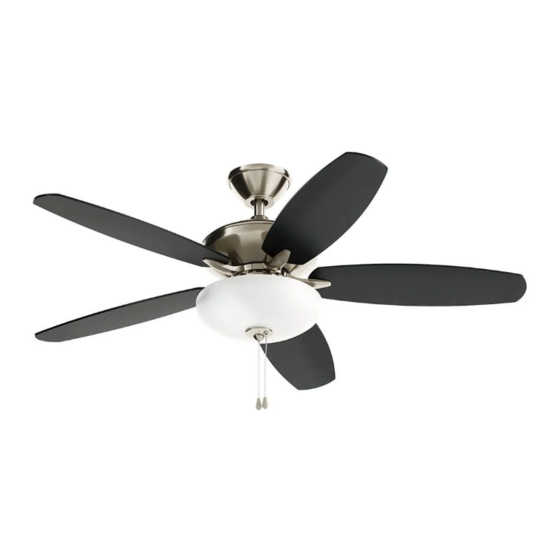
- Page 1 52" RENEW SELECT Product images may vary slightly from actual product. INSTRUCTION MANUAL UL Model #330161 REV 02-APR-2021 READ AND SAVE THESE INSTRUCTIONS...
- Page 2 Net Weight: 8.30 kgs (18.30 lbs) Gross weight: 9.70 kgs (21.38 lbs)
-
Page 3: Table Of Contents
ATTACHING THE GLASS SHADE MOUNTING OPTIONS OPERATING INSTRUCTIONS HANGING THE FAN TROUBLESHOOTING INSTALLATION OF SAFETY SUPPORT CEILING AND WALL FAN WARRANTY ELECTRICAL CONNECTIONS FCC INFORMATION Read all instructions BEFORE assembly and USE of product KEEP INSTRUCTIONS FOR FUTURE USE 52" Renew Select |... -
Page 4: Safety Rules
SAFETY RULES CAUTION -RISK OF SHOCK- 9. Avoid placing objects in the path of the blades. Disconnect Power at the main circuit breaker panel 10. To avoid personal injury or damage to the fan and other or main fusebox before starting and during the items, be cautious when working around or cleaning installation. -
Page 5: Care And Use Instructions
Wash glass with a soft cloth, rinse and wipe dry. wire to the “hot” current carrying supply wire. 52" Renew Select |... -
Page 6: Package Contents
TOOLS REQUIRED • Philips screw driver • Blade screw driver • 11mm wrench • Step ladder • Wire cutters PACKAGE CONTENTS Unpack your fan and check the contents. You should have the following items: A. Fan blades (5) K. Glass shade B. -
Page 7: Mounting Options
Make sure the joist hanger you Recessed purchase has been designed for use with ceiling fans. (Fig. 4) outlet box Ceiling mounting plate Fig. 3 Fig. 4 Outlet box 52" Renew Select |... -
Page 8: Hanging The Fan
HANGING THE FAN cULus Listed REMEMBER to turn off the power before you begin. outlet box To properly install your ceiling fan, follow the steps below. NOTE: This ceiling fan is supplied with two types of hanging assemblies; the standard ceiling installation using the downrod with ball and socket mounting and the “close-to-ceiling”... - Page 9 Step 6. Tighten two set screws on top of the fan motor firmly. (Fig. 6) Check tab Registration slot Step 7. Place downrod ball into the hanger bracket socket. (Fig 7) Fig. 7 52" Renew Select |...
- Page 10 Screws and Lock HANGING THE MOTOR ASSEMBLY washers(3 of 6 places) Canopy Close-to-Ceiling Installation Step 1. Pass the 120-volt supply wires through the center hole in the ceiling hanger bracket as shown in Fig. 5. Decoration ring Step 2. Secure the hanger bracket to the ceiling outlet box with the Gasket screws and washers provided with your outlet box.
-
Page 11: Installation Of Safety Support
Now, put the loop in the end of the safety cable over the wood screw securely. NOTE: Although the safety support cable is required for Canadian Fig. 10 installations only. It’s a good idea to make the attachment with any installation. 52" Renew Select |... -
Page 12: Electrical Connections
ELECTRICAL CONNECTIONS WARNING: To avoid possible electrical shock, be sure you have turned off the power at the main circuit panel. Outlet box in the ceiling Follow the steps below to connect the fan to your household wiring. Use the wire connecting nuts supplied with your fan. Secure the connector with electrical tape. -
Page 13: Finishing The Motor Installation
Lift up and turn the fan assembly until the heads of the mounting screws are in the narrow Decoration ring end of the keyhole slots. Step 3. Make sure all four mounting screws are tight. (Fig. 13) Canopy Fig. 13 52" Renew Select |... -
Page 14: Attaching The Fan Blades
ATTACHING THE FAN BLADES Screw Washer Blade arm Blade CAUTION: Remove the rubber shipping blocks attached to the face of the motor. These blocks keep the motor from shifting during shipping and MUST be removed during installation. Step 1. Attach the blade to the blade bracket using the screws and washers as shown in Figure 14. -
Page 15: Attaching The Glass Shade
Glass shade Tighten the finial by hand evenly to secure the glass. DO NOT OVER TIGHTEN. (Fig. 16) Step 4. Attach fobs to pull chains. (Fig. 16) Glass holder Finial Fig. 16 52" Renew Select |... -
Page 16: Operating Instructions
OPERATING INSTRUCTIONS Turn the power on and check the operation of your ceiling fan. The pull chain controls the fan speed as follows: 1 pull = High 2 pulls = Medium 3 pulls = Low 4 pulls = Off. NOTE: To set the fan blades in reverse, the reverse slide switch is located on the side of the switch housing. -
Page 17: Troubleshooting
FAN, NEVER ATTACH THE BLADE ASSEMBLIES UNTIL THE CEILING FAN HAS BEEN MOUNTED ON THE CEILING. DO NOT BEND THE BLADE ARMS WHILE INSTALLING, BALANCING OR CLEANING THE FAN. DO NOT INSERT FOREIGN OBJECTS BETWEEN ROTATING FAN BLADES. 52" Renew Select |... -
Page 18: Ceiling And Wall Fan Warranty
What We Will Do Note: Some states/provinces (including Quebec) do not allow the exclusion or limitation Kichler Lighting, at its sole discretion, will repair or replace, free of charge, during the of special, incidental or consequential damages, so the below limitations and exclusions applicable warranty period, any product or component part (as described above) that may not apply to you. -
Page 19: Fcc Information
Increase the separation between the equipment and receiver. • Connect the equipment into an outlet on a circuit different from that to which the receiver is connected. • Consult the dealer or an experienced radio/TV technician or help. 52" Renew Select |... - Page 20 www.kichler.com KICHLER LIGHTING ® 7711 EAST PLEASANT VALLEY ROAD CLEVELAND, OHIO 44131-8010 CUSTOMER SERVICE 866.558.5706 8:00 AM TO 5:00 PM EST, MONDAY - FRIDAY | KICHLER.COM...
- Page 21 RENEW SELECT, 132 CM Les images du produit peuvent varier légèrement par rapport au produit réel. MANUEL D'INSTRUCTIONS Modèle UL nº 330161 LISEZ ET CONSERVEZ CES INSTRUCTIONS...
- Page 22 INFORMATIONS DE LA FCC CONNEXIONS ÉLECTRIQUES Lire toutes les instructions AVANT de procéder à l’assemblage et l’UTILISATION du produit. Net Weight: 8,30 kgs (18,30 lbs) CONSERVER CES INSTRUCTIONS POUR UN USAGE ULTÉRIEUR Gross weight: 9,70 kgs (21,38 lbs) Renew Select, 132 cm |...
-
Page 23: Règles De Sécurité
Le ventilateur doit être éteint et les pales immobiles avant d’inverser le sens de rotation des pales. | KICHLER.COM Renew Select, 132 cm |... -
Page 24: Outils Et Équipement Requis
à solive que vous achetez est conçu pour une utilisation avec les ventilateurs de plafond. (Fig. 4) J. Supports de pale avec vis 6) Capuchons de connexion (3) de montage préinstallées (5) Fig. 4 Boîte de sortie Outlet box | KICHLER.COM Renew Select, 132 cm |... -
Page 25: Suspension Du Ventilateur
Étape 6. Serrez fermement les deux vis de pression situées sur le dessus du moteur du ventilateur. (Fig. 6) Étape 7. Placez la rotule sphérique de la tige de suspension dans la douille du support de suspension. (Fig. 7) Fig. 7 | KICHLER.COM Renew Select, 132 cm |... -
Page 26: Installation Du Câble De Support De Sécurité
Étape 6. Suspendez le ventilateur au crochet du support de montage. Assurez-vous que le pavillon est complètement fixé au crochet, comme illustré dans la Fig. 9. Ceci vous permettra Canopy Pavillon d’effectuer les connexions électriques. Fig. 9 | KICHLER.COM Renew Select, 132 cm |... -
Page 27: Connexions Électriques
Étape 5. Tournez les capuchons de connexion vers le haut Canopy Pavillon et poussez les fils à l’intérieur de la boîte de sortie. Étape 3. Assurez-vous que les quatre vis de montage sont bien serrées. (Fig. 13) Fig. 11 Fig. 13 | KICHLER.COM Renew Select, 132 cm |... -
Page 28: Installation Des Pales Du Ventilateur
Étape 2. Poussez soigneusement tous les fils dans le boîtier du commutateur. Fixez le boîtier du commutateur sur l’anneau de fixation avec les vis fournies. Veillez à ce que chaque vis soit bien serrée. (Fig. 15) Fig. 15 | KICHLER.COM Renew Select, 132 cm |... -
Page 29: Mode D'emploi
VENTILATEUR DE PLAFOND, NE FIXEZ JAMAIS LES PALES AVANT D’AVOIR MONTÉ LE VENTILATEUR AU PLAFOND. Fig. 18 NE PLIEZ PAS LES BRAS DE PALE PENDANT L’INSTALLATION, L’ÉQUILIBRAGE OU LE NETTOYAGE DU VENTILATEUR. N’INSÉREZ AUCUN CORPS ÉTRANGER ENTRE LES PALES DE VENTILATEUR EN ROTATION. | KICHLER.COM Renew Select, 132 cm |... -
Page 30: Garantie Des Ventilateurs De Plafond Et Muraux
Kichler Lighting recommande Kichler Lighting LLC (« Kichler Lighting ») garantit que les produits suivants, catalogués de faire appel à un électricien professionnel pour toute installation et réparation de ses Cet appareil est conforme aux dispositions prévues à... - Page 31 KICHLER LIGHTING ® 7711 EAST PLEASANT VALLEY ROAD CLEVELAND, OHIO 44131-8010 SERVICE À LA CLIENTÈLE 866 558-5706 ENTRE 8 H ET 17 H, HNE, DU LUNDI AU VENDREDI | KICHLER.COM...
- Page 32 RENEW SELECT DE 52 plg (1.32 m) Las imágenes del producto pueden diferir ligeramente del producto original. MANUAL DE INSTRUCCIONES Modelo # 330161 aprobado por UL LEA Y GUARDE ESTAS INSTRUCCIONES...
- Page 33 Peso net: 8.30 kgs (18.30 lbs) Preso bruto: 9.70 kgs (21.38 lbs)
- Page 34 SOLUCIÓN DE PROBLEMAS INSTALACIÓN DE SOPORTE DE SEGURIDAD SOLUCIÓN DE PROBLEMAS CONEXIONES ELÉCTRICAS INFORMACIÓN DE LA FCC Leer todas las instrucciones ANTES de ensamblar y USAR el producto CONSERVA ESTAS INSTRUCCIONES PARA USO FUTURO Renew Select de 52 plg (1.32 m) |...
-
Page 35: Normas De Seguridad
NORMAS DE SEGURIDAD PRECAUCIÓN - RIESGO DE DESCARGA ELÉCTRICA- Evita colocar objetos en la trayectoria de las aspas. Desconectar la corriente eléctrica en el panel del 10. Para evitar lesiones personales o daños al ventilador y otros cortacircuitos principal o la caja principal de fusibles artículos, ten cuidado al limpiarlo o al trabajar cerca de él. -
Page 36: Instrucciones De Uso Y Cuidado
“vivo” que trae corriente. Asegúrese de que el artefacto esté sostenido solamente por una cadena (si el artefacto cuelga de una cadena) y no del cable. Renew Select de 52 plg (1.32 m) |... -
Page 37: Contenido Del Paquete
HERRAMIENTAS NECESARIAS • Destornillador Phillips • Destornillador para aspas • Llave de 11 mm • Escalera de tijera • Cortacables CONTENIDO DEL PAQUETE Desempaca tu ventilador y revisa el contenido. Debes tener los siguientes artículos: A. Aspas del ventilador (5) K. -
Page 38: Opciones De Montaje
Asegúrate de que el soporte de viga mounting plate en el techo que compres esté diseñado para usar con ventiladores de techo. Fig. 3 (Fig. 4) Fig. 4 Outlet box Caja eléctrica Renew Select de 52 plg (1.32 m) |... -
Page 39: Cómo Colgar El Ventilador
CÓMO COLGAR EL VENTILADOR cULus Listed Caja eléctrica RECUERDA desconectar la corriente antes de comenzar. aprobada por outlet box cULus Para instalar correctamente tu ventilador de techo, sigue los pasos a continuación. NOTA: Este ventilador de techo viene con dos tipos de ensamblajes de soporte: la instalación de techo estándar con tubo bajante Ceiling Soporte... - Page 40 Paso 6. Aprieta firmemente los dos tornillos de fijación en la parte superior del motor de ventilador. (Fig. 6) Paso 7. Coloca la esfera del tubo bajante dentro del soporte de montaje colgante. (Fig. 7) Fig. 7 Renew Select de 52 plg (1.32 m) |...
- Page 41 Screws and Lock CÓMO COLGAR EL ENSAMBLAJE DEL MOTOR Tornillos y arandela de seguridad washers(3 of 6 places) (3 de 6 lugares) Canopy Cubierta Instalación cerca del techo Paso 1. Pasa los cables de suministro de 120 voltios a través del orificio central en el soporte colgante del techo como lo muestra Decoration ring Aro decorativo...
-
Page 42: Instalación De Soporte De Seguridad
Fig. 10 manera segura. NOTA: A pesar de que el cable de soporte de seguridad se requiere para instalaciones en Canadá únicamente. Es una buena idea hacer la conexión en cualquier instalación. Renew Select de 52 plg (1.32 m) |... -
Page 43: Conexiones Eléctricas
CONEXIONES ELÉCTRICAS ADVERTENCIA: Para evitar una posible descarga eléctrica, asegúrate de haber apagado la electricidad en el panel Caja eléctrica Outlet box de circuito principal. en el cielo in the ceiling raso Sigue estos pasos para conectar tu ventilador al circuito de tu hogar. -
Page 44: Cómo Finalizar La Instalación Del Motor
Paso 3. Asegúrate de que los tornillos de montaje están apretados. (Fig. 13) Fig. 13 Renew Select de 52 plg (1.32 m) |... -
Page 45: Cómo Fijar Las Aspas Del Ventilador
CÓMO FIJAR LAS ASPAS DEL VENTILADOR Screw Tornillo Washer Arandela Blade arm Brazo del Blade Hoja aspa PRECAUCIÓN: Quita los bloques de envío de goma que están sujetados a la cara del motor. Estos bloques evitan que el motor se mueva durante el envío y DEBEN retirarse durante la instalación. -
Page 46: Cómo Montar La Pantalla De Vidrio
Remate NO APRIETES DEMASIADO. (Fig. 16) Paso 4. Coloca las perillas de extremo en los interruptores de Fig. 16 Llave cadena. (Fig. 16) Renew Select de 52 plg (1.32 m) |... -
Page 47: Instrucciones De Uso
INSTRUCCIONES DE USO Reestablece la electricidad y chequea el funcionamiento de tu ventilador de techo. El interruptor de cadena controla las velocidades del ventilador de la siguiente manera: Halar 1 vez = Alta Halar 2 veces = Media Halar 3 veces = Baja Halar 4 veces = Apagar NOTA: Para configurar las aspas del ventilador en reversa, Fig. -
Page 48: Solución De Problemas
ADECUADO DE TU VENTILADOR DE TECHO, NUNCA FIJES LOS ENSAMBLAJES DE LAS ASPAS HASTA QUE SE HAYA INSTALADO EL VENTILADOR EN EL TECHO. NO DOBLAR LOS BRAZOS DE LAS ASPAS DURANTE LA INSTALACIÓN, COMPENSACIÓN O LIMPIEZA DEL VENTILADOR. NO INSERTES OBJETOS EXTRAÑOS ENTRE LAS ASPAS EN FUNCIONAMIENTO. Renew Select de 52 plg (1.32 m) |... - Page 49 CA (60 Hz), del mal uso (incluido el uso del producto para una aplicación no intencionada), derechos que varían según el estado o la provincia. del uso indebido, del embalaje inadecuado del producto devuelto a Kichler Lighting, de Esta garantía no es transferible.
-
Page 50: Información De La Fcc
Incrementar la distancia entre el equipo y el receptor. • Conectar el equipo a un tomacorriente de circuito distinto al que el receptor esté conectado. • Para obtener ayuda, consulta al distribuidor o algún técnico de radio/TV con experiencia. Renew Select de 52 plg (1.32 m) |... - Page 51 KICHLER LIGHTING ® 7711 EAST PLEASANT VALLEY ROAD CLEVELAND, OHIO 44131-8010 SERVICIO AL CLIENTE: 866.558.5706 DE LUNES A VIERNES, DE 8:00 A.M. A 5:00 P.M. (ESTE) | KICHLER.COM...
Need help?
Do you have a question about the Renew Select and is the answer not in the manual?
Questions and answers