VADDIO OneLINK Bridge Installation Manual
Av interface
Hide thumbs
Also See for OneLINK Bridge:
- Installation manual (58 pages) ,
- Quick start manual (2 pages) ,
- Configuration and administration manual (36 pages)
Table of Contents
Advertisement
Quick Links
Download this manual
See also:
Installation Manual
Advertisement
Table of Contents

Related Manuals for VADDIO OneLINK Bridge


Summary of Contents for VADDIO OneLINK Bridge
- Page 1 Installation Guide for the OneLINK Bridge AV Interface Document 411-0009-31 Rev A August 2017...
-
Page 2: Table Of Contents
Contents Overview What's in this Guide Features Unpacking the AV Interface A Quick Look at the OneLINK Bridge AV Interface Front Panel Connector Panel Connector Panel – EZIM Installation Don’t Void Your Warranty! Cabling Notes Mounting the Extension Module Connections... -
Page 3: Overview
999-9950-200W/201W/209W – RoboSHOT 20 UHD HDBT OneLINK System (white RoboSHOT 20 UHD camera) 999-9960-200/201/209 – RoboSHOT 12 HDBT OneLINK Bridge System 999-9963-200/201/209 – RoboSHOT 30 HDBT OneLINK Bridge System (black RoboSHOT 30 HDBT camera) 999-9963-200W/201W/209W – RoboSHOT 30 HDBT OneLINK Bridge System (white RoboSHOT 30 HDBT camera) 999-9690-000/001/009 –... -
Page 4: Features
Converts any conference room to a BYOD environment, delivering a USB stream for soft conferencing clients Incorporates Vaddio’s market-leading AV Bridge functionality, connecting professional AV equipment to PC applications via USB 3.0 media stream Simple, clutter-free camera installation – power, control, video, and streaming over one Cat-5e or better cable Extends installation distance for HDBaseT cameras up to 100 m (328 ft.) -
Page 5: Unpacking The Av Interface
Installation Guide for the OneLINK Bridge AV Interface Unpacking the AV Interface Make sure you received all the items you expected. Here are the packing lists for the OneLINK Bridge AV interface. OneLINK Bridge AV interface, 999-9595-000/001/009 OneLINK Bridge AV interface unit, 998-9595-000 48 VDC, 1.36A switching power supply... - Page 6 USB 3.0 cable, type A to type B, 6 ft. (1.8 m) Screws, 6-32 X .188" (2) Quick-Start Guide OneLINK Bridge System for Sony and Panasonic HDMI Cameras, 999-9630-000/001/009 Camera not included. OneLINK BridgeAV interface unit, 998-9595-000 OneLINK HDMI EZCamera Interface Module (EZIM) 48 VDC, 1.36A switching power supply...
- Page 7 Installation Guide for the OneLINK Bridge AV Interface OneLINK Bridge Systems for Cisco Precision Series Cameras, 999-9660-000/001/009 Camera not included. OneLINK BridgeAV interface unit, 998-9595-000 OneLINK HDMI EZCamera Interface Module (EZIM) 48 VDC, 1.36A switching power supply AC cord set(s):...
-
Page 8: A Quick Look At The Onelink Bridge Av Interface
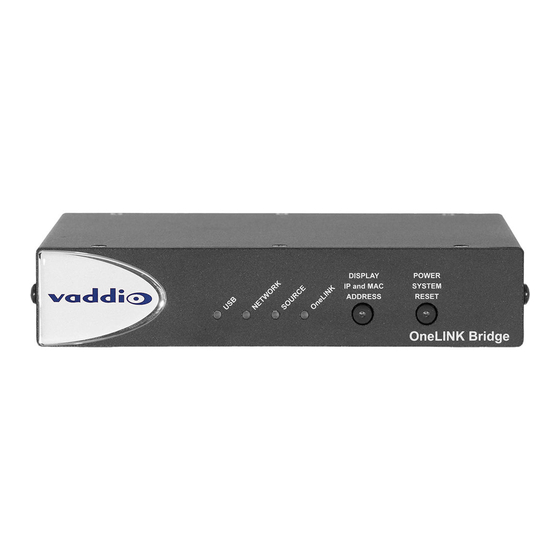
A Quick Look at the OneLINK Bridge AV Interface This section covers the physical features of the OneLINK Bridge AV interface. Note The OneLINK Bridge is not a camera control device. You cannot access camera control from the OneLINK Bridge AV interface's IP address. Front Panel USB indicator –... -
Page 9: Connector Panel - Ezim
Connector Panel – EZIM The OneLINK HDMI EZIM is not required when using the OneLINK Bridge with a Vaddio HDBaseT camera; however, it is required when using the OneLINK Bridge with a RoboSHOT HDMI or other HDMI camera. From left to right: Camera power jack –... -
Page 10: Installation
Use only the power supply included with this product. Using a different one will void the warranty, and could create unsafe operating conditions or damage the product. Do not connect the OneLINK power supply to a camera. It does not provide the correct voltage for Vaddio cameras, and will damage the camera and void the camera's warranty. -
Page 11: Mounting The Extension Module
Connections Conferencing installation with HDBaseT camera (RoboSHOT 20 UHD shown) Note To discover the IP address for the OneLINK Bridge, press the Display IP and MAC Address button. The information is overlaid on the HDMI, HD-SDI, and USB video outputs. -
Page 12: Connecting To A Conferencing Codec
Shown with Cisco camera and codec Note Ensure that echo cancellation is enabled on only one device, whether it is the OneLINK Bridge or the conferencing codec. If echo cancellation is enabled on both the OneLINK Bridge and the codec, unexpected audio effects may result. -
Page 13: Connecting To An Hdbaset Switcher
Installation Guide for the OneLINK Bridge AV Interface Connecting to an HDBaseT Switcher Shown with Crestron switcher... -
Page 14: Powering Up The Equipment
Installation Guide for the OneLINK Bridge AV Interface Powering up the Equipment Power up any connected equipment that is not powered by the OneLINK Bridge AV interface, then connect power to the OneLINK Bridge. Next Steps The OneLINK Bridge is now ready to configure and use. This information is available in the Integrator's... -
Page 15: Operation, Storage, And Care
Installation Guide for the OneLINK Bridge AV Interface Operation, Storage, and Care For smears or smudges on the product, wipe with a clean, soft cloth. Use a lens cleaner on the lens. Do not use any abrasive chemicals. Keep this device away from food and liquids. -
Page 16: Compliance Statements And Declarations Of Conformity
Installation Guide for the OneLINK Bridge AV Interface Compliance Statements and Declarations of Conformity Statements are given separately for the OneLINK Bridge AV interface and the OneLINK HDMI EZCamera Interface Module (EZIM). OneLINK Bridge AV Interface Compliance testing was performed to the following regulations: FCC Part 15 (15.107, 15.109), Subpart B... -
Page 17: European Compliance
Installation Guide for the OneLINK Bridge AV Interface European Compliance This product has been evaluated for Electromagnetic Compatibility under the EMC Directive for Emissions and Immunity and meets the requirements for a Class A digital device. In a domestic environment this product may cause radio interference in which case the user may be required to take adequate measures. ... -
Page 18: Compliance And Declarations Of Conformity
This device must accept any interference including interference that may cause undesired operation of the device. Changes or modifications not expressly approved by Vaddio can affect emission compliance and could void the user’s authority to operate this equipment. ICES-003 Compliance This digital apparatus does not exceed the Class A limits for radio noise emissions from digital apparatus set out in the Radio Interference Regulations of the Canadian Department of Communications. ... - Page 19 Installation Guide for the OneLINK Bridge AV Interface European Compliance This product has been evaluated for Electromagnetic Compatibility under the EMC Directive for Emissions and Immunity and meets the requirements for a Class A digital device. In a domestic environment this product may cause radio interference in which case the user may be required to take adequate measures. ...
-
Page 20: Warranty Information
Vaddio receives notice of such defects during the warranty. Vaddio, at its option, will repair or replace products that prove to be defective. Vaddio manufactures its hardware products from parts and components that are new or... -
Page 21: Index
RJ-45 connectors 8 Index status lights 6 storage environment 13 anatomy of the AV interface 6 anatomy of the interface module 7 temperature, operating and storage 13 cable connectors 6-8 warranty 8, 18 cables 8 cleaning 13 connection example 9-10 connectors 6-8 damage, preventing 8 hardware reset 6... - Page 22 Vaddio, OneLINK, and RoboSHOT are trademarks or registered trademarks of Milestone AV Technologies. The terms HDMI and HDMI High-Definition Multimedia Interface, and the HDMI logo, are trademarkes or registered trademarks of HDMI Licensing LLC in the United States and other countries.
Need help?
Do you have a question about the OneLINK Bridge and is the answer not in the manual?
Questions and answers