VADDIO OneLINK Bridge Configuration And Administration Manual
Hide thumbs
Also See for OneLINK Bridge:
- Installation manual (58 pages) ,
- Installation manual (22 pages) ,
- Quick start manual (2 pages)

Subscribe to Our Youtube Channel
Related Manuals for VADDIO OneLINK Bridge


Summary of Contents for VADDIO OneLINK Bridge
- Page 1 Configuration and Administration Guide for the OneLINK Bridge AV Interface Document 411-0009-32 Rev B January 2018...
-
Page 2: Table Of Contents
Viewing System Information Saving (Exporting) or Restoring (Importing) a Configuration Rebooting the OneLINK Device Restoring Factory Settings Starting a Firmware Update Contacting Vaddio Technical Support and Viewing Diagnostics Troubleshooting Compliance Statements and Declarations of Conformity OneLINK Bridge AV Interface FCC Part 15 Compliance... - Page 3 Configuration and Administration Guide for the OneLINK Bridge AV Interface ICES-003 Compliance European Compliance Warranty Information Index...
-
Page 4: Overview
999-9690-000/001, OneLINK Bridge AV interface for RoboSHOT HDMI cameras The OneLINK Bridge AV interfaceis also available as a component of several Vaddio camera systems. Part number suffixes indicate power cord set types. Those ending in -000 include cord sets for use in North America;... -
Page 5: What's In This Guide
Warranty For your convenience, most of this information is also available in smaller, limited-purpose manuals: Installation Guide for the OneLINK Bridge AV Interface – Unpacking, physical features, installation, and initial power-on. Configuration and Administration Guide for the OneLINK Bridge AV Interface – Physical features, web interface for device configuration and system administration, and troubleshooting. -
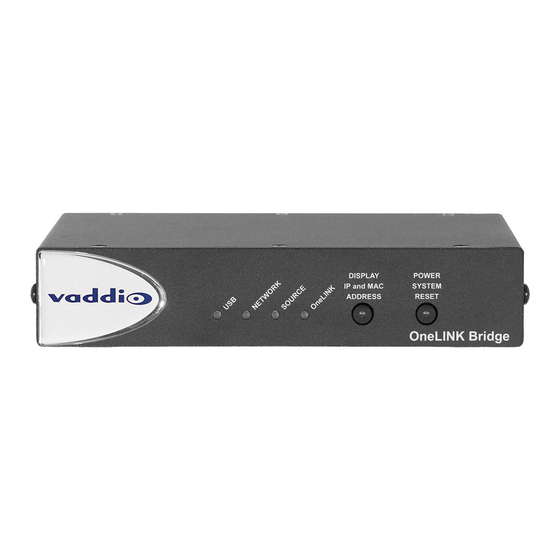
Page 6: A Quick Look At The Onelink Device
OneLINK indicator – Illuminates when the OneLINK Bridge detects a connection to an HDBaseT device or to the OneLINK EZIM. Display IP and MAC Address button (illuminated blue) – Outputs the OneLINK Bridge IP and MAC addresses as an overlay on the HDMI, HD-SDI, and USB video outputs. -
Page 7: Configuration And Administration Tasks
Configuration and Administration Guide for the OneLINK Bridge AV Interface Configuration and Administration Tasks The OneLINK Bridge AV interface provides a web interface to allow configuration and administration using a browser. The web interface allows password-protected access to tasks such as setting passwords, changing the IP address, viewing diagnostics, and installing firmware updates. -
Page 8: Accessing The Web Interface
The login page opens. The username admin and the default password is password. After you log in, the System page opens. Note For best security, Vaddio strongly recommends changing the default password. Using default passwords leaves the product vulnerable to tampering. See Managing Access and... -
Page 9: Web Interface Cheat Sheet
Configuration and Administration Guide for the OneLINK Bridge AV Interface Web Interface Cheat Sheet You must log in to access the pages for all system administration tasks. Note The OneLINK device's web interface does not provide access to the connected camera. To configure the camera, use the camera's web interface, which is at a separate IP address. -
Page 10: Assigning A Hostname
Assigning a Hostname ETWORKING PAGE The default hostname for the OneLINK BridgeAV interface is the string vaddio-onelink-bridge- followed by the device's MAC address. You can change this in the Hostname field. If your network supports hostname resolution, you can browse to the OneLINK device by hostname even if you cannot readily determine its IP address. -
Page 11: Specifying Time Zone And Ntp Server
Configuration and Administration Guide for the OneLINK Bridge AV Interface Specifying Time Zone and NTP Server ETWORKING PAGE To ensure that data exports receive accurate time stamps, and to display the correct date and time on the Networking page, NTP updating must be enabled. -
Page 12: Managing Access And Passwords
Make sure you have a way to remember the admin password. There is no hardware factory reset. Adding Room Information to the Web Interface ABELS PAGE On this page, you can provide information about the OneLINK Bridge AV interface's location: Name of the organization Name of the room where the equipment is installed... -
Page 13: Configuring Streaming Settings
The camera's settings are used for IP streaming; the OneLINK BridgeAV interface passes the IP stream from the camera and does not require additional IP streaming configuration. For non-USB cameras, the OneLINK Bridge AV interface provides USB streaming capability. On the Streaming page, you can:... -
Page 14: Enabling Phantom Power To Microphones
Configuration and Administration Guide for the OneLINK Bridge AV Interface Enabling Phantom Power to Microphones UDIO PAGE NALOG TAB To supply 48 VDC phantom power to a connected microphone, check the Phantom Power checkbox below the controls for the Line/Mic input. -
Page 15: Configuring Audio Settings
Configuration and Administration Guide for the OneLINK Bridge AV Interface Configuring Audio Settings UDIO PAGE The web interface provides separate controls for each of the audio inputs and outputs: Analog (Mic/Line In 1 and 2, and Line Out 1 and 2) -
Page 16: Default Microphone Settings
If using the OneLINK Bridge with a conferencing codec, ensure that echo cancellation is enabled on only one device, whether it is the OneLINK Bridge or the codec. If echo cancellation is enabled on both the OneLINK Bridge and the codec, unexpected audio effects may result. We recommend disabling echo cancellation on the OneLINK Bridge and allowing the conferencing codec to handle it. -
Page 17: Microphone Settings For Environments With Audiences
Configuration and Administration Guide for the OneLINK Bridge AV Interface Microphone Settings for Environments with Audiences UDIO PAGE NALOG AND ATRIX TABS Speech Lift: Feeds the signal from the specified microphone to the speakers in the room, so that people in the back of the room can hear the person who is speaking. -
Page 18: Microphone Adjustments
Configuration and Administration Guide for the OneLINK Bridge AV Interface Microphone Adjustments UDIO PAGE NALOG TAB To adjust for more natural speech reproduction: High-pass filter – Specify the lowest frequency that the microphone should pick up. Use this setting to reduce low-frequency background noise such as heating/air conditioning systems. -
Page 19: Speaker Adjustments
Configuration and Administration Guide for the OneLINK Bridge AV Interface Speaker Adjustments UDIO PAGE NALOG AND TREAMING TABS To sync the sound with the video: If the video lags noticeably behind the audio, check the Delay box for the appropriate audio outputs (Analog or Streaming tab) and enter a delay value in msec. -
Page 20: Preventing Audio Feedback
Configuration and Administration Guide for the OneLINK Bridge AV Interface Preventing Audio Feedback UDIO PAGE NALOG TAB Audio feedback results when the microphones pick up audio from the speakers. 1. Select Echo Cancellation on any line inputs that are connected to signal sources. -
Page 21: Default Audio Matrix
UDIO PAGE ATRIX TAB To specify how the OneLINK Bridge uses a given audio input, locate its row. Locate the column representing the desired output and select the table cell where the desired row and column intersect. Example: The USB stream has left and right audio channels, but by default Line/Mic 1 provides the source for both channels of outbound USB audio (USB Record left and right) and both channels of incoming USB audio are routed to Output 1 (Audio Line Out 1). -
Page 22: Viewing System Information
Configuration and Administration Guide for the OneLINK Bridge AV Interface Viewing System Information YSTEM PAGE The information on the System page includes the version – so you don't need to guess about whether the latest update has already been installed. -
Page 23: Rebooting The Onelink Device
Configuration and Administration Guide for the OneLINK Bridge AV Interface To export the current configuration: Select Export Data. The configuration file downloads to your computer's default download location as a .dat file. The filename is the device's hostname. Note You can import a configuration file from another OneLINK device; however, the configuration file can only be imported to a device that is using the same version of firmware from which the file was exported. -
Page 24: Starting A Firmware Update
6. When you are ready to start the update, select Continue. 7. If the update process presents warnings or error messages, read them carefully. 8. Contact Vaddio technical support if you encounter any problems with the update. -
Page 25: Contacting Vaddio Technical Support And Viewing Diagnostics
Help page. This page provides Vaddio Technical Support contact information. Your Vaddio technical support representative may ask you to download and email the log file available from the Diagnostics page. The information on this page does not necessarily indicate errors or problems. Most of it is a log of code... -
Page 26: Troubleshooting
If neither of these reveal the problem, use this table to determine whether it's time to call Vaddio Technical Support. - Page 27 Configuration and Administration Guide for the OneLINK Bridge AV Interface What is it doing? Possible causes Check and correct custom cable is connected the wrong on its labels. direction. The camera is not compatible with the Be sure you are using your OneLINK OneLINK device.
-
Page 28: Compliance Statements And Declarations Of Conformity
Configuration and Administration Guide for the OneLINK Bridge AV Interface Compliance Statements and Declarations of Conformity Statements are given separately for the OneLINK Bridge AV interface and the OneLINK HDMI EZCamera Interface Module (EZIM). OneLINK Bridge AV Interface Compliance testing was performed to the following regulations: FCC Part 15 (15.107, 15.109), Subpart B... -
Page 29: European Compliance
Configuration and Administration Guide for the OneLINK Bridge AV Interface European Compliance This product has been evaluated for Electromagnetic Compatibility under the EMC Directive for Emissions and Immunity and meets the requirements for a Class A digital device. In a domestic environment this product may cause radio interference in which case the user may be required to take adequate measures. ... -
Page 30: Onelink Hdmi Ezcamera Interface Module (Ezim)
This device must accept any interference including interference that may cause undesired operation of the device. Changes or modifications not expressly approved by Vaddio can affect emission compliance and could void the user’s authority to operate this equipment. ICES-003 Compliance This digital apparatus does not exceed the Class A limits for radio noise emissions from digital apparatus set out in the Radio Interference Regulations of the Canadian Department of Communications. ... - Page 31 Configuration and Administration Guide for the OneLINK Bridge AV Interface European Compliance This product has been evaluated for Electromagnetic Compatibility under the EMC Directive for Emissions and Immunity and meets the requirements for a Class A digital device. In a domestic environment this product may cause radio interference in which case the user may be required to take adequate measures. ...
- Page 32 Vaddio receives notice of such defects during the warranty. Vaddio, at its option, will repair or replace products that prove to be defective. Vaddio manufactures its hardware products from parts and components that are new or...
- Page 33 Index echo cancellation 13, 15, 17 equalizer 15-16 equipment location information 9 acoustic echo cancellation 13 adjusting microphones 14 factory defaults, restoring 20 admin login 5, 9 fault isolation 23 AGC (automatic gain control) 13, 15 firmware update 21 ambient noise, suppressing 13 anatomy of the OneLINK device 3 audio 12-18 getting help 22...
- Page 34 Configuration and Administration Guide for the OneLINK Bridge AV Interface noise cancellation 13 PEQ (parametric equalizer) 15 powering 11 saving a configuration 19 speech lift adjustment 14 Security page (web) 9 muting audio 12 settings, default, restoring 20 microphones 12...
- Page 35 Configuration and Administration Guide for the OneLINK Bridge AV Interface Streaming page 10 System page 19-21...
- Page 36 Vaddio, OneLINK, and RoboSHOT are trademarks or registered trademarks of Milestone AV Technologies. The terms HDMI and HDMI High-Definition Multimedia Interface, and the HDMI logo, are trademarkes or registered trademarks of HDMI Licensing LLC in the United States and other countries.
Need help?
Do you have a question about the OneLINK Bridge and is the answer not in the manual?
Questions and answers