VADDIO OneLINK Bridge Installation Manual
Av interface
Hide thumbs
Also See for OneLINK Bridge:
- Installation manual (22 pages) ,
- Quick start manual (2 pages) ,
- Configuration and administration manual (36 pages)

Related Manuals for VADDIO OneLINK Bridge


Summary of Contents for VADDIO OneLINK Bridge
- Page 1 Installation Guide for the OneLINK Bridge AV Interface Document 411-0009-31 Rev C February 2018...
-
Page 2: Table Of Contents
Features Unpacking the OneLINK Bridge AV Interface OneLINK Bridge for HDBaseT Cameras OneLINK Bridge For HDBaseT Cameras Used with Codecs OneLINK Bridge For HDMI Cameras OneLINK Bridge For HDMI Cameras Used with Codecs A Quick Look at the OneLINK Device... - Page 3 Installation Guide for the OneLINK Bridge AV Interface Compliance Statements and Declarations of Conformity OneLINK Bridge AV Interface FCC Part 15 Compliance ICES-003 Compliance European Compliance OneLINK HDMI EZCamera Interface Module (EZIM) FCC Part 15 Compliance ICES-003 Compliance European Compliance...
-
Page 4: Overview
999-9690-000/001, OneLINK Bridge AV interface for RoboSHOT HDMI cameras The OneLINK Bridge AV interfaceis also available as a component of several Vaddio camera systems. Part number suffixes indicate power cord set types. Those ending in -000 include cord sets for use in North America;... -
Page 5: What's In This Guide
Extends installation distance for HDMI and HDBaseT™ cameras up to 100 m (328 ft.) Compatible with Vaddio HDBaseT cameras – no EZCamera Interface Module (EZIM) needed Compatible with Vaddio and other HDMI cameras Available in system configurations with Vaddio cameras... -
Page 6: Unpacking The Onelink Bridge Av Interface
Unpacking the OneLINK Bridge AV Interface Make sure you received all the items you expected. Here are the packing lists for the OneLINK Bridge kits. Every OneLINK device ships with a power supply and at least one AC cord set. The last three digits of the kit part number contain the regional code that specifies which cord set(s). -
Page 7: Onelink Bridge For Hdmi Cameras
Installation Guide for the OneLINK Bridge AV Interface OneLINK Bridge for Vaddio HDBaseT Cameras with Cisco Codecs, 999-9675-000/001/009 Camera and codec not included. Note If connecting to a Cisco SX20 codec, you will need to provide a Cisco split cable, Cisco part number CAB-PHD4XS2- SPLIT. -
Page 8: Onelink Bridge For Hdmi Cameras Used With Codecs
Installation Guide for the OneLINK Bridge AV Interface OneLINK Bridge For HDMI Cameras Used with Codecs OneLINK Bridge for Polycom Cameras with Polycom Codecs, 999-9620-000/001/009 Camera and codec not included. OneLINK Bridge AV Interface OneLINK EZCamera Interface Module (EZIM) Power supply, 48 VDC/1.36 A, with AC cord set(s) - Page 9 Installation Guide for the OneLINK Bridge AV Interface OneLINK Bridge for Cisco Cameras with Cisco Codecs, 999-9660-000/001/009 Camera and codec not included. Note If connecting to a Cisco SX20 codec, you will need to provide a Cisco split cable, Cisco part number CAB-PHD4XS2- SPLIT.
-
Page 10: A Quick Look At The Onelink Device
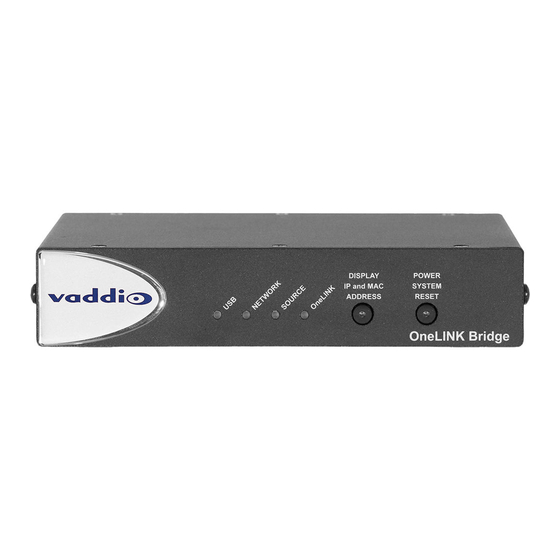
OneLINK indicator – Illuminates when the OneLINK Bridge detects a connection to an HDBaseT device or to the OneLINK EZIM. Display IP and MAC Address button (illuminated blue) – Outputs the OneLINK Bridge IP and MAC addresses as an overlay on the HDMI, HD-SDI, and USB video outputs. -
Page 11: Connector Panel Of The Receiver
Installation Guide for the OneLINK Bridge AV Interface Connector Panel of the Receiver From the left: Power input jack – Use the supplied 48VDC, 1.36A power supply. OneLINK interface port – Connect a Cat-5e (or better) cable to the EZIM, or to the camera if your OneLINK kit or system did not include an EZIM. This bidirectional connection carries video, audio (if... -
Page 12: Connector Panel Of The Ezcamera Interface Module (Ezim)
Installation Guide for the OneLINK Bridge AV Interface Connector Panel of the EZCamera Interface Module (EZIM) If the OneLINK device is used with an HDMI camera, the EZIM is required. From the left: Power output jack – Supplies power to the camera. The kit you purchased includes the appropriate cable to connect your camera's power input to this jack. -
Page 13: Installing The Onelink Device
Use only the power supply included with this product. Using a different one will void the warranty, and could create unsafe operating conditions or damage the product. Do not connect the OneLINK power supply to a camera. It does not provide the correct voltage for Vaddio cameras, and will damage the camera and void the camera's warranty. -
Page 14: Mounting The Onelink Device
If you are installing the OneLINK device with a OneLINK EZIM, mount the EZIM with or near the camera. Most Vaddio Thin Profile Wall Mounts include two mounting holes to attach the EZIM to the underside of the mount using two 6-32 screws. Connect all required cables during camera installation. -
Page 15: Visual Conventions For Connection Diagrams
HDBaseT camera, and brings HDMI video from the camera to a display. The camera can optionally be controlled by a camera controller on an RS-232 serial connection to the OneLINK Bridge or over the network, depending on the controller. The OneLINK Bridge also provides connections for microphones and speakers, and can originate a USB stream to bridge the non-USB camera and audio equipment into a USB- based conferencing application. -
Page 16: Connecting A Vaddio Hdbaset Camera
In this diagram, the OneLINK Bridge extends network connectivity, power, and control to a RoboSHOT 12 HDBT camera, and brings HDMI video from the camera to a display. The OneLINK Bridge also provides audio connections, and can originate a USB stream to bridge non-USB equipment into a USB-based conferencing application. -
Page 17: Connections For Hdbaset Cameras Used With Codecs
OneLINK device directly via RS-232, or they may communicate over the IP network, depending on the codec. The OneLINK Bridge can originate a USB stream to bridge the camera, codec, and codec- connected audio equipment into a USB-based conferencing application. -
Page 18: Connecting A Vaddio Hdbaset Camera And Polycom Codec
In these diagrams, the OneLINK Bridge extends network connectivity, power, and control to a RoboSHOT 12 HDBT camera, and connects the camera to a Polycom codec. The OneLINK Bridge also provides audio connections, and can originate a USB stream to bridge non-USB equipment into a USB-based conferencing application. - Page 19 Other Vaddio HDBaseT cameras connect in the same way. Hardware Note: IR Forwarding Although the OneLINK Bridge does not support IR forwarding, the two unterminated wires of the fan-out cable can be terminated and connected to an IR emitter (repeater).
-
Page 20: Connecting A Vaddio Hdbaset Camera And Cisco Codec
In these diagrams, the OneLINK Bridge extends network connectivity, power, and control to a RoboSHOT 12 HDBT camera, and connects the camera to a Cisco codec. The OneLINK Bridge also provides audio connections, and can originate a USB stream to bridge non-USB equipment into a USB-based conferencing application. - Page 21 Installation Guide for the OneLINK Bridge AV Interface RoboSHOT HDBT Camera and Cisco C60 Codec The C40 codec looks very similar and connects in the same way. Other Vaddio HDBaseT cameras connect in the same way.
- Page 22 Installation Guide for the OneLINK Bridge AV Interface RoboSHOT HDBT Camera and Cisco SX20 Codec Other Vaddio HDBaseT cameras connect in the same way. Note If connecting to a Cisco SX20 codec, you will need to provide a Cisco split cable, Cisco part number CAB-...
- Page 23 For RS-232 connections to Cisco gear using DE-9 connectors, use the 998-1002-232 RJ-45 to DE-9 adapter. Its wiring differs from the 998-1001-232 adapter shipped with many Vaddio products. For RS-232 connections to Cisco gear using the Cisco split cable, use the appropriate null-modem cable to the RJ-45 side of the split cable.
- Page 24 AEC reference if you made the audio connections as shown in these diagrams. On the Audio page of the OneLINK Bridge web interface, set Master Output/AEC Reference to Output 2 if using Line Out 2 for the speaker connection.
-
Page 25: Connections For Hdmi Cameras
HDMI video from the camera to a display. The camera can optionally be controlled by a camera controller on an RS-232 serial connection to the OneLINK Bridge or over the network, depending on the controller. The OneLINK Bridge also provides connections for microphones and speakers, and can originate a USB stream to bridge the non-USB camera and audio equipment into a USB-based conferencing application. -
Page 26: Connecting A Roboshot Hdmi Camera
Connecting a RoboSHOT HDMI Camera 999-9690-000/001/009 In this diagram, the OneLINK Bridge extends network connectivity, power, and control to a RoboSHOT HDMI camera, and brings camera video to the connected HDMI display. The OneLINK Bridge also provides audio connections, and can originate a USB stream to bridge non-USB equipment into a USB- based conferencing application. -
Page 27: Connecting A Polycom Eagleeye Iv Camera
In this diagram, the OneLINK Bridge extends network connectivity, power, and control to a Polycom EagleEye IV camera, and brings HDMI video from the camera to a display. The OneLINK Bridge also provides audio connections, and can originate a USB stream to bridge non-USB equipment into a USB- based conferencing application. -
Page 28: Connecting A Cisco Camera
Connecting a Cisco Camera 999-9660-000/001/009 In these diagrams, the OneLINK Bridge extends power and control to a Cisco camera, and brings HDMI video from the camera to a display. The OneLINK Bridge also provides audio connections, and can originate a USB stream to bridge non-USB equipment into a USB-based conferencing application. - Page 29 Installation Guide for the OneLINK Bridge AV Interface Cisco Precision 60 Camera Hardware Note: RS-232 Connections For RS-232 connections to Cisco cameras, use the appropriate null-modem cable. Connect it as indicated on the cable labels. This cable is used with the Cisco split cable CAB-PHD4XS2-SPLIT for some...
-
Page 30: Connecting A Sony Or Panasonic Hdmi Camera
Connecting a Sony or Panasonic HDMI Camera 999-9630-000/001/009 In these diagrams, the OneLINK Bridge extends power and control to a Sony or Panasonic HDMI camera, and brings video from the camera to a display. The OneLINK Bridge also provides audio connections, and can originate a USB stream to bridge non-USB equipment into a USB-based conferencing application. - Page 31 Installation Guide for the OneLINK Bridge AV Interface Sony SRG300 Camera The SRG120 camera's connector panel looks very similar, and connects in the same way.
-
Page 32: Connections For Hdmi Cameras Used With Codecs
OneLINK device directly via RS-232, or they may communicate over the IP network, depending on the codec. The OneLINK Bridge can originate a USB stream to bridge the camera, codec, and codec- connected audio equipment into a USB-based conferencing application. -
Page 33: Connecting A Roboshot Hdmi Camera And Polycom Codec
In these diagrams, the OneLINK Bridge extends network connectivity, power, and control to a RoboSHOT 12 or 30 HDMI camera, and connects the camera to a Polycom codec. The OneLINK Bridge also provides audio connections, and can originate a USB stream to bridge non-USB equipment into a USB-based conferencing application. - Page 34 RoboSHOT HDMI Camera and Polycom RealPresence Group 700 Codec Hardware Note: IR Forwarding Although the OneLINK Bridge does not support IR forwarding, the two unterminated wires of the fan-out cable can be terminated and connected to an IR emitter (repeater).
-
Page 35: Connecting A Polycom Eagleeye Iv Camera And Polycom Codec
In these diagrams, the OneLINK Bridge extends network connectivity, power, and control to a Polycom EagleEye IV camera, and connects the camera to a Polycom codec. The OneLINK Bridge also provides audio connections, and can originate a USB stream to bridge non-USB equipment into a USB-based conferencing application. - Page 36 Polycom EagleEye IV Camera and Polycom RealPresence Group 700 Codec Hardware Note: IR Forwarding Although the OneLINK Bridge does not support IR forwarding, the two unterminated wires of the fan-out cable can be terminated and connected to an IR emitter (repeater).
-
Page 37: Connecting A Roboshot Hdmi Camera And Cisco Codec
In these diagrams, the OneLINK Bridge extends network connectivity, power, and control to a RoboSHOT 12 or 30 HDMI camera, and connects the camera to a Cisco codec. The OneLINK Bridge also provides audio connections, and can originate a USB stream to bridge non-USB equipment into a USB-based conferencing application. - Page 38 Installation Guide for the OneLINK Bridge AV Interface RoboSHOT HDMI Camera and Cisco C60 Codec The C40 codec looks very similar and connects in the same way.
- Page 39 Installation Guide for the OneLINK Bridge AV Interface RoboSHOT HDMI Camera and Cisco SX20 Codec Note If connecting to a Cisco SX20 codec, you will need to provide a Cisco split cable, Cisco part number CAB- PHD4XS2-SPLIT.
- Page 40 For RS-232 connections to Cisco gear using DE-9 connectors, use the 998-1002-232 RJ-45 to DE-9 adapter. Its wiring differs from the 998-1001-232 adapter shipped with many Vaddio products. For RS-232 connections to Cisco gear using the Cisco split cable, use the appropriate null-modem cable to the RJ-45 side of the split cable.
- Page 41 AEC reference if you made the audio connections as shown in these diagrams. On the Audio page of the OneLINK Bridge web interface, set Master Output/AEC Reference to Output 2 if using Line Out 2 for the speaker connection.
-
Page 42: Connecting A Cisco Camera And Codec
Connecting a Cisco Camera and Codec 999-9660-000/001/009 In these diagrams, the OneLINK Bridge extends network connectivity, power, and control to a Cisco camera, and connects the camera to a Cisco codec. The OneLINK Bridge also provides audio connections, and can originate a USB stream to bridge non-USB equipment into a USB-based conferencing application. - Page 43 Installation Guide for the OneLINK Bridge AV Interface Cisco Precision 40 or Precision HD Series Camera and Cisco C20 Codec...
- Page 44 Installation Guide for the OneLINK Bridge AV Interface Cisco Precision 40 or Precision HD Series Camera and Cisco C60 Codec The C40 codec looks very similar and connects in the same way.
- Page 45 Installation Guide for the OneLINK Bridge AV Interface Cisco Precision 40 or Precision HD Series Camera and Cisco SX20 Codec...
- Page 46 Installation Guide for the OneLINK Bridge AV Interface Cisco Precision 40 or Precision HD Series Camera and Cisco SX80 Codec...
- Page 47 For RS-232 connections to Cisco gear using DE-9 connectors, use the 998-1002-232 RJ-45 to DE-9 adapter. Its wiring differs from the 998-1001-232 adapter shipped with many Vaddio products. For RS-232 connections to Cisco gear using the Cisco split cable, use the appropriate null-modem cable to the RJ-45 side of the split cable.
- Page 48 AEC reference if you made the audio connections as shown in these diagrams. On the Audio page of the OneLINK Bridge web interface, set Master Output/AEC Reference to Output 2 if using Line Out 2 for the speaker connection.
-
Page 49: Powering Up The Equipment
OneLINK device power up together. Next Steps The OneLINK device is now ready to configure and use. This information is available in the Integrator's Complete Guide for the OneLINK Bridge AV Interface or the Configuration and Administration Guide for the OneLINK Bridge AV Interface. -
Page 50: Operation, Storage, And Care
Installation Guide for the OneLINK Bridge AV Interface Operation, Storage, and Care For smears or smudges on the product, wipe with a clean, soft cloth. Use a lens cleaner on the lens. Do not use any abrasive chemicals. Keep this device away from food and liquids. -
Page 51: Compliance Statements And Declarations Of Conformity
Installation Guide for the OneLINK Bridge AV Interface Compliance Statements and Declarations of Conformity Statements are given separately for the OneLINK Bridge AV interface and the OneLINK HDMI EZCamera Interface Module (EZIM). OneLINK Bridge AV Interface Compliance testing was performed to the following regulations: FCC Part 15 (15.107, 15.109), Subpart B... -
Page 52: European Compliance
Installation Guide for the OneLINK Bridge AV Interface European Compliance This product has been evaluated for Electromagnetic Compatibility under the EMC Directive for Emissions and Immunity and meets the requirements for a Class A digital device. In a domestic environment this product may cause radio interference in which case the user may be required to take adequate measures. ... -
Page 53: Onelink Hdmi Ezcamera Interface Module (Ezim)
This device must accept any interference including interference that may cause undesired operation of the device. Changes or modifications not expressly approved by Vaddio can affect emission compliance and could void the user’s authority to operate this equipment. ICES-003 Compliance This digital apparatus does not exceed the Class A limits for radio noise emissions from digital apparatus set out in the Radio Interference Regulations of the Canadian Department of Communications. ... -
Page 54: European Compliance
Installation Guide for the OneLINK Bridge AV Interface European Compliance This product has been evaluated for Electromagnetic Compatibility under the EMC Directive for Emissions and Immunity and meets the requirements for a Class A digital device. In a domestic environment this product may cause radio interference in which case the user may be required to take adequate measures. ... -
Page 55: Warranty Information
Vaddio receives notice of such defects during the warranty. Vaddio, at its option, will repair or replace products that prove to be defective. Vaddio manufactures its hardware products from parts and components that are new or... -
Page 56: Index
Models.All OneLINK HDMI [54] 31 Sony SRG300 28 capabilities 2 Vaddio HDBaseT 13 cleaning 47 Vaddio HDBaseT with Cisco C20 17 Codec Control Mode (Vaddio cameras) 16, 21, 31, 38 Vaddio HDBaseT with Cisco C40 18 configuring 13, 16, 21, 23, 31, 38, 45... - Page 57 Installation Guide for the OneLINK Bridge AV Interface items you will need 4, 6, 13, 15, 17, 23-25, 27, product capabilities 2 30, 32, 34, 39 product returns and repairs 52 product SKUs 1, 3-6 key for connection diagrams 12...
- Page 58 Vaddio, OneLINK, and RoboSHOT are trademarks or registered trademarks of Milestone AV Technologies. The terms HDMI and HDMI High-Definition Multimedia Interface, and the HDMI logo, are trademarkes or registered trademarks of HDMI Licensing LLC in the United States and other countries.
Need help?
Do you have a question about the OneLINK Bridge and is the answer not in the manual?
Questions and answers