Table of Contents
Advertisement
Quick Links
Advertisement
Table of Contents

Related Manuals for Caple C970i


Summary of Contents for Caple C970i
- Page 2 Dear customer, Congratulations on your purchase of a Caple induction hob. In order to make the best use of your appliance, please carefully read the following use and care manual and keep it for reference.
-
Page 3: Table Of Contents
SUMMARY SAFETY ..................................4 ............................4 RECAUTIONS BEFORE USE ..............................5 SING THE APPLIANCE ......................6 RECAUTIONS NOT TO DAMAGE THE APPLIANCE ......................7 RECAUTIONS IN CASE OF APPLIANCE FAILURE ..............................7 THER PRECAUTIONS ENVIRONMENTAL PROTECTION ..........................8 CE DECLARATIONS OF CONFORMITY ........................8 WARRANTY ................................... -
Page 4: Safety
SAFETY Precautions before use • Unpack the hob and all associated components, taking care not to lose or mishandle any parts. • The appliance must be installed by a suitably qualified professional and connected to the electricity supply by a qualified electrician who will comply with the local regulations. -
Page 5: Using The Appliance
Using the appliance • Always switch cooking zones off after use. • Take particular care when cooking with oils or fats that may ignite. • Cooking pans and ustensils and the hob itself become hot during use. Caution, risk of injury to people and pets both during and after use. -
Page 6: Precautions Not To Damage The Appliance
Precautions not to damage the appliance • Use of damaged pans or those with raw cast iron bottoms may damage the hob ceramic glass. • Abrasive materials such as scouring cleaners and grits may damage the ceramic glass. • Avoid dropping objects onto the ceramic glass. •... -
Page 7: Precautions In Case Of Appliance Failure
Precautions in case of appliance failure • If a fault is noticed, switch off the appliance and turn off the electricity supply. • There are no user-serviceable parts inside the appliance. Don’t open the appliance by yourself. All repairs must be performed by a suitably qualified service engineer or similar. -
Page 8: Environmental Protection
Registration can also be completed online by visiting www.caple.co.uk. Ensure you keep your warranty card safe, you may need to show it to Caple Service together with proof of purchase. If you fail to show your warranty card you will incur all repair charges. Spare parts are only... -
Page 9: Description Of The Appliance
DESCRIPTION OF THE APPLIANCE Technical Characteristics Type C970I Total power 11100 W Energy consumption for the hob EC 185.9 Wh/kg Heating zone 260 x 140 mm Minimum detection Ø 100 mm Nominal power* 1400 W Booster power* 1750 W Booster power*... -
Page 10: Use Of The Appliance
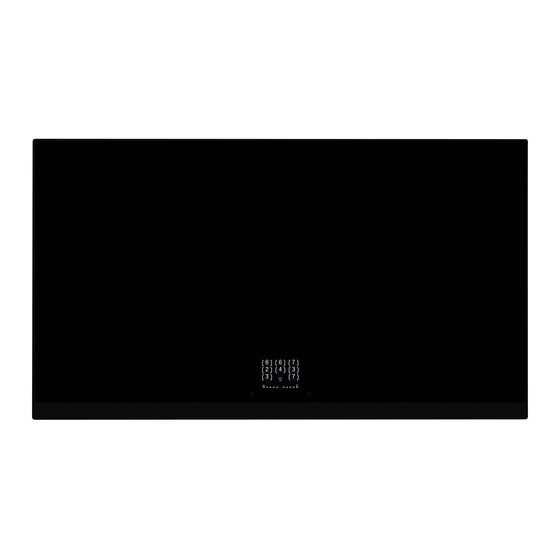
USE OF THE APPLIANCE Touch Control Your ceramic hob is fitted with touch control. When your finger presses a key, the corresponding command is activated. This activation is validated by a control light, a letter or a number in the display and/or a “beep”... -
Page 11: Starting-Up And Appliance Management
STARTING-UP AND APPLIANCE MANAGEMENT Before Using Your New Induction Hob Clean your hob with a damp cloth, and then dry the surface thoroughly. Do not use detergent, as this risks causing blue-tinted colour on the glass surface. Screen WARNING: NEVER PLACE A PAN ON THE SCREEN. Each time when you switch on the hob, an animation will inform you that you must not place a pan over the display. -
Page 12: Booster Function
Booster Function Booster level 1 [ B1 ] and level 2 [ B2 ] provide a boost of power to the selected heated zones for 10 minutes. This function is used for example, to rapidly heat large quantities of water. •... -
Page 13: Residual Heat Indication
Residual heat indication The hob is equipped with residual heat indicators to warn when any of the zones are still hot after cooking. The symbol [ ] will show in the relevant zone display after cooking until the zone is at a safe temperature to touch. As long as the residual heat indicators are displayed, do not touch the corresponding heating zones and do not put any items on them as there may be a risk of burn or fire. -
Page 14: Timer Function
Timer Function The timer can be set separately for each zone, from 0 up to 99 minutes and 30 seconds. Please note: If no action is made within 20 second, the display automatically switches back to the cooking menu. • Set and change the cooking time: Control Panel Action Display... -
Page 15: Keep Warm Function
Keep Warm Function This function enables to reach and maintain temperatures of 42°C, 70°C or 94°C due to sensors located under the ceramic glass. Please note: If no action is made within 20 second, the display automatically switches back to the cooking menu. -
Page 16: Hob Menu
Hob Menu The hob menu gives access to functions that will be activated for the whole hob. To activate the hob menu, you have to press the “multifunction” key when no cooking zone is selected: Pause function Egg timer function Settings Locking function Clean-lock... -
Page 17: Settings
Settings This menu is used to configure hob parameters such as brightness, sound, shortcuts… Shortcut Brightness setting setting Demo Mode Sound Function setting Set Brightness • Modify the Brightness: Control Panel Action Display Hob function press “multifunction” key Setting menu press under the [ ] key Brightness menu... -
Page 18: Set Loudness
Set Volume • Modify the sound level: Control Panel Action Display Hob function press “multifunction” key Setting menu press slider under [ ] symbol Sound menu press slider under [ ] symbol the volume changes Modify the sound level slide or press on the slider Validate the sound level press “multifunction”... -
Page 19: Demo Mode
Control Panel Action Display Choose the desired Function shortcut press under the function shortcut and after 3 seconds it is automatically validated To exit the shortcut function press “multifunction” key the shortcut has changed Demo Mode This function enables use of the hob for demonstration purposes without any power supply to the cooking zones. -
Page 20: Clean-Lock Function
• Deactivate the Demo Mode: Control Panel Action Display Hob function press “multifunction” key Setting menu the demo mode is press under the [ ] key desactivated Deactivate the demo mode press under the [ ] key Clean-Lock Function This function is locking the control panel (with exception to the On/Off key) for 20 seconds but does not stop the cooking. -
Page 21: Locking Function
• Personalise the power level for the Chef Function: Control Panel Action Display Select the desired zone press under the desired zone To set (adjust the power) slide on the “SLIDER“ to the right or [ 0 ] to [ B ] to the left Locking Function To avoid modifying the cooking zone settings, the control panel can be locked (with exception... -
Page 22: Egg Timer Function
Egg Timer Function Egg timer is an independent function. The egg timer and the timer can be used simultaneously. • Set and change the Egg Timer: Control Panel Action Display Hob Function press “multifunction” key Egg Timer Function press under the [ selection Set the timer press [ - ] to decrease the time the time decreases... -
Page 23: Recall Function
Recall Function After switching off ( ) the hob (less than 6 seconds), it is possible to recall the last settings. • cooking stages of all cooking zones (Booster) • minutes and seconds of programmed cooking zone-related timers • Keep warm function •... -
Page 24: Bridge Function
Bridge Function This function allows the use of 2 cooking zones at the same time (left zones and right zones) with the same features as a single cooking zone. Booster function is allowed. • Activate / Deactivate the Bridge function: Control Panel Action Display... -
Page 25: Auto Bridge Function
Control Panel Action Display Activate the bridge on the 3 press on the middle zone selection key for 4 seconds zones Deactivate the bridge on the 3 press on the middle zone selection key for 4 seconds zones The front zone has priority over the rear zone during the bridge function: the bridge keeps the power level of the front zone just before the activation of the bridge function. -
Page 26: Cooking Advices
COOKING ADVICES Choosing the Right Cookware Adapted materials: steel, enamelled steel, cast iron, ferromagnetic stainless-steel, aluminium with ferromagnetic bottom. Non-Adapted materials: aluminium and stainless-steel without ferromagnetic bottom, copper, brass, glass, ceramic, porcelain. Look for the induction symbol on the packaging or on the bottom of the pan. To check if pans are compatible: •... -
Page 27: Examples Of Cooking Power Setting
Examples of cooking power setting (the power levels below are indicative) 1 to 2 Melting Sauces, butter, chocolate, gelatine Reheating Dishes prepared beforehand 2 to 3 Simmering Rice, pudding, sugar syrup Defrosting Dried vegetables, fish, frozen products 3 to 4 Steam Vegetables, fish, meat 4 to 5... -
Page 28: Troubleshooting
TROUBLESHOOTING Noise * Buzzing sounds are normal with induction hobs * Intermittent humming sounds are also normal. They indicate that the cooktop works in intermittent modus in order to reach lower temperatures. * Sound of the fan may also be heard when cooking for a long time and/or with higher temperatures. - Page 29 The control panel displays [ Er47 ]: • The hob is not connected to the network. Check the connection and reconnect the hob. If one of the symbols above persists, contact Caple Service: T - 0117 938 7420 E - service@caple.co.uk...
-
Page 30: Installation Instructions
INSTALLATION INSTRUCTIONS The installation comes under the exclusive responsibility of specialists. The installer is held to respect the legislation and the standards enforced in their country. How to stick the gasket: The gasket supplied with the hob avoids all infiltration of liquids in the cabinet. Installation has to be done carefully, in conformity with the following drawing. - Page 31 • The safety gap between the hob and the cooker hood placed above must respect the indications of the hood manufacturer. In case of absence of instructions, use a minimum distance of 760mm. • After installation, make sure the connection cord is not being constrained e.g. by the drawer.
-
Page 32: Electrical Connection
ELECTRICAL CONNECTION • The installation of this appliance and the connection to the electrical network should only be carried out by a qualified electrician. • When installing, make sure no part of the hob is under stress or tension. • Necessary Connection data is placed on the hob casing near the connection box. •... - Page 33 Connection of the hob Setting up the configurations: For the various kinds of connection, use the brass bridges which are in the box next the terminal Monophase 230V~1P+N Put the 1 bridge between terminals 1 and 2, the 2 between terminals 2 and 3 and the 3 between terminals 4 and 5.
- Page 34 Notes:...
- Page 35 Notes:...
- Page 36 Caple Service Fourth Way Avonmouth Bristol BS11 8DW t: 0117 938 7420 e: service@caple.co.uk www.caple.co.uk 21509-2 Please keep this instruction manual for future reference...
Need help?
Do you have a question about the C970i and is the answer not in the manual?
Questions and answers