
Related Manuals for Caple C990i


Summary of Contents for Caple C990i
- Page 2 Dear customer, Thank you for having chosen our induction ceramic hob. In order to make the best use of your appliance, we would advise you to read carefully the following notes and to keep them for a later consulting.
- Page 3 SUMMARY SUMMARY ........................................3 SAFETY ........................................4 ................................... 4 RECAUTIONS BEFORE USING ..................................... 5 SING THE APPLIANCE ............................6 RECAUTIONS NOT TO DAMAGE THE APPLIANCE ............................7 RECAUTIONS IN CASE OF APPLIANCE FAILURE ....................................7 THER PRECAUTIONS ENVIRONMENTAL PROTECTION ................................8 CE DECLARATIONS OF CONFORMITY ..............................
- Page 4 SAFETY Precautions before using • Unpack all the materials. • The installation and connecting of the appliance have to be done by approved specialists. The manufacturer cannot be responsible for damage caused by installation or connecting errors. • To be used, the appliance must be well-equipped and installed in a kitchen unit and an adapted and approved work surface.
- Page 5 Using the appliance • Switch the heating zones off after using. • Keep an eye on cooking when using grease or oils, which can quickly ignite. • Be careful not to burn yourself whilst or after using the appliance. • Make sure no cable of any fixed or moving appliance contacts with the glass or the hot saucepan.
- Page 6 Precautions not to damage the appliance • Raw pan bottoms or damaged saucepans (not enameled cast iron pots,) may damage the ceramic glass. • Sand or other abrasive materials may damage ceramic glass. • Avoid dropping objects, even little ones, on the vitroceramic. •...
- Page 7 • If the ceramic glass is cracked or fissured, you must unplug the appliance and contact the after sales service. • A repair must be made by a Caple approved engineer or similarly qualified person. Do not open the appliance casing or attempt to repair by yourself.
- Page 8 Registration can also be completed online by visiting www.caple.co.uk. Ensure you keep your warranty card safe, you may need to show it to Caple Service together with proof of purchase. If you fail to show your warranty card you will incur all repair charges. Spare parts are only...
- Page 9 DESCRIPTION OF THE APPLIANCE Technical characteristics Type C990I Total power 11100 W Energy consumption for the hob EC 179,6 Wh/kg Dimension of the cooking area 870 x 385mm Minimum detection Ø 100mm Nominal power* 2600 W Booster power* 3650 W Standardised cookware category** A (Ø...
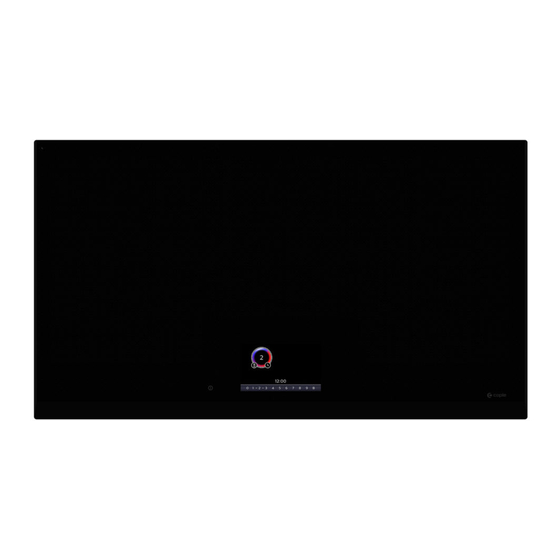
- Page 10 Control panel Pan position (size according to pan dimension) Power display Clock Pause Menu Keylock Minute minder USE OF THE APPLIANCE Display Display Designation Description Zero The heating zone is activated. 1…9 Power level Selection of the cooking level. Pan failure Inadequate pan or pan conflict.
- Page 11 STARTING-UP AND APPLIANCE MANAGEMENT Before Using Your New Induction Hob Clean your hob with a damp cloth, and then dry the surface thoroughly. Do not use detergent, as this risks causing blue-tinted colour on the glass surface. How Induction Works Induction coils are located under the cooking area.
- Page 12 Starting-up Place a pan and select the desired power level by using the slider at the bottom of the display. Keep warm Melting Timer Simmering Power selection zone “SLIDER” • Start-up / switch off the hob: Action Control panel Display To start Press key [ Main screen...
- Page 13 • Power levels: For optimal using and control of your cooking process, 17 power levels are implemented. When a pan is selected the display shows only full power levels on the slider. As soon as a power level is selected on the slider, a little dot will be displayed between the full power levels to indicate half power levels.
- Page 14 Booster function The Booster function [ B ] add a booster power to the selected heating zone. If this function is activated the heating zones work for 10 minutes with an ultra-high Booster. Booster is useful for example to heat up rapidly big quantities of water for rice, pasta or noodles etc. •...
- Page 15 • To stop the cooking time: Example for 1 hour and 05 minutes at power 2: Action Control panel Display Pan selection Select the desired pan [ 2 ] Select “Timer” Press [ ] next to the pan [ 01:05 ] Set the hours Scroll to [ 00 ] [ 00:05 ]...
- Page 16 Pause function This function stops the entire hob’s cooking activity temporarily and allows restarting with the same settings. If the Pause state is longer than 10 minutes, the hob will automatically switch off. • Start-up/stop the pause function: Action Control panel Display Engage pause Press [ II ]...
- Page 17 Control panel locking To avoid accidentally activating or interfering with the setting of the cooking zones , in particular during cleaning, the control panel can be locked (with exception of the On/Off key [ • Lock: Action Control panel Display Start Press on key [ [ 0 ] or [ H ]...
- Page 18 Settings Menu The settings menu contains various functions to configurate the hob: • Personalise • Child lock • Sound • Brightness • Clock • Language • Factory Reset To enter this menu, press the icon [ ] at the front right of the screen. Swipe to the left or to the right to navigate in this menu.
- Page 19 Child Lock In order to restrict the access (e.g. for children) and prevents from accidentally operation of the hob, it is possible to activate the Child Lock function. • Activate the child lock: Action Control panel Display Enter in the Settings menu Press menu key [ The settings are displayed Enter in the Child Lock setting Press on [...
- Page 20 Sound This function allows to change the sound level. • Change the sound level: Action Control panel Display Enter in the Settings menu Press menu key [ The settings are displayed Enter in the Sound setting Press on [ Sound setting is open It is possible to change the sound level for: Notification (acoustic feedback for validation, etc …) Timer (ring tone at the end of the timer)
- Page 21 Clock Settings This function allows to set the time of the clock that shows on the main screen. • Change the Clock settings: Action Control panel Display Enter in the Settings menu Press menu key [ The settings are displayed Enter in the Clock settings Press on [ Clock Settings is open...
- Page 22 CONFLICT MANAGEMENT Different types of conflict can occur on the display during cooking process: • Power conflict • Scenario conflict • Interface conflict • Pan conflict Power conflict An unfavourable position of pans on the hob (on the same induction coil) in combination with strongly different power levels can cause a conflict.
- Page 23 • Case 2: Pan with power level [ 1 ] moves to an induction coil which is in operation already. A power level conflict occurs: Due to safety reasons the pan with the lowest power level has priority. The power level of the pan (heated with power level [ 8 ]) is decreased to the max. possible power level (here e.g.
- Page 24 Scenario conflict This conflict occurs if the positioning of the pans on the hob is not clear. The conflict is always shown on the display. Lift one or more pans until the problem is solved. The pans are seen as newly placed pans; all settings that have been set for the pans are disappeared. Example of conflict: 2 pans placed at the same moment on the hob.
- Page 25 COOKING ADVICE Choosing the Right Cookware Adapted materials: steel, enamelled steel, cast iron, ferromagnetic stainless-steel, aluminium with ferromagnetic bottom. Non-adapted materials: aluminium and stainless-steel without ferromagnetic bottom, copper, brass, glass, ceramic, porcelain. Look for the induction symbol on the packaging or on the bottom of the pan. To check if pans are compatible: •...
- Page 26 Examples of cooking power setting (the values below are indicative) Melting Sauces, butter, chocolate, gelatine 1 to 2 Reheating Dishes prepared beforehand Simmering Rice, pudding, sugar syrup 2 to 3 Defrosting Dried vegetables, fish, frozen products 3 to 4 Steam Vegetables, fish, meat Steamed potatoes, soups, pasta, 4 to 5...
- Page 27 The hob is not connected to the network. Check the connection and reconnect the hob. The control panel displays [ Er62 ]: • Pan position not clear. Move the pan to another position. If one of the symbols above persists, contact Caple Service. T - 0117 938 7420 E - service@caple.co.uk.
- Page 28 INSTALLATION INSTRUCTIONS The installation comes under the exclusive responsibility of specialists. The installer is held to respect the legislation and the standards enforced in their country. How to stick the gasket: The gasket supplied with the hob avoids all infiltration of liquids in the cabinet. His installation has to be done carefully, in conformity of the following drawing.
- Page 29 • Materials which are often used to make worktops, expand on contact with water. To protect the cut-out edge, apply a coat of varnish or special sealant. Particular care must be given to applying the adhesive joint supplied with the hob to prevent any leakage into the supporting furniture.
- Page 30 ELECTRICAL CONNECTION • The electrical connection of this appliance to the household electrical supply should be undertaken by a competent electrician in accordance with the local regulations. • The mains cable must be positioned so that it does not come into contact with the hot surfaces of the hob or the cabinet construction.
- Page 31 ELECTRICAL CONNECTION OF THE HOB Monophase 220-240V (UK installation): The hob is supplied as a 5-core connection as per the below images: 1, 2 & 3 = Live 4 & 5 = Neutral Earth = Earth Live wires 1, 2 & 3 will all need to be connected to the mains live supply. Alternatively, you can change the configuration of the electrical connection in the hob to 3 cores as shown below (hob not supplied with 3 core cable).
- Page 32 Biphase (400V~ 2P+N): For a Biphase connection, Live wires 1 & 2 will need to have the same Live mains supply, and Live wire 3 will have its own separate connection. The Neutral and Earth can be connected into their relevant mains connectors. Triphase (400V~ 3P+N): For a Triphase connection, each Live wire will require its own separate Live mains supply.
- Page 33 DEMO FUNCTION On/Off key Control panel Cooking area To activate the Demo Function, you must enter the Service Menu. A. Disconnect the hob from the electrical network. B. Reconnect the hob to the electrical network, but DO NOT switch the hob on using the On/Off key. C.
- Page 36 Caple Service Fourth Way Avonmouth Bristol BS11 8DW t: 0117 938 7420 e: service@caple.co.uk www.caple.co.uk 27536-0 Please keep this instruction manual for future reference...
Need help?
Do you have a question about the C990i and is the answer not in the manual?
Questions and answers