
Subscribe to Our Youtube Channel
Related Manuals for REMKO GPS Series


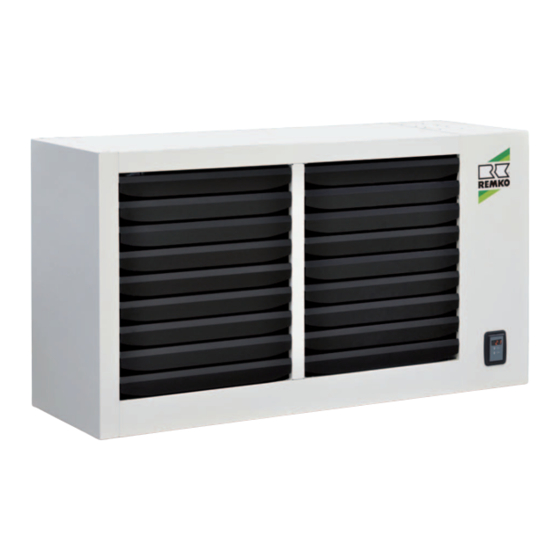
Summary of Contents for REMKO GPS Series
- Page 1 Operating and installation instructions REMKO GPS series Wall heater with 2-stage gas burner GPS 15, GPS 25, GPS 35, GPS 55, GPS 75 Edition EN - Q07 Read the instructions prior to performing any task!
-
Page 3: Table Of Contents
Contents Safety notes Unit installation Unit description 6-11 Intended use Customer service and guarantee Environmental protection and recycling Installation 13-16 17-21 Flue gas connection Electrical wiring 22-24 Electrical wiring diagram Gas connection Commissioning 27-28 Maintenance 29-30 Replacement of the control board Replacement of the STB Chimney sweep Replacement of the gas valve... -
Page 4: Safety Notes
REMKO GPS series Safety notes Always observe the respective local building The units must be installed away from traffic ■ zones - by crane, for example. A safety zone with code and fire prevention guidelines as well as the guidelines of the accident prevention and a clearance of 1 m must be ensured insurance associations when using the units. -
Page 5: Unit Installation
Unit installation Application area Selection of the installation location With the REMKO gas wall heaters from the GPS With determination of the installation location, range, it is possible to heat small rooms, such the requirements must be coordinated in regard to:... -
Page 6: Unit Description
Function of the units the burner can be operated with gases of the second The 2-stage gas wall heaters of the GPS series have family (natural gas - group H and L) and with gases been developed for the heating of industrial and of the third family (butane and propane). - Page 7 Fans Safety thermostat(s) with vertical air flow The switching on of the fans is time-controlled A safety thermostat (STB) is installed on the units by the control board, whereby the timing begins with for each fan, for manual resetting. the switching-on of the main burner. If the safety thermostats are triggered then a safety shutdown is also triggered.
- Page 8 REMKO GPS series Cycle of operation The units from the GPS range are fully-automatic hot In order to switch the hot air heater off, the switch air heaters, which are equipped with an electronic on the control panel must be set to the “0” position.
- Page 9 Modulation The gas wall heaters are units with 2-stage gas burner modulation, whereby outputs between the minimum and maximum settings are possible during operation. The highest output serves for raising the room temperature quickly when switching on the units. The second stage enables a slower heat-up speed of the space, which means that the burner is required to switch on and off less often.
- Page 10 General notes Control panel Safety thermostat The hot air heaters from the GPS series are fitted as The GPS unit series is equipped with a safety standard with a control panel on the front of the unit. thermostat with automatic reset function and positive All unit information or fault indications are displayed safety device as standard.
- Page 11 The desired comfortable temperature should be F2 - Tripping of the safety thermostat. reached and maintained with this. However, it is If the temperature detected by the thermostat necessary to ensure that the units are operated with is too high, it disconnects and disables the lowest necessary temperature value, in order the operation of the unit.
-
Page 12: Intended Use
As a prerequisite for any guarantee claims to be considered, it is essential that the ordering party or their representative complete and return the "certificate of guarantee" to REMKO GmbH & Co. KG at the time when the units are purchased and commissioned. -
Page 13: Installation
Installation The following instructions for installation and set-up Ventilation openings of the units are intended exclusively for authorised technicians. The rooms where gas-powered units are operated All safety notes must be observed without fail. must have one or more permanent openings (windows or doors). - Page 14 REMKO GPS series Permanent wall installation Align the wall brackets in a suitable place on the wall (spirit level) and securely fasten. Mark the boreholes to be made with a pencil. - Securely attach the wall brackets with suitable anchors and screws - M10 or greater.
- Page 15 Pivoting wall installation NOTE The brackets must be connected to the unit and The instructions for installation of the pivoting the wall in a de-energised state. brackets are included with the packaging. The use of pivoting brackets is appropriate for the following cases: CAUTION The units may only be mounted on stable walls,...
-
Page 16: Installation
Small guide holes are provided for correct arrangement of the suspension brackets. These must be aligned at the top edge of the unit. Refer to corresponding figure here. With a vertical unit installation (only possible with the GPS series), a fan thermostat must be additionally installed. -
Page 17: Flue Gas Connection
Flue gas connection The units work with a closed combustion cycle. The fan is located in front of the heat exchanger. Individually, the units are classified for the following versions: The flue gas evacuation and/or combustion air supply must be planned and executed in observance B23/C13/C33/C43/C53/C63 of the respective local guidelines. - Page 18 REMKO GPS series If there is a combustion air supply duct, the pressure Condensate water losses must be added to those of the flue gas pipe. With long pipes condensate can form, because the temperature of the flue gas drops below If the sum total of the pressure losses lies above the condensation temperature.
- Page 19 Installation examples Type B23 horizontal through the outside wall. Gas fireplace type B23 Room-air-dependent combustion system. 750 mm The combustion cycle is not sealed compared to the environment in which it has been installed. The combustion air is taken directly from the installation space.
- Page 20 REMKO GPS series Type B23 vertical through the ceiling. Gas fireplace type C Room-air-independent combustion system. The combustion cycle is sealed compared to the environment in which it is installed. The combustion air is fed from outside. The ductwork runs horizontally through the outside wall or vertically through the roof.
- Page 21 Type C33 Room-air-independent combustion system. Exhaust/ and combustion air are led through an LAS end piece through the roof. Schematic side view Schematic front view NOTE In this version the position of the connections to the unit must be changed, meaning they must be Type C33 vertical / coaxial repositioned from behind to above.
-
Page 22: Electrical Wiring
(electrical power company- approved) in accordance with the applicable regulations. The hot air heaters from the GPS series must always A main/emergency shut-off switch should be installed in be connected to a thermostat, a timer or a room... - Page 23 KF-30 connection RR-30 connection The cabled remote control KF-30 is a simple control The room temperature controller RR-30 is for the GPS unit range and has the following electronically controlled and is designed for simple functions: and convenient regulation of the room temperature. It offers the following functions: On / off switch ■...
- Page 24 REMKO GPS series Connecting the ATR-10 for a GPS unit GPS group operation using the ATR-10 The ATR-10 electronic temperature controller The ATR-10 electronic temperature controller is is designed for convenient regulation of the room suitable for group operation of GPS units. One RP-10 temperature.
-
Page 25: Electrical Wiring Diagram
Electrical wiring diagram BROWN BLUE BROWN BLACK BLUE BLACK BLACK BROWN BLUE GREEN GREEN GREEN WHITE BLUE ORANGE GREEN BLACK BROWN EXPLANATION OF SYMBOLS Ignition electrode E/O/I Main switch EV1 - First GAS solenoid valve GAS main solenoid valve GAS ignition valve IONO Flame detection electrode Unlocking indication... -
Page 26: Gas Connection
REMKO GPS series Gas connection The installation of the gas connection may only Prior to the initial commissioning, the gas supply be executed by authorised technicians (authorised line must be thoroughly cleaned and bled through by the municipal gas supplier) in observance of appropriate measures. -
Page 27: Commissioning
Commissioning The initial commissioning may only be carried out 1. Loosen the lock screw in the pressure tap of by a contract installation company or the factory the burner. customer service department. Do not unscrew completely! Carry out the following steps prior to the initial commissioning: 2. - Page 28 REMKO GPS series If the value lies outside the indicated range, make After any changes to the offset regulation, the CO adjustments with the CO regulating screw at value at the high output must be checked again the Venturi tube.
-
Page 29: Maintenance
Maintenance In order to preserve the performance and a long It is important that the monitoring electrode [IO] lies service life of the units, a number of mandatory tangential to the ignition burner head and not within checks must be carried out once yearly and in each case prior to the beginning of the heating season: The ignition electrode [Z] must discharge to the outside edge of the ignition burner at an... -
Page 30: Replacement Of The Control Board
REMKO GPS series 7) Check of the safety thermostat(s) The check must be carried out in the unit heating Ionisation mode. monitoring electrode - Heat up the thermostat probe with a hot air gun or other suitable means until the alarm F2 is issued. -
Page 31: Replacement Of The Stb
2) Undo all plugs and cable terminals of the GPS board and remove cables Ignition transformer GPS control board (flame monitoring unit) The mounting bracket for the STB is behind the front Plug connections air fins. 3) Press plug connections together and release board from the plug connections 4) Remove board and insert new board Chimney sweep... -
Page 32: Replacement Of The Gas Valve
REMKO GPS series Replacement of the gas valve and CO 2 and offset regulation value. Unit with and without temperature controller With replacement of the gas valve, the CO and, After completion of all steps for the initial if applicable, the offset value must be adjusted. -
Page 33: Conversion To Liquid Gas
Conversion to liquid gas The on-site conversion of the gas type may only If the burner is in operation and working at high be carried out by authorised, qualified technicians. output, check: Prior to the conversion, the country-specific 1) that the pressure at the inlet to the gas valve requirements must be fulfilled. -
Page 34: Troubleshooting
REMKO GPS series Troubleshooting Fault-finding Operation Wall-mounted heater REMKO GPS Is the burner switched on? Does the green Is the expelled air Check power supply operating light warm? of the unit illuminate Is the Does the red burner running at... - Page 35 Error number and error Types of malfunction • Gas supply not present or defective Burner does not ignite • Phase and neutral lines switched Malfunction of the flame monitoring • Earth conductor missing or incorrectly connected unit because of unsuccessful ignition of •...
-
Page 36: Unit Dimensions
REMKO GPS series Unit dimensions (480)* * Dimension for the fixed wall bracket Series Dimensions Opening Gas supply ØG GPS 15 3/4“ GPS 25 3/4“ GPS 35 3/4“ GPS 55 3/4“ GPS 75 1310 1010 3/4“ Series Horizontal discharge GPS 15... -
Page 37: Exploded View Of The Unit
Exploded view of the unit When ordering spare parts, please state the EDP no., unit number and type (see name plate)! - Page 38 REMKO GPS series Venturi burner We reserve the right to modify the dimensions and design as part of the ongoing technical development process.
-
Page 40: Spare Parts List
REMKO GPS series Spare parts list Designation GPS 15 GPS 25 GPS 35 GPS 55 GPS 75 Switch group, compl. F1 fuse 6.3 A Board housing Transformer Flame monitoring unit Indicator light RED (square) Indicator light GREEN (square) Unlock key (RESET) -
Page 41: Country Table Of Gas Types
Country table of gas types Country Category Natural gas Pressure Pressure AT, CH 20 mbar G30/G31 50 mbar 2H3B/P G20/G25 20/25 mbar 37 mbar BE <70 kW 2E(S)B,I3P BE >70 kW G20/G25 20/25 mbar 37 mbar 2E(R)B,I3P CY, MT G30/G31 30 mbar 3B/P G20/G25... -
Page 42: Technical Data
REMKO GPS series Technical data Series GPS 15 GPS 25 GPS 35 GPS 55 GPS 75 Symbol Unit Q ̇ Nominal thermal load 16.5 34.8 52.2 73.5 Nominal heat capacity 24.6 31.9 48.1 67.5 rated,h Minimum capacity 12.1 20.4 25.8 39.9... - Page 43 The following applies to all models in the GPS range: Propane gas 28.14 kWh/m air heating unit: Propane gas 14.00 kWh/kg air heating unit: air heating unit: REMKO GmbH & Co. KG Air conditioning and heating technology Im Seelenkamp 12 32791 Lage...
- Page 44 REMKO QUALITY WITH SYSTEMS Air-Conditioning | Heating | New Energies REMKO GmbH & Co. KG Telephone +49 (0) 5232 606-0 Hotline within Germany Klima- und Wärmetechnik Telefax +49 (0) 5232 606-260 +49 (0) 5232 606-0 Im Seelenkamp 12 E-mail info@remko.de...
Need help?
Do you have a question about the GPS Series and is the answer not in the manual?
Questions and answers