Akuvox R27A Admin Manual
Hide thumbs
Also See for R27A:
- User manual (42 pages) ,
- Quick start manual (22 pages) ,
- Admin manual (68 pages)
Table of Contents
Advertisement
Quick Links
Download this manual
See also:
User Manual
Advertisement
Table of Contents

Related Manuals for Akuvox R27A


Summary of Contents for Akuvox R27A
- Page 1 R27A R27C R27 Series Door Phone Admin Guide...
- Page 2 About This Manual Thank you for choosing Akuvox’s R27A/C door phone. This manual is intended for end users who need to properly configure the door phone. This manual is applicable to 27.0.3.xx version, and it provides all functions’ configurations of R27A/C. Please visit Akuvox forum or consult technical support for any new information or latest firmware.
-
Page 3: Table Of Contents
Content 1. Product Overview....................................... 1 1.1. Product Description....................................1 1.2. Connector Introduction....................................1 1.3. LED Status Information....................................2 2. Daily Use..........................................3 2.1. Make a Call........................................3 2.2. Receive a Call......................................3 2.3. Unlock........................................... 4 2.3.1. Unlock by Public Pin Codes................................4 2.3.2. Unlock by Private Pin Codes................................4 2.3.3. - Page 4 3.2. Access the Website Setting..................................7 3.2.1. Obtain IP Address.....................................7 3.2.2. Access the Device Website................................7 3.3. Password Modification....................................8 3.3.1. Modify the Device Admin Code..............................8 3.3.2. Modify the Device Service Code..............................8 3.3.3. Modify the Web Password................................9 3.4. Phone Configuration....................................9 3.4.1.
- Page 5 3.4.4. Display......................................14 3.4.5. Sound....................................... 15 3.4.6. DND........................................16 3.5. Intercom Call......................................16 3.5.1. Direct IP Call....................................16 3.5.2. SIP Call......................................17 3.5.2.1. SIP Account...................................17 3.5.2.2. SIP Server 1&2..................................18 3.5.2.3. Outbound Proxy Server..............................19 3.5.2.4. Transport Type..................................19 3.5.2.5. NAT......................................19 3.5.3. Dial Plan......................................20 3.5.4.
- Page 6 3.6.1. Live view......................................23 3.6.2. RTSP........................................ 24 3.6.3. ONVIF......................................25 3.7. Access Control......................................25 3.7.1. Relay........................................ 25 3.7.2. Unlock via DTMF Codes................................26 3.7.3. Unlock via RFID Cards (Optional)............................... 27 3.7.3.1. RFID Cards in Device................................27 3.7.3.2. RFID Cards in Website............................... 29 3.7.4.
- Page 7 3.9. Reset.......................................... 34 3.9.1. Reset in Device....................................34 3.9.2. Reset in Website.................................... 34 4. Advanced Features......................................35 4.1. Phone Configuration....................................35 4.1.1. LED........................................35 4.1.2. IR LED......................................35 4.1.3. RFID Card Code Display Related..............................36 4.1.4. Key Display Related..................................36 4.2. Intercom........................................37 4.2.1. Call Time Related................................... 37 4.2.2.
- Page 8 4.2.8. DTMF....................................... 42 4.2.9. Session Timer....................................42 4.2.10. BLF List......................................42 4.2.11. Encryption......................................43 4.2.12. NAT.........................................43 4.2.13. User Agent.....................................44 4.3. Access Control......................................44 4.3.1. Web Relay....................................... 44 4.3.2. Wiegand......................................45 4.4. Security........................................46 4.4.1. Anti-alarm......................................46 4.4.2. Motion.......................................47 4.4.3. Action........................................47 4.4.3.1. Action Parameters................................47 4.4.3.2. No Answer Action................................. 49 4.4.3.3.
- Page 9 4.4.3.5. Motion Triggered Action..............................50 4.4.3.6. Unlock via RFID Card Action..............................51 4.5. Upgrade........................................51 4.5.1. Web Upgrade....................................51 4.5.2. Autop Upgrade....................................52 4.5.3. Backup Config File..................................54 4.6. Log..........................................54 4.6.1. Call Log......................................54 4.6.2. Door Log......................................55 4.6.3. System Log..................................... 55 4.6.4.
-
Page 10: Product Overview
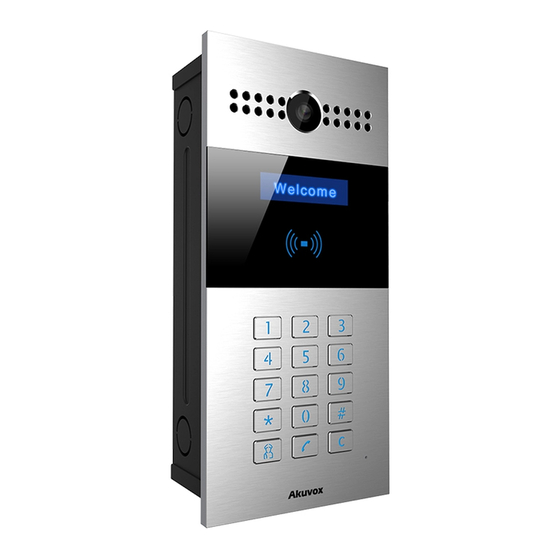
Users can communicate with visitors via audio and video calls, and unlock the door if they need. Users can also use RFID cards to unlock the door (R27A only). It is applicable Figure 1.1 Product Description in villas, offices and so on. -
Page 11: Led Status Information
R27A/C Admin Guide WG_D0/WG_D1: Wiegand terminal. DOORA/B/C: Trigger signal input terminal. RelayA/B/C (NO/NC/COM): Relay control terminal. Note: The general door phone interface diagram is only for reference. 1.3. LED Status Information Figure 1.2-2 General interface LED Status Description Blue Always on... -
Page 12: Daily Use
R27A/C Admin Guide 2. Daily Use 2.1. Make a Call In the idle interface, press the SIP account or IP address and “Dial key” to make a call. Management center call : Users can make a speed dial to management center by pressing “Management center key.”... -
Page 13: Unlock
R27A/C Admin Guide 2.3. Unlock 2.3.1. Unlock by Public Pin Codes Users can unlock doors by using predefined public pin code. Press “#,” public pin code, “#” to unlock, and then users will hear “The door is now opened.” If users press wrong public pin code, the screen will show “Incorrect Code.”... -
Page 14: Unlock By Rfid Cards (Optional)
Place the predefined user cards in RFID card reader to unlock. Under normal conditions, R27A will announce “The door is now opened.” If the card has not been registered, R27A will show “Unauthorized.” Both 13.56MHz and 125KHz RFID cards are supported on R27A. -
Page 15: Basic Features
R27A/C Admin Guide 3. Basic Features 3.1. Access the System Setting 3.1.1. Administrator Interface Press “*2396#” to enter administrator interface. Administrator interface provides some advanced permissions to administrators, including “System Information,” “Admin Settings” and “System Settings.” 3.1.2. User Interface Press “*3888#” to enter user interface. User interface includes “Public Pin Modif,”... -
Page 16: Access The Website Setting
R27A/C Admin Guide 3.2. Access the Website Setting 3.2.1. Obtain IP Address R27 use DHCP IP by default. Press “*2396#” to enter administrator interface. Press “1” to enter system Information interface to check the IP address. 3.2.2. Access the Device Website Open a web browser, and access the corresponding IP address. -
Page 17: Password Modification
R27A/C Admin Guide 3.3. Password Modification 3.3.1. Modify the Device Admin Code Admin code is used to enter administrator interface. The default code is 2396. Press “*2396#” to enter administrator interface. Press “2” to enter admin settings interface. Press “2” to enter admin code setting interface to input a 4-digit new admin code, and press “Dial key”... -
Page 18: Modify The Web Password
R27A/C Admin Guide 3.3.3. Modify the Web Password Go to Security - Basic to modify password for webpage. To modify password for “admin” or “user” account. Figure 3.3.3 Modify the web password 3.4. Phone Configuration Figure 3.4.1 Language 3.4.1. Language Go to Phone - Time/Lang to select language for webpage. -
Page 19: Network
R27A/C Admin Guide 3.4.3. Network 3.4.3.1. DHCP Mode At device side, press “*2396#” to enter administrator interface. Press “3” to enter system setting interface, and press “1” to enter network setting interface. Select DHCP mode, and R27 will access network automatically. -
Page 20: Static Ip Mode
R27A/C Admin Guide 3.4.3.2. Static IP Mode At device side, press “*2396#” to enter administrator interface. Press “3” to enter system setting interface, and press “1” to enter network setting interface. Select static IP mode, users need to setup IP address, subnet mask, default gateway and DNS server address. -
Page 21: Snmp
R27A/C Admin Guide Starting RTP Port: Determine the minimum port that RTP stream can use. Max RTP Port: Determine the maximum port that RTP stream can use. 3.4.3.4. SNMP Go to Network - Advanced to configure. SNMP: To display and configure SNMP settings. -
Page 22: Vlan
R27A/C Admin Guide 3.4.3.5. VLAN Go to Network - Advanced to configure. VLAN: To display and configure VLAN settings. Active: To enable or disable VLAN feature for designated port. VID: To configure VLAN ID for designated port. Priority: To select VLAN priority for designated port. -
Page 23: Display
R27A/C Admin Guide side devices. URL: To configure URL address for ACS or CPE. User Name: To configure username for ACS or CPE. Password: To configure password for ACS or CPE. Periodic Inform: To enable periodically inform. Periodic Interval: To configure interval for periodic inform. -
Page 24: Sound
R27A/C Admin Guide AccountStatus Enabled: The LCD text will only be shown if the the account is valid. LCD Text Enable: Switch this feature. LCD Text: Display content. 3.4.5. Sound Go to Phone - Voice to configure volume and upload tone file. -
Page 25: Dnd
R27A/C Admin Guide 3.4.6. DND Go to Phone - Call Feature to configure DND feature. DND: DND allows phones to ignore any incoming calls. Return Code when DND: Determine what response code should be sent back to server when there is an incoming call if DND is on. -
Page 26: Sip Call
R27A/C Admin Guide phones first. In the idle interface, press the IP address (like IP address 192.168.1.100, users need to press “192*168*1*100”) and “Dial key” to make a direct IP call. 3.5.2. SIP Call SIP calls which use SIP numbers to make or receive calls should be supported by SIP server. -
Page 27: Sip Server 1&2
R27A/C Admin Guide Display Name: To configure name sent to the other call party for displaying. Register Name: To enter extension number which users want and the number is allocated by SIP server. User Name: To enter user name of the extension. -
Page 28: Outbound Proxy Server
R27A/C Admin Guide 3.5.2.3. Outbound Proxy Server An outbound proxy server is used to receive all initiating request messages and route them to the designated SIP server. Figure 3.5.2.3 Outbound proxy server 3.5.2.4. Transport Type To display and configure transport type for SIP message. -
Page 29: Dial Plan
R27A/C Admin Guide Note: By default, NAT is disabled. In the idle interface, press the a SIP account and “Dial key” to make a SIP call. 3.5.3. Dial Plan This feature allows users to modify selected rules information. Once users dial prefix value, it will call out replace number. -
Page 30: Speed Dial
R27A/C Admin Guide Select account for the replace rule. Enter a display name for the prefix value. Input a suitable prefix value. Enter the replace number. Click “Submit” to save. All replace rules will show in the list. Users can edit or delete the existed replace rules. -
Page 31: Auto Answer
R27A/C Admin Guide 3.5.5. Auto Answer Go to Account - Advanced to enable auto answer feature for SIP calls. Figure 3.5.5-1 Auto answer for sip calls Go to Phone - Call Feature to enable auto answer feature for direct IP calls. -
Page 32: Multicast
R27A/C Admin Guide 3.5.7. Multicast Go to Intercom - Multicast to configure. Paging Barge: Choose the multicast number, and the range is from 1 to 10. Paging priority Active: Enable or disable the multicast. Listening Address: Enter IP address which users need to listen. -
Page 33: Rtsp
R27A/C Admin Guide 3.6.2. RTSP R27 supports RTSP stream, go to Intercom - RTSP to enable or disable RTSP server. The URL for RTSP stream is: rtsp://IP_address/live/ch00_0. RTSP Stream: To enable RTSP video and select the video codec. R27 supports H.264 video codec by default. -
Page 34: Onvif
R27A/C Admin Guide bitrate of MPEG4. 3.6.3. ONVIF R27 supports ONVIF protocol, which means R27’s camera can be searched by other devices, like NVR which supports ONVIF protocol as well. Go to Intercom - ONVIF to configure ONVIF mode, its username and password. -
Page 35: Unlock Via Dtmf Codes
R27A/C Admin Guide There are three terminals of relay: NO, NC and COM. NO stands for normally open contact. NC stands for normally closed contact. Relay ID: R27 supports three relays. Users can configure them respectively. Relay Type: Default state means NC and COM are normally closed, while Invert state means NC and COM are normally opened. -
Page 36: Unlock Via Rfid Cards (Optional)
R27A/C Admin Guide DTMF Option: To select digit of DTMF code, R27 support maximum to 4 digits’ DTMF code. DTMF&Multiple DTMF: To configure DTMF code for remote unlocking. 3.7.3. Unlock via RFID Cards (Optional) 3.7.3.1. RFID Cards in Device Add/Clean admin card Press “*2396#”... - Page 37 R27A/C Admin Guide “ Please Swipe Admin Card.., ” and place the added admin card which users want to delete in the RFID card area. After the screen shows “An admin card is deleted,” it means deleting successfully. Add/Delete user card Users card is used to unlock.
-
Page 38: Rfid Cards In Website
Go to Intercom - Card setting to manage card access system. Import/Export Card Data R27A supports import or export the card data file, which is convenient for administrator to deal with a large number of cards. The maximum card data file is 200K which is around 500 cards. -
Page 39: Unlock Via Pin Codes
R27A/C Admin Guide Note: Remember to set Card Status back to “Normal” after adding cards. 3.7.4. Unlock via Pin Codes 3.7.4.1. Public Pin Codes in Device Press “*3888#” to enter user interface. Press “1” to enter public pin modify interface. The default public pin code is 33333333. Before... -
Page 40: Private Pin Codes In Device
R27A/C Admin Guide Key Value: The public key for the all occupants in a building. 3.7.4.3. Private Pin Codes in Device Press “*3888#” to enter user interface. Press “3” to enter add private pin interface. Before adding private pin code, users need to swipe admin card or enter admin code. -
Page 41: Unlock Via Http Command
R27A/C Admin Guide template file. Obtain and Add Private Key Enter the “PKey Name” and 3-8 digits “PKey Code”; Select the valid day and time; Choose which door users want to open; Click “Add” to add it into list. -
Page 42: Unlock Via Exit Button
R27A/C Admin Guide http://IP_address/fcgi/do?action=OpenDoor&UserName=&Pas sword=&DoorNum=1. 3.7.6. Unlock via Exit Button Go to Intercom - Input to configure input settings. R27 supports three input triggers “Input A/B/C(DOOR A/B/C).” Input Service: To enable or disable input trigger service. Trigger Option: To choose open circuit trigger or closed circuit trigger. -
Page 43: Reset
R27A/C Admin Guide 3.9. Reset 3.9.1. Reset in Device Press “*2396#” to enter administrator interface. Press “3” to enter system setting interface, and then press “2” to enter restore default setting interface. After users are sure to make the device reset to factory setting, they can swipe admin card or enter admin code, and then the device will restore. -
Page 44: Advanced Features
R27A/C Admin Guide 4. Advanced Features 4.1. Phone Configuration 4.1.1. LED Go to Intercom - LED Setting to configure. Users can control three parts’ LED, screen, keypad and card area. Users can also setup the valid time. For example, start time from 18 to 23 means the LED will light up from 6pm to 11pm. -
Page 45: Rfid Card Code Display Related
R27A/C Admin Guide Photoresistor value relates to light intensity and larger value means that light intensity is smaller. Users can configure the upper and lower bound and when photoresistor value is larger than upper bound, infrared LED will turn on. As contrast, when photoresistor value is smaller than lower bound, infrared LED will turn off and device turns to normal mode. -
Page 46: Intercom
R27A/C Admin Guide DialPad Input Number Limit: To limit the input numbers to prevent unnecessary security problems. Figure 4.1.4-2 Dialpad input number limitation 4.2. Intercom 4.2.1. Call Time Related Go to Intercom - Basic to configure. Max Call Time: To configure the max call time. -
Page 47: Intercom
R27A/C Admin Guide 4.2.3. Intercom Go to Phone - Call Feature to configure. Intercom: Intercom allows users to establish a call directly with the callee. Active: To enable or disable Intercom feature. Figure 4.2.3 Intercom Intercom Mute: If enabled, once the call established, the callee will be muted. - Page 48 R27A/C Admin Guide designated SIP account. Min Local SIP Port: To configure maximum local SIP port for designated SIP account. Caller ID Header: To choose caller ID header format. Provisional Response ACK: 100% reliability for all provisional messages, this means it will send ACK every time the phone receives a provisional SIP message from SIP server.
-
Page 49: Codec
R27A/C Admin Guide 4.2.6. Codec Go to Account - Advanced to configure SIP call related codec. Sip Account: To choose which account to configure. Audio Codec: R27 support four audio codecs: PCMA, PCMU, G729, G722. Different audio codecs require different bandwidth, users can enable/disable them according to different network environment. -
Page 50: Subscribe
R27A/C Admin Guide standards. Codec Resolution: R27 support four resolutions, QCIF, CIF, VGA, 4CIF and 720P. Codec Bitrate: To configure bit rates of video stream. Codec Payload: To configure RTP audio video profile. Go to Phone - Call Feature to configure multicast related codec. -
Page 51: Dtmf
R27A/C Admin Guide 4.2.8. DTMF Go to Account - Advanced to configure RTP audio video profile for DTMF and its payload type. Type: Support inband, info, RFC2833 or their combination. How To Notify DTMF: Only available when DTMF type is info. -
Page 52: Encryption
R27A/C Admin Guide BLFList PickUp Code: To set the BLF pick up code. BLFList BargeIn Code: To set the BLF barge in code. 4.2.11. Encryption Go to Account - Advanced to configure. Figure 4.2.11 Encryption If enabled, voice will be encrypted. -
Page 53: User Agent
R27A/C Admin Guide 4.2.13. User Agent Go to Account - Advanced to configure. One can customize user agent field in the SIP message. If user agent is set to specific value, users can see the information from PCAP. If user agent is not set Figure 4.2.13 User Agent... -
Page 54: Wiegand
R27A/C Admin Guide Web Relay Action: Web relay action is used to trigger the web relay. The action URL is provided by web relay vendor. Web Relay Key: If the DTMF keys are same with the local relay, the web relay will be open with local relay. But if there are different, the web relay is invalid. -
Page 55: Security
R27A/C Admin Guide Wiegand Mode: Input or output. Typically, when users select input, we generally connect the wiegand input device, such as the wiegand card reader. Or R27 can be used as output, it is generally used to connect the third-party access control, and R27 change the card information as wiegand signal, and then transfer to the access control module. -
Page 56: Motion
R27A/C Admin Guide 4.4.2. Motion R27 supports motion detection, go to Intercom - Motion to configure detection related parameters. Motion Detection: To enable or disable motion detection. Motion Delay: To configure minimum time gap between two snapshots. Motion Detect Time Setting: To configure motion detect time Figure 4.4.2 Motion... - Page 57 R27A/C Admin Guide Email Notification Sender’s email address: To configure email address of sender. Receiver’s email address: To configure email address of receiver. SMTP server address: To configure SMTP server address of sender. SMTP user name: To configure user namer of SMTP service (usually it is same with sender’s email address).
-
Page 58: No Answer Action
R27A/C Admin Guide SIP Notification SIP Call Number: To configure sip call number. SIP Call Name: To configure display name of R27. Figure 4.4.3.1-3 SIP call notification parameters Five specific actions which will be triggered in R27: 4.4.3.2. No Answer Action Go to Intercom - Basic to configure. -
Page 59: Input Interface Triggered Action
R27A/C Admin Guide HTTP URL: If users choose HTTP mode, enter the URL format: http://http server IP address/any information. 4.4.3.4. Input Interface Triggered Action Go to Intercom - Input to configure. Action to execute: To choose which action to execute after triggering. -
Page 60: Unlock Via Rfid Card Action
R27A/C Admin Guide Http URL: To configure URL, if HTTP action is chosen. SDMC Upload: Upload the capture to the SDMC. 4.4.3.6. Unlock via RFID Card Action Go to Intercom - Card Setting to configure. Action to execute: To choose which action to execute after unlocking via a RFID card. -
Page 61: Autop Upgrade
R27A/C Admin Guide 4.5.2. Autop Upgrade Go to Upgrade - Advanced to configure automatically update server’s settings. Plug and Play, once PNP is enabled, the phone will send SIP subscription message to PNP server automatically to get auto provisioning server’s address. - Page 62 R27A/C Admin Guide more easily, it is a typical C/S architecture upgrade mode, which is mainly used by the terminal device or PBX server to initiate an upgrade request. URL: Auto provisioning server address. User Name: Configure if server needs an username to access, otherwise left blank.
-
Page 63: Backup Config File
R27A/C Admin Guide This auto provisioning mode is actually self-explanatory. For example, mode “Power on” means the phone will go to do provisioning every time it powers on. Note: Please refer to the related feature guide from forum. 4.5.3. Backup Config File Go to Upgrade - Advanced to backup the config file. -
Page 64: Door Log
R27A/C Admin Guide 4.6.2. Door Log Go to Phone - Door Log, users can see a list of door logs which records card information and date. 4.6.3. System Log Go to Upgrade - Advanced to configure system log level and export system log file. - Page 65 R27A/C Admin Guide Start: To start capturing all the packets file sent or received from phone. Stop: To stop capturing packets.
- Page 66 R27A/C Admin Guide Abbreviations ACS: Auto Configuration Server DNS-SRV: Service record in the Domain Name System Auto: Automatically FTP: File Transfer Protocol AEC: Configurable Acoustic and Line Echo Cancelers GND: Ground ACD: Automatic Call Distribution HTTP: Hypertext Transfer Protocol Autop: Automatical Provisioning...
- Page 67 R27A/C Admin Guide SIP: Session Initiation Protocol PCAP: Packet Capture SNMP: Simple Network Management Protocol PNP: Plug and Play STUN: Session Traversal Utilities for NAT RFID: Radio Frequency Identification SNMP: Simple Mail Transfer Protocol RTP: Real-time Transport Protocol SDMC: SIP Devices Management Center...
- Page 68 Contact us For more information about the product, please visit us at www.akuvox.com or feel free to contact us by Sales email: sales@akuvox.com Technical support email: techsupport@akuvox.com Telephone: +86-592-2133061 ext.7694/8162 We highly appreciate your feedback about our products.
Need help?
Do you have a question about the R27A and is the answer not in the manual?
Questions and answers