
Subscribe to Our Youtube Channel
Related Manuals for REED R7700


Summary of Contents for REED R7700
- Page 1 INSTRUMENTS INSTRUMENTS R7700 Model Gloss Meter Instruction Manual reedinstruments REED Instruments 1-877-849-2127 | info@reedinstruments.com | www.reedinstruments.com...
- Page 2 • Keep the lens protected from bright light. If it’s unavoidable use a light/ tight cloth. • When drastically changing the temperature environment of the unit allow the unit time to calibrate to the new environment. • Recalibrate the unit if measurement last longer then an hour. Features • Compact design allows for one-handed operation • Multi-angle measurement (20/ 60/ 85°) • Backlit LCD display • Auto calibration • Internal memory stores last 254 data points • Built-in rechargeable battery • Designed to meet ASTMD523, ASTMD1455, ASTMC584 and ASTMD2457 international standards • Includes AC adapter, calibration standard, cleaning cloth and hard carrying case INSTRUMENTS reedinstruments REED Instruments INSTRUMENTS 1-877-849-2127 | info@reedinstruments.com | www.reedinstruments.com...
-
Page 3: Specifications
20° / 60° / 85° Accuracy +/- 1.0 GU Resolution 0.1 GU Repeatability +/- 0.5 GU Measuring Area 7x14mm Display Backlit Display Auto Shut-off Yes (after 30 mins) Low Battery Indicator Power Supply Rechargeable Lithium Battery Internal Memory Yes (up to 254 datapoints) Product Certifications CE / RoHS Operating Temperature 32 to 104°F (0 to 40°C) Storage Temperature -4 to 140°F (-20 to 60°C) Operating Humidity Range 0-85% Dimensions 5.5 x 1.8 x 3” (140 x 45 x 75 mm) Weight 10.76oz (305g) INSTRUMENTS reedinstruments REED Instruments INSTRUMENTS 1-877-849-2127 | info@reedinstruments.com | www.reedinstruments.com... -
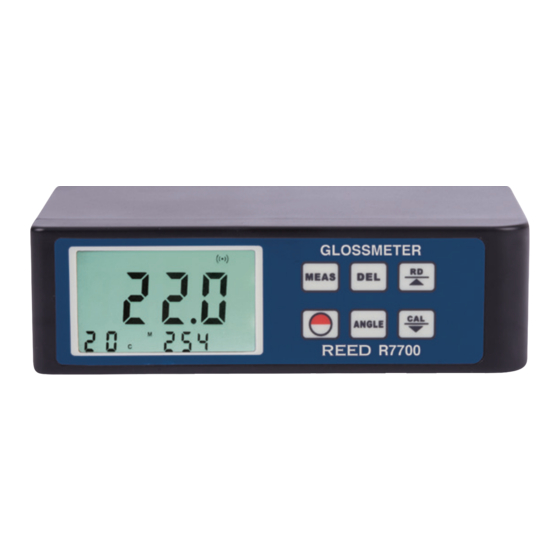
Page 4: Product Description
6. Angle Button 7. Calibration Button Operating Instructions Power ON / OFF Hold the “POWER” Button to power on and off the unit. Calibration Press the “ANGLE” button to select the right measuring geometry. Place the unit into the included calibration standard. Take measurements by pressing the “MEASUREMENT” button. Compare the measured value with the value marked on the standard label. If it matches the value on the tile holder, the instrument is within calibration and ready for use. If the measured value does not match the assigned value, press the “CALIBRATION” button. It is necessary to inspect the condition of the calibration tile and instrument optics before each use. Any dust or debris on the optic should be removed from the lenses using dry clean air, the lenses must not be touched. If there are any permanent marks or scratches on the lens, the unit is no longer suitable for measuring and should be returned to an authorized distributor. The calibration tile must be perfectly clean from smears and scratches before attempting calibration. Fingerprints and dust can be removed with the supplied optic cleaning cloth. INSTRUMENTS reedinstruments REED Instruments INSTRUMENTS 1-877-849-2127 | info@reedinstruments.com | www.reedinstruments.com... -
Page 5: Data Logging
Measurement Place the measurement aperture against the material. Take measurements by pressing the “MEASUREMENT” button. The reading that displays within 2 seconds is the gloss value at that position. Each result is automatically logged in the memory. Find the center of measurement by the intersection of the arrows marked on the front and side of the instrument. Data Logging All measurements are automatically stored internally. 254 groups of data can be stored. When memory becomes full it will automatically delete the oldest data entry. Data Recall When in measuring mode (Marked by ’M’ on the display) press the “READ” button to access logged data (Marked by ‘R’ on the display). Press the “READ” button cycle through the values forwards, press the “CALIBRATION” button to cycle through backwards. To get back to the measuring mode press any button other then “READ & CALIBRATION”. Delete Data When in measuring mode (Marked by ’M’ on the display) you can delete the most recently logged data by pressing the “DELETE” button. To clear the data in memory press the “DELETE” button for 3 seconds. The stored reading will be come 000. INSTRUMENTS reedinstruments REED Instruments INSTRUMENTS 1-877-849-2127 | info@reedinstruments.com | www.reedinstruments.com... - Page 6 Charging Battery When the battery is low a battery icon will appear on the display of the unit. The power adapter should be connected to the instruments and plugged into a power outlet. It can take up to 5 hours to be fully charged. The instrument can still be used while the battery is being charged. For service on this or any other REED product or information on other REED products, contact REED Instruments at info@reedinstruments.com. Notes _________________________________________ ________________________________________________ ________________________________________________ ________________________________________________ ________________________________________________ ________________________________________________ ________________________________________________ ________________________________________________ ________________________________________________ INSTRUMENTS reedinstruments REED Instruments INSTRUMENTS 1-877-849-2127 | info@reedinstruments.com | www.reedinstruments.com...
Need help?
Do you have a question about the R7700 and is the answer not in the manual?
Questions and answers