Single Digit Data Entry Method (Hexadecimal and decimal) ..................4 Multiple Feature Select Programming Method ......................4 Data Display Mode (LED Keypads Only) ........................5 Paradox Memory Key ..............................5 ZONE PROGRAMMING ..........................6 What is an Expansion Input? ............................6 How Do I Program the Zones? .............................7 SYSTEM TIMERS ............................
Page 4
Connecting A Liberator Wireless Bus Module (SPC-319) ..................37 Connecting A Zone Expansion Module (SPC-ZX8) ....................37 
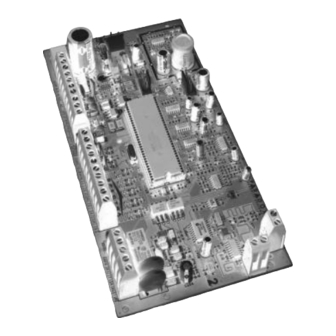
Spectra 1725, 1725EX, 1728 and 1728EX PCB Layout ....................38 Spectra 1755, 1755EX, 1758 and 1758EX PCB Layout ....................39 Connecting Speakers to the Bell Output (Siren Driver Option Only) ................39...
Manual. To program the Spectra control panel using a keypad, you must enter the Programming Mode as shown below. Once a control panel has been programmed, you can use the Paradox Memory Key to copy the contents from the programmed control panel to one or more control panels (see page 5).
PARADOX MEMORY KEY Copy the programmed contents of one Spectra control panel into the Paradox Memory Key. Then copy the contents of the Paradox Memory Key into as many Spectra control panels as you need. Each control panel is programmed in less than 3 seconds.
ZONE PROGRAMMING When programming zones please note that the Spectra control panels’ zone assignment is dependent on where the detection devices in the system are connected (see Table 2 below). Table 2: Zone Recognition Table Device connected to 1725EX 1725 1728EX 1728 which input?
HOW DO I PROGRAM THE ZONES? STEP 1: Press the [ ] key ENTER STEP 2: Enter the [ ] (Default: 000000) INSTALLER CODE STEP 3: Enter 3-digit [ SECTION STEP 4: Enter one digit from the Zone Definition table STEP 5: Enter one digit from the Partition Assignment table STEP 6: Select one or more options from the Zone Options table STEP 7: Press the [...
SYSTEM TIMERS Section # Decimal Value (000-255) Description Default Value [050] ___/___/___ x10 msec. 600 msec. ZONE SPEED ZONE [051] ___/___/___ x10 msec. 600 msec. ZONE SPEED ZONE [052] ___/___/___ x10 msec. 600 msec. ZONE SPEED ZONE [053] ___/___/___ x10 msec. 600 msec.
HOW DO I SET THE PROGRAMMABLE OUTPUTS? Example: section [120] = 05 03 02: this means PGM1 will activate whenever partition 2 is Stay Armed. Section # Event Group # Sub-Group # Partition # 01 = Partition 1 [120] = PGM1 Start Event ___/___ ___/___ ___/___...
Page 12
Event Group # Sub-Group # 06 = Arm/Disarm with Remote Control 01-08 = Remote Controls 1 to 8 99 = Any Remote Control 07 = Button Pressed on Remote (see 01-08 = Remote Controls 1 to 8 button option “B” on page 27) 99 = Any Remote Control 08 = Button Pressed on Remote (see 01-08 = Remote Controls 1 to 8...
Page 13
Event Group # Sub-Group # 24 = Special Alarm 00 = Emergency Panic 01 = Auxiliary Panic 02 = Fire Panic 03 = Recent Closing 04 = Auto Zone Shutdown 05 = Duress Alarm 99 = Any Sub-Group 25 = Auto Zone Shutdown 01-16 = Zones 1 to 16 99 = Any Zone 26 = Zone Tamper...
SYSTEM OPTIONS Bold = Default Setting SECTION [127]: General Options Option l Disabled l Enabled Partitioning l 6-digits l 4-digits Access Code Length l Disabled l Enabled Keypad Audible Trouble Warning l Disabled l Enabled Lock System Master Code l 350mA l 700mA Battery Charge Current l Disabled...
Bold = Default Setting SECTION [131]: Arming/Disarming Options Option l Always l Only after alarm Report Disarming l Disabled l Enabled Regular Arming Switches to Force Arming l Disabled l Enabled Bell Squawk on Arm/Disarm with Remote Control (must be enabled for UL installations) l Disabled l Enabled No Exit Delay When Arming with a Remote Control...
Bold = Default Setting SECTION [134]: Partition 2 Options Option l Disabled l Enabled Auto-Arm on Time l Disabled l Enabled Auto-Arm on No Movement l Regular Arming l Stay Arming Auto Arming = Regular or Stay l N/A l N/A Future Use l N/A l N/A...
Bold = Default Setting SECTION [138]: Event Call Direction Option l Disabled l Enabled Call Telephone #1 for Trouble/Restore Report Codes l Disabled l Enabled Call Telephone #2 for Trouble/Restore Report Codes l Disabled l Enabled Call Telephone #1 for Special Report Codes l Disabled l Enabled Call Telephone #2...
REPORT CODES Each section contains report codes for up to 4 events: Ademco Slow, Silent Knight, SESCOA, Ademco Express and Pager Formats: Enter desired 1 or 2-digit hexa-value (0-F) Ademco “All Codes” Format: The control panel automatically generates report codes from the “All Codes - Ademco Report Code List” on page 19. Ademco “Programmable”...
PROGRAMMABLE - ADEMCO CONTACT ID REPORT CODE LIST If using the Ademco Contact ID Programmable code format, enter the 2-digit hexadecimal value from the table below (Prog. Value) into sections [160] to [213] to program the desired report codes. To enter a 0 value press the [ ] key.
ALL CODES - ADEMCO CONTACT ID REPORT CODE LIST System Event Default Contact ID Report Code when option [3] is on in section [136] Arming with Master Code (##) 3 4A1 - Close by user Arming with User Code (##) 3 4A1 - Close by user Arming with Keyswitch (##) 3 4A9 - Keyswitch Close...
System Event Default Contact ID Report Code when option [3] is on in section [136] Clock lost 1 626 - Time/Date inaccurate Fire loop trouble 1 373 - Fire trouble Wireless Transmitter Low Battery 1 384 - RF xmtr. low battery Wireless Transmitter Supervision Loss 1 381 - Loss of super.
USER CODE OPTIONS [301] __/__/__/__/__/__ (see note on preceeding page) Default: 123456 SYSTEM MASTER CODE [1] on = Partition 1 Access [5] on = Force Arming [2] on = Partition 2 Access [6] on = Arm Only [3] on = Bypass Programming [7] on = PGM Activation Only [4] on = Stay Arming [8] on = Not Used...
LIBERATOR WIRELESS BUS MODULE (SPC-319) The following options and features are only available to program when a Liberator Wireless Bus Module has been connected to the Spectra control panel’s communication bus as shown on page 37. The Liberator Wireless Bus Module (SPC-319) allows you to add up to eight fully programmable remote controls and up to eight Liberator Wireless Detectors and Contact Switches (door contacts).
SIGNAL STRENGTH DISPLAY Enter the section (see next page) corresponding to the desired Expansion Input, then activate the transmitter by opening/ closing the zone or by pressing the tamper switch. NOTE: after entering the section, ignore the first reading as it won’t be accurate.
ZONE EXPANSION MODULES (SPC-ZX4/8) The following options and features are only available to program when a Zone Expansion Bus Module has been connected to the Spectra control panel’s communication bus as shown on page 37. The Zone Expansion Modules provide you with up to 4 (SPC-ZX4) or up to eight (SPC-ZX8) additional hardwired inputs and one normally open 50mA PGM output (on SPC-ZX8 only).
PGM PROGRAMMING (Zone Module SPC-ZX8 Only) The system will ignore sections [656] and [657] if PGM1 has been programmed to follow the Global PGM. Refer to option [3] in section [650] on page 25. Section # Event Group # Sub-Group # Partition # [656] = PGM1 Start Event ___/___...
REMOTE CONTROL PROGRAMMING USER ASSIGNMENT Section # Decimal Value Description Default Value [701] ___/___/___ (001-048 = #1 - [721]/[731] USER REMOTE CONTROL SECTION [702] ___/___/___ (001-048 = #2 - [722]/[732] USER REMOTE CONTROL SECTION [703] ___/___/___ (001-048 = #3 - [723]/[733] USER REMOTE CONTROL...
MODULE WITH THE SETTINGS SAVED IN THE CONTROL PANEL O DO SO ENTER SECTION AND PRESS ENTER HE KEYPADS WILL BEEP TWICE EVERY SECOND UNTIL THE PROCEDURE IS COMPLETED PARADOX MEMORY KEY [900] OWNLOAD FROM ARADOX EMORY EY TO DESTINATION CONTROL PANEL...
USER OPERATION TROUBLE DISPLAY The Spectra system continuously monitors fourteen possible trouble conditions. When a trouble condition occurs, the [ button or [ ] indicator will illuminate on the LED keypads or “Trouble” will appear on the LCD keypad’s screen. Press the TRBL ] or [ ] button to switch to the Trouble Display.
PARTITIONING The Spectra system is equipped with a partitioning feature which can divide the alarm system into two distinct areas identified as Partition 1 and Partition 2. Partitioning can be used in installations where shared security systems are more practical, such as an office/warehouse building. When partitioned, each zone, each User Code and some of the system's features can be assigned to either Partition 1, Partition 2, or both partitions.
DISARMING & DEACTIVATING AN ALARM To disarm an already armed system or to deactivate an alarm simply key in a valid access code. Program a designated entry/exit point, such as the front door or the garage door with an Entry Delay Timer. When these entry/exit point are opened (breached), it will set off a timer.
INSTANT ARMING After Stay Arming the system and during its Exit Delay, press and hold the [ ] button for 3 seconds. You should hear a STAY " ". This will switch all armed zones to Instant zones. CONFIRMATION BEEP If you have access to both partitions: To Instant Arm one partition, press [ ] + [...
BYPASS RECALL FEATURE After disarming the system, the control panel will erase the bypass entries. By using the Bypass Recall Feature, you can reinstate the previous bypass entries saved in memory. This eliminates the need to manually program the bypass entries every time you arm the system.
AUTO-ARMING You can program the Spectra alarm panel to automatically arm at a specific time everyday or if no movement is detected for a specified period of time. The user is only allowed to program the Auto Arm Timer. Please note that the control panel will enter a 60- second Exit Delay period before arming the system.
SPECTRA 1755, 1755EX, 1758 AND 1758EX PCB LAYOUT Other than the location of the parts on the board and the items that have been indicated below, connections to these control panels are identical to those on page 38. CONNECTING SPEAKERS TO THE BELL OUTPUT (Siren Driver Option Only) An optional siren driver is available with the Spectra 1755, 1755EX, 1758 and 1758EX control panels.