
Related Manuals for Blackmagicdesign HyperDeck Extreme Control


Summary of Contents for Blackmagicdesign HyperDeck Extreme Control
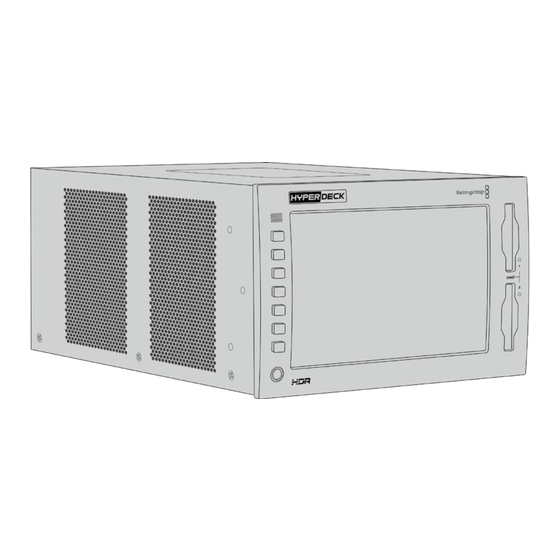
- Page 1 Installation and Operation Manual HyperDeck Extreme 8K HDR and HyperDeck Extreme Control July 2019...
- Page 2 Extreme 8K HDR as well as broadcast decks such as Betacam SP, Digital Betacam decks and even 1 inch machines. HyperDeck Extreme Control can control up to 8 broadcast decks via industry standard RS-422 connections and we believe you will find the experience intuitive and efficient! This instruction manual contains all the information you need to get started with HyperDeck Extreme 8K HDR and HyperDeck Extreme Control.
-
Page 3: Table Of Contents
Testing Control Settings Finding your Timecode Point Dashboard Menu using the Search Dial Record Using the Transport Controls Monitor HyperDeck Extreme Control Front Panel Audio HyperDeck Extreme Control Rear Panel Setup Accessories LUTs Rack Mounting HyperDeck Storage Media RS-422 Control... -
Page 4: Getting Started With Hyperdeck Extreme 8K Hdr
However, you can also connect Blackmagic HyperDeck Extreme Control and operate your HyperDeck remotely. This is a powerful external controller with many features including a search dial for precise jog and shuttle control. -
Page 5: Plugging In Video And Audio
NOTE When plugging in external power, make sure the power voltage output matches the input voltage range marked on the rear panel. Once powered, the touchscreen display will prompt you to select your language. To select your language, tap on the language option followed by ‘update’. The main window will now appear. Select your language and tap update to confirm You can change your language at any time via the setup menu. -
Page 6: Plugging In Cfast Cards
HyperDeck Extreme 8K HDR automatically detects the video format and frame rate and you can see this information displayed on the touchscreen overlay. Plugging in CFast Cards HyperDeck Extreme 8K HDR ships ready to record immediately. All you need is a formatted CFast card! You can format your CFast cards via the touchscreen LCD or via a computer. -
Page 7: Recording
Recording HyperDeck Extreme 8K HDR records video using H.265 and Apple ProRes codecs. The default codec is Apple ProRes so you can press record straight away and record high quality 10-bit video. If you want to record 8K video, you will need to change the codec to H.265. This section of the manual will show you how to do that. -
Page 8: Starting Record
For more information on codecs and available quality settings, see the ‘codec and quality’ section in the record menu later in this manual. Starting Record Now that you have set your source and codec, you can start recording. Press the ‘record’ button on the front panel, or tap the red record icon on the touchscreen. You can see your HyperDeck is recording because the record button will illuminate red along with the timecode display and media icon. -
Page 9: Playback
Cache Recording You can avoid the risk of problems with your media completely by using the optional cache recording feature in HyperDeck Extreme 8K HDR. This lets you record the highest resolutions and frame rates on even the slowest media. For example, with a cache you can record 8K ProRes HQ files onto a CFast card. -
Page 10: Hyperdeck Extreme 8K Hdr Front Panel
HyperDeck Extreme 8K HDR. Using the HyperDeck Extreme Control your HyperDeck Extreme 8K HDR and 7 other remote devices at once! For more information on HyperDeck Extreme Control, see the dedicated section later in this manual. HyperDeck Extreme 8K HDR Front Panel The front panel includes soft touch buttons for easy, immediate access and an ultra bright 2000 nit HDR display to see your video in brilliant true to life colors. - Page 11 If you are using a RS-422 device to control playback and recording remotely, press the ‘rem’ button. This will allow the your HyperDeck to be controlled externally from a device such as the HyperDeck Extreme Control or the HyperDeck Ethernet Protocol. The button will illuminate to indicate the remote feature is active.
-
Page 12: Hyperdeck Extreme 8K Hdr Rear Panel
HyperDeck Extreme 8K HDR Rear Panel Power There are two power options on the rear, an AC power input for IEC mains power input as well as a 12V 4 pin XLR DC input for connecting redundancy or battery power. Ensure any DC power source connected to the units is compatible with the input voltage and current rating marked at the DC IN connector Analog Input... - Page 13 This means you can have multiple devices in your facility receiving a reference signal from a single source, such as the Blackmagic Sync Generator, to genlock all your equipment together! Select between the input and external reference source via the touchscreen setup menu.
- Page 14 Connect your 4 12G-SDI cables from the input or output on the HyperDeck Extreme to one of the 8K inputs or outputs on the rear of the ATEM Constellation 8K. It is important to connect your quad link SDI cables in the correct order. For example, connect the SDI input or output labelled ‘c’...
-
Page 15: Touchscreen Display
Touchscreen Display Touchscreen Features The interactive touchscreen display lets you view and select options directly from the screen The intuitive 7 inch display lets you view and select many of the HyperDeck Extreme functions directly from the touchscreen display. The display includes an upper and lower toolbar. These toolbars display settings and status information, for example the current source, or the clip currently being recorded or played. - Page 16 Use the slider or arrow to select your zebra percentage You can also set the zebra to highlight areas of your image that represent specific video levels on a waveform, for example setting the zebra for 50% means you can visually identify which regions of your image will appear at approximately 50% on a waveform scope.
- Page 17 Grid The grid view display provides three overlays to assist with shot framing. There are three different views available on the HyperDeck Extreme 8K HDR to assist with shot framing. Thirds Thirds will overlay two horizontal and two vertical lines over your image, breaking it up into 9 smaller sections to help you compose your shot.
- Page 18 False Color The ‘false color’ setting toggles the appearance of false color exposure assistance on the LCD touchscreen and the SDI monitor out. When false color is on, different colors are superimposed over your image to represent different exposure levels. For example, optimal exposure for skin tones can be achieved by using green for dark shades and pink for pale shades.
- Page 19 Codec The codec icon displays your currently selected ‘record’ codec or the ‘playback’ codec of the file currently playing. You can select a new codec for recording by tapping the codec icon and selecting from the menu options displayed on screen. For more codec information, see the ‘record settings’...
- Page 20 Video Scopes Tap on the video scopes icon to display the video scope options. Tap on the scopes icon to reveal the different video scopes you can view There are 4 different video scopes to choose from: Waveform The waveform monitor is a graphical representation of the image, showing luma values in the same position relative to those within the frame.
- Page 21 Adjust the opacity of the background by using the slider adjustment Scope Brightness You can control the brightness of the white scope graphic from 0% to full brightness at 100%. This can help you find areas of fine detail that may not be so clear with a low scope brightness.
-
Page 22: Lower Toolbar
If your video scopes aren’t appearing when you switch them on, make sure ‘scopes’ is enabled in the monitor page of the dashboard menu. For more information, see the ‘monitor settings’ section later in this manual. Menu The last icon on the top row is the menu icon where you can access the dashboard menu. This dashboard menu is where you can access to all the recording options including source and codec, audio channels, monitor options audio preferences and more. - Page 23 The time counter to the left of the timeline bar displays the current location of the playhead and the time counter to the right displays the total duration of all clips. You can navigate along the timeline by tapping the ‘skip’ back and ‘skip’ next icons. Tap the skip back button once to move the playhead to the first frame of the current clip.
- Page 24 Clip Name and Transport Status During playback only the top and bottom toolbars will be in view. When playback is paused or you are playing at greater than real time speed, the transport status will appear on the top right hand side of the display.
- Page 25 Storage Indicators The storage indicators display the status of the media slots including record duration available. The first two icons represent 2 CFast card slots on the front panel. The third drive icon displays the active USB flash disk connected via the ‘ext disk’ connector on the rear of the HyperDeck Extreme 8K HDR.
-
Page 26: Settings
Settings Dashboard Menu Pressing the ‘menu’ icon on your HyperDeck Extreme 8K HDR will open the dashboard menu. This is a tabbed menu containing the settings not available from your HyperDeck’s front upper and lower toolbars. Settings are divided by function into ‘record’, ‘monitor’, ‘audio’, ‘setup’ and ‘LUTs’. Dots at the bottom of the menu let you know when a tab contains multiple pages. - Page 27 Input Once your sources are connected, you can select your input via the ‘record’ settings tab. The four options represent each type of connection and it’s as easy as tapping the button to select the input. For SDI connections from standard definition to quad link 8K, tap on ‘sdi’.
- Page 28 Record Page 2 Additional settings on the second record page Trigger Record There are two trigger record modes available, video start/stop and timecode run. Some cameras, such as the URSA Mini, send a signal over SDI to start and stop recording on external recorders. Tapping on ‘video start/stop’ will trigger the HyperDeck Extreme to start or stop recording when the record button is pressed on the camera.
-
Page 29: Monitor
Monitor The ‘monitor’ tab lets you toggle the monitor options as well as Display 3D LUT and Scopes. These can be toggled on or off for the LCD display and SDI monitor out. Tap on LCD or SDI to toggle the options on or off Monitor Settings –... - Page 30 Display 3D LUT Toggles display LUTs on and off to your LCD or monitor SDI. The toggle appears disabled when no LUT is active. For information on how to set a LUT, see the LUTs section later in this manual. Monitor Settings –...
-
Page 31: Audio
Audio Audio Page 1 The audio input displays audio meters for embedded, XLR and RCA audio inputs. You can select to display PPM or VU Meters. To change your meter type, see the ‘setup’ settings later in this manual. Video Click on the video tab for audio embedded in SDI and HDMI signals. -
Page 32: Setup
Setup The setup tab provides access to network, timecode and reference settings as well as your audio meters. Setup Page 1 Add your HyperDeck Name and network settings on the Setup tab HyperDeck Name Change the name of the unit by clicking on the pencil icon to the right of the name. It can be especially useful to name your device when you have more than one HyperDeck Extreme 8K HDR on your network for easy identification. - Page 33 DHCP To connect to your network via a dynamic IP address, toggle the switch to on. To manually set a static IP address, toggle it to off. IP address When DHCP is switched ‘off’, you can enter your network details manually. Click on the pencil edit icon.
- Page 34 Timecode Input There are four timecode input options available when recording. Video Input Selecting video input will take the embedded timecode from SDI and HDMI sources with embedded SMPTE RP 188 metadata. This will maintain sync between your SDI or HDMI source and the file recorded on the HyperDeck Extreme 8K HDR.
- Page 35 Reference Source Select your reference source from the two options. Input Select ‘input’ if your source has embedded reference that you want to sync to. An example of this would be where your tape based deck may have a genlock source directly connected. External If you have an external reference device, for example the Blackmagic Sync Generator, connected via the ‘ref in’...
- Page 36 Available dynamic ranges include: Auto Rec. 709 Rec. 2020 SDR ST2084 300 ST2084 500 ST2084 800 ST2084 1000 ST2084 2000 ST2084 4000 ST2084 Setup Page 4 The last page of ‘setup’ includes audio meter settings and filename options Audio Meters You can choose from two different audio meter display types.
- Page 37 Filename Prefix When first set up, your HyperDeck Extreme 8K HDR will record clips to your CFast or USB Flash disk using the following filename convention. Untitled_0001 Untitled_0001 Filename Untitled_0001 Clip Number You can edit the filename of your recorded files by tapping the ‘edit’ pencil icon. A touchscreen keyboard will appear.
-
Page 38: Luts
Factory Reset Tap on ‘reset HyperDeck’ to restore your HyperDeck to factory settings. Setup Page 5 Analog Input NTSC IRE For analog NTSC inputs, select between 0.0 IRE and 7.0 IRE depending on the region you are working in. Analog Input Levels When you have selected component video, you can switch between SMPTE and Betacam levels. - Page 39 Display LUTs can be applied for the LCD display as well as the SDI monitor out. To view a LUT you first need to select your active LUT. In the LUT menu, tap on the LUT you want to use, it will highlight blue.
-
Page 40: Storage Media
The LUT will now appear in the list and once you make it active your can apply it to the LCD and external monitor. NOTE If you try to import a LUT that already exists, a screen will prompt you to either keep both or replace the existing LUT. -
Page 41: Ext Disk
NOTE Slower CFast cards are compatible when the optional cache is installed. This is because the cache can accept overflow data when the card cannot keep up. However, it might take a few minutes for the cache to finish copying to the card when recording stops, depending on the speed of the media card. - Page 42 Preparing CFast Cards on HyperDeck Extreme 8K HDR Tap the drive area icon on the front panel to enter the storage manager. Tap ‘format card 1’ or ‘format card 2’ to select the card to format. These numbers correspond to the labels on the CFast slots on the HyperDeck Extreme front panel.
-
Page 43: Preparing Media On A Computer
A confirmation window will appear detailing which card is to be formatted, the selected format option and the card name. Tap on the ‘format card’ button. Formatting will begin. While the card is being formatted the status led on the CFast slot will illuminate green. - Page 44 Set the format to Mac OS Extended (Journaled) or exFAT. Type a name for the new volume and then click erase. Your media will quickly be formatted and made ready for use with HyperDeck. Formatting Media on a Windows computer The format dialog box can format a drive in the exFAT format on a Windows PC.
-
Page 45: Storage Indicators
Storage Indicators The status of the storage media slots can be seen on the bottom toolbar of the main display. These icons display the number, name, progress and status the CFast slots and active external disk drive. Number Drives ‘1’ and ‘2’ show the two CFast card slots on the front panel. Drive ‘3’ shows the status of the external drive connected via the ‘ext disk’... - Page 46 Status Text underneath the progress bar will display either the storage space remaining or the status of the slot. Capacity remaining When your CFast card or drive has space remaining, the duration available will be displayed in hours:minutes:seconds based on the current source format and your chosen codec and quality settings.
- Page 47 If you are using a dock to connect multiple external disks, such as the Blackmagic MultiDock 10G, you can access the full list of attached drives by tapping on the ‘drive list’ button. To select an active drive from the drive list: Tap on the ‘drive list’...
-
Page 48: Using The Optional Internal Cache
Using the Optional Internal Cache The cache feature on HyperDeck Extreme 8K HDR enables you to record up to 8K Ultra HD on to a M.2 NVMe PCIe flash disk in case of problems with your media.. This means you can use slower external drives and CFast cards which in turn can be less expensive. - Page 49 To install the cache: Disconnect your HyperDeck Extreme 8K HDR from the power source. You can leave other cables connected, but you may find it easier to remove them. Turn the unit upside down and unfasten the 6 screws from the cover plate to remove it. NOTE HyperDeck Extreme 8K HDR ships with thermally conductive heat pads pre installed to fill the air gaps between your PCIe flash disk and the unit.
-
Page 50: Formatting The Cache
Push the card down lightly onto the standoff mount and fasten the standoff screw. You only need to tighten enough to keep the NVMe SSD snug. Remove the protective blue film from the heat pad on the inside of the cover plate. Replace the cover plate, the screws will only line up when installed correctly. -
Page 51: Getting Started With Hyperdeck Extreme Control
Getting Started with HyperDeck Extreme Control HyperDeck Extreme Control is a remote control panel that lets you control up to 8 HyperDeck disk recorders or broadcast decks from a single control panel. All playback and record units are controlled via the RS-422 connections on HyperDeck Extreme Control’s rear panel. -
Page 52: Plugging In Power
Plugging in Power To power your HyperDeck Extreme Control, connect an IEC cable to the AC power input on the rear of the unit. You can also use the 12V DC input if you want to connect external power or redundancy via an external power supply, for example an uninterruptible power supply or external 12V battery. -
Page 53: Hyperdeck Extreme Control Workflow
Connecting your RS-422 Devices RS-422 connections on the rear of the HyperDeck Extreme Control allow up to 8 RS-422 enabled decks and devices to be attached from the rear or your HyperDeck recorder or broadcast deck to the RS-422 connections on the rear panel of the HyperDeck Extreme Control. -
Page 54: Connecting Your Video Signal
By tightening the screws to either side of your 9 pin serial cable, you can prevent any interruption to the connection. HyperDeck Extreme 8K HDR and HyperDeck Extreme Control can both be rack mounted using the HyperDeck rack mount kit. See the section ‘accessories’ later in this manual. -
Page 55: Reference Signal
Reference Signal The HyperDeck Extreme Control features reference in and reference out connections on the rear panel to allow synchronous recordings. If you are using an external reference source, connect your reference signal from the ‘ref out’ of your reference device or deck to the ‘ref in’ on the controller. -
Page 56: Testing Control
‘in’ and ‘out’ points. Finding your Timecode Point using the Search Dial The HyperDeck Extreme Control search dial has three modes; shuttle, jog and position. The selected button will illuminate when you choose your mode. The search direction indicators will illuminate to show you which direction your are moving and at what speed. - Page 57 The search dial will now respond to how fast you rotate the dial. The dial will spin freely without any clutch engaging. Jog backward Jog forward Light indicators will display the direction of your search dial position. HyperDeck Extreme Control Workflow...
- Page 58 Now that you have found your timecode in point, you can use the four soft touch timecode buttons to define your in and out timecode points. These timecode entry buttons operate the same way as they do on traditional broadcast decks. HyperDeck Extreme Control Workflow...
-
Page 59: Using The Transport Controls
HOURS MINUTES SECONDS FRAMES You can also use the transport controls on the HyperDeck Extreme Control to navigate to your in and out points. The two rows of transport controls feature buttons commonly found on SHUTTLE POSITION traditional broadcast decks and will be familiar to you. These buttons include ‘preroll’, ‘record’, RECORD ‘edit’, ‘eject’, ‘rewind’, ‘play’, ‘fast fwd’... - Page 60 5 seconds and the preroll button is pressed on the deck or HyperDeck Extreme Control, the deck will search and park the tape 5 seconds prior to that point. This is important for tape based decks where the deck needs time to lock the signal before it is useable.
-
Page 61: Hyperdeck Extreme Control Front Panel
‘eject’ will stop the record or playback and switch slots in the one step. If you are using a HyperDeck recorder with HyperDeck Extreme Control, the illuminated ‘eject’ button will let you know there is no media inserted in the drive slots of the HyperDeck recorder. -
Page 62: Hyperdeck Extreme Control Rear Panel
HyperDeck Extreme Control Rear Panel Power Inputs The HyperDeck Extreme Control has inputs for both AC and DC power. A USB port lets you connect your controller to a computer so you can update via the HyperDeck Setup Utility. -
Page 63: Accessories
Accessories Rack Mounting HyperDeck The HyperDeck Extreme 8K HDR and HyperDeck Extreme Control can be rack mounted into a broadcast rack or road case using the HyperDeck rack mount kit. Sitting at three rack units high and half the width of a standard rack, HyperDeck Extreme can be mounted side by side or individually using the blanking panel provided with the kit. - Page 64 Preparing to rack mount a HyperDeck Extreme 8K HDR with a HyperDeck Extreme Control. When rack mounting HyperDeck Extreme 8K HDR and HyperDeck Extreme Control side by side, it’s best to have the controller on the right. This way your headphone port will be on the far left and your search dial on the far right, making it a seamless transition from traditional broadcast deck to your HyperDeck Extreme.
-
Page 65: Control
Attach the rack ears to the outer edges near the front of both units using the supplied rack ear screws. Your HyperDeck Extreme 8K HDR and HyperDeck Extreme Control are now ready to be mounted into your rack as a single unit. - Page 66 For example, you can remotely start and stop recording and playback of your HyperDeck as well as performing other common jog and shuttle functions. The full list of supported RS-422 commands is in the following section named ‘supported RS-422 commands’. Receive Receive Transmit...
- Page 67 Command Reply No Remote Notes 0x21 0x12 VarFwd1 Acknowledge Disabled Uses ShuttleFwd1 Treated as N=1; 0x22 0x12 VarFwd2 Acknowledge Disabled Same as VarFwd1 0x21 0x13 ShuttleFwd1 Acknowledge Disabled Treated as N=1; 0x22 0x13 ShuttleFwd2 Acknowledge Disabled Same as ShuttleFwd1 0x20 0x20 Rewind Acknowledge...
- Page 68 Command Reply No Remote Notes 0x44 0x15 OutDataPreset Acknowledge Disabled 0x40 0x18 InShift+ Acknowledge Disabled 0x40 0x19 InShift- Acknowledge Disabled 0x40 0x1A OutShift+ Acknowledge Disabled 0x40 0x1B OutShift- Acknowledge Disabled 0x40 0x20 InReset Acknowledge Disabled 0x40 0x21 OutReset Acknowledge Disabled 0x40 0x22 AInReset...
- Page 69 Command Reply No Remote Notes 0x74 0x09 GenUBData — — 00:00:00:00 0x74 0x10 InData — — 0x74 0x11 OutData — — 0x74 0x12 AInData — — 0x74 0x13 AOutData — — 0x74 0x14 CorrectedLTCTimeData — — Current Time Please see “Status Bits” sheet: Limited to 9 bytes 0x70 0x20...
- Page 70 RS-422 Developer Information bit 7 bit 6 bit 5 bit 4 bit 3 bit 2 bit 1 bit 0 Byte 0 Cassette out Local Byte 1 Standby Stop Rewind Forward Record Play Byte 2 Servo Lock Shuttle Direction Still Byte 3 Auto Mode Aout Set Ain Set...
-
Page 71: Transferring Files Over A Network
Transferring Files over a Network HyperDeck Extreme 8K HDR supports file transfer via file transfer protocol, or ftp. This powerful feature lets you copy files directly from your computer to your HyperDeck via a network with the fast speeds a local network can provide. For example, you could be copying new files to a HyperDeck unit being used for playing back video on monitor walls and digital signage. -
Page 72: Developer Information
Transferring Files Once connected to HyperDeck Extreme 8K HDR you can transfer files as you normally would with your ftp program. Most ftp applications have a drag and drop interface, but check your particular application for the appropriate method. You can also transfer any file to and from a HyperDeck Extreme 8K HDR, but it’s worth noting that any files you intend to play back from the HyperDeck will need to conform to your HyperDeck’s supported codecs and resolutions. -
Page 73: Protocol Commands
Protocol Commands Command Command Description help Provides help text on all commands and parameters commands return commands in XML format device info return device information disk list query clip list on active disk disk list: slot id: {n} query clip list on disk in slot {n} quit disconnect ethernet control ping... - Page 74 Command Command Description query clip info using specified output version: clips get: version: {1/2} version 1: id: name startT duration version 2: id: startT duration inT outT name clips add: name: {name} append a clip to timeline clips add: clip id: {n} name: {name} insert clip before existing clip {n} clips add: in: {inT} out: {outT} name: append the {inT} to {outT} portion of clip...
- Page 75 Command Command Description goto: timeline: {n} goto frame position {n} within timeline goto: timeline: +{n} go forward {n} frames within timeline goto: timeline: -{n} go backward {n} frames within timeline goto: timecode: {timecode} goto specified timecode goto: timecode: +{timecode} go forward {timecode} duration goto: timecode: -{timecode} go backward {timecode} duration goto: slot id: {n}...
-
Page 76: Protocol Details
Command Combinations You can combine the parameters into a single command, for example: play: speed: 200 loop: true single clip: true Or for configuration: configuration: video input: SDI audio input: XLR Or to switch to the second disk, but only play NTSC clips: slot select: slot id: 2 video format: NTSC Using XML While you can use the Terminal to talk to HyperDeck, if you are writing software you can use... - Page 77 Failure response codes Failure responses to commands are indicated with response codes in the range of 100 to 199: 100 syntax error 101 unsupported parameter 102 invalid value 103 unsupported 104 disk full 105 no disk 106 disk error 107 timeline empty 108 internal error 109 out of range 110 no input...
- Page 78 Handling of deck "remote" state The “remote” command may be used to enable or disable the remote control of the deck. Any attempt to change the deck state over ethernet while remote access is disabled will generate an error: 111 remote control disabled↵ To enable or disable remote control: remote: enable: {“true”...
- Page 79 Controlling device playback The “play” command instructs the deck to start playing: play↵ The play command accepts a number of parameters which may be used together in most combinations. By default, the deck will play all remaining clips on the timeline then stop. The “single clip”...
- Page 80 To go to the start or end of the current clip: goto: clip: {“start” , “end”}↵ To go to the start of the first clip or the end of the last clip: goto: timeline: {“start” , “end”}↵ To go to a specified timecode: goto: timecode: {timecode}↵...
- Page 81 Retrieving device information The "device info" command returns information about the connected deck device: device info↵ The server will respond with: 204 device info:↵ protocol version: {Version}↵ model: {Model Name}↵ unique id: {unique alphanumeric identifier}↵ ↵ Retrieving slot information The “slot info” command returns information about a slot. Without parameters, the command returns information for the currently selected slot: slot info↵...
- Page 82 Retrieving clip count The "clips count" command returns the number of clips on the current timeline: clips count ↵ The server responds with the number of clips: 214 clips count: ↵ clip count: {Count}↵ Retrieving timeline information The “clips get” command returns information for each available clip, for a given range in timecode, on the current timeline.
- Page 83 Video Formats The following video formats are currently supported on HyperDeckExtreme 8K HDR: NTSC, PAL, NTSCp, PALp 720p50, 720p5994, 720p60 1080p23976, 1080p24, 1080p25, 1080p2997, 1080p30 1080i50, 1080i5994, 1080i60 4Kp23976, 4Kp24, 4Kp25, 4Kp2997, 4Kp30 4Kp50, 4Kp5994, 4Kp60 Video format support may vary between models and software releases. File Formats HyperDeck Extreme 8K HDR supports the following file formats: H.264Low...
- Page 84 Selecting active slot and video format The “slot select” command instructs the deck to switch to a specified slot, or/and to select a specified output video format. To switch to a specified slot: slot select: slot id: {slot ID}↵ To select the output video format: slot select: video format: {video format}↵...
-
Page 85: Help
Blackmagic Design Online Support Pages The latest manual, software and support notes can be found at the Blackmagic Design support center at www.blackmagicdesign.com/support. Blackmagic Design Forum The Blackmagic Design forum on our website is a helpful resource you can visit for more information and creative ideas. -
Page 86: Regulatory Notices
Regulatory Notices Disposal of Waste of Electrical and Electronic Equipment Within the European Union. The symbol on the product indicates that this equipment must not be disposed of with other waste materials. In order to dispose of your waste equipment, it must be handed over to a designated collection point for recycling. -
Page 87: Safety Information
Safety Information For protection against electric shock, the equipment must be connected to a mains socket outlet with a protective earth connection. In case of doubt contact a qualified electrician. To reduce the risk of electric shock, do not expose this equipment to dripping or splashing. Ensure any DC power source connected to the units is compatible with the input voltage and current rating marked at the DC IN connector. -
Page 88: Warranty
Warranty 12 Month Limited Warranty Blackmagic Design warrants that this product will be free from defects in materials and workmanship for a period of 12 months from the date of purchase. If a product proves to be defective during this warranty period, Blackmagic Design, at its option, either will repair the defective product without charge for parts and labor, or will provide a replacement in exchange for the defective product.
Need help?
Do you have a question about the HyperDeck Extreme Control and is the answer not in the manual?
Questions and answers