
Related Manuals for Leica Aperio GT 450


Summary of Contents for Leica Aperio GT 450
- Page 1 Aperio GT 450 User’s Guide For research use only. Not for use in diagnostic procedures. MAN-0391, Revision A | 22 May 2019...
- Page 2 Copyright © 2019 Leica Biosystems Imaging, Inc. All Rights Reserved. LEICA and the Leica logo are registered trademarks of Leica Microsystems IR GmbH. Aperio is a trademark of the Leica Biosystems group of companies in the USA and optionally in other countries. Other logos, product and/or company names might be trademarks of their respective owners.
- Page 3 Tel: 0080052700527 (toll free) In-country Tel: +31 70 413 21 00 Danmark: Email: support.nl@leicabiosystems.com Tel: 0080052700527 (toll free) In-country Tel: +45 44 54 01 01 Email: support.dk@leicabiosystems.com Aperio GT 450 User’s Guide, Revision A © Leica Biosystems Imaging, Inc. 2019...
- Page 4 Tel: 0080052700527 (toll free) In-country Tel: +44 1908 577 650 Email: support.uk@leicabiosystems.com USA: Tel: +1 844 534 2262 (toll free) Direct International Tel: +1 760 539 1150 Email: TechServices@leicabiosystems.com Aperio GT 450 User’s Guide, Revision A © Leica Biosystems Imaging, Inc. 2019...
-
Page 5: Table Of Contents
Slide Racks Supported .........................21 Slide Capacity ..........................21 Barcodes Supported ........................21 Optional Aperio Viewing Station ......................21 Aperio eSlide Viewers ........................21 Slide Preparation......................22 Tissue Preparation ..........................22 Staining ............................22 Aperio GT 450 User’s Guide, Revision A © Leica Biosystems Imaging, Inc. 2019... - Page 6 Clean the Objective and Koehler .....................44 Materials Needed ........................44 Clean the Stage Slide Tray ......................47 Clean the Carousel ........................48 Clean the Fan Filter ........................49 Clean the Slide Racks ........................51 Aperio GT 450 User’s Guide, Revision A © Leica Biosystems Imaging, Inc. 2019...
- Page 7 Scanner Does Not Power On ......................74 Touchscreen Does Not Respond to Touch ..................75 Touchscreen is Black ........................75 Slides are broken inside the scanner ....................75 Index ............................. 76 Symbols..........................79 Aperio GT 450 User’s Guide, Revision A © Leica Biosystems Imaging, Inc. 2019...
-
Page 8: Introduction
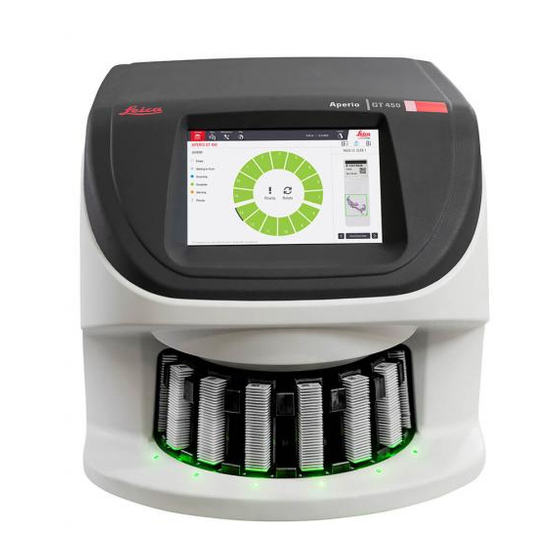
Introduction The Aperio GT 450 is a high performance, brightfield whole slide scanner that includes continuous loading with 450 slide- capacity across 15 racks, priority rack scanning, automated image quality check and a scan speed of ~32 seconds at 40x scanning magnification for a 15 mm x 15 mm area. -
Page 9: Intended Use
P<100uw, = 630-670nm Electromagnetic Warnings If the scanner is used in any manner not specified in this documentation, the protection provided by the equipment may be impaired. Aperio GT 450 User’s Guide, Revision A © Leica Biosystems Imaging, Inc. 2019... -
Page 10: Instrument Warnings
L’ÉLECTROCUTION, DES BRÛLURES ET D’AUTRES DANGERS. Component and Part Replacement Warnings There are no user-replaceable parts or components in the Aperio GT 450 scanner. Replacement of parts or components within the Aperio GT 450 scanner must be performed by qualified Leica Biosystems Technical Services personnel. -
Page 11: Installation
WARNING: Two people are required for lifting the scanner. AVERTISSEMENT: Il faut deux personnes pour soulever l’appareil. Installation and setup of the scanner should only be performed by a trained Leica Biosystems Imaging Service representative. L’installation et le réglage du numériseur doivent être effectués uniquement par un représentant qualifié de service sur site d’Leica Biosystems Imaging. - Page 12 If you are not sure of the type of power supplied to your facility, consult your local power company. Check that the voltage setting matches the electrical supply voltage. Aperio GT 450 User’s Guide, Revision A © Leica Biosystems Imaging, Inc. 2019...
- Page 13 Pénétration d’objets et de liquides – N’introduisez jamais aucun objets par les orifices du numériseur. Ils pourraient toucher des points sous tension dangereux et court-circuiter des pièces et provoquer ainsi un incendie ou une Aperio GT 450 User’s Guide, Revision A © Leica Biosystems Imaging, Inc. 2019...
- Page 14 Moving – Use care if you must slide the scanner around the workbench. If you need to pick up the scanner to move it off the workbench, contact Leica Biosystems Technical Services. Removal of the scanner may void the applicable product warranty—contact Leica Biosystems Imaging for advice.
- Page 15 Cleaning – Apply the recommended cleaning solution to a clean cloth to clean the equipment. Do not apply cleaning solutions directly to the equipment. Nettoyage – N’utilisez pas de nettoyants liquides ou aérosols. Utilisez seulement un chiffon humide pour le nettoyage. Aperio GT 450 User’s Guide, Revision A © Leica Biosystems Imaging, Inc. 2019...
-
Page 16: Aperio Gt 450 Overview
The carousel contains 15 rack slots. After you load See “Carousel Rotation” on page racks in the carousel, the carousel rotates the racks to the scanning area and the rack loading area. Aperio GT 450 User’s Guide, Revision A © Leica Biosystems Imaging, Inc. 2019... -
Page 17: Turn The Scanner On And Off
“Shut Down the Scanner” on page 41. Ì “Restart the Scanner After Interior Maintenance” on page 52. Ì “Perform a Safe Restart After an Error” on page 55. Ì Aperio GT 450 User’s Guide, Revision A © Leica Biosystems Imaging, Inc. 2019... -
Page 18: Touchscreen Interface Overview
Status colors appear on the rack slot positions on the touchscreen interface, and on the status lights in front of the carousel. Note: the Legend is for information only and is not interactive. Aperio GT 450 User’s Guide, Revision A © Leica Biosystems Imaging, Inc. 2019... - Page 19 36. Rack Order Tap Rack Order to view scan order and “View Rack Scan Order” on page 36. status of the racks. Aperio GT 450 User’s Guide, Revision A © Leica Biosystems Imaging, Inc. 2019...
-
Page 20: Help Videos And Guides
Chapter 2: Aperio GT 450 Overview Help Videos and Guides You can access training videos and the Aperio GT 450 Quick Reference Guide directly from the touchscreen interface. Tap Help, and then tap a video or guide to view. Key Features This section describes some key features of your Aperio GT 450. -
Page 21: Slide Types Supported
The scanner supports 1 x 3 inch glass slides (per ISO 8037/1). Coverslips Fully-cured coverslips are required. The Aperio GT 450 supports common industry coverslips used for 1 x 3 inch slides. Slide Racks Supported Optimized and recommended for use with Leica HistoCore Spectra workstation racks (stainer and coverslipper), which include the Leica Universal Rack 30-slide capacity (part number 23RACKGT450). -
Page 22: Slide Preparation
Slides are fully cured (not “wet”). Ì All slides have coverslips. Coverslips are required when using the Aperio GT 450 scanner. Ì There is no mounting adhesive around the edges of a slide. This can cause it to stick or catch in the scanner Ì... -
Page 23: Tissue Placement
Leica Biosystems HistoCore SPECTRA Coverslipper. The Aperio GT 450 supports common industry glass or plastic coverslips used for 1-inch x 3-inch (2.54 cm x 7.62 cm) slides. See the Aperio GT 450 Specifications for coverslip specifications. (Glass coverslips are recommended.) The quality of the scan is affected by the condition of the coverslip. -
Page 24: Labels
Wipe the coverslip clean of dust and fingerprints before loading the slide in the scanner. Ì Labels The Aperio GT 450 supports common industry labels used for 1 x 3 inch slides. Improperly applied slide labels can cause slides to jam. Ensure the following: Do not apply multiple labels to the same slide—this can cause the slide to exceed the specification for slide... -
Page 25: Scan Slides
This section provides basic concepts on the scanning workflow and the carousel rotation features. We recommend reviewing this section before using the scanner. Scan Workflow The Aperio GT 450 is a continuous load scanner. You can continually load new racks and unload completed racks, as shown below: Slides loaded... -
Page 26: Carousel Rotation
Log In and Log Out of the Scanner Your Lab Administrator sets up the scanner pass codes and timeout period for your lab using the Aperio GT 450 SAM client application software. You need to log into the scanner to interact with the touchscreen interface. You do not need to log in to load and unload racks for scanning. -
Page 27: Load Slides In The Rack
Insert each slide as shown with the label facing out and Push each slide into the rack until the slide touches the back of the rack, ensuring each slide is fully inserted into the rack. Aperio GT 450 User’s Guide, Revision A © Leica Biosystems Imaging, Inc. 2019... -
Page 28: Load Racks In The Carousel
When the rack is fully inserted, there is a “click” sound, and the rack position on the Home screen turns light blue. Continue loading racks as needed or until you fill the front six rack slots. When you’ve finished loading the first set of racks: Aperio GT 450 User’s Guide, Revision A © Leica Biosystems Imaging, Inc. 2019... - Page 29 If the completed rack is in the back of the carousel, you can rotate it to the rack loading area. See “Rotate a Rack to the Rack Loading Area” on page 31. Aperio GT 450 User’s Guide, Revision A © Leica Biosystems Imaging, Inc. 2019...
-
Page 30: Priority Scanning
Use Priority to move a rack to the front of the scan queue. You can apply the Priority option on up to three racks at a time. Tap the rack position. The Priority option appears when you select the rack position. Tap Priority. Aperio GT 450 User’s Guide, Revision A © Leica Biosystems Imaging, Inc. 2019... -
Page 31: Rotate A Rack To The Rack Loading Area
To rotate a rack to the rack loading area: Tap the rack position. The Rotate option appears when you select the rack position. Aperio GT 450 User’s Guide, Revision A © Leica Biosystems Imaging, Inc. 2019... -
Page 32: Unload Racks From The Carousel
Make sure all the slides in the rack were successfully scanned (the rack status is green). If the rack status is orange, see “Rack Warnings” on page 37. If the rack is in the loading area, carefully remove the rack from the rack slot. Aperio GT 450 User’s Guide, Revision A © Leica Biosystems Imaging, Inc. 2019... -
Page 33: Check Scan Status
CAUTION: If you must remove a rack before all slides in the rack are scanned, note the rack and slide status. After removal, the rack’s scan status is no longer available. Aperio GT 450 User’s Guide, Revision A © Leica Biosystems Imaging, Inc. 2019... -
Page 34: Check Rack Status
If there is an error on at least one side in the rack that is currently scanning, the rack position pulses blue and orange. See “Rack Warnings” on page 37. Aperio GT 450 User’s Guide, Revision A © Leica Biosystems Imaging, Inc. 2019... -
Page 35: View Slide Status For A Rack
No scanned image created. (See page 37.) The slide scanned successfully, passed image QC, and was transferred to the specific image location. The slide has a scan warning. (See page 37.) Aperio GT 450 User’s Guide, Revision A © Leica Biosystems Imaging, Inc. 2019... -
Page 36: View Macro Images Of Scanned Slides
Racks in the list appear in the scan order. Ì The scan status is indicated for each rack. Ì In the example, rack 3 is set as priority. Ì Aperio GT 450 User’s Guide, Revision A © Leica Biosystems Imaging, Inc. 2019... -
Page 37: Rack Warnings
The scanner created an image, but there is an error. An error prevented the scanner from creating an image. In the example below, slide 7 in rack 1 has a warning. Aperio GT 450 User’s Guide, Revision A © Leica Biosystems Imaging, Inc. 2019... - Page 38 Tap the Slide View icon to view the macro image for the slide that has a warning. Take note of the error code and message. For information and steps to resolve the error, go to “Slide Errors and Solutions” on page 70. Aperio GT 450 User’s Guide, Revision A © Leica Biosystems Imaging, Inc. 2019...
-
Page 39: Scan Statistics
Scan Statistics The Aperio GT 450 provides scan statistics, such as the number of slides or racks scanned per day, per week, etc. Tap Stats to view statistics for the Last 7 Days, Last 12 Months, or Lifetime by Year. -
Page 40: Maintenance
Maintenance This chapter contains a maintenance schedule and procedures for maintaining your Aperio GT 450 scanner. Call Leica Biosystems Technical Services if you cannot perform a maintenance routine or if you discover a problem with your scanner. Maintenance Schedule To keep your Aperio GT 450 scanner in optimal working condition, follow these maintenance routines. -
Page 41: Serial Number And Firmware Version
Chapter 5: Maintenance Serial Number and Firmware Version You need the serial number and current software version if you call Leica Biosystems Technical Support. Tap Maintenance on the touchscreen interface to view the serial number, firmware version, and other system information. -
Page 42: Open The Scanner Cover And Access The Interior Components
Grasp the cover using the handhold indentations as shown in the following examples: Slide the cover out until it reaches the point shown above. Rotate the VPU latch 180 degrees to the open position, as shown below. Aperio GT 450 User’s Guide, Revision A © Leica Biosystems Imaging, Inc. 2019... -
Page 43: Recommended Daily Maintenance
All racks are unloaded from the carousel. Ì There are no slides scanning. Ì The system does not have any errors displayed. Ì From the touchscreen interface, tap Maintenance and tap Restart Scanner. Aperio GT 450 User’s Guide, Revision A © Leica Biosystems Imaging, Inc. 2019... -
Page 44: Six Month Maintenance
Do not drag anything (including lens paper) across the lens surface using a lot of Ì pressure. This may damage the lens. Materials Needed Texwipe TX404 Absorbond Synthetic Wipers (lens cleaning wipes made of lint-free microfiber). Ì Laboratory gloves. Ì Aperio GT 450 User’s Guide, Revision A © Leica Biosystems Imaging, Inc. 2019... - Page 45 Pivot out VPU For detailed steps, see “Open the Scanner Cover and Access the Interior Components” on page 42. The objective and Koehler shown below in blue: Objective Koehler Aperio GT 450 User’s Guide, Revision A © Leica Biosystems Imaging, Inc. 2019...
- Page 46 CAUTION: The objective may move when you’re cleaning it. Wear gloves when cleaning the objective. Clean the objective using small circular motions with the recommended lint-free microfiber cloth. Aperio GT 450 User’s Guide, Revision A © Leica Biosystems Imaging, Inc. 2019...
-
Page 47: Clean The Stage Slide Tray
For detailed steps, see “Open the Scanner Cover and Access the Interior Components” on page 42. CAUTION: The stage slide tray is not removable. Do not attempt to remove it. Aperio GT 450 User’s Guide, Revision A © Leica Biosystems Imaging, Inc. 2019... -
Page 48: Clean The Carousel
Use a cotton swab soaked in a cleaning solvent, such as denatured alcohol, to thoroughly clean the carousel. Be sure to clean inside the slide rack slots. Aperio GT 450 User’s Guide, Revision A © Leica Biosystems Imaging, Inc. 2019... -
Page 49: Clean The Fan Filter
If the scanner is on, shut down the scanner by following the steps in,“Shut Down the Scanner” on page 41. Remove the fan filter by gripping the handle (shown in blue), and sliding it left, right, or up depending on your scanner’s configuration. Aperio GT 450 User’s Guide, Revision A © Leica Biosystems Imaging, Inc. 2019... - Page 50 Shake off any excess water. Dry the filter thoroughly with a clean cloth or a dryer. CAUTION: Ensure the fan filter is completely dry before inserting it in the scanner. Aperio GT 450 User’s Guide, Revision A © Leica Biosystems Imaging, Inc. 2019...
-
Page 51: Clean The Slide Racks
Frequency: at least every six months. Ì To clean the scanner cover: Wipe the outer cover of the scanner with a damp cloth. Immediately dry the cover using a dry cloth. Aperio GT 450 User’s Guide, Revision A © Leica Biosystems Imaging, Inc. 2019... -
Page 52: Clean The Touchscreen
Follow these steps to restart the scanner after you have accessed the scanner interior. Pivot the VPU into the closed position. Secure the VPU in place by rotating the VPU latch toward you 180 degrees. Aperio GT 450 User’s Guide, Revision A © Leica Biosystems Imaging, Inc. 2019... -
Page 53: Transporting Or Moving The Aperio Gt 450
“Shut Down the Scanner” on page 41. If you want to store the scanner, contact Leica Biosystems Imaging Technical Services for assistance. Aperio GT 450 User’s Guide, Revision A © Leica Biosystems Imaging, Inc. 2019... -
Page 54: Troubleshooting
Troubleshooting This chapter contains information and instructions to help you resolve troubleshooting issues with your scanner. For issues with the Scanner Administration Manager, see the Aperio GT 450 IT Manager and Lab Administrator Guide. Personal Protective Equipment If you need to access the interior of the scanner while troubleshooting an issue, follow the policies and procedures of your institution, including the use personal protective equipment (PPE). -
Page 55: Perform A Safe Restart After An Error
Open the cover and access the interior: Open scanner cover. Rotate the VPU latch. Pivot out VPU For detailed steps, see “Open the Scanner Cover and Access the Interior Components” on page 42. Aperio GT 450 User’s Guide, Revision A © Leica Biosystems Imaging, Inc. 2019... - Page 56 Slide the pusher to the front of the scanner, as shown in the rightmost image below. Hold the pusher in one of the areas circled below. Avoid touching the LED and objective. Aperio GT 450 User’s Guide, Revision A © Leica Biosystems Imaging, Inc. 2019...
-
Page 57: Error Codes And Solutions
Pivot out VPU For detailed steps, see “Open the Scanner Cover and Access the Interior Components” on page 42. Take photos of any obstructions. Leica Biosystems Technical Services may request the photos if you need additional assistance after completing the steps below. - Page 58 Slide the pusher to the front of the scanner, as shown in the rightmost image below. Hold the pusher in one of the areas circled below. Avoid touching the LED and objective. Aperio GT 450 User’s Guide, Revision A © Leica Biosystems Imaging, Inc. 2019...
-
Page 59: 1001: Scanner Cannot Initialize
For detailed steps, see “Open the Scanner Cover and Access the Interior Components” on page 42. Check if there is a slide on the stage or partially on the stage. Aperio GT 450 User’s Guide, Revision A © Leica Biosystems Imaging, Inc. 2019... - Page 60 Slide the pusher to the front of the scanner, as shown in the rightmost image below. Hold the pusher in one of the areas circled below. Avoid touching the LED and objective. Aperio GT 450 User’s Guide, Revision A © Leica Biosystems Imaging, Inc. 2019...
-
Page 61: 1002: Carousel Cannot Rotate
Check the rack loading area and pinch points for any unexpected object. Rack loading area with light curtain highlighted: Pinch points on either edge of rack loading area: Aperio GT 450 User’s Guide, Revision A © Leica Biosystems Imaging, Inc. 2019... - Page 62 If there are no obstructions and the carousel still does not rotate, restart the scanner. See “Perform a Safe Restart After an Error” on page 55. If the issue persists, contact Leica Biosystems Technical Services. Aperio GT 450 User’s Guide, Revision A © Leica Biosystems Imaging, Inc. 2019...
-
Page 63: 1003: Carousel Cannot Rotate. Carousel Pinch Point Obstructed
If issue persists, contact Leica Biosystems Technical Services. 2000: Slide handling error at slide stage, rack, or pusher. Cause: There is an obstruction at the slide stage, rack, or pusher. Ì Aperio GT 450 User’s Guide, Revision A © Leica Biosystems Imaging, Inc. 2019... - Page 64 Pivot out VPU For detailed steps, see “Open the Scanner Cover and Access the Interior Components” on page 42. Take photos of the obstruction. Leica Biosystems Technical Services may request the photos if you need additional assistance after completing the steps below.
- Page 65 Slide the pusher to the front of the scanner, as shown in the rightmost image below. Hold the pusher in one of the areas circled below. Avoid touching the LED and objective. Aperio GT 450 User’s Guide, Revision A © Leica Biosystems Imaging, Inc. 2019...
-
Page 66: 2001: Slide Handling Error At Rack Gripper, Lift, Or Carousel
WARNING: Do not attempt to recover broken slides. Call Leica Biosystems Technical Services. AVERTISSEMENT: Ne pas tenter de récupérer les lames brisées. Appeler les Services Techniques de Leica Biosystems. Aperio GT 450 User’s Guide, Revision A © Leica Biosystems Imaging, Inc. 2019... - Page 67 Rotate the VPU latch. Slide the cover until it clicks closed. For detailed steps, see “Restart the Scanner After Interior Maintenance” on page 52. Contact Leica Biosystems Technical Services. Aperio GT 450 User’s Guide, Revision A © Leica Biosystems Imaging, Inc. 2019...
-
Page 68: 9000: Scanner Cover Is Open
After you remove a rack, the rack’s scan status is no longer available on the Home screen. 1005: Cannot process rack. Cause: There is an issue with a rack that prevents scanning. Ì Aperio GT 450 User’s Guide, Revision A © Leica Biosystems Imaging, Inc. 2019... -
Page 69: 1006: Cannot Process One Or More Slides In Rack
Go to the section that matches the slide error: “Tilted Slide(s)” on page 70 Ì “No Barcode” on page 70 Ì “No Tissue” on page 71 Ì Aperio GT 450 User’s Guide, Revision A © Leica Biosystems Imaging, Inc. 2019... -
Page 70: Slide Errors And Solutions
If there is an issue scanning a slide, one of the following error messages appears in Slide View. Follow the steps in order until the issue is resolved. If you follow the steps and the issue persists, contact Leica Biosystems Technical Services. -
Page 71: No Tissue
Ì Slide tray is clean. Ì Check the stain quality. Check that the slide and coverslip thickness are meet the requirements. See the Aperio GT 450 Specifications. Check for common slide preparation issues: Coverslip is not missing or overhanging. Ì... -
Page 72: Image Quality
Chapter 6: Troubleshooting If every slide has the same error, or if the issue persists after following the previous steps, call Leica Biosystems Technical Services. Image Quality Cause: The scanner’s Auto-Image QC feature detected an image quality issue. Ì Follow these steps in order until the issue is resolved: Review the scanned slide image in Aperio ImageScope. -
Page 73: Aborted
Clean the slide. Insert the slide into a different rack and scan it again. If the issue persists after following the previous steps, call Leica Biosystems Technical Services. Aborted Message Appears on All Slides Follow these steps in order until the issue is resolved: Remove any completed slide racks from the carousel. -
Page 74: Symptoms And Solutions
Ensure there is power available where the scanner is plugged in. Verify there is a network connection to the device. Ensure the main scanner cover is fully closed. If the issue persists, call Leica Biosystems Technical Services. Aperio GT 450 User’s Guide, Revision A © Leica Biosystems Imaging, Inc. 2019... -
Page 75: Touchscreen Does Not Respond To Touch
AVERTISSEMENT: Ne pas tenter de récupérer les lames brisées. Appeler les Services Techniques de Leica Biosystems. Take photos of the location of the damage. Leica Biosystems Technical Services may request the photos when providing assistance. Aperio GT 450 User’s Guide, Revision A © Leica Biosystems Imaging, Inc. 2019... -
Page 76: Index
18 coverslips 21, 23 light curtain 17 load racks in scanner 28 daily maintenance 43 load slides in rack 27 DICOM 20 DICOM converter error 63 Aperio GT 450 User’s Guide, Revision A © Leica Biosystems Imaging, Inc. 2019... - Page 77 28 clean objective 44 clean scanner cover 51 load slides in 27 clean slide racks 51 unload 32 warning 37 clean stage slide tray 47 Aperio GT 450 User’s Guide, Revision A © Leica Biosystems Imaging, Inc. 2019...
- Page 78 18 touchscreen problem 75 troubleshooting 54 error codes 57 how to use steps 54 rack warnings 68 symptoms 68 touchscreen 75 turn on scanner 17 Aperio GT 450 User’s Guide, Revision A © Leica Biosystems Imaging, Inc. 2019...
-
Page 79: Symbols
The exclamation point within an equilateral triangle is intended to alert you to the presence of important operating and maintenance (servicing) instructions. Le point d’exclamation dans un triangle équilatéral vise à avertir l’utilisateur qu’il s’agit d’instructions d’utilisation et d’entretien importantes. Class I Laser Aperio GT 450 User’s Guide, Revision A © Leica Biosystems Imaging, Inc. 2019... - Page 80 LeicaBiosystems.com/Aperio...
Need help?
Do you have a question about the Aperio GT 450 and is the answer not in the manual?
Questions and answers