Table of Contents
Advertisement
Quick Links
Advertisement
Table of Contents

Related Manuals for Leica GLOW400


Summary of Contents for Leica GLOW400
- Page 1 GLOW400 User Manual 10 748 697 - Version 01...
- Page 2 The information provided by this manual is directly related to the operation of the equipment. Medical decision remains the responsibility of the clinician. Leica Microsystems has made every effort to provide a complete and clear user manual highlighting the key areas of product use. Should additional information regarding the use of the product be required, please contact your local Leica representative.
-
Page 3: Table Of Contents
Configuring the user inputs on the handles and foot switches Modifying the GLOW400 settings Excitation intensity Fluorescence visibility Operation Operating range limits for GLOW400 Preoperative checklist Test standard Test card preoperative check Using the GLOW400 GLOW400 / Ref. 10 748 697 / Version 01... -
Page 4: Introduction
Leica surgical microscope, and in particular the safety notes. GLOW400 is a digital accessory for the ARveo 8 surgical microscope. In this user manual the functions of the GLOW400 are described. For Intended use information and description of the surgical microscope, refer to the user manual of ARveo 8. -
Page 5: Dangers Of Use
WARNING Risk of infection. The 3D glasses must not be touched by sterile personnel. Do not use the GLOW400 test card in the sterile field. WARNING Risk of injury to patient. Medical device is to be used only by trained personnel. -
Page 6: Directions For The Person Responsible For The Instrument
Allocate responsibilities for commissioning, operation and licensed medical maintenance. Monitor compliance with this. practitioner. (USA Only) Only use the GLOW400 when it is free of defects. CE label Inform your Leica representative or Leica Microsystems (Schweiz) AG, Medical Division, 9435 Heerbrugg, Switzerland,... -
Page 7: Description
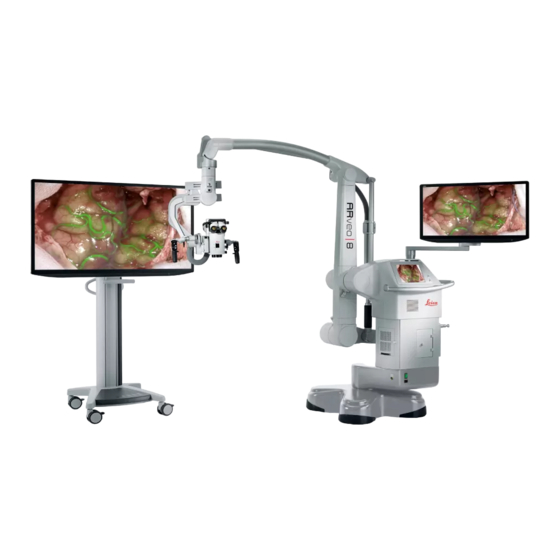
2D or 3D on a visualization The illumination for the GLOW400 is a xenon lamp located in the device, i.e., monitor. stand of the ARveo 8. This lamp provides visible and fluorescence 3.2.1... -
Page 8: Controls
2 4-function joystick 3 Working distance 4 Release all brakes There is no default factory setting for GLOW400 activation/ 5 Release preselected brakes deactivation. It must be assigned manually following assignment of the FL400 activation/deactivation function. -
Page 9: Status Leds
Highlighted Fluorescence) (see chapter 5.3 "GLOW400 visualization types"). 1 Status LED for fluorescence A prerequisite to use GLOW400 is to have FL400 already 2 Status LED for recording installed and license activated with blue light visualization being shown on the monitors (see chapter 6.4.1 "Example of The fluorescence status LED (1) indicates the fluorescence activity: how to assign the GLOW400 function to a handle button"). -
Page 10: And 3D View
Do not use 3D glasses on 2D monitor WARNING WARNING Risk of compromised surgery. Risk of infection. Use only compatible monitors provided by Leica The 3D glasses must not be touched by sterile personnel. Microsystems. GLOW400 / Ref. 10 748 697 / Version 01... -
Page 11: Glow400 Visualization Types
Visualization GLOW400 visualization types GLOW400 offers two different visualization types to observe the fluorescence signal and/or surrounding anatomical structures. WARNING Risk of compromised surgery. Use White Light or GLOW400 Anatomy to visualize peripheral view and/or surrounding anatomy. GLOW400 Anatomy GLOW400 Highlighted Fluorescence (HiFluo) -
Page 12: Glow400 Visualization Arrangements
Each output view is a selection of visualization type(s) and the arrangement of type(s) (e.g. mono view or side-by-side view). When reaching the last output view and the predefined GLOW400 toggle button is pressed again, the GLOW400 visualization is deactivated and the blue light visualization of FL400 is shown on the monitors. -
Page 13: Preparation Before Surgery
The "Copy" function (see chapter 6.1.2 "Creating a new surgeon profile from an existing surgeon profile or preset") allows to copy settings from a preset or an existing surgeon profile which can then be adapted to your needs. GLOW400 / Ref. 10 748 697 / Version 01... -
Page 14: Select An Existing Surgeon Profile
Choose between different surgeon profiles from the "wheel". surgeon profiles and presets is displayed. The GLOW400 user can chose a surgeon profile for which the If more than 5 profiles have been defined, the user can rotate GLOW400 profile has already been defined or choose the FL400 through all defined and activated profiles by dragging with their preset profiles _Tumor or _Tumor+IGS. -
Page 15: How To Use Preset Profiles
ARveo 8 user manual. Configure the user input settings (see chapter 6.4.1 "Example of how to assign the GLOW400 function to a handle button"). The preset profile can be used and modified, but any changes to the profile settings will not be saved. Therefore, with each new start-up, the default profile settings will be restored. -
Page 16: Configuring The User Inputs On The Handles And Foot Switches
Predefined factory settings of the right handle are displayed: Tap the "Surgeon Settings" icon (2). The "Surgeon Settings" page is displayed: Now the handle settings can be viewed or edited for the selected surgeon profile. GLOW400 / Ref. 10 748 697 / Version 01... - Page 17 FL400 mode activation is a prerequisite to enable GLOW400 functionality on the microscope. The following steps show how the GLOW400 toggle function can be assigned to a button i.e., on the left handle, first by assigning FL400 activation/deactivation functionality to the handle.
- Page 18 Press "Back" to return to the "Options" page. This process can also be used for any of the buttons to which you wish to assign any other function. To switch to the white light mode, deactivate FL400 mode. GLOW400 / Ref. 10 748 697 / Version 01...
- Page 19 Preparation before surgery Example of foot switch with GLOW400 assignment GLOW400 / Ref. 10 748 697 / Version 01...
-
Page 20: Modifying The Glow400 Settings
Excitation intensity The excitation intensity is linked to Leica FL400 product. Please refer to Leica FL400 user manual on how to change this default excitation intensity. Per default this excitation value is set to 100% (see recommended excitation settings). -
Page 21: Fluorescence Visibility
The fluorescence visibility can decrease even with standard conditions if the efficiency of the illumination system is reduced or the xenon bulb lifetime reaches its end. Please refer to FL400 User Manual for any limitations related to FL400. GLOW400 / Ref. 10 748 697 / Version 01... -
Page 22: Operation
Switch on the illumination used for GLOW400 and FL400. Activate FL400. Check if GLOW400 toggle can be activated and if the 5 output views are visualized on the monitor (after activating FL400 mode). Make sure the 3D glasses are ready for use in OR. -
Page 23: Test Standard
(article number 10748249). Test card preoperative check GLOW400 Test Card Use the test card to verify the proper functionality of the GLOW400 as well as the surgical microscope system. Perform the preoperative check of FL400 as described in the Check the expiration date on the test card and replace the FL400 user manual. - Page 24 • Magnification: 3.0 x • When toggling through GLOW400 visualizations all 4 intensity • Excitation: 100% spots 1-4 should be visible on the monitors in all five GLOW400 output views. Test card functional areas description (front side), in two GLOW400...
-
Page 25: Using The Glow400
Operation Using the GLOW400 Switch on the illumination of the Leica surgical microscope. Select a surgeon profile for which the GLOW400 profile has been defined or create a new surgeon profile with preassigned FL400 and GLOW400 functionality. Activate the FL400 mode by pressing the predefined activation/... -
Page 26: Recording In Fluorescence Mode
When a 3D license is installed on the ARveo 8 and 3D recording is activated on the "Live Screen" page, it generates 6 videos (3 videos per left and right channel). Otherwise, when 2D recording is activated, it generates 3 videos. GLOW400 / Ref. 10 748 697 / Version 01... -
Page 27: Taking Pictures
If you want to name the current patient, refer to the ARveo 8 user manual. Tap the "Preview & Export" (3) button. The list of recordings and saved images is displayed: GLOW400 / Ref. 10 748 697 / Version 01... -
Page 28: Export
Please refer to the ARveo 8 user manual for more detailed export instructions. Tap the extension again in the upper right corner to deactivate the extension. The "Live Screen" page appears. GLOW400 / Ref. 10 748 697 / Version 01... -
Page 29: Care And Maintenance
Care and maintenance 10 Care and maintenance GLOW400 is an accessory for a ARveo 8 surgical microscope. For care and maintenance please refer to the corresponding user manual. It is recommended to conclude a service contract with Leica Service for the whole Leica Surgical microscope (annual maintenance). -
Page 30: What To Do If
If problem persists, contact Leica Service. High high 7506* Timeout Error Mode Switch could not be completed Try the last action again. Reboot the microscope. If problem persists, contact Leica Service. GLOW400 / Ref. 10 748 697 / Version 01... -
Page 31: Common Troubleshooting Steps
11.3 Common troubleshooting steps Malfunction Cause Remedy No GLOW400 fluorescence visible on the monitor GLOW400 is not active. Check if FL400 is activated: • The status LED lights up in blue. • The microscope illumination emits blue light to the surgical field. - Page 32 • Check the bulb life indicator time. Please refer to the ARveo 8 User Manual. If the intensity value is still insufficient, call the Leica service. Bulb usage is above time limit. Replace the bulb.
-
Page 33: Technical Data
500 mbar to 1060 mbar atmospheric pressure Transport –40°C to +70°C –40°F to +158°F 10% to 100% relative humidity 500 mbar to 1060 mbar atmospheric pressure Test cards only allow a maximum temperature of 30°C for storage and transport. GLOW400 / Ref. 10 748 697 / Version 01... -
Page 34: Manufacturer's Declaration Of Electromagnetic Compatibility (Emc)
Manufacturer's declaration of electromagnetic compatibility (EMC) 13 Manufacturer's declaration of electromagnetic compatibility (EMC) For the EMC declaration, refer to the user manual of ARveo 8. GLOW400 / Ref. 10 748 697 / Version 01... - Page 35 GLOW400 / Ref. 10 748 697 / Version 01...
- Page 36 CONNECT 10 748 697en/01 • Copyright © by Leica Microsystems (Schweiz) AG, Medical Division, CH-9435 Heerbrugg, 2023 • 03.2023 – • LEICA and the Leica Logo are registered trademarks of Leica WITH US! Microsystems IR GmbH. Leica Microsystems (Schweiz) AG · Max Schmidheiny Strasse 201 · CH-9435 Heerbrugg T +41 71 726 3333 www.leica-microsystems.com...
Need help?
Do you have a question about the GLOW400 and is the answer not in the manual?
Questions and answers