Advertisement
General Information
PLEASE READ THROUGH BEFORE BEGINNING ASSEMBLY.
IMPORTANT: Check boxes for Contents Listed
Check inside of parts as some parts are packaged
inside of others
In the event of missing, damaged or defective parts
please call our customer service dept. at 1-877-258-6020
When assembling components, place on a clean, flat
non-abrasive surface to avoid scratches
Tools Required
... Battery or Electric Drill
... File
... Hammer or Rubber Mallet
with #2 phillips bit
(recommended)
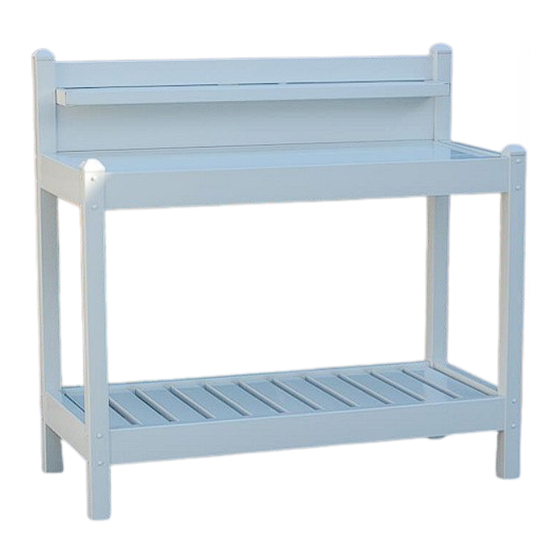
Greenfield Potting Bench
11203
Model#
Part #
1
2" sq. x 48¼" Back Left Post
2
2" sq. x 48¼" Back Right Post
3
2" sq. x 38" Front Post
4
1½ x 4 x 46½" Table Support
5
1½ x 4 x 46½" Shelf Support
6
1½ x 4 x 20¼" Side Rail
7
⅞ x 3 x 20¼" PtB Rail
8
⅞ x 3 x 46½" Back Rail
9
1½ x 5½ x 46½" Back Rail
10
1½ x 5½ x 42½" Shelf Rail
11
10¾" Shelf Support Bracket
12
1½ x 5½ x 43" Table Top Rail
13
⅞ x 1½ x 16½" Table Brace
14
16½" Table Top End Cap
15
5½" Shelf End Cap
16
Hardware Bag
2" sq." Post Cap
1¼" Painted Screw
¾" Painted Screw
Super Glue Tube
150 Birch Road
P.O. Box 122
Sheboygan Falls, WI 53085
Assembly Instructions
Description
Qty
14
(includes:)
12
48
1
1-877-258-6020
www.dura-trel.com
sales@dura-trel.com
1
1
2
2
2
4
1
1
1
2
3
2
2
2
1
4
1
Advertisement
Table of Contents

Subscribe to Our Youtube Channel
Related Manuals for Dura Trel Greenfield 11203


Summary of Contents for Dura Trel Greenfield 11203
- Page 1 When assembling components, place on a clean, flat non-abrasive surface to avoid scratches Tools Required … Battery or Electric Drill with #2 phillips bit … File … Hammer or Rubber Mallet (recommended) 1-877-258-6020 150 Birch Road www.dura-trel.com P.O. Box 122 sales@dura-trel.com Sheboygan Falls, WI 53085...
- Page 2 Dura-Trel, Inc., P.O. Box 122, Sheboygan Falls, WI 53085 Dura-Trel, Inc. reserves the right to discontinue or change its design, and or color. If the original color or style is not available, Dura-Trel, Inc. shall have the right to substitute a product designated by Dura-Trel, Inc.
- Page 3 Insert ⅞" x 3” x 46½” back rail (part 8) into top hole in back right post (part 2). Insert 1½" x 5½" x 46½” back rail (part 9) into top of large hole of back right post. Insert one table support (part 4), into bottom of large hole of back right post.
- Page 4 Insert three ⅞" x 3” x 20¼” table/shelf rails (part 7) into table support of back panel. Insert eleven ⅞" x 3” x 20¼” table/shelf rails (part 7) into shelf support of back panel. Insert two 1½" x 4" x 20¼” side rails (part 6) into back right and back left post.
- Page 5 Lay out the 1½" x 5½" x 42½" shelf rail and two 10¾" shelf suppport brackets. Using a tape measure, mark shelf rail 6" in from each end. Using three ¾" screws per bracket, fasten narrow end of each bracket to shelf rail 6"...
Need help?
Do you have a question about the Greenfield 11203 and is the answer not in the manual?
Questions and answers