Rice Lake CW-90 Technical Manual
Checkweigher
Hide thumbs
Also See for CW-90:
- Installation manual (78 pages) ,
- Technical manual (78 pages) ,
- Options installation (16 pages)

Subscribe to Our Youtube Channel
Related Manuals for Rice Lake CW-90


Summary of Contents for Rice Lake CW-90
- Page 1 CW-90/90X Checkweigher Firmware Version 1.07 Technical Manual July 18, 2019 PN 105942 Rev E...
- Page 2 All information contained within this publication is, to the best of our knowledge, complete and accurate at the time of publication. Rice Lake Weighing Systems reserves the right to make changes to the technology, features, specifications and design of the equipment without notice.
-
Page 3: Table Of Contents
Adjusting Final Calibration ..............38 Technical training seminars are available through Rice Lake Weighing Systems. - Page 4 9.0 CW-90/90X Limited Warranty ........
- Page 5 11.0 Specifications ............... . . 73 Technical training seminars are available through Rice Lake Weighing Systems.
- Page 6 CW-90/90X Checkweigher Rice Lake continually offers web-based video training on a growing selection of product-related topics at no cost. Visit www.ricelake.com/webinars Visit our website www.RiceLake.com...
-
Page 7: Introduction
Do not operate or work on this equipment unless this manual has been read and all instructions are understood. Failure to follow the instructions or heed the warnings could result in injury or death. Contact any Rice Lake Weighing Systems dealer for replacement manuals. -
Page 8: Overview
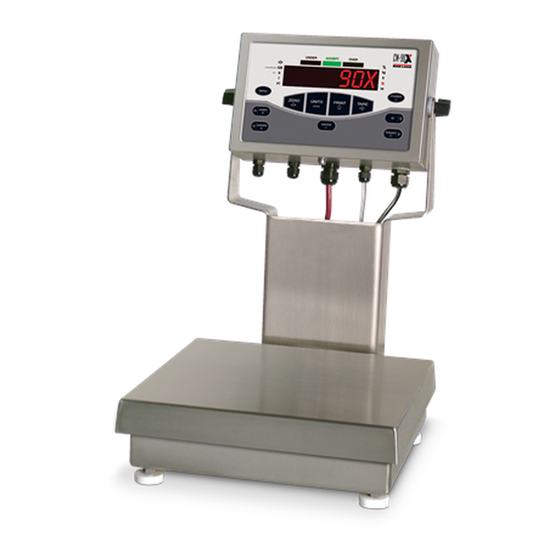
CW-90/90X Checkweigher Overview The CW-90/90X is a high-speed digital weight indicator and scale base programmed to compare weight readings with predetermined tolerance limits defining an ACCEPT band. If the current weight reading is within the acceptable range, the green ACCEPT LED is illuminated. If the current weight reading is less than the acceptable range, one or more of the red UNDER segments is illuminated. -
Page 9: Keypad Functions
Display – weight display area Bar Chart – see Section 1.6 Percent LED– value is displayed as percent Unit LED’s – weight unit being displayed; kg, g, lb, oz Table 1-1. Keypad Functions © Rice Lake Weighing Systems ● All Rights Reserved... -
Page 10: Tare Recall
CW-90/90X Checkweigher Tare Recall When a stored tare is displayed, the gross and net annunciators are turned off and the PT annunciator is lit. To display a stored tare: 1. Press 2. Press . The tare value is displayed for 10 seconds. If there is no tare in the system, nothing will display. -
Page 11: Installation
6. Install coupling nuts, counter bored end first, onto threaded stem of rubber feet. 7. Install feet onto bottom side of the column. 8. Turn the CW-90/90X upright and replace the platter on the platform. 9. Attach indicator to the column with the two knobs and nylon washers provided. Position nylon washers between indicator enclosure and column mounting holes. -
Page 12: Leveling
Leveling Set the CW-90/90X in an area that is level and free of vibrations and air currents. Adjust the four corner feet on the base and refer to the bubble level on the inside frame. The base should not rock and the feet should have solid contact with the surface. -
Page 13: Cable Grounding
2. Strip another 1/2'' (15 mm) of the insulation to expose the braid where the cable passes through the clamp. Load Cell Cables Cut the shield wire just past the grounding clamp. Shield wire function is provided by contact between the cable shield and the grounding clamp. © Rice Lake Weighing Systems ● All Rights Reserved... -
Page 14: Serial Communications
CW-90/90X Checkweigher 2.6.2 Serial Communications Port 1 supports full duplex RS-232 communications only; Port 2 provides either active 20 mA output or duplex RS-232 transmission. 1. Wire serial communications cables to J2, which is Port 1 (5-wire RS-232 port) and J3, which is Port 2 (RS-232 and 20 mA). -
Page 15: Enclosure Reassembly
For best results, replace the battery while in Weigh Mode and with AC power applied. Use care not to bend the battery retaining spring. © Rice Lake Weighing Systems ● All Rights Reserved... -
Page 16: 2.10 Installing Option Cards
Holes OPTION J2/Port 1 J3/Port 2 Figure 2-6. CW-90/90X CPU Board Jumper Description JP1/JP2 Jump excitation to sense. If using a 4-wire load cell cable, leave JP1 and JP2 on. If using a 6-wire load cell cable, take JP1 and JP2 off. -
Page 17: 2.11 Replacement Parts
Washer, Lock NO 8 Type A 14626 Nut, Kep 8-32NC HEX 45043 Wire, Ground 4in W/No. 8 104914 Overlay, Membrane Switch (CW-90) 104915 Overlay, Piezo (CW-90X) 105850 Bracket, Power Supply Table 2-6. Replacement Parts © Rice Lake Weighing Systems ● All Rights Reserved... - Page 18 50 lb 107176 100 lb 107177 Table 2-7. CW-90X Load Cells Scale Capacity Load Cell Part Number 5 lb 107756 10 lb 107757 25 lb 107758 50 lb 107759 100 lb 107760 Table 2-8. CW-90 Load Cells www.RiceLake.com Visit our website...
- Page 19 Installation 11.24 9.50 3.12 6.00 8.57 10.02 3.75 4.00 10.02 2.01 6.00 3.75 3.00 .281 Figure 2-8. CW-90/90X Dimensions © Rice Lake Weighing Systems ● All Rights Reserved...
-
Page 20: Configuration
(JMP1) in the ON position, allowing configuration access by pressing If the CW-90/90X has been sealed for Legal for Trade, the setup switch needs to be pressed to gain access to the menus. The setup switch is located on the bottom of the indicator. -
Page 21: Audit Menu
The CW-90/90X requires the WZERO and WSPAN points to be calibrated. The linearity points are optional, but must NOT duplicate zero or span. During calibration, ENTER acts as a data entry confirmation key. It also acts as an EXECUTE key, and accepts the value if calibration was successful. -
Page 22: Setup Menu
CW-90/90X Checkweigher Parameter Description WZERO Press ENTER and the A/D raw counts will be displayed; press ENTER again to calibrate zero, or press MENU to cancel. CALIBRATING, PLEASE WAIT displays prior to automatically moving to WVAL WVAL Press ENTER to display and edit the test weight value; press ENTER again to move to WSPAN WSPAN Press ENTER and the A/D raw counts will be displayed;... -
Page 23: Setup Menu
NONE BOTH 4OUT NOTARE DELAY 7.5HZ 15HZ 8OUT PBTARE 60HZ 16OUT KEYED 120HZ 32OUT 240HZ 64OUT 128OUT 100D 480HZ 960HZ 200D 250D * Not Legal for Trade Figure 3-5. Setup Menu © Rice Lake Weighing Systems ● All Rights Reserved... - Page 24 CW-90/90X Checkweigher Parameter Choices Description CALIBR WZERO Section 3.3 for selection descriptions and Section 4.0 on page 35 for calibration procedures WVAL WSPAN Calibration can be performed in two places within the menu: the CALIBR menu shown in Figure 3-5 is an in- depth scale setup and calibration;...
- Page 25 NOTE: If checkweighing is used, THRESH should be less than the under value or it can disable the digital I/O points from tripping. Table 3-4. Scale Menu Parameters (Continued) © Rice Lake Weighing Systems ● All Rights Reserved...
- Page 26 CW-90/90X Checkweigher Parameter Choices Description Level 4 submenus PRIMRY UNITS Allows you to set the primary units, decimal point format, and display divisions DECPNT DSPDIV Allows you to set the secondary units; decimal point format and display divisions are selected automatically;...
- Page 27 ( ) keys to place the decimal 88888.8 point where desired 8888.88 888.888 888880 8.88888 88.8888 DSPDIV Display divisions; selects the minimum division size for the primary unit’s displayed weight Table 3-4. Scale Menu Parameters (Continued) © Rice Lake Weighing Systems ● All Rights Reserved...
-
Page 28: Featur Submenu
CW-90/90X Checkweigher 3.4.2 FEATUR Submenu AUDIT CALIBR SETUP TEST EXIT T&D ACCUM BRIGHT XXXXXXX Only displayed if Only displayed if turned on turned on from Setup menu from Setup menu CONFIG SCALE SERIAL PFORMT DIGI/O VERS FEATUR REMOTE CHKWGH REGION... - Page 29 T&D NOTE: Overriding passwords will clear configuration and calibration settings. To preserve settings (i.e., ID information), use Revolution software to upload your data to a PC, then download it back to the CW-90 ACCUM after the password override is performed.
- Page 30 Accept band tolerance values BOTH is a combination mode that allows the operator to have the CW-90/90X acquire Accept band tolerances from actual weights on the scale, but then gives the operator an opportunity to digitally modify those values directly afterward RDONLY is a “read only”...
- Page 31 NOTE: Overriding passwords will clear configuration and calibration settings. To preserve settings (i.e., T&D ID information), use Revolution software to upload your data to a PC, then load it back to the CW-90 after the password override is performed. ACCUM...
-
Page 32: Featur Menu, Regula / Indust Submenu
CW-90/90X Checkweigher 3.4.3 FEATUR Menu, REGULA / INDUST Submenu AUDIT CALIBR SETUP TEST EXIT T&D ACCUM BRIGHT XXXXXXX Only displayed if Only displayed if turned on turned on from Setup menu from Setup menu CONFIG SCALE FEATUR SERIAL PFORMT DIGI/O... - Page 33 The value specified for this parameter affects the function of the front panel TARE and ZERO keys; Section 9.6 on page 68 for more information Table 3-6. REGACY / INDUST Submenu Parameters (Continued) © Rice Lake Weighing Systems ● All Rights Reserved...
-
Page 34: Serial, Pformt, Dig I/O, Vers Submenus
CW-90/90X Checkweigher 3.4.4 Serial, PFORMT, DIG I/O, VERS Submenus AUDIT CALIBR SETUP TEST EXIT T&D ACCUM BRIGHT XXXXXXX Only displayed if Only displayed if turned on turned on from Setup menu from Setup menu CONFIG SCALE SERIAL PFORMT DIGIO VERS... -
Page 35: Test Menu
V 1.00 Displays the software version LR,V.1.00 Displays the legally relevant version DEFALT Resets settings to default values if YES is selected Table 3-7. Serial, PFORMT, DIG I/O, VERS Submenu Parameters © Rice Lake Weighing Systems ● All Rights Reserved... - Page 36 CW-90/90X Checkweigher SETUP Menu Parameter Choices Description Level 4 submenus Turns the Digital input/output off INPUT OVER Digital input functions UNDER TARGET PRINT ZERO TARE UNITS ENTER CLEAR DSP ACC CLR ACC T&D DSP TAR CLR TAR KEY LCK HOLD...
- Page 37 DIGITAL I/O FAIL PASS PASS BEFORE RUNNING TEST FAIL FAIL LOOP DIO 1 DIO 2 DIO 3 DIO 4 STATUS STATUS STATUS STATUS PASS FAIL SPAN EXCVDC ZERO Figure 3-11. Test Menu © Rice Lake Weighing Systems ● All Rights Reserved...
-
Page 38: Time And Date Menu
CW-90/90X Checkweigher TEST Menu Parameter Choices Description Level 2 submenus Gives details of current or live A/D counts as well as stored zero and span A/D values; shows ZERO voltage levels for signal and excitation voltages SPAN EXCVDC Tests your digital I/O ports; if correctly functioning, PASS is displayed. If not functioning, FAIL is... -
Page 39: Accum Menu
Setup menu 000000 CLEAR Figure 3-13. ACCUM Menu BRIGHT Menu There are eight brightness settings (0-7) on the CW-90/90X. If a number greater than 7 is selected, RANGE will be displayed because the number is out of range. AUDIT CALIBR SETUP... -
Page 40: Id Menu
CW-90/90X Checkweigher ID Menu For ID menu to appear, ON must be selected from the SETUP » CONFIG » FEATUR » CHKWGH » ID menu (see Figure 3-8). AUDIT CALIBR SETUP TEST EXIT T&D ACCUM BRIGHT XXXXXXX Only displayed if... -
Page 41: Calibration
3-5, more in-depth scale setup and calibration The CW-90/90X requires the WZERO and WSPAN points to be calibrated. The linearity points are optional, but must NOT duplicate zero or span. During calibration, the ENTER key is used for data entry confirmation. It also acts as an EXECUTE key, and accepts the value if calibration was successful. -
Page 42: Five-Point Linearization
CW-90/90X Checkweigher 5. Press , the stored calibration weight displays. ENTER 6. Enter the value of the test weights used for the span calibration. See Section 3.1.1 on page 7. Press to store the value. WSPAN displays. ENTER 8. Press to view the A/D count. -
Page 43: Edp Command Calibration
SC.REZERO command. The indicator displays CALIBRATING, PLEASE WAIT while the zero and span calibrations are adjusted. 8. Send the SC.KUPARROW or SC.KEXIT EDP command to return to normal mode. © Rice Lake Weighing Systems ● All Rights Reserved... -
Page 44: Revolution Calibration
2. From Revolution, select File » New.The Select Indicator dialog box displays. 3. Select CW-90 and click OK. 4. From the Communications menu, select Connect. 5. From the left pane, expand the Scale selection and click the Scale button. -
Page 45: Operation
Operation Operation The CW-90/90X can be configured for one of the three modes of operation: range, target weight, and target percent. Selecting which operation mode is done under the CHKWGH menu, MODE sub-menu. AUDIT CALIBR SETUP TEST EXIT T&D ACCUM... -
Page 46: Value Set: Keyed
OVER UNDER TARGET enter the desired under value. If using the CW-90, the numeric keypad can be used to enter the desired under value. To discard any changes and return to weigh mode, press the Menu button. Note 8. When the desired value is displayed, press Enter. The decimal point flashes. -
Page 47: Value Set: Keyed
OVER UNDER TARGET enter the desired value. If using the CW-90, the numeric keypad can be used to enter the desired under value. To discard any changes and return to weigh mode, press the Menu button. Note 3. When the desired value is displayed, press .The decimal point flashes. -
Page 48: Target Percent Mode
OVER UNDER TARGET enter the desired value. If using the CW-90, the numeric keypad can be used to enter the desired under value. To discard any changes and return to weigh mode, press the Menu button. Note 10. When the desired value is displayed, press . -
Page 49: Value Set: Push
(entering 5 equals 5%). If using the CW-90, you can also use the numeric keypad to enter the desired under value. To discard any changes and return to weigh mode, press the Menu button. -
Page 50: Ids
CW-90/90X Checkweigher IDs are used to save and recall previously set over/under/tare settings, descriptions, and units preferences. The CW-90/90X has the capacity to store up to 50 individual IDs. Make sure you have IDs enabled under the CHKWGH menu shown in Figure 5-1 or the menu will not appear. - Page 51 If using the CW-90, you can also use the numeric keypad to enter the desired value. To discard any changes and return to weigh mode, press the Menu button.
-
Page 52: Using A Stored Id
Note this key to navigate from a two-digit ID to a one-digit ID. On the CW-90, use the CLR or ZERO key. 3. Press Enter to start using the PROD ID. LOADING is displayed, as well as the PROD ID number and Description Field 1 (i.e., LOADING ID1 HAM). -
Page 53: Negative Checkweighing
If using the CW-90, you can also use the numeric keypad to enter the desired over value. The Over value you are entering is a negative value. However, it will appear to be a higher number than the Under Note value on the display because the negative symbol is not displayed. - Page 54 CW-90/90X Checkweigher The Under value you are entering is a negative value. However, it will appear to be a lower number than the Over Note value on the display because the negative symbol is not displayed. An example of Over/Under negative checkweighing values as they appear on the display would be Over: 3 (actually recorded as -3) and Under: 1 (actually recorded -1).
-
Page 55: Serial Commands
Serial Commands The CW-90/90X can be controlled by a PC or remote keyboard connected to an indicator serial port. Control is provided by a set of serial commands that can simulate front panel key press functions, display and change setup parameters, and perform reporting functions. -
Page 56: Reporting Commands
6.1.3 Clear and Reset Commands RESETCONFIGURATION can be used to clear and reset the CW-90/90X: Reset System ( ) – resets the indicator without resetting the configuration. RESETCONFIGURATION – restores all configuration parameters to the default values (menu mode only). It can also be initiated by navigating to the DEFALT parameter in the VERS menu and selecting YES. - Page 57 Temporary zero — SC.REZERO Rezero — SC.SEC Secondary units lb, kg, g, oz, lb/oz, CUSTOM, OFF SC.TER Tertiary units lb, kg, g, oz, lb/oz, CUSTOM, OFF Table 6-4. SCALES Serial Commands © Rice Lake Weighing Systems ● All Rights Reserved...
- Page 58 CW-90/90X Checkweigher Command Description Values EDP.BAUD#p Port baud rate 1200, 2400, 4800, 9600, 19200, 28800, 38400, 57600, 115200 EDP.BITS#p Port data bits/parity 8NONE, 7EVEN, 7ODD EDP.TERMIN#p Port termination character CR/LF, CR EDP.STOPBITS#p Port stop bits 2, 1 EDP.PRNMSG#P Print message ON, OFF EDP.ECHO#p...
- Page 59 Set time hhmm (enter using 24-hour format) TIMEFMT Time format 12HOUR, 24HOUR TIMESEP Time separator COLON, COMMA ZERONLY Disable all keys except ZERO OFF, ON Table 6-6. FEATURE Serial Commands © Rice Lake Weighing Systems ● All Rights Reserved...
-
Page 60: Normal Mode Commands
CW-90/90X Checkweigher Command Description Values GFMT.FMT Gross demand print format string See Section 7.0 on page 58 for information about demand print format strings. NFMT.FMT Net demand print format string ACC.FMT Accumulator print format string BUF.FMT Buffer print format string STRM.FMT... -
Page 61: Unique Commands
=00 if MODE=GROSS =01 if MODE=NET =10 if MODE=TARE =11 (not used) Dynamic =00 if UNITS=PRIMARY =01 if UNITS=SECONDARY =10 if UNITS=TERTIARY =11 (not used) Table 6-11. Custom Stream Format Identifiers © Rice Lake Weighing Systems ● All Rights Reserved... - Page 62 CW-90/90X Checkweigher Format Identifier Defined By Description Configuration =00 (not used) =01 if current DSPDIV=1 =10 if current DSPDIV=2 =11 if current DSPDIV=5 Configuration =00 (not used) =01 if primary DSPDIV=1 =10 if primary DSPDIV=2 =11 if primary DSPDIV=5 Configuration...
- Page 63 © Rice Lake Weighing Systems ● All Rights Reserved...
-
Page 64: Print Formatting
CW-90/90X Checkweigher Print Formatting The CW-90/90X provides seven print formats, GFMT, NFMT, ACC.FMT, STRM.FM, BUS.FMT, HDRFMT1 and HDRFMT2. These determine the format of the printed output when the PRINT key is pressed or when a KPRINT EDP command is received. The GFMT and NFMT will print to all ports assigned as DEMAND in the TRIGGE parameter, based on whether a tare is in the indicator. -
Page 65: Print Formatting Commands
**After receiving an SU command, the indicator sends unformatted data until the next SU command is received. Unformatted data omits decimal points, leading and trailing characters. Table 7-1. Print Format Commands © Rice Lake Weighing Systems ● All Rights Reserved... -
Page 66: Customizing Print Formats
7.2.1 Using the EDP Port With a personal computer, terminal, or remote keyboard attached to the CW-90/90X EDP port, you can use the EDP command set to customize the print format strings. To view the current setting of a format string, type the name of the string (GFMT or NFMT) and press Enter. For example, to check the current configuration of the GFMT format, type GFMT and press Enter. -
Page 67: Using Revolution Iii
(<NL> and <SP>) required by the front panel or EDP command methods. Using Revolution, type text directly into the grid, then select weight value fields from the tool bar and place them where they should display on the ticket. Figure 7-2. Revolution Print Format Grid © Rice Lake Weighing Systems ● All Rights Reserved... -
Page 68: Wlan Option Card
WiPort™ wireless networking device (PN 108671) can be installed inside the ® CW-90/90X Checkweigher. This option is used to communicate with a serial port on the host indicator. The Windows -based configuration software, DeviceInstaller™ (available on the CD that comes with the kit) can be used for installation and setup after the option card is connected to your wireless network. -
Page 69: Appendix
Appendix Appendix Error Messages If the error cannot be cleared, call Rice Lake Weighing Systems Service for assistance. Error Display Description Solution Over range • Check load cell wiring, including sense jumpers • Check configuration, including number of grads and display divisions •... -
Page 70: Using The Xe Edp Command
CW-90/90X Checkweigher Using the XE EDP Command The XE EDP command can be used to remotely query the CW-90/90X for the error conditions shown on the front panel. The XE command returns a 5-digit number in the format: xxxxx yyyyy where xxxxx contains a decimal representation of existing error conditions. -
Page 71: Status Messages
Center of zero Standstill Table 9-3. Status Codes Returned on the ZZ Command Continuous Output (Stream) Format The continuous output format is sent to a CW-90/90X port when that port’s TRIGGE parameter (SERIAL menu) is set to STREAM. <STX> <POL>... -
Page 72: Digital Filtering
CW-90/90X Checkweigher Digital Filtering The CW-90/90X uses averaged digital filtering to reduce the effect of vibration on weight readings. Adjustable threshold and sensitivity functions allow quick settling by suspending filter averaging, allowing the weight reading to jump to the new value. -
Page 73: Setting The Digital Filter Parameters
The exact format of the information shown depends on the regulatory agency specified for the REGULA parameter (FEATUR menu). Audit trail information can be printed from Revolution or by sending the DUMPAUDIT serial command. © Rice Lake Weighing Systems ● All Rights Reserved... -
Page 74: Regulatory Mode Functions
CW-90/90X Checkweigher Regulatory Mode Functions The function of the front panel keys depends on the value specified for the REGULAT parameter on the TARE ZERO FEATURE menu. The following table describes the function of these keys for the NTEP, CANADA, OIML, and NONE regulatory modes. -
Page 75: Updating Cw-90/90X Firmware
Revolution to avoid any data loss. 1. Unplug power to the CW-90/90X and remove the back plate. 2. Wire the serial cable to the CW-90/90X’s Port 1. Refer to the following table for cable connection settings. DB9 Cable... - Page 76 CW-90/90X Checkweigher Figure 9-5. Revolution CW-90/90X Screen. 7. The Rice Lake CW90 Updater screen displays. Specify the COM port the CW-90/90X is connected to, change the baud rate if needed. 8. Press to browse to and select the desired .hex file.
-
Page 77: Cw-90/90X Limited Warranty
CW-90/90X Limited Warranty CW-90/90X Limited Warranty Rice Lake Weighing Systems (RLWS) warrants that all RLWS equipment and systems properly installed by a Distributor or Original Equipment Manufacturer (OEM) will operate per written specifications as confirmed by the Distributor/OEM and accepted by RLWS. All systems and components are warranted against defects in materials and workmanship for two years. -
Page 78: Compliance
CW-90/90X Checkweigher 10.0 Compliance DECLARATIONOF CONFORMITY CW90 and CW90X 2014/30/EU EMC EN 55011:2007+A2:2007, EN 61326-1:2006 2014/35/EU LVD EN 60950-1-03:2006 2011/65/EU RoHS EN 50581:2012 __________________________ _ ___ ________ __________________________ May 3, 2019 __________________________ __________________________ __________________________ www.RiceLake.com Visit our website... -
Page 79: Specifications
12 x 12 x 4.25 in 12in 33 lb 105968 50 x 0.01lb (25 x 0.005kg) 800 x 0.2oz 12 x 12 x 4.25 in 12in 33 lb Table 11-2. CW-90X Specifications © Rice Lake Weighing Systems ● All Rights Reserved... - Page 80 CW-90/90X Checkweigher 105969 100 x 0.02lb (50 x 0.01kg) 1600 x 0.5oz 12 x 12 x 4.25 in 12in 33 lb 230VAC CE Marked/OIML Approved Capacity (enter in pounds (kg) or ounces) Column Est. Ship Part # Pounds Platform Dimensions...
- Page 81 Accuracy Class III/IIIL n :10 000 CW-90/90X Scale CoC Number 95-072A2 Accuracy Class III n :5 000 File NumberE151461-A7 Visit www.nsf.org and search by manufacturer. Or visit the direct link at: http://www.nsf.org/Certified/food/Listings.asp?CompanyName=Rice+Lake%25& © Rice Lake Weighing Systems ● All Rights Reserved...
- Page 82 CW-90/90X Checkweigher Appr.oval No. R76/2006-GB1-10.02 Accuracy Class II, III n : 10 000 Approval No. AM-5710 The CW90 complies with Part 15 of the FCC Rules. Operation is subject to the following conditions: • This device may not cause harmful interference.
- Page 84 Specifications subject to change without notice. Rice Lake Weighing Systems is an ISO 9001 registered company. 230 W. Coleman St. • Rice Lake, WI 54868 • USA U.S. 800-472-6703 • Canada/Mexico 800-321-6703 • International 715-234-9171 • Europe +31 (0)26 472 1319...
Need help?
Do you have a question about the CW-90 and is the answer not in the manual?
Questions and answers