
Subscribe to Our Youtube Channel
Related Manuals for Renishaw ATOM DX


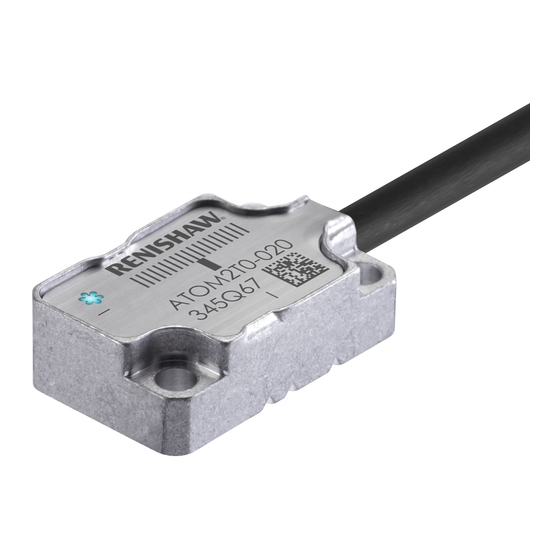
Summary of Contents for Renishaw ATOM DX
- Page 1 Installation guide M-9414-9447-01-A ATOM DX rotary encoder systems RSLM high accuracy linear encoder ™...
-
Page 2: Table Of Contents
Contents Product compliance System calibration Restoring factory defaults Storage and handling Enabling/disabling AGC ATOM DX system installation overview Readhead LED diagnostics RCDM rotary disc Installation drawing Troubleshooting Mounting the disc ATOM DX Aligning the disc Cabled readhead dimensions System connection:... -
Page 3: Product Compliance
Product compliance Further information Further information relating to the ATOM DX encoder range can be found in the ATOM DX system Data Renishaw plc declares that ATOM DX complies with the applicable standards and regulations. sheet (L-9517-9736), Advanced Diagnostic Tool ADTi -100 Data sheet (L-9517-9699), Advanced Diagnostic... -
Page 4: Storage And Handling
Storage and handling Disc and readhead N-heptane Propan-2-ol CHOHCH Storage Operating Humidity +70 °C +70 °C −20 °C 0 °C 95% relative humidity (non-condensing) to EN 60068-2-78 ATOM DX rotary installation guide... -
Page 5: Atom Dx System Installation Overview
ATOM DX system installation overview This section gives an overview of the steps involved in installing, setting-up and calibrating an ATOM DX encoder system. More detailed information is contained within the rest of the document. For information on designing the readhead and disc into the system refer to the detailed installation drawings www.renishaw.com /opticalencoders... -
Page 6: Rcdm Rotary Disc Installation Drawing
2.5 ±0.055 (20 µm version) 8 192 4 096 25.5 47.25 55.9 52.15 30.19 0.125 0.225 10 000 5 000 25.5 58.55 67.9 63.66 35.94 0.15 0.125 16 384 8 192 50.9 99.20 107.9 104.30 56.26 0.225 ATOM DX rotary installation guide... -
Page 7: Mounting The Disc
Disc contact surface Adhesive overspill areas Align the disc so it is concentric with the hub / shaft. Contact your local Renishaw representative for more information on designing the Cure the adhesive. mounting surface, suggested materials and adjustment methods. ATOM DX... -
Page 8: Aligning The Disc
Rotate the assembly and repeat steps 3 to 5 until the total alignment band movement is within the design specifications. Cure the adhesive. Recheck the run-out. Contact your local Renishaw representative for more information on aligning the disc. ATOM DX rotary installation guide... - Page 9 For more information on choosing appropriate DSi and readheads for your system contact correct position. your local Renishaw representative. For more information on the DSi refer to the TONiC DSi data sheet (L-9517-9466). Rotate the axis to the minimum count position and reset the counter to zero.
-
Page 10: System Connection: Top Exit Readhead
P-clip are fitted with a P-clip to ensure appropriate cable strain relief. When using Renishaw’s top exit cables ensure that the P-clip is mounted within a 50mm radius of the readhead cable exit. Minimum static bend radius of cores is 3 mm. -
Page 11: Readhead Mounting And Alignment: Methods
Care must be taken to ensure the disc surface is not scratched. 12 Tighten the readhead fixing screws. Renishaw offer a DTI adapter (A-9401-0105) that can be used to assist with this process. 13 Proceed with ‘System calibration’ section (see page 12). -
Page 12: Dummy Head (A-9401-0072)
The reuseable dummy head has the same mounting holes as the Install the ATOM DX readhead in place of the dummy head using 2 off M2 × 6 screws ATOM DX readhead with a longer ‘nose’ that is machined to the in diagonally opposite fixing holes. -
Page 13: Atom Dx Calibration Overview
ATOM DX calibration overview This section is an overview of the calibration procedure for an ATOM DX encoder system. More detailed information on calibrating the readhead is on page 12 of this installation guide. The optional Advanced Diagnostic Tool ADTi-100 * and ADT View software †... -
Page 14: System Calibration
Reference mark detected (visible indication at speed <100mm/s only) Settings stored Alarm 4 red flashes Low signal or over signal; system in error Blue single flashing None, restore factory defaults and recalibrate Blue double flashing Incremental only Blue (auto-complete) Incremental and reference mark ATOM DX rotary installation guide... -
Page 15: Troubleshooting
Check the disc and readhead orientation Check that the readhead variant is the correct type for the chosen disc (see the ATOM DX data sheet (L-9517- 9736) for details of readhead configuration) Unable to get a flashing Green LED System run-out is not within specification... - Page 16 Check that the readhead variant is the correct type for the chosen disc (see the ATOM DX data sheet (L-9517- 9736) for details of readhead configuration) No reference mark output Ensure you are not over-speeding the readhead during calibration mode (maximum speed <100 mm/sec)
-
Page 17: Cabled Readhead Dimensions
ATOM DX cabled readhead dimensions Dimensions and tolerances in mm (40 µm version) (20 µm version) Readhead datum faces 6.45 Set-up LED 10.25 12.7 11.7 4.85 * Datum face 4.15 Ø9 max Readhead / disc orientation 3 off mounting holes 16.5... -
Page 18: Top Exit Readhead Dimensions
ATOM DX top exit readhead dimensions Dimensions and tolerances in mm (40 µm version) (20 µm version) Set-up LED 6.45 10.45 Readhead datum faces 10.25 8.37 12.7 4.85 * Datum face 4.15 Ø9 max Readhead / disc orientation 16.5 3 off mounting holes Ø2.5 min through 20.5... -
Page 19: Output Signals
Remote CAL Clear Shield – Screen Case Case Case Ferrule – † PCB mount mating connectors - Top entry: BM10B-SRSS-TB Side entry: SM10B-SRSS-TB. ‡ Connector on top exit readhead only. Mating connector 10SUR - 32S. ATOM DX rotary installation guide... -
Page 20: Speed
Angular speed depends on disc diameter - use the following equation to convert to rev /min. V × 1000 × 60 Angular speed (rev/min) = Where V = maximum linear speed (m / s) and D = optical diameter of RCDM (mm) ATOM DX rotary installation guide... -
Page 21: Electrical Connections
Shield electronics IMPORTANT: The shield should be connected to the machine earth (Field Ground). 100R NOTE: For Renishaw top exit readhead cables the shield connection is provided by the P-clip. E− 100nF Maximum readhead cable length: 3 m Maximum extension cable length: Dependent on cable type, readhead cable length and clock speed. - Page 22 Synchronised pulse Z, ‡ 0.01 0.0025 duration as resolution. Bi-directionally repeatable † 40 μm ATOM DX only ‡ 20 μm ATOM DX only * Inverse signals not shown for clarity Alarm Line driven (Asynchronous pulse) (Not available with ‘A’ cable termination) >15 ms...
-
Page 23: General Specifications
20 µm version <±75 nm Error (SDE) 40 µm version <±120 nm Renishaw encoder systems have been designed to the relevant EMC standards but must be correctly integrated to achieve EMC compliance. In particular, attention to shielding arrangements is essential. ATOM DX... - Page 24 © 2017-2019 Renishaw plc. All rights reserved. Renishaw reserves the right to change specifications without notice. RENISHAW and the probe symbol used in the RENISHAW logo are registered trade marks of Renishaw plc in the United Kingdom and other countries. Part no.: M-9414-9447-01-A apply innovation and names and designations of other Renishaw products and technologies are trade marks of Renishaw plc or its subsidiaries.
Need help?
Do you have a question about the ATOM DX and is the answer not in the manual?
Questions and answers