Table of Contents
Advertisement
Quick Links
Advertisement
Table of Contents

Subscribe to Our Youtube Channel
Related Manuals for Knauer Azura P 6.1L


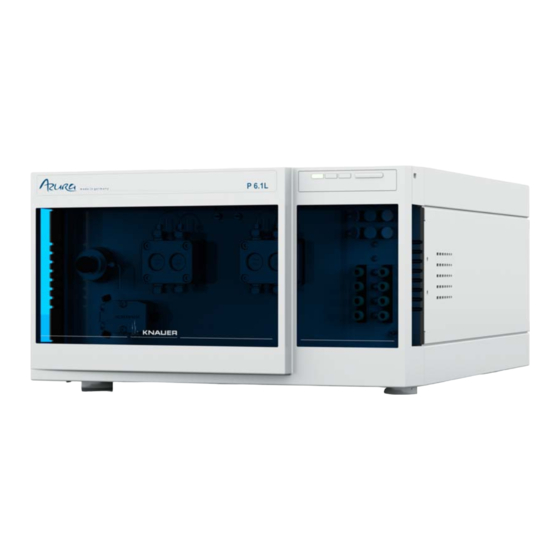
Summary of Contents for Knauer Azura P 6.1L
- Page 1 Pump P 6.1L User Manual V6890...
- Page 2 The information in this document is subject to change without prior notice. For latest version of the manual, check our website: http://www.knauer.net/en/downloads.html Copyright: © KNAUER Wissenschaftliche Geräte GmbH 2017 All rights reserved. ® AZURA is a registered trademark of KNAUER Wissenschaftliche Geräte GmbH.
-
Page 3: Table Of Contents
Table of Contents Table of Contents Product Information ..........Operating Ranges . - Page 4 Table of Contents Pin Header Connectors ........... Remote Terminal Strip .
- Page 5 Table of Contents Device Variants ............P 6.1L isocratic .
-
Page 6: Product Information
Product Information Product Information Note: Only use the device for applications that fall within the range of the intended use. Otherwise, the protective and safety equipment of the device could fail. Description The pump P 6.1L is suitable for analytical and semi-preparative applications. Operating Ranges Operating ranges The device can be used in the following areas:... - Page 7 Product Information Binary pump The binary pump consists of two pump drives and a 2-channel degasser with a Solvent Selection valve. A pressure sensor with an integrated inline fil- ter and a venting screw are also part of the pump. Legend Pressure sensor Mixer...
-
Page 8: Rear View
Product Information Rear View On the back of pump, the connectors for LAN and power chord are locate- das well as the serial number of the device an the power switch (on/off). Service Interface Please note that the service interface is solely used for repair and mainte- nance tasks performed by service technicians. -
Page 9: Eluents
Product Information Parameter stainless steel Bio-Inert Size 50 μl, 100 μl, 200 μl 250 μl Pressure 1000 bar 400 bar Piston backflushing The piston backflushing function automatically flushes the rear piston area of the pump head upon switch-on and in continuous mode. ... - Page 10 Product Information Suitable Eluents acetate buffer solutions acetone at 4 °C-25 °C (39.2 °C-77.0 °F) acetonitrile benzene chloroform ethyl acetate ethanol formiate buffer solution isopropanol carbon dioxide (liquid 99.999 % CO ...
-
Page 11: Scope Of Delivery
Scope of Delivery Scope of Delivery Note: Only use original parts and accessories made by KNAUER or a com- pany authorized by KNAUER. Pump P 6.1L Power cable AZURA accessories kit P 6.1L accessories kit ... -
Page 12: Signal Words
At any time, take the device completely out of operation by either switching off the power switch or by pulling the power plug. Opening the Device The device may be opened by the KNAUER Technical Support or any com- pany authorized by KNAUER only. Signal Words Possible dangers related to the device are divided into personal and material damage in this user manual. -
Page 13: Symbols And Signs
Symbols and Signs Decontamination Report Devices without a completed Decontamination Report will not be repaired. If you would like to return a device to KNAUER, make sure to enclose a com- pleted Decontamination Report with the device: http://www.knauer.net/ en/downloads/service.html Symbols and Signs... -
Page 14: Location Requirements
Installation Location Requirements Only if the requirements for ambient conditions of the operating environ- ment are met, can the intended use be ensured. Details on the operating conditions can be found in the Technical Data section. Device defect The device overheats at exposure to sunlight and insufficient air circulation. Device failures are very likely. -
Page 15: Capillaries And Fittings
Installation Tools Utility knife Bruising danger Damage to the device by carrying or lifting it on protruding housing parts. The device may fall and thus cause injuries. Lift the device only centrally on the side of the housing. Process 1. -
Page 16: Integrating The Pump Into An Hplc Flow System
Installation Color Material Inner Diameter red marker stainless steel 0.1 mm blue marker stainless steel 0.25 mm black marker stainless steel 0.45 mm red stripe PEEK 0.1 mm blue stripes PEEK 0.25 mm orange stripes PEEK 0.5 mm Note: PEEK capillaries are not suitable for use with pure acetonitrile. Aceto- nitrile can cause capillaries to crack or rupture. -
Page 17: Connecting The Pump Head To The Solvent
Installation Connecting the Pump Head to the Solvent Prerequisites The device has been switched off. The power plug has been pulled. The front cover has been removed. material flangeless fitting Device defect The pump head can get damaged when the inlet and outlet are blocked. ... -
Page 18: Connecting The Degasser
Installation Every pump head can operate with two different solvents. Both solvents are connected with the Solvent Selectionvalve . The solvents are conveyed into one pump head each and combined in the pressure sensor. The pres- sure sensor is connected to the mixer. The mixer is connected to the HPLC system. -
Page 19: Quaternary Pump
Installation Prerequisites The device has been switched off. The power plug has been pulled. The front cover has been removed. material Flangeless fitting Procedure Process Figure 1. Connect the tubing from the four solvent bottles to the inlets A1, A2 and B1, B2. -
Page 20: Connecting The Pump Head To The Solvent
Installation Connecting the Pump Head to the Solvent Prerequisites The device has been switched off. The power plug has been pulled. The front cover has been removed. Material Flangeless fitting Device defect The pump head can get damaged when the inlet and outlet are blocked. ... -
Page 21: Connecting The Valve Block
Installation Procedure Process Figure 1. Connect the tubing from the four solvent bottles to the inlets A, B, C, and D of the degasser (see 2. Seal inlets not in use with cap fittings. Fig. 15 4-channel degasser with valve block Next Steps Integrate the pump into the HPLC flow system. -
Page 22: Connecting The Leak Management
Installation Procedure Process Figure 1. Plug one silicone tube onto the inlet of the flush pump and connect to the flushing solution bottle. 2. Plug a second silicone tube onto a vacant capillary connector of the flush pump and connect to the flushing solution bottle. -
Page 23: Control
Installation Process Process Figure 5. For the bottom device, push the short end of the nozzle into the opening in the collection point of the leak tray. 6. Connect the hose to the nozzle and lead the second ending to the waste bottle. -
Page 24: Connecting The Cables
Installation Prerequisite In Windows, power saving, hibernation, standby, and screen saver must be deactived. In case you use an USB-to-COM box, the option "Allow the computer to turn off ths device to save power" in the devicemanager must be deacti- vated for all USB hosts. -
Page 25: Integrating The Lan Into A Company Network
Installation 4. In the router configuration, check the IP address range and make changes if necessary. Result Once the router has assigned IP addresses to all devices, the chromatogra- phy software can be used to remotely control the system. Integrating the LAN into a Company Network A network administrator can integrate the LAN into your company network. -
Page 26: Pin Header Connectors
Installation 4. Enter the IP address into the text box IP Address 5. If necessary, change the subnet mask and the gateway 6. Click in the top right corner. 7. Restart the device. Next steps In case necessary, go back to the original setting with the [Reset] button that can be found under Settings >... - Page 27 Installation Signal Explanation Start OUT TTL Output Levels: passive 5 V active 0 V Start IN TTL Input Low active Secure switching threshold at least 10 mA After receiving a signal (short-circuit to ground) from an external device, the device starts. If con- trolled with software, an electronic trigger is send through the LAN.
-
Page 28: Events Connector
Installation Legend Display Events terminal strip Fig. 24 Events Remote Connector Assignment connection Function 1TTL TTL Output Levels: passive 0 V active 5 V Pulse: 5 V for at least 1000 ms 2TTL TTL Output Levels: passive 0 V ... -
Page 29: Connecting Cables To The Terminal Strip
Installation Assignment connection Function 5TTL TTL Output Levels: passive 0 V active 5 V Pulse: 5 V for at least 1000 ms TTL-compatible output Levels: passive 5 V active 0 V Pulse: 5 V for at least 1000 ms Reference point of the voltage at the signal inputs. -
Page 30: Analog Control
Only the supplied power cable is to be used to connect the device to the power supply. Replace defective power cables only with accessories from KNAUER. Only use power cables with a permission for use in your country. Power Plug Make sure that the power plug on rear of the device is always accessible, so that the device can be disconnected from the power supply. -
Page 31: Pump Head
If the device is part of an HPLC system, you should also note the following: The network connection to the router is established The chromatography software has been installed by KNAUER or a com- pany authorized by KNAUER. The capillaries have been connected. -
Page 32: Switch-On
Operation Procedure Process Figure 1. Open the venting screw of the pressure sensor. 2. With the syringe, extract fluid through the bleed port Fig. 25 Venting screw of the pressure sensor Next Steps Start the pump using the software (option: Purge) with a medium flow rate (50 % of the maximum flow). -
Page 33: Operating With Mobile Control
Operation Devices can be controlled with e. g. OpenLAB EZChrom edition version A.04.05 or higher or ClarityChrom version 5.0.2 or higher. You find a detailed description on chromatography software in a corresponding user manual. Operating with Mobile Control The Mobile Control is an app which can be installed on your computer or tablet. -
Page 34: Functional Tests Iq And Oq
Functional Tests IQ and OQ Installation Qualification The customer may request the Installation Qualification, which is free of charge. In case of a request, the Technical Support of KNAUER or from a (IQ) provider authorized by KNAUER performs this functionality test during the installation. -
Page 35: Troubleshooting
Troubleshooting Troubleshooting First Measures 1. Check all cabling. 2. Check all screw fittings. 3. Check whether air has gotten into the supply lines. 4. Check device for leaks. 5. Pay attention to system messages. Go through the following steps, in case no connection between the com- puter and the devices can be established. -
Page 36: System Messages
Troubleshooting Pump does not Purge the pump head to remove the air bub- transport solvent bles. Clean the check valves. Exchange the check valves. If the pump head seals are defective, solvent enters the piston backflushing; inform the technical support. - Page 37 Troubleshooting System message "Cannot operate Create a link. with an empty link" "Cannot purge End method and start purging. during the run" "Cannot read data Switch the device off and on. Inform the technical from FRAM" support in case the system message repeats. "Cannot start time Check the data on the device's display or in the table"...
- Page 38 Troubleshooting System message “Leak was detected” Switch off the device. Remove the leak and start the device afterwards. "Line in time table is Edit the program line. empty" "Link is running" Wait until the link has been completed, then change the link or delete it. ...
- Page 39 Troubleshooting System message "Program does not Create and edit a program. exist, please edit the program number" "Program is running" Quit program or wait until program has been completed. "Pump head type: Switch the device off and on head data uninitial- ...
-
Page 40: Maintenance And Care
Opening the Module The device may only be opened by the KNAUER Technical Support or any company authorized by KNAUER. Electronic defect Performing maintenance tasks on a switched on device can cause damage to the device. -
Page 41: Cleaning And Caring For The Device
Maintenance and Care Operating Hours Measures 1000 Check the torque of the screw fittings Clean the pistons of the pump Check the check valves of the pump head 5000 Replace all seals Clean the check valves of the pump head ... -
Page 42: Putting The Pump Out Of Operation
Maintenance and Care Device defect Residuals chemicals can damage the pump head if they are not being removed before storage. For reuse, flush the pump head and fill it with isopropanol. Before storage, seal the inlets and outlets with cap fittings. Auxiliary Material flushing solution, silicone tubing Procedure... -
Page 43: Disconnecting The Power Supply
Maintenance and Care The device can be stored under the following ambient conditions: temperature range 4-40 °C (39.2-104 °F) air humidity below 90 %, non-condensing Disconnecting the Power Supply Prerequisites The device has been switched off. Procedure Process 1. - Page 44 Maintenance and Care Device defect Residuals chemicals can damage the pump head if they are not being removed before storage. For reuse, flush the pump head and fill it with isopropanol. Before storage, seal the inlets and outlets with cap fittings. Component defect Damage to the pistons if they tilt.
-
Page 45: Check Valves
Maintenance and Care Next Steps Maintain the check valves or install a new pump head. Check Valves Clogged check valves do not open and close properly. They cause pressure fluctuations and irregular flow. If it is impossible to clean the check valves, replace the whole unit. -
Page 46: Inline Filter On The Pressure Sensor
Maintenance and Care Normal phase Insert the check valves in the direction of the flow. The arrow on the check valve points upward. Prerequisites The check valves have dried. Component defect Damaging the threads of components caused by overtightened fittings. Pay attention to the torque values. -
Page 47: Inserting The New Inline Filter Cartridge
Maintenance and Care Procedure Process Figure 3. Loosen the fitting of the inline filter with the open-end wrench (size 13) and remove- manually. 4. Remove clogged inline filter car- tridge. Fig. 33 Loosen the screw fitting of the inline filter cartridge Next Steps Insert the new inline filter cartridge. -
Page 48: Replacing The Mixer
Maintenance and Care Replacing the Mixer A clogged mixer can cause pressure fluctuations and irregular flow. The mixer is replaced completely as an assembly. Voraussetzung The mixer has been rinsed with isopropanol. The sealing plugs are on site. ... -
Page 49: Technical Data
Technical Data Technical Data P 6.1L General Data Main Features Solvent conveyance Variants Isocratic HPLC pump Quaternary low-pressure gradient pump Binary high-pressure gradient pump Delivery system Dual-piston pump Pulsation compensation Active pressure and pulsation compensation Pulsation < 2 % Amplitude (typically: < 1,3 %) or <... -
Page 50: Communication
Technical Data Communication Interfaces Pin header connectors (Analog IN, Start IN, Error IN) Control Analog and event control Mobile Control Analog input 0-10 V Analog control input Flow rate Level / event outputs 8 event outputs (TTL, OC, Relais) and 24 V programming 19 programs, 9 program links, 1 WAKE UP program... -
Page 51: P 6.1L Binary
Technical Data P 6.1L binary Setup Pump type Binary analytical HPLC pump with degasser Pump Head Versions 5 ml/min stainless steel 10 ml/min stainless steel 10 ml/min ceramic 10 ml/min for stainless steel for Normal Phase applications degasser 2 channels Solvent selection valve 2 x 2 channels Weight... -
Page 52: Pump Heads
Technical Support in case there are any questions on spare parts or accessories. Further Information Further information on spare parts and accessories can be found online: www.knauer.net Devices Name Order num- P 6.1L isocratic with 10 ml stainless steel pump head APH30EA P 6.1L isocratic with 10 ml stainless steel pump head for... -
Page 53: Accessories And Spare Parts
Repeat Orders Name Order num- P 6.1L isocratic with 50 ml stainless steel pump head for APH30FD Normal Phase P 6.1L isocratic with 10 ml ceramic pump head APH60EB P 6.1L isocratic with 50 ml ceramic pump head APH60FB P 6.1L binary with 10 ml stainless steel pump head, APH35EA degasser and mixer (100 μl) P 6.1L binary with 10 ml stainless steel pump head for... - Page 54 Repeat Orders Name Order num- Pump head, 50 ml, stainless steel AHC20 Pump head 50 ml, stainless steel for Normal Phase AHC20BA Pump head, 50 ml, ceramic AHC22 Check valves Check valve unit for AZURA 5, 10 ml pump head, ruby G0924B sapphire Check valve unit for AZURA 5, 10 ml pump head, nor-...
-
Page 55: Legal Information
packaging and transport damage In the event of device malfunctions, directly contact the manufacturer. KNAUER Wissenschaftliche Geräte GmbH Hegauer Weg 38 14163 Berlin, Germany Phone: +49 30 809727-111... -
Page 56: Warranty Seal
2001), old devices manufactured by KNAUER are marked as waste electrical and electronic equipment: 160214. WEEE Registration KNAUER as a company is registered by the WEEE number DE 34642789 in the German "Elektroaltgeräteregister" (EAR). The number belongs to cate- gory 8 and 9, which, among others, comprise laboratory equipment. - Page 57 HPLC Glossary Term Definition Gradient Time-dependent composition of solvent (mobile phase) on low-pressure or high-pressure side of system LPG pump Pump configured to generate a gradient on the high-pressure side. Usu- ally a binary pump with two separate pump units which each convey one solvent.
-
Page 58: Index
Index Index additives High-pressure side ambient conditions HPLC Analog port AVV marking Inline Filter Removing Binary pump Inline filter cartridge inserting. reorder Cap fitting installation capillary site fitting pre-installed Isocratic pump Check valve cleaning installing label removing chromatogram port clean problems Computer router... - Page 59 Index PMax Mode Screw fittings port (LAN) torque power Service Interface disconnect software plug solvent power cable flammability power strip line power supply self-ignition point connect tray Pressure sensor Solvent bottles professional group connecting Pump Solvent selection valve bio-inert space requirements bleeding standby Flushing...
- Page 60 Latest manuals online: www.knauer.net/downloads www.knauer.net HPLC · SMB · Osmometry KNAUER Phone: +49 30 809727-0 Wissenschaftliche Geräte GmbH Fax: +49 30 8015010 Hegauer Weg 38 e-Mail: info@knauer.net 14163 Berlin Internet: www.knauer.net © KNAUER 2017...
Need help?
Do you have a question about the Azura P 6.1L and is the answer not in the manual?
Questions and answers