
Related Manuals for Baileigh Industrial BR-16E-36LT


Summary of Contents for Baileigh Industrial BR-16E-36LT
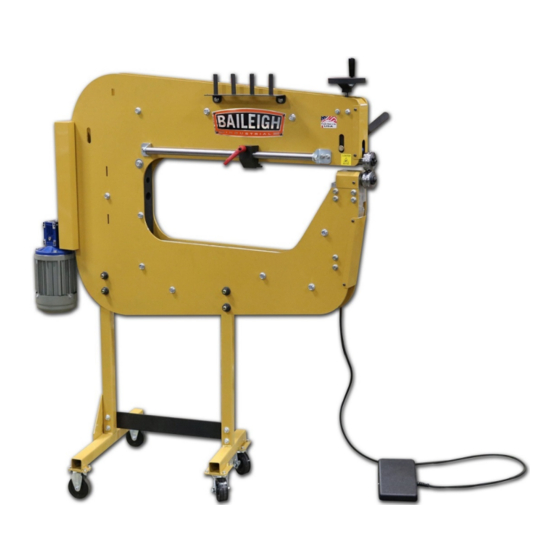
- Page 1 OPERATOR’S MANUAL LOWER THROAT METAL BEAD ROLLER MODEL: BR-16E-36LT (B8680) Rev. 12/2016 © 2016 Baileigh Industrial, Inc.
-
Page 2: Table Of Contents
Table of Contents INTRODUCTION ......................1 GENERAL NOTES ......................1 SAFETY INSTRUCTIONS ....................2 SAFETY PRECAUTIONS ....................4 Dear Valued Customer: ....................4 TECHNICAL SPECIFICATIONS ..................6 UNPACKING AND CHECKING CONTENTS ..............7 Cleaning ........................7 TRANSPORTING AND LIFTING ..................8 INSTALLATION ....................... -
Page 3: Introduction
INTRODUCTION The quality and reliability of the components assembled on a Baileigh Industrial machine guarantee near perfect functioning, free from problems, even under the most demanding working conditions. However if a situation arises, refer to the manual first. If a solution cannot be found, contact the distributor where you purchased our product. -
Page 4: Safety Instructions
Note: This symbol refers to useful information throughout the manual. IMPORTANT PLEASE READ THIS OPERATORS MANUAL CAREFULLY It contains important safety information, instructions, and necessary operating procedures. The continual observance of these procedures will help increase your production and extend the life of the equipment. SAFETY INSTRUCTIONS LEARN TO RECOGNIZE SAFETY INFORMATION This is the safety alert symbol. - Page 5 SAVE THESE INSTRUCTIONS. Refer to them often and use them to instruct others. PROTECT EYES Wear safety glasses or suitable eye protection when working on or around machinery. PROTECT AGAINST NOISE Prolonged exposure to loud noise can cause impairment or loss of hearing.
-
Page 6: Safety Precautions
SAFETY PRECAUTIONS Metal working can be dangerous if safe and proper operating procedures are not followed. As with all machinery, there are certain hazards involved with the operation of the product. Using the machine with respect and caution will considerably lessen the possibility of personal injury. However, if normal safety precautions are overlooked or ignored, personal injury to the operator may result. - Page 7 7. Dressing material edges. Always chamfer and deburr all sharp edges. 8. Do not force tool. Your machine will do a better and safer job if used as intended. DO NOT use inappropriate attachments in an attempt to exceed the machines rated capacity. 9.
-
Page 8: Technical Specifications
TECHNICAL SPECIFICATIONS This bead roller is power driven and will form sheet metal up to 16 Gauge thickness mild steel (or equivalent). Available die sets allow for the following operations to be performed: wiring, edging, ogee bead, single bead, and elbow edging. Capacity, Mild Steel 16ga. -
Page 9: Unpacking And Checking Contents
UNPACKING AND CHECKING CONTENTS Your Baileigh machine is shipped complete. Separate all parts from the packing material and check each item carefully. Make certain all items are accounted for before discarding any packing material. WARNING: SUFFOCATION HAZARD! Immediately discard any plastic bags and packing materials to eliminate choking and suffocation hazards to children and animals. -
Page 10: Transporting And Lifting
TRANSPORTING AND LIFTING IMPORTANT: Lifting and carrying operations should be carried out by skilled workers, such as a truck operator, crane operator, etc. If a crane is used to lift the machine, attach the lifting chain carefully, making sure the machine is well balanced. Follow these guidelines when lifting with truck or trolley: •... -
Page 11: Installation
INSTALLATION IMPORTANT: Consider the following when looking for a suitable location to place the machine: • Overall weight of the machine. • Weight of material being processed. • Sizes of material to be processed through the machine. • Space needed for auxiliary stands, work tables, or other machinery. •... -
Page 12: Electrical
ELECTRICAL CAUTION: HAVE ELECTRICAL UTILITIES CONNECTED TO MACHINE BY A CERTIFIED ELECTRICIAN! Check if the available power supply is the same as listed on the machine nameplate. WARNING: Make sure the grounding wire (green) is properly connected to avoid electric shock. DO NOT switch the position of the green grounding wire if any electrical plug wires are switched during hookup. - Page 13 • Improper connection of the equipment-grounding conductor can result in risk of electric shock. The conductor with insulation having an outer surface that is green with or without yellow stripes is the equipment-grounding conductor. If repair or replacement of the electric cord or plug is necessary, do not connect the equipment-grounding conductor to a live terminal.
-
Page 14: General Bead Rolling
GENERAL BEAD ROLLING The primary purpose is to “roll form” into sheet metal, primarily “Beads”. A multitude of tools are available for just about any profile you can think of. Bead rolling is both functional and artistic. The functional portion of this operation will add strength and rigidity to sheet material. The artistic portion will add aesthetic appeal to the design. -
Page 15: Operation
OPERATION CAUTION: Always wear proper eye protection with side shields, safety footwear, and leather gloves to protect from burrs and sharp edges. CAUTION: Keep hands and fingers clear of the rolling dies. Be aware of how the material moves as it is being formed. Normally the operator should stand in front of the bead roller to avoid getting hit with the material as it is being formed. - Page 16 4. Set the back gauge as desired to assist in positioning the material between the dies. This also assists in repeatability. 5. The quick release (B) is very handy because it will always return to the same depth setting. 6. When the material is positioned as desired, closed the quick release handle to close the gap between the rolls to start to impress the rolls...
-
Page 17: Offsetting The Rolls
Offsetting the Rolls The top shaft and roll assembly has the ability to be offset from the bottom roll from -.375” (9.5mm) to +2.125” (54mm). This will allow the rolls to offset to allow for material thickness is rolls like step rolls, or offset to allow for experimentation with various end results based upon the rolls being in different positions relative to the lower roll. -
Page 18: Support Tray
Support Tray 1. When not in use, the support tray may be stored in the slot (A) located in the upper back corner of the frame. It may be installed into the storage slot from either side. 2. Loosen the lock lever and insert the mounting bar into the lower bearing block while guiding the support plate over and around rolls. -
Page 19: Material Selection
MATERIAL SELECTION CAUTION: It must be determined by the customer that materials being processed through the machine are NOT potentially hazardous to operator or personnel working nearby. When selecting materials keep these instructions in mind: • Material must be clean and dry. (without oil) •... -
Page 20: Lubrication And Maintenance
LUBRICATION AND MAINTENANCE WARNING: Make sure the electrical disconnect is OFF before working on the machine. Maintenance should be performed on a regular basis by qualified personnel. Always follow proper safety precautions when working on or around any machinery. Note: Proper maintenance can increase the life expectancy of your machine. •... -
Page 21: Optional Tooling Available
OPTIONAL TOOLING AVAILABLE Part Number Description BR18E - .090" STEP ROLL .090" Step Roll Set BR18E - .090" STEP ROLL-NYLON Nylon .090" Step Roll Set BR18E - 1" FLAT BEAD 1" Flat Bead Roll Set BR18E - 1" FLAT BEAD-NYLON Nylon 1"... - Page 22 Part Number Description BR18E - 3/32" STEP ROLL NYLON Nylon 3/32" Step Roll Set BR18E - 3/4" FLAT BEAD 3/4" Flat Bead Roll Set BR18E - 3/4" FLAT BEAD-NYLON Nylon 3/4" Flat Bead Roll Set BR18E - 3/4" ROUND BEAD 3/4"...
-
Page 23: Frame Assembly
FRAME ASSEMBLY... -
Page 24: Shaft Housing Assembly
SHAFT HOUSING ASSEMBLY... -
Page 25: Lower Shaft Assembly
LOWER SHAFT ASSEMBLY... -
Page 26: Cam Housing Assembly
CAM HOUSING ASSEMBLY... -
Page 27: Intermediate Shaft Assembly
INTERMEDIATE SHAFT ASSEMBLY... -
Page 28: Top Shaft Assembly
TOP SHAFT ASSEMBLY... -
Page 29: Bearing Block Assembly
BEARING BLOCK ASSEMBLY... -
Page 30: Fence Assembly
FENCE ASSEMBLY... -
Page 31: Parts List
Parts List Item Part Number Description Qty. BR16-6A006 LH Cam Housing Side Frame BR16-6A007 RH Cam Housing Side Frame BR16-6A008 Cam Housing BR16-7A003 BR16-7A008 Guide Roller BR16-7A014 Roller Shaft BR16-6A005 Cam Housing Block BR16-6A003 Adjustment Block BR16-6A001-V2 Rh Side Frame PP-0196 0.5 ID x 0.625 OD x 0.562 LG BR16-5A006... - Page 32 Item Part Number Description Qty. BR16-6A038 Table BS-0283 .375-16 x 2.0 Stud BR16-7A017 Roller BR16-6A002-V2 RH Side Frame BR16-6A033 Stand Spacer BR16-6A013 Controller Bracket PP-1720 KBMA Controller BR16-6A025-V2 Rear Chain Guard BR16-7A006 Gear Spacer PB24-7A038 Guard Spacer BR16-6A019 Lower Front Guard BR16-6A045 Upper Sprocket Guard BR16-6A044...
- Page 33 Item Part Number Description Qty. PP-0133 Black Ball Knob PP-1738 .3125-24 Female Rod End PP-1737 .3125-24 Male Rod End BR16-5A009 Rear Stand BR16-5A010 Front Stand PP-0048-2 4.0 Inch Caster BR16-5A002 Tool Holder BR16-5A011 Table Mount M8 X 1.25 X 20 Hex Flange M10 X 1.5 X 25 Hex Flange...
- Page 34 Item Part Number Description Qty. PP-1733 1.0 ID x 1.125 OD x 1.0 Bushing M8 X 1.25 X 16 FHCS PP-0037 1/2" Clamp Collar BR16-7A034 Cam Housing Washer 1/4-20 X 3/8 Set Screw M6 X 1.0 X 25 SHCS BR15-5A003 Roller Table STD.
- Page 35 NOTES...
- Page 37 General Machinery Safety Instructions Machinery House requires you to read this entire Manual before using this machine. 1. Read the entire Manual before starting 14. Use correct amperage extension cords. machinery. Machinery may cause serious injury if Undersized extension cords overheat and lose not correctly used.
- Page 38 Swage & Jenny Machine Safety Instructions Machinery House requires you to read this entire Manual before using this machine. 1. Maintenance. 11. Work area hazards. Make sure the Swage & Jenny is Keep the area around the turned off and disconnect from the main power Swage &...
Need help?
Do you have a question about the BR-16E-36LT and is the answer not in the manual?
Questions and answers