Table of Contents
Advertisement
Quick Links
Advertisement
Table of Contents

Related Manuals for Eaton Remote Power Panel


Summary of Contents for Eaton Remote Power Panel
- Page 1 ® Eaton Remote Power Panel (RPP) User’s Guide...
- Page 3 ® Eaton Remote Power Panel (RPP) User’s Guide...
- Page 4 Fire Protection Association, Inc. Phillips is a registered trademark of the Phillips Screw Company. All other trademarks are property of their respective companies. Copyright20102019 Eaton Corporation, Raleigh, NC, USA. All rights reserved. No part of this document may be reproduced in any way without the express written approval of Eaton Corporation.
- Page 5 2.0 FIRMWARE LICENSE 2.1 Ownership. Eaton or its third party licensors retains all title, copyright and other proprietary rights in, and ownership of the Firmware regardless of the media upon which the original or any copy may be recorded or fixed.
- Page 6 5.0 GENERAL PROVISIONS 5.1 Update Policy. Eaton may from time to time, but has no obligation to, create Updates of the Firmware or components thereof. 5.2 Limitation on Liability. NOTWITHSTANDING ANY PROVISION OF THIS AGREEMENT TO THE CONTRARY, LICENSEE EXPRESSLY UNDERSTANDS AND AGREES THAT EATON, ITS AFFILIATES, AND ITS LICENSORS, WILL NOT BE LIABLE FOR: (A) ANY DIRECT, INDIRECT, INCIDENTAL, SPECIAL, CONSEQUENTIAL OR EXEMPLARY DAMAGES WHICH MAY BE INCURRED BY LICENSEE OR ANY THIRD PARTY, HOWEVER CAUSED AND UNDER ANY THEORY OF LIABILITY.
- Page 7 5.13 Confidentiality. Licensee acknowledges that confidential aspects of the Firmware (including any proprietary source code) are a trade secret of Eaton, the disclosure of which would cause substantial harm to Eaton that could not be remedied by the payment of damages alone and such confidential aspects of the Firmware shall not be disclosed to third parties without the prior written consent of Eaton.
- Page 8 Special Symbols The following are examples of symbols used on the product to alert you to important information: RISK OF ELECTRIC SHOCK - Observe the warning associated with the risk of electric shock symbol. CAUTION: REFER TO OPERATOR'S MANUAL - Refer to your operator's manual for additional information, such as important operating and maintenance instructions.
-
Page 9: Table Of Contents
SPECIFICATIONS ..................Eaton Remote Power Panel (RPP) User’s Guide 164202125—Rev 5... - Page 10 WARRANTY ................... Eaton Remote Power Panel (RPP) User’s Guide 164202125—Rev 5...
- Page 11 Figure 25. Cooper Bussmann Panel Spare Fuse Compartment ..........Eaton Remote Power Panel (RPP) User’s Guide 164202125—Rev 5...
- Page 12 List of Figures This page intentionally left blank. Eaton Remote Power Panel (RPP) User’s Guide 164202125—Rev 5 www.eaton.com/powerquality...
- Page 13 Table 21. SPD ..................Eaton Remote Power Panel (RPP) User’s Guide 164202125—Rev 5...
- Page 14 List of Tables This page intentionally left blank. Eaton Remote Power Panel (RPP) User’s Guide 164202125—Rev 5 www.eaton.com/powerquality...
-
Page 15: Introduction
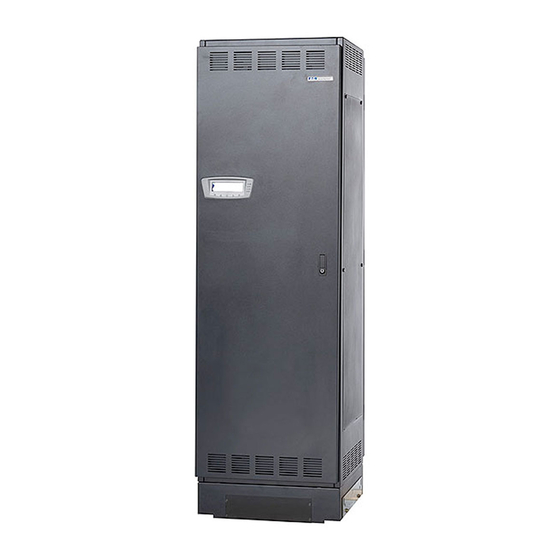
Introduction ® The Eaton Remote Power Panel (RPP) is designed to provide increased distribution capacity in a small, compact cabinet without the need for costly electrical rework. Providing outstanding performance and reliability, the Eaton unique benefits include the following: 208V, 60 Hz or 400V, 60Hz power distribution unit, delivering up to 168 branch breakers Available in a small footprint design for limited space applications or a large footprint design to line up and match with other data center product. -
Page 16: Figure 1. Small Or Large Rpp (Front View)
Optional surge protection with Surge Protective Device (SPD) Easy conversion to isolated ground by the customer. Figure 1 shows an RPP. Figure 1. Small or Large RPP (Front View) Eaton Remote Power Panel (RPP) User’s Guide 164202125—Rev 5 www.eaton.com/powerquality... -
Page 17: Safety Warnings
IMPORTANT SAFETY INSTRUCTIONS SAVE THESE INSTRUCTIONS This manual contains important instructions that should be followed during installation and maintenance of the Eaton Remote Power Panel (RPP). Please read all instructions before operating the equipment and save this manual for future reference. - Page 18 Safety Warnings This page intentionally left blank. Eaton Remote Power Panel (RPP) User’s Guide 164202125—Rev 5 www.eaton.com/powerquality...
-
Page 19: Installation
To file a claim for shipping damage or concealed damage: 1) File with the carrier within 15 days of receipt of the equipment; 2) Send a copy of the damage claim within 15 days to an Eaton service representative. Tools Required... -
Page 20: Checking The Accessory Kit
Checking the Accessory Kit Verify that the following items are included inside the Remote Power Panel (RPP) cabinet: Note: To open a door, press the key insert to release the handle, turn the handle in either either direction and swing the door open. -
Page 21: Figure 2. Small Rpp Bottom View
Lower each leveling foot until it makes firm contact with the floor. The cabinet is now stable and in place. Leveling Foot (4 Places) Caster (4 Places) [22.0] [24.0] Front [17.0] [3.5] [24.0] Dimensions are in millimeters [inches] Figure 2. Small RPP Bottom View Eaton Remote Power Panel (RPP) User’s Guide 164202125—Rev 5 www.eaton.com/powerquality... -
Page 22: Figure 3. Large Rpp Bottom View
Installation Leveling Foot (4 Places) Caster (4 Places) 272.3 [10.7] [39.0] [17.0] [3.5] [24.0] Front Dimensions are in millimeters [inches] Figure 3. Large RPP Bottom View Eaton Remote Power Panel (RPP) User’s Guide 164202125—Rev 5 www.eaton.com/powerquality... -
Page 23: Installing The Rpp
Disconnect the ground strap near the bottom of the interior barrier and pull the barrier toward you. Place the barriers in a safe area away from the cabinet to prevent injury or damage to the RPP or personnel. Figure 4. Unfastening an Interior Barrier Eaton Remote Power Panel (RPP) User’s Guide 164202125—Rev 5 www.eaton.com/powerquality... -
Page 24: Wiring Input And Output Power
18 or Figure 10 on page 19) to the input ground terminal for each input and run a separate wire to the chassis ground terminal located on the bottom of the unit. Rearrange or remove the entry plates at the top or bottom of the cabinet as needed. Eaton Remote Power Panel (RPP) User’s Guide 164202125—Rev 5 www.eaton.com/powerquality... -
Page 25: Figure 5. Rpp Layout
Distribution Panel Breaker 42-Circuit Distribution Panel Branch Circuit Breakers Output Neutral Output Ground Current Transformers (CTs) (left and right strips) Optional SPD Casters and Leveling Feet Figure 5. RPP Layout Eaton Remote Power Panel (RPP) User’s Guide 164202125—Rev 5 www.eaton.com/powerquality... -
Page 26: Figure 6. Rpp Layout - Cooper Bussmann Panel
Current Transformers (CTs) (one row each side) Branch Fuses and Disconnect Switches Output Ground Output Neutral Optional SPD Casters and Leveling Feet Figure 6. RPP Layout – Cooper Bussmann Panel Eaton Remote Power Panel (RPP) User’s Guide 164202125—Rev 5 www.eaton.com/powerquality... -
Page 27: Table 1. Rpp Main Input Feed Conductor Coding And Termination (208V And 400V)
Single MLO N (White) Neutral 6 – #2–600MCM 56 (500) G (Green) Ground 2 – #14–1/0 5.6 (50) Isolated Ground G (Green) Isolated Ground 1 – #6–300MCM 31 (275) (if applicable) Eaton Remote Power Panel (RPP) User’s Guide 164202125—Rev 5 www.eaton.com/powerquality... -
Page 28: Table 2. Conductor Sizing Load Rating (80% Rated Breakers)
(3/0) 225A Four Panelboards 208V 180A 900A Neutral 126mm (250) Single MLO 400V Ground 34mm (1/0) NOTE: Wire sizes are based on NEC 2008 Table 310.16 using 90° copper conductors. Eaton Remote Power Panel (RPP) User’s Guide 164202125—Rev 5 www.eaton.com/powerquality... -
Page 29: Table 3. Conductor Sizing Load Rating (100% Rated Breakers)
(3/0) Two Panelboards 200A 100% 200A 200A Neutral 85mm (3/0) Single MLO 400V Ground 21mm (#4) NOTE: Wire sizes are based on NEC 2008 Table 310.16 using 90° copper conductors. Eaton Remote Power Panel (RPP) User’s Guide 164202125—Rev 5 www.eaton.com/powerquality... -
Page 30: Figure 7. Wiring The Input Connections (Each Side) For Single Or Dual Mlo Rpp
Ground For chassis and isolatd ground Neutral connections, see Figure 9 on Ground CT page 18. Figure 7. Wiring the Input Connections (each side) for Single or Dual MLO RPP Eaton Remote Power Panel (RPP) User’s Guide 164202125—Rev 5 www.eaton.com/powerquality... -
Page 31: Figure 8. Wiring Input Connections (Each Side) For Direct Connect Rpp
(one per phase) Neutral (bottom panel) Ground For chassis and isolatd ground connections, see Figure 10 on page 19. Ground CT Figure 8. Wiring Input Connections (each side) for Direct Connect RPP Eaton Remote Power Panel (RPP) User’s Guide 164202125—Rev 5 www.eaton.com/powerquality... -
Page 32: Figure 9. Isolated Ground Connections (Each Side) For Single Or Dual Mlo Rpp
Chassis Ground Terminal Note: Small RPP shown. Connections are the same for the Large RPP Figure 9. Isolated Ground Connections (each side) for Single or Dual MLO RPP Eaton Remote Power Panel (RPP) User’s Guide 164202125—Rev 5 www.eaton.com/powerquality... -
Page 33: Figure 10. Isolated Ground Connections (Each Side) For Direct Connect Rpp
Chassis Ground Terminal Note: Small RPP shown. Connections are the same for the Large RPP Figure 10. Isolated Ground Connections (each side) for Direct Connect RPP Eaton Remote Power Panel (RPP) User’s Guide 164202125—Rev 5 www.eaton.com/powerquality... -
Page 34: Figure 11. Wiring The Cts (For Ems Premium Metering Only)
(CT) opposite the breaker terminal to the breaker lug. Use care when bending and routing the wires through the CTs. See Figure 11. Circuit Breakers Figure 11. Wiring the CTs (for EMS Premium Metering Only) Eaton Remote Power Panel (RPP) User’s Guide 164202125—Rev 5 www.eaton.com/powerquality... -
Page 35: Table 5. Torque Specifications
31.1 Nm (275 lb in) NOTE: Use 50 lb in for 3-#10 conductors. 3/8” 42.4 Nm (375 lb in) 1/2” 56.5 Nm (500 lb in) 9/16” 67.8 Nm (600 lb in) Eaton Remote Power Panel (RPP) User’s Guide 164202125—Rev 5 www.eaton.com/powerquality... -
Page 36: Figure 12. Wiring The Output Connections (Each Side)
Installation Top Entry Wiring Breaker Ground Neutral Breaker Breaker Ground Neutral Breaker Bottom Entry Wiring Figure 12. Wiring the Output Connections (each side) Eaton Remote Power Panel (RPP) User’s Guide 164202125—Rev 5 www.eaton.com/powerquality... -
Page 37: Figure 13. Wiring The Output Connections - Cooper Bussmann Panel (Each Side)
Current Transformers (CTs) (one row each side) Branch Fuses and Disconnect Switches Output Neutral Output Ground Bottom Entry Wiring Figure 13. Wiring the Output Connections – Cooper Bussmann Panel (each side) Eaton Remote Power Panel (RPP) User’s Guide 164202125—Rev 5 www.eaton.com/powerquality... -
Page 38: Shunt Trip And Auxiliary Contact Interface Connections
Connect the wiring. See Figure 15 for terminal assignments and Table 7 for termination requirements. Optional Aux and Shunt Trip Terminal Block for Main Breaker. See Figure 15 for details. Figure 14. Shunt Trip and Auxiliary Contact Terminal Location (each side) Eaton Remote Power Panel (RPP) User’s Guide 164202125—Rev 5 www.eaton.com/powerquality... -
Page 39: Initial Startup
Remove any foreign objects from the interior of the unit. Note: Verify that intake and exhaust air screens are clean and free of obstruction. Complete the installation checklist (see 27). Turn on utility power to the RPP. Eaton Remote Power Panel (RPP) User’s Guide 164202125—Rev 5 www.eaton.com/powerquality... -
Page 40: Replacing The Interior Barriers, Side Panels, And Doors
Phase Voltages Breaker Turn on the panelboard circuit breaker(s). If the breaker trips within one minute, contact your Eaton service representative for assistance. Note: The control circuit is energized when the panelboard breaker is tripped or off. 10. EMS option only. Verify that the On indicator is illuminated. -
Page 41: Completing The Installation Checklist
Adequate workspace exists around the RPP. Adequate lighting is provided around the RPP. A 120V service outlet is located within 7 .5m (25 ft) of the RPP. Eaton Remote Power Panel (RPP) User’s Guide 164202125—Rev 5 www.eaton.com/powerquality... - Page 42 Installation This page intentionally left blank. Eaton Remote Power Panel (RPP) User’s Guide 164202125—Rev 5 www.eaton.com/powerquality...
-
Page 43: Operation
Chapter 4 Operation This chapter describes how to use the Eaton Remote Power Panel (RPP), including front panel operation, initial configuration, and startup and shutdown. Control Panel Functions The RPP with the Energy Management System (EMS) option has a five-button graphical LCD with backlight (see Figure 16). -
Page 44: Ems Meter Levels
Branch circuit monitoring Display Functions The LCD displays the Eaton logo. Press any button to activate the mimic screen and menu options (see Figure 17). The mimic screen shows a real-time graphical representation of the operating status of the system. -
Page 45: Table 9. Menu Map For Display Functions
(utility frequency) (V1, V2, V3, I1, I2, I3) Input Crest Ratio (in percent) of the peak to RMS of the input currents (I1, I2, I3) Input KWH Total power (KWH/m, KWH/y, KWHt) Eaton Remote Power Panel (RPP) User’s Guide 164202125—Rev 5 www.eaton.com/powerquality... -
Page 46: Setup Options
EATON RPP Reset All Lower Level Passwords Reset the System Setup Level 1 password to the default setting None * Minimum System Setup Level required to access the setup option. Eaton Remote Power Panel (RPP) User’s Guide 164202125—Rev 5 www.eaton.com/powerquality... -
Page 47: Initial Configuration
Turn on utility power to the RPP. Turn on the panelboard circuit breakers. Turn on the individual panelboard circuit breakers following the startup sequence recommended by the load equipment manufacturer. Close the exterior doors. Eaton Remote Power Panel (RPP) User’s Guide 164202125—Rev 5 www.eaton.com/powerquality... -
Page 48: Shutdown
SPD is reported either through the three indicators on the unit or through the normally-open contact monitored by Eaton Energy Management System (EMS). For the location of the SPD, see Figure 6 on page 12. For specification details, see Table 21 on page 44. -
Page 49: Communication
DB-9 communication port X-Slot cards Relay output contacts Programmable signal inputs Figure 19 shows the location of the communication options and control terminals on the Remote Power Panel (RPP). X-Slot Communication Bay 1 X-Slot Communication Bay 2 DB-9 Communication Port... -
Page 50: Installing Communication Options
To install the communication options and control terminals: Install the appropriate X-Slot card and/or necessary cable(s). See Figure 20. Note: Eaton recommends populating the X-Slot Communication Bay 2 (top slot) first, then if needed, use X-Slot Communication Bay 1 (bottom slot). Figure 20. Installing Communication Connections Connect the cables to the appropriate location. -
Page 51: Communication Options
1, 2, 3, 4, and 5 for the five pushbuttons on the RPP display. The indicators display as text to the right of the main screen. * Hold down the [ESC] key and press the letter key. Eaton Remote Power Panel (RPP) User’s Guide 164202125—Rev 5 www.eaton.com/powerquality... -
Page 52: X-Slot Cards
(PDPs) through standard Web pages, Power Xpert Software, or third-party software. An integral part of the Eaton Power Xpert Architecture, which provides end-to-end PowerChain Management™ solutions, the PXGX PDP Card provides a central point to connect PDPs to the Ethernet network. -
Page 53: Relay Output Contacts
The relay output contacts must not be connected to any utility connected circuits. Reinforced insulation to the utility is required. The relay output contacts have a maximum rating of 240 Vac/8A. Control Pan Figure 23. Large RPP Control Pan Eaton Remote Power Panel (RPP) User’s Guide 164202125—Rev 5 www.eaton.com/powerquality... -
Page 54: Programmable Signal Inputs
This feature lets you connect the RPP to your building alarms, such as smoke detectors or overtemperature alarms. For each building alarm, you can set: The building alarm name The contact type (NO or NC) Building alarm type Notice level Eaton Remote Power Panel (RPP) User’s Guide 164202125—Rev 5 www.eaton.com/powerquality... -
Page 55: Maintenance
Chapter 6 Maintenance This section explains how to Perform preventive maintenance for the Eaton Remote Power Panel (RPP) Store the RPP Recycle the RPP Important Safety Instructions The RPP interior is unsafe until AC source power is removed. WARNING Servicing and maintenance should be performed by qualified service personnel only. -
Page 56: Cooper Bussmann Fuse Replacement
CAUTION Do not discard waste electrical or electronic equipment (WEEE) in the trash. For proper disposal, contact your local recycling/reuse or hazardous waste center. Eaton Remote Power Panel (RPP) User’s Guide 164202125—Rev 5 www.eaton.com/powerquality... -
Page 57: Specifications
Chapter 7 Specifications This section provides the following specifications for the Eaton Remote Power Panel (RPP): Model number Weights and dimensions Electrical input and output Meter Environmental and safety Surge Protective Device (SPD) Table 15. Model Number Model Feeds Eaton RPP Up to four separate incoming feeds (450A, 900A) Table 16. -
Page 58: Table 19. Ems Meter
EMI/RFI filtering, up to 50 dB noise attenuation from 10 kHz to 100 MHz monitored models only) Safety Conformance UL 1449 3rd Edition Relay Contact (for EMS Form C relay contact monitored by Eaton EMS monitored models only) Eaton Remote Power Panel (RPP) User’s Guide 164202125—Rev 5 www.eaton.com/powerquality... -
Page 59: Troubleshooting
Troubleshooting Typical Alarms and Conditions The following table describes typical alarms and conditions for the Remote Power Panel (RPP). For further help, please contact the Help Desk. To view the active alarms or alarm history, select EVENTS on the display, then ACTIVE EVENTS or HISTORY. - Page 60 Troubleshooting This page intentionally left blank. Eaton Remote Power Panel (RPP) User’s Guide 164202125—Rev 5 www.eaton.com/powerquality...
-
Page 61: Warranty
“End-User”) of the Eaton Three-Phase PDU, RPP, and STS Products (the “Product”) and cannot be transferred. This Warranty applies even in the event that the Product is initially sold by Eaton for resale to an End-User. This warranty is not valid unless a separately purchased Startup service is purchased. - Page 62 OTHER LIMITATIONS: Eaton's obligations under this Warranty are expressly conditioned upon receipt by Eaton of all payments due to it (including interest charges, if any). During such time as Eaton has not received payment of any amount due to it for the Product, in accordance with the contract terms under which the Product is sold, Eaton shall have no obligation under this Warranty.
- Page 64 *164202125 3* 164202125 5...
Need help?
Do you have a question about the Remote Power Panel and is the answer not in the manual?
Questions and answers