Eaton ePDU G3 Operating Manual
Enclosure power distribution unit
Hide thumbs
Also See for ePDU G3:
- Operation manual (155 pages) ,
- Quick start manual (20 pages) ,
- Installation and connection manual (2 pages)
Table of Contents
Advertisement
Quick Links
Advertisement
Table of Contents

Subscribe to Our Youtube Channel
Related Manuals for Eaton ePDU G3


Summary of Contents for Eaton ePDU G3
- Page 1 Eaton Enclosure Power Distribution Unit (ePDU ) G3 ® ® Operations Manual...
- Page 2 Phillips Screw Company. All other trademarks are property of their respective companies. ©Copyright 2015 Eaton Corporation, Raleigh NC, USA. All rights reserved. No part of this document may be reproduced in any way without the express written approval of Eaton Corporation.
- Page 3 Cet appareil numérique de la classe A respecte toutes les exigences du Règlement sur le matériel brouilleur du Canada. Eaton is not responsible for damage to this product resulting from accident, disaster, misuse, abuse, non-Eaton modification of the product, or other events outside the reasonable control of Eaton or not arising under normal operating conditions. 1F61...
- Page 4 Special Symbols The following are examples of symbols used on the ePDU or accessories to alert you to important information: RISK OF ELECTRIC SHOCK - Observe the warning associated with the risk of electric shock symbol. CAUTION: REFER TO OPERATOR'S MANUAL - Refer to your operator's manual for additional information, such as important operating and maintenance instructions.
-
Page 5: Table Of Contents
Eaton ePDU Models ........ - Page 6 ..............Eaton ePDU G3 Operation Manual P-164000277—Rev 5...
- Page 7 User-Defined Group Definition ........... . . 100 Eaton ePDU G3 Operation Manual P-164000277—Rev 5...
- Page 8 Define SNMPv3 User-based Security Model Users ....... . . 108 Access Eaton ePDU MIB Objects (Privileged Access Only) ......109 Energy Wise .
- Page 9 WARRANTY................Eaton ePDU G3 Operation Manual P-164000277—Rev 5...
-
Page 10: Introduction
19-inch rack. A wide range of models let you connect and manage a variety of outlets from a single power connection. Most models have monitoring or switching capabilities, or both. Figure 1 shows examples of installed G3 Eaton ePDUs. Figure 1. Example ePDU G3 Installations... -
Page 11: Product Specifications
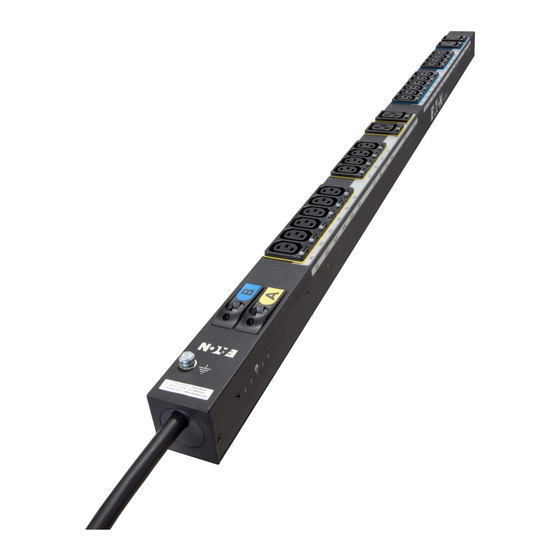
Introduction The ePDU G3 family provides six different ePDU topologies. The monitoring or switching capabilities are characterized as follows: Basic (BA) with no monitoring or intelligent controls In-Line Metered (IL) with monitoring at the input Metered Input (MI) with monitoring at the input and branch... - Page 12 Outlets (Protected by Breaker E) Outlets (Protected by Breaker C) Outlets (Protected by Breaker F) Metered Input (MI) Basic (BA) Figure 2. Example ePDU G3 Products NOTE EMEA models have different markings and laser etching. Eaton ePDU G3 Operation Manual P-164000277—Rev 5...
-
Page 13: Lcd Interface
Ethernet Port Connector. Connects to a LAN, allowing configuration through a 10/100 autosensing network connection. Daisy Chain Port Connector. Used to daisy-chain two to four ePDUs together to use a single Ethernet connection. USB Port. Used for firmware upgrade. Eaton ePDU G3 Operation Manual P-164000277—Rev 5... -
Page 14: Circuit Breakers
NOTE 3 To disconnect power on models without a circuit breaker, disconnect the ePDU input power cord. Figure 4 shows circuit breaker examples. Figure 4. Circuit Breakers Eaton ePDU G3 Operation Manual P-164000277—Rev 5... -
Page 15: Power Outlets
Protocol (SNMP) when acceptable alarm limits are exceeded or contact status changes. Changes in external contact status are logged in the ePDU event history log. When temperature and humidity values exceed user-selectable limits, the event is logged in the ePDU event history log. Eaton ePDU G3 Operation Manual P-164000277—Rev 5... -
Page 16: Features
For information updates, refer to the Eaton ePDU catalog or go to www.eaton.com/ePDU. Features The Eaton ePDUs provide outstanding performance and reliability, including some or all of these benefits (varies by model): Ease of Use Easy and flexible rack installation... -
Page 17: Configurability And Security
Configurable alarm thresholds Configurable user access control through collocation Enterprise security using LDAP or RADIUS Acknowledgements The Eaton software development team is grateful to the following projects: OpenLDAP (http://www.openldap.org/) Cyrus SASL developed by Computing Services at Carnegie Mellon University (http://www.cmu.edu/ computing/) uthash hash table (http://uthash.sourceforge.net) -
Page 18: Safety Warnings
IMPORTANT SAFETY INSTRUCTIONS — SAVE THESE INSTRUCTIONS This manual contains important instructions that you should follow during installation and operation of the Eaton Enclosure Power Distribution Unit (ePDU) G3. Please read all instructions before operating the equipment and save this manual for future reference. - Page 19 The battery is not user-replaceable. There is risk of explosion if battery is replaced by an incorrect type. Ensure that used batteries are disposed of according to the instructions. For more information, contact your local recycling/reuse or hazardous waste center for proper disposal information. Eaton ePDU G3 Operation Manual P-164000277—Rev 5...
-
Page 20: Installation
Chapter 3 Installation All 0U Eaton Enclosure Power Distribution Unit (ePDU) G3 models are mounted vertically inside rack structures. The In-line Metered (IL) models are mounted horizontally or vertically. Use the information in this chapter to prepare, install, and connect the ePDU and optional accessories. -
Page 21: Inspecting The Equipment
Table 2 lists the accessory parts that are included in the shipping carton with the ePDUs. Table 2. Shipped with the ePDU in the Shipping Carton Quantity Description 1 per language Eaton ePDU G3 Installation and Connectivity Quick Start (English) (varies by NOTE Supplied in the shipping carton and also available in several region) languages at www.eaton.com/ePDU. -
Page 22: Optional Environmental Monitoring Probe
Optional Environmental Monitoring Probe Optional Environmental Monitoring Probe (EMP) equipment with sensors can be connected to the ePDU as an accessory. The equipment is customer-supplied and should be installed using the manufacturer’s instruction manual. Eaton ePDU G3 Operation Manual P-164000277—Rev 5... -
Page 23: Brackets For Cisco Racks (Us Only)
See for “Using Mounting Brackets for Cisco Racks (US only)” on page 23 for installation instructions. Two Clip Feet Shipped with ePDU Two Brackets, 8-32 and 10-32 Screws, Two keps Nuts Provided in kits Figure 7. Mounting Bracket and Clip feet for Cisco Racks Eaton ePDU G3 Operation Manual P-164000277—Rev 5... -
Page 24: Installation Overview
Tools The ePDU G3 is designed to be mounted without the use of tools. Mounting buttons are pre-installed on the rear of the ePDU at the factory. If you wish to use a different mounting option, such as the clip foot or side... -
Page 25: Power Feed Labels
Adhere one to the side of an ePDU at your discretion to indicate the power feed direction (see Figure 10). Figure 10. Power Feed Labels Eaton ePDU G3 Operation Manual P-164000277—Rev 5... -
Page 26: Chassis Hole Pattern (Emea Models Only)
Then, flip it to the reverse side (see Figure 13). To distinguish the sides, one side is marked with a black painted ring. For EMEA models, you must not see the black ring when installed. Eaton ePDU G3 Operation Manual P-164000277—Rev 5... -
Page 27: Iec Outlet Grip Plug Retention Mechanism
These are supplied in case the default metal solution is not well suited to the rack. Or, you can use these when you attach mounting buttons to clip feet to install the Eaton ePDUs. Your hardware pack may also contain two additional spare M4 or M3 screws. -
Page 28: Installing Vertical Epdus In A Rack Cabinet
Does the factory-installed mounting button fit flush in the rack keyhole? If no, go to Step 4. If yes, go to Step 5. Unscrew and remove the mounting button. Turn it around 180°. Secure the mounting button to the ePDU (see Figure 16). Eaton ePDU G3 Operation Manual P-164000277—Rev 5... - Page 29 The ePDU will fit tight and it may require minor force to engage in the slot. This is a friction fit to hold the ePDU in the slot. Figure 17. Securing the ePDU Eaton ePDU G3 Operation Manual P-164000277—Rev 5...
-
Page 30: Using Mounting Buttons Installed On Clip Feet
Push down to make sure the ePDU is secured into position. Continue to “Grounding the ePDU” on page 28 if you are installing a ground screw and grounding cable. Otherwise, go to “Network and Environmental Ports” on page 29. Eaton ePDU G3 Operation Manual P-164000277—Rev 5... -
Page 31: Using Clip Feet And Cage Nuts On A Square-Hole Rack
Repeat for the second mounting clip. Tighten the screws. Go to Step 8. Figure 19. Attaching the Clip Feet and Cage Nuts Eaton ePDU G3 Operation Manual P-164000277—Rev 5... -
Page 32: Using Mounting Brackets For Cisco Racks (Us Only)
Position the brackets to align with the top, upper, lower, and/or bottom mounting rail. NOTE Mount the bracket with the clip feet facing up for upper and top rail installation. Mount the bracket with the clip feet facing down for lower and bottom rail installation. Eaton ePDU G3 Operation Manual P-164000277—Rev 5... - Page 33 Clip Feet Turned Downward for Lower Mounting Rail Lower Mounting Rail Existing screws in the U-channel NOTE: Side-by-side orientation shown. Only one clip foot is used for single G3 ePDU installations. Figure 21. Single or Side-by-Side Inboard Eaton ePDU G3 Operation Manual P-164000277—Rev 5...
- Page 34 Clip Feet Turned Downward for Lower Mounting Rail Lower Mounting Rail Existing screws in the U-channel Clip Feet Turned Downward for Bottom Mounting Rail Bottom Mounting Rail Figure 22. Multiple 902 mm Inboard Eaton ePDU G3 Operation Manual P-164000277—Rev 5...
-
Page 35: Installing The Horizontal Models In A Rack Cabinet
Otherwise, go to “Network and Environmental Ports” on page 29. Installing the Horizontal Models in a Rack Cabinet NOTE For horizontal installations in square-hole racks, a cage nut must be installed in the selected mounting holes. Eaton ePDU G3 Operation Manual P-164000277—Rev 5... - Page 36 For all other racks. Insert and tighten two M6 screws through the ears on each side of the ePDU (see Figure 24). Figure 24. Installing Horizontal Models Continue to “Grounding the ePDU” if you are installing a ground screw and grounding cable. Otherwise, go to “Network and Environmental Ports” on page 29. Eaton ePDU G3 Operation Manual P-164000277—Rev 5...
-
Page 37: Grounding The Epdu
Figure 25 and Figure 26. The internal diameter of the ground strap ring is M6 (6 mm). Figure 25. Grounding Screw Location for 0U Vertical Models Figure 26. Grounding Screw Location for IL Horizontal Models Eaton ePDU G3 Operation Manual P-164000277—Rev 5... -
Page 38: Network And Environmental Ports
If your computer does not have a DB9 serial connector, obtain a DB9-to-USB converter. Follow the manufacturer’s instructions to install the converter cable device drivers and to connect the converter cable to your computer. Eaton ePDU G3 Operation Manual P-164000277—Rev 5... -
Page 39: Connecting To A Lan Ethernet Port
Two to eight ePDUs can be chained together using an Ethernet cable between the Daisy Chain ports located on the front panel. Daisy chain uses Eaton's patented RS-485 daisy chain (strapping) technology. This allows access to the ePDU data of multiple ePDUs from the same network connection. One ePDU is defined as the Host. - Page 40 Insert a Y splitter in the Daisy Chain connector for all ePDUs between the Host and the last ePDU in the chain, as shown in Figure 29 and Figure 30. Go to Step 7 to configure the daisy-chained ePDUs. Eaton ePDU G3 Operation Manual P-164000277—Rev 5...
-
Page 41: Connecting Optional Environmental Monitoring Probe Equipment
Locate the Ethernet cable dedicated to the EMP. Connect one end of the cable to the RJ-45 connector on the EMP, then connect the other end of the cable to the serial connector on the ePDU (see Figure 31). Eaton ePDU G3 Operation Manual P-164000277—Rev 5... -
Page 42: Connecting The Output Devices
Connect the power cord to a properly wired and grounded dedicated power source. The ePDU turns on and displays the Eaton startup screen while starting. After five seconds, the sequence of LCD screensaver screens for this ePDU model begin cycling. -
Page 43: Operating The Epdu
Route all power cords neatly. If desired, use cable ties to secure the cords. Operating the ePDU See “Operation Overview” on page 35 for instructions to operate the ePDU, including starting and shutting down the equipment. Eaton ePDU G3 Operation Manual P-164000277—Rev 5... -
Page 44: Operation Overview
Chapter 4 Operation Overview This chapter describes the Eaton Enclosure Power Distribution Unit (ePDU) G3 operation overview. Operation Interfaces The type of model you are using dictates the level of ePDU operation control you have. You can configure, manage, or monitor the ePDU through a local interface (onboard the ePDU) or through remote interfaces (through the network): Configure (All except Basic). -
Page 45: Remote Operation Interfaces
SNMP trap or e-mail alert. *** If you install an optional EMP, you must dedicate the serial connector to the EMP. (The EMP Ethernet cable is supplied in the EMP shipping carton.) Eaton ePDU G3 Operation Manual P-164000277—Rev 5... -
Page 46: Outlets And Circuit Breakers
Operation Overview Outlets and Circuit Breakers A variety of outlet types are available for the Eaton ePDUs. Each ePDU model has a specific configuration of outlets.The configuration can be standard or customized to suit your needs. The outlets are grouped in sets called sections. Sections are preset groups of individual outlets that you can identify and monitor through the interfaces that are available with your particular type of ePDU. - Page 47 USB Port: Used for firmware upgrade and configuration file download/upload Daisy Chain Port Yellow Daisy Chain Port LED: Transmission Activity Status FLASHING: ePDU is transmitting data Green Daisy Chain Port LED: Role Assignment in Communication Protocol ON: Device FLASHING: Host Eaton ePDU G3 Operation Manual P-164000277—Rev 5...
-
Page 48: Operation Concepts
Otherwise, go to Step 2. NOTE 1 Plug the ePDU into an appropriately rated outlet for its type. NOTE 2 Do not replace or rewire the power cord. Verify all circuit breakers are in the On position. Eaton ePDU G3 Operation Manual P-164000277—Rev 5... -
Page 49: Shutting Down The Epdu
Operation Overview IMPORTANT To power cycle the Eaton ePDU, remove the power cord from the power source and then plug it back in. Shutting Down the ePDU To shut down the ePDU: Shut down the connected devices according to the manufacturer’s recommended shutdown sequence. - Page 50 Operation Overview Figure 36. Reset the eNMC Module from the Web Interface (Metered Input ePDU G3) For a hardware restart, locate the Reset opening (labeled R) on the ePDU (see Figure 37). Insert a probe, press the recessed button, and retract the probe. This method is not necessarily the best choice because the communications module does not force the system to save the parameters in the file system before restarting.
- Page 51 Operation Overview Reset Button Figure 37. Reset Button Eaton ePDU G3 Operation Manual P-164000277—Rev 5...
-
Page 52: Network Communication Configuration
Chapter 5 Network Communication Configuration The Eaton Enclosure Power Distribution Unit (ePDU) G3 automatically collects the network communication configuration settings (IP parameters) from the server by default. When the ePDU is not connected to the network, it continuously attempts to connect. If DHCP is enabled on your network, G3 automatically collects the network communication configuration settings. -
Page 53: Lcd- Static Ip Address
Figure 40. Set the Static IP Address After 10 seconds, use the reset button to restart the eNMC module and apply the new settings (see Figure 41). Reset Button Figure 41. Reset Button Eaton ePDU G3 Operation Manual P-164000277—Rev 5... -
Page 54: Serial Connection - Static Ip Address
Wait 10 seconds. Use the reset button to restart the eNMC module and apply the new settings. NOTE You can also connect up to four ePDUs together using the Daisy Chain port and an RJ-45 splitter (provided). This enables multiple ePDUs to communicate over one Ethernet port. Eaton ePDU G3 Operation Manual P-164000277—Rev 5... -
Page 55: Verify Web Operation After Configuration
When the user authentication pop-up dialog displays, type admin in the User name field and admin in the Password field. The home page opens with the ePDUOverview page. Eaton ePDU G3 Operation Manual P-164000277—Rev 5... -
Page 56: Lcd Interface Operation
Chapter 6 LCD Interface Operation This chapter contains operation information for the Eaton ePDUs, including: LCD display and control button functions Menu selections NOTE The LCD language is configurable. See language settings in“Language Submenu” on page 66. LCD Display and Control Buttons The ePDU has a four-button, graphical LCD display (see Figure 42). -
Page 57: Operation Mode
Figure 44. 3Ph Delta-configured Screensaver Cycle Startup Screen When the ePDU powers up, the Startup screen displays (see Figure 45). Press ENTER to go to the Main Menu. 14/06/2013 15:55:26 192.168.123.123 Figure 45. Startup Screen Eaton ePDU G3 Operation Manual P-164000277—Rev 5... -
Page 58: Password Protected Menus
The Control Menu is not available for Metered Input (MI) and Metered Outlet (MO) ePDUs. Main Menu Main Menu Active Alarms Active Alarms Alarms History Meters Control Settings ePDU Info Figure 47. Main Menu Selections Eaton ePDU G3 Operation Manual P-164000277—Rev 5... - Page 59 NOTE 4 This submenu is only available for Host ePDUs when a daisy-chained configuration is used. NOTE 5 This submenu is only available if a USB drive is detected. Figure 48. ePDU Menu Hierarchy Eaton ePDU G3 Operation Manual P-164000277—Rev 5...
-
Page 60: Active Alarms Menu
[12.000] 13.054A [25.00] 26.12°C Meter Control 09/05/2011 09/05/2011 14:23:32 14:23:32 Settings ePDU Info Main Menu Active Alarms Active Alarms Alarms History No alarms Meter Control Settings ePDU Info Figure 49. Example Active Alarm Displays Eaton ePDU G3 Operation Manual P-164000277—Rev 5... -
Page 61: Alarms History Menu
Phase Input data measurements for 3Ph, split-phase, and dual input ePDUs. Depending on the ePDU electrical topology, different ePDU measures will display in the Total Input and the Input Phase meter screens. Eaton ePDU G3 Operation Manual P-164000277—Rev 5... - Page 62 0.912 07/01/2011 since 07/01/2011 17:32:23 17:32:23 Figure 52. Example 1Ph Total Input Display NOTE The Total Input > Input Meter selection screens will be different for 1Ph, 3Ph, dual input, and split-phase ePDUs. Eaton ePDU G3 Operation Manual P-164000277—Rev 5...
-
Page 63: Sections Submenu
On the Meter menu, scroll up or down to highlight Outlets. Press ENTER to display the Outlets submenu. Scroll up or down to review the data for your selection. After you review the data, press ESC twice to return to the previous menu (see Figure 55). Eaton ePDU G3 Operation Manual P-164000277—Rev 5... -
Page 64: Environment Submenu
Press ENTER to review the data for your selection. After you review the data, press ESC to return to the previous menu. (Contact closures are not displayed on the LCD.) Meter Environment ePDU Temperature: Sections 24.3 °C Outlets Humidity: Environment Environment 23.5 % Figure 56. Example Environment Submenu Display Eaton ePDU G3 Operation Manual P-164000277—Rev 5... -
Page 65: Control Menu
ENTER to display the submenu options. Press ESC to return to the previous menu. Settings Main Menu Main Menu Active Alarms Display Alarms History Daisy Chain Meters Language Control IPv4 Settings Factory ePDU Info Figure 58. Example Settings Menu Display Eaton ePDU G3 Operation Manual P-164000277—Rev 5... -
Page 66: Usb Flash Mode Submenu
After this procedure is completed, the following files will exist on the USB device: eNMC/config/ConfigurationData.xml - Contains all network and communication-related settings. This can be saved from and loaded to any ePDU G3 when replicating configurations regardless of part number. eNMC/config/ConfigurationPdu.xml - Contains all the user-configurable settings related to the ePDU itself such as voltage and current thresholds, customized naming, and outlet control parameters. - Page 67 When the pop-up confirms that the USB is detected, click OK then press Enter to go to the Main Menu. (If not confirmed within 10 seconds, the pop-up goes away by itself.) Select USB Flash Mode from the Settings menu. The module restarts. Eaton ePDU G3 Operation Manual P-164000277—Rev 5...
- Page 68 Select Save eNMC file to save the ePDU hardware configuration file to the USB drive (see Figure 64). The file will save to the eNMC/config/hw path at the USB drive root directory (see Figure 65).). Eaton ePDU G3 Operation Manual P-164000277—Rev 5...
- Page 69 Select Load eNMC file, then click OK to upload the ePDU hardware configuration file to the eNMC (see Figure 66). When the file is successfully loaded, click OK to confirm. Remove the USB flash drive and select Exit. Eaton ePDU G3 Operation Manual P-164000277—Rev 5...
- Page 70 There can only be one Image*.bin file in the eNMC/upgrade directory on your USB drive. Make sure eNMC module is powered ON. Insert the flash drive in the USB port of the eNMC front panel. Eaton ePDU G3 Operation Manual P-164000277—Rev 5...
-
Page 71: Display Submenu
Press ESC to return to the previous menu. Settings Display Contrast: Contrast: Display 0° 90° 90° Daisy Chain 180° IPv4 - 90° Language Orientation: Orientation: Factory 0 ° 0 ° Figure 70. Example Display Submenu Displays Eaton ePDU G3 Operation Manual P-164000277—Rev 5... -
Page 72: Daisy Chain Submenu
Select Middle when the ePDU (or ePDUs) are connected between a host and another ePDU. NOTE 3 Select End when assigning the last device in the chain when daisy-chaining three or more ePDUs. Press ESC to return to the previous menu. Eaton ePDU G3 Operation Manual P-164000277—Rev 5... - Page 73 Daisy Chain Daisy Chain Settings 0 (Host) Host Display Discovery Daisy Chain Daisy Chain Host IPv4 Place: Middle 1 (Device) Language Middle Factory Place: Figure 72. Example Daisy Chain Host ePDU Setup (Host) Eaton ePDU G3 Operation Manual P-164000277—Rev 5...
- Page 74 Figure 73. Example Daisy Chain ePDU Discovery (Communicating) Settings Daisy Chain Daisy Chain Settings Display Discovery Daisy Chain No device chained IPv4 Language Factory Figure 74. Example Daisy Chain ePDU Discovery (Not Communicating) Eaton ePDU G3 Operation Manual P-164000277—Rev 5...
-
Page 75: Ipv4 Submenu
On the Settings menu, scroll down to highlight Factory. Press ENTER to display the screens to set and confirm the return to factory settings. After you make the selections, press ENTER to set the values as displayed on the screen. Press ESC to return to the previous menu. Eaton ePDU G3 Operation Manual P-164000277—Rev 5... -
Page 76: Epdu Info Menu
Eaton ePDU Meter Control IPv4 address Part Number Firmware Version Settings xx .xx .xxxx xxx.xxx.xxx.xxx ePDU Info ePDU Info IPv6 address xxxx:xxxx:xxxx:xxxx xxxx:xxxx:xxxx:xxxx Figure 78. Example ePDU Info Display Eaton ePDU G3 Operation Manual P-164000277—Rev 5... -
Page 77: Serial Interface Operation
Serial Interface Operation This section describes the command line interface (CLI) commands used to remotely configure and monitor the Eaton Enclosure Power Distribution Unit (ePDU) G3 through the serial interface connection or network connection between the and a laptop or workstation. -
Page 78: Command
Usage: change the device data defined by its’ name followed by the new value set [name] [value] pdu#0> Example 2 pdu#0>pdu ? Usage: select the strapping pdu unit to focus on pdu [number] PDU#0 Eaton ePDU G3 Operation Manual P-164000277—Rev 5... -
Page 79: Info Command
<object> = name of a simple object, an object of type array or a family of objects. Example 1 pdu#0>info System.Network.DHCP Name Unit RO/RW Type System.Network.DHCP 0: Disabled 1: Enabled Example 2 pdu#0>info PDU.* Name Unit RO/RW Type PDU.DaisyChain[x].ChangedStatus.Communication Integer:0..4294967295(136 years) Lost Eaton ePDU G3 Operation Manual P-164000277—Rev 5... - Page 80 2: SNMP V3 Example 4 pdu#0>info Environment.* Name Unit RO/RW Type Environment.ChangedStatus.CommunicationLost sec Integer:0..4294967295(136 years) Environment.ChangedStatus.OverHumidity Integer:0..4294967295(136 years) Environment.ChangedStatus.OverTemperature Integer:0..4294967295(136 years) Environment.Humidity Float:0..6553.5 Environment.Input[1].ChangedStatus.Alarm Integer:0..4294967295(136 years) Environment.Input[1].iName String[31] Environment.Input[1].PresentStatus.Alarm 0: Normal 1: Alarm Eaton ePDU G3 Operation Manual P-164000277—Rev 5...
-
Page 81: Quit Command
Use this command to log out and exit the serial or network interface for the ePDU. Usage pdu#0>quit Log out of the CLI pdu#0>quit Example with serial interface pdu#0>quit Session closed Example with network interface pdu#0>quit Connection to host lost. Eaton ePDU G3 Operation Manual P-164000277—Rev 5... -
Page 82: Get Command
[i] = the index in the array, from 1 to n. The value of n depends of the HID object and is obtained with a get command Example pdu#0>get System.NetworkManagementSystem[1].TrapCommunity public pdu#0> Get all values of an array pdu#0>get <path[x]>.<name> NOTE Values are separated by the pipe character ( | ). Example pdu#0>get System.User[x].SecurityRight 0|0|0|0|0|0|0|0 pdu#0> Eaton ePDU G3 Operation Manual P-164000277—Rev 5... - Page 83 System.DaisyChain.Status. The Status value is: 0: No Communication 1: Communication OK 2: Communication failed 3: Host conflict 4: Device conflict NOTE 2 The Count command value is the number of ePDUs connected in the daisy-chain configuration. Eaton ePDU G3 Operation Manual P-164000277—Rev 5...
-
Page 84: Set Command
[i] = the index in the array, from 1 to n. The value of n depends of the HID object and is obtained with a get command Example pdu#0>set System.Network.SNMP.V3.User[1].Name User 1 User 1 pdu#0> Eaton ePDU G3 Operation Manual P-164000277—Rev 5... - Page 85 [x] = enter 0 as a unique identifier for the host only pdu#0>set System.DaisyChain.Position [x] where: [x] = 0 if the host ePDU is connected between two other ePDUs; 1 if the host ePDU is connected to just one ePDU Eaton ePDU G3 Operation Manual P-164000277—Rev 5...
- Page 86 Serial Interface Operation Example pdu#0>set System.DaisyChain.DeviceID 0 pdu#0> pdu#0>set System.DaisyChain.Postion 1 pdu#0> Eaton ePDU G3 Operation Manual P-164000277—Rev 5...
-
Page 87: Pdu Command
- The user has insufficient rights to modify the data. The PDU1 is not available. This error displays when the indicated PDU is unreachable. XML Object Tables XML object tables are available online at www.eaton.com/ePDU. Eaton ePDU G3 Operation Manual P-164000277—Rev 5... -
Page 88: Web Interface Operation
Chapter 8 Web Interface Operation This chapter describes remotely configuring, managing, and monitoring an Eaton Enclosure Power Distribution Unit (ePDU) G3 remotely through the ePDU Network Management and Control (eNMC) module Web interface. This chapter describes the following: Navigating the Web interface... - Page 89 Description 1 - Application Header Bar The header bar identifies which Eaton ePDU Web application is within the host window (Managed [MA], Metered Input [MI], Metered Outlet [MO], In-Line Metered [IL], or Switched [SW]). 2 - Menu Selection Page Display As each menu link is selected, the corresponding information displays as the main page.
-
Page 90: Languages
On most pages, you can display relevant tooltips as you roll over images and fields. Languages The Web interface language is configurable. The following languages are available for your selection: English French Spanish German Italian Chinese Simplified Japanese Korean Chinese Traditional Polish Portuguese Czech Eaton ePDU G3 Operation Manual P-164000277—Rev 5... -
Page 91: Accessing The Web Interface
Depending on the permission level of the user, the Menu Bar provides up to four groups of selections: Power Management - Overview - ePDU [0] See NOTE 1 - ePDU [7] See NOTE 1 - Groups - Outlets - Environment - Active Alarms Eaton ePDU G3 Operation Manual P-164000277—Rev 5... -
Page 92: Power Management
3Ph ePDU models, all phases. This page includes data such as current, voltage, and crest factor. The outlet icons are green if the outlet is on and red if the outlet is off. Roll over the icon to see the outlet type and status. Eaton ePDU G3 Operation Manual P-164000277—Rev 5... -
Page 93: Logs & Notifications
SNMP: Use this page to configure general SNMP settings, SNMPv1 settings, and SNMPv3 settings. You can also access the Eaton ePDU Management Information Base (MIB) from this page. Energy/Wise: Use this page to enable or disable the Energy Wise feature. -
Page 94: Access Privileges
Exclusive access to the Network and Date and Time Settings menu NOTE The default Administrator login and password is “admin” and should be changed at the first connection. If the administrator loses the password or login, contact your service representative to recover it. Eaton ePDU G3 Operation Manual P-164000277—Rev 5... -
Page 95: Local Or Remote Administrator
Access to retrieved ePDU up-to-date data and measurements Clear logs Local Administrator Only. Can switch on bootloader mode and upgrade firmware. Read-Only Access A local or remote administrator with read-only access has limited privileges, including: Eaton ePDU G3 Operation Manual P-164000277—Rev 5... -
Page 96: Epdu-User
(Remote ePDU-Users cannot change the login or password, but can change their own e-mail address.) Cannot access the Serial interface; must use the Web interface only Can access the log and notifications submenu, but cannot clear the logs data Eaton ePDU G3 Operation Manual P-164000277—Rev 5... -
Page 97: Outlet-User
Only one ePDU-User or Outlet User with read-write access and at least one common outlet can be logged-in at a time. When the administrator connects, any existing read-write sessions are closed. The other user (or users) will be asked to authenticate and open a new read-only session. Eaton ePDU G3 Operation Manual P-164000277—Rev 5... -
Page 98: Overview
To enter new threshold values, type new values in any of the text boxes that follow, then click Save: Low warning current threshold High warning current threshold High critical current threshold Low critical voltage threshold Low warning voltage threshold High warning voltage threshold High critical voltage threshold Eaton ePDU G3 Operation Manual P-164000277—Rev 5... -
Page 99: Groups
Off before switching On during a reboot, type the number of seconds the outlets should be Off in the Power Reboot Period text box. Click Save. NOTE This setting overwrites the Power Reboot Period defined for individual outlets on the Outlet Settings dialog. Eaton ePDU G3 Operation Manual P-164000277—Rev 5... -
Page 100: Outlets
On: Turn on the outlet. Off: Turn off the outlet. Reboot: Reboot the outlet. To modify ePDU threshold values for a specified outlet, click the link on the group friendly name. The Outlet Settings dialog displays. Eaton ePDU G3 Operation Manual P-164000277—Rev 5... -
Page 101: Environment
Also review the status of installed dry contacts, open or closed. NOTE The environmental monitoring data panel only displays data under these circumstances: if the EMP is installed and configured in the system if the user read-write access rights Eaton ePDU G3 Operation Manual P-164000277—Rev 5... - Page 102 To cancel this action and return to the Environment page, click Cancel. NOTE To change the temperature scale to Celsius or Fahrenheit unit of measurement (°C or °F), see “Set General System Settings” on page 101. Eaton ePDU G3 Operation Manual P-164000277—Rev 5...
-
Page 103: Power Schedule
Set the schedule for this action by selecting a date and time from the drop lists for the “at:” and Date of Action” field. NOTE This date and time must occur after the date and time set for the first action. 10. Click Save. Eaton ePDU G3 Operation Manual P-164000277—Rev 5... -
Page 104: Active Alarms
Download the Event Log as a Comma Separated Value File Access the Web interface and log in. Under Logs & Notifications, select Logs. The Logs page displays. Eaton ePDU G3 Operation Manual P-164000277—Rev 5... -
Page 105: Trap Notification
From the On Event drop down list, select one of the following trap sources: Disable: The trap receiver is disabled and the Test button is deactivated. All Alarms: The trap receiver is enabled. Eaton ePDU G3 Operation Manual P-164000277—Rev 5... -
Page 106: Syslog
- 5426: Transfer over UDP - 6587: Transfer over TCP - 3167: Syslog protocol IETF (obsolete) facility code used for all messages from 1 to 23 use of unicode byte order mask (BOM) according to RFC 5424 Eaton ePDU G3 Operation Manual P-164000277—Rev 5... -
Page 107: Access Accounts
13. Otherwise, click Save or Cancel. Configure the LCD Password NOTE 1 Only an administrator can activate, deactivate, or modify the LCD password. NOTE 2 There can only be one LCD password on the ePDU. Eaton ePDU G3 Operation Manual P-164000277—Rev 5... -
Page 108: Configure Local User Access
Read/Write: The user can access the Web interface, view the measures, and is allowed to change settings. To configure an e-mail address for this account, click the link of the e-mail address corresponding to this user. See “Configure the E-mail Notification Settings” for more information. Eaton ePDU G3 Operation Manual P-164000277—Rev 5... -
Page 109: Configure Remote Group Access
Click Save. To enable an e-mail address for this account, click the link on the e-mail address under the e-mail Address column. User-Defined Group Definition NOTE Only the Administrator has access to this page. Eaton ePDU G3 Operation Manual P-164000277—Rev 5... -
Page 110: Configure An Outlet For A User-Defined Outlet Group
In the General panel, type the Device Administrator Contact Name and the Device location in the text boxes. To change the language, select a language from the drop down list (see Figure 84). Eaton ePDU G3 Operation Manual P-164000277—Rev 5... -
Page 111: Enable/Disable Firmware Upgrade
NOTE When uploading a file, you cannot write the file path in the text field. You must select the file from the file explorer window that displays when you click Browse. Eaton ePDU G3 Operation Manual P-164000277—Rev 5... -
Page 112: Perform Firmware Upgrade
Access the Web interface and log in. Under Settings, select System. The System Settings page displays. Ensure that the Device Administrator Contact Name and the Device location have been typed in the text boxes. Eaton ePDU G3 Operation Manual P-164000277—Rev 5... -
Page 113: Date &Time
In the Global Settings panel, choose the date format. Click Save. In the Global Settings panel, click the Synchronize with NTP Server radio button Type the Time Server IPv4 / IPv6 address or host name. Eaton ePDU G3 Operation Manual P-164000277—Rev 5... -
Page 114: Tcp/Ip
Network Management and Control (eNMC) module. A pop-up confirmation message displays: Are you sure you want to restart the Network Management Card? Note: This will NOT restart the ePDU or change the power status of the outlets. Eaton ePDU G3 Operation Manual P-164000277—Rev 5... -
Page 115: Configure The Ipv4 Settings
IPv6 address is defined by the user. NOTE 3 Regardless of the configuration you choose, the local IPv6 address is auto-generated by the eNMC module. Type the local IPv6 address. Type the prefix length for the global IPv6 address. Eaton ePDU G3 Operation Manual P-164000277—Rev 5... -
Page 116: Configure The Dns
If not already provided, type the SMTP port. If your SMTP server requires authentication, perform the following: Check the SMTP Server Authentication check box. Type the login. Type the password. If not already provided, type the sender address. Click Save. Eaton ePDU G3 Operation Manual P-164000277—Rev 5... -
Page 117: Snmp
No Access: the SNMPv3 user is disabled with no access to the MIB objects. Read-Only: the SNMPv3 user can only get the MIB objects. Read-Write: the SNMPv3 user can get and set the MIB objects. Eaton ePDU G3 Operation Manual P-164000277—Rev 5... -
Page 118: Access Eaton Epdu Mib Objects (Privileged Access Only)
Type the privacy key (if required by security level), with 8 to 24 characters allowed. Click Save. Otherwise, click Cancel to return to the SNMP Settings page. Access Eaton ePDU MIB Objects (Privileged Access Only) Access the Web interface and log in. -
Page 119: Security
URL link: The Network Management Card is protected by SSL encryption. Please use the following address(es) to connect to the Network Management Card. https://166.99.224.82 Eaton ePDU G3 Operation Manual P-164000277—Rev 5... -
Page 120: Enable/Disable The Telnet Interface
Network Management and Control (eNMC) module. Set Authentication Mode Access the Web interface and log in. Under Network and Security, select Global. The Security page displays. Eaton ePDU G3 Operation Manual P-164000277—Rev 5... -
Page 121: Set Ldap Search Configuration
When you click your cursor in inactive fields, nothing happens. You can type in active fields. Access the Web interface and log in. Under Network and Security, select LDAP . The LDAP page displays. Eaton ePDU G3 Operation Manual P-164000277—Rev 5... -
Page 122: Authenticate Ldap Remote User
Click Test. An authentication test is launched and a message displays on the LDAP Authentication Test panel to indicate if the authentication was successful or unsuccessful. Table 9 provides authentication error messages and descriptions of possible causes. Eaton ePDU G3 Operation Manual P-164000277—Rev 5... - Page 123 LDAP server as Trusted Certification Authority. If the Activate AC Certificate field of the LDAP Server Global Parameters panel is checked, the LDAP Server Authority Certificate uploaded in the PDU is not the correct. Eaton ePDU G3 Operation Manual P-164000277—Rev 5...
-
Page 124: Set Ldap Server Global Parameters
If enabled, you can choose to change the server name, the port number, and the number of seconds to time out in the Server, Port, and Time Out (sec) entry boxes. Click Save. Otherwise, click Cancel to return to the LDAP page. Eaton ePDU G3 Operation Manual P-164000277—Rev 5... -
Page 125: Add Radius Server
In the RADIUS Server panel Name column, click the name of the RADIUS server you want to edit. The RADIUS Settings dialog displays. Change the parameters as needed. When you finish modifying parameters for the RADIUS server, click Save or Cancel. Eaton ePDU G3 Operation Manual P-164000277—Rev 5... -
Page 126: Maintenance And Alarms
Chapter 9 Maintenance and Alarms This section explains maintenance functions for the Eaton Enclosure Power Distribution Unit (ePDU) G3, including: Preventive maintenance Equipment disposal Replacing the ePDU Network Management and Control (eNMC) module Updating Firmware Alarms Preventive Maintenance For the best preventive maintenance, keep the area around the ePDU clean and dust-free. If the atmosphere is very dusty, clean the outside of the system with a vacuum cleaner. - Page 127 (The Sign In button will not be available if you are already logged in. The button selection will be “Sign Out” instead of “Sign In. ” ) Figure 86. Sign In/Sign Out Button Eaton ePDU G3 Operation Manual P-164000277—Rev 5...
- Page 128 Maintenance and Alarms 11. Enter the part number of your ePDU in the Eaton Product Wizards “ePDU Part Number Search” field. Click Search. The Search Results page displays (see Figure 87). Figure 87. Search Wizard 12. On the Search Results page, click the linked part number under the part number column. The Product page for the specified ePDU opens (see Figure 88).
- Page 129 Keep the <config file> name exactly as it is downloaded from the website. It must begin with the prefix “epdu_cfg_” or the eNMC module will not recognize it. 29. Type the following command to verify the file has been uploaded: >dir Eaton ePDU G3 Operation Manual P-164000277—Rev 5...
-
Page 130: Restarting The Enmc Module And Resetting The Epdu
Web site. Additional validation checks are performed as well. The new firmware files can be uploaded using either Hypertext Transfer Protocol (HTTP), File Transfer Protocol (FTP), or USB. With all methods, the basic steps are the same: Eaton ePDU G3 Operation Manual P-164000277—Rev 5... -
Page 131: Upgrading Firmware With Hypertext Transfer Protocol
Web pages. NOTE Groups of Eaton ePDU G3 models can be configured or updated with new firmware at the same time using Eaton Intelligent Power Manager (IPM). The IPM software is available separately at no cost for up to 10 devices. - Page 132 Do not disturb the upgrade until the progress bar shows complete. 11. When finished, a message displays and the communications module restarts automatically. The upgrade takes four to five minutes. When the upgrade completes, refresh the Web pages. Eaton ePDU G3 Operation Manual P-164000277—Rev 5...
-
Page 133: Upgrading The Firmware With Ftp Protocol
Type the hash command. This allows you to follow the upload as it progresses. At the ftp> command line, use the put command with the Image<xxx>.bin file to launch the upgrade (see Figure 92). Eaton ePDU G3 Operation Manual P-164000277—Rev 5... - Page 134 Web pages. As the upgrade processes, the LCD display shows the completion status. When completed, an upgrade message on the LCD displays F/W: 100%, and the communications module reboots with the new firmware and refreshed Web pages. Eaton ePDU G3 Operation Manual P-164000277—Rev 5...
-
Page 135: Upgrading The Firmware With The Usb Port
USB. Active Alarms The Eaton ePDUs have a rich set of alarms and events to notify you of up-to-date activity and operation status. Both the local ePDU LCD interface and the remote Web interface provide active alarm notifications when alarms become active. -
Page 136: Defining The Alarm Or Event Condition
For Type 2 and Type 3 = Identi cation Code (0 to 999) and Index Code (0 to 99) 1-Digit Type Code: 0 or 1 = OS or System 2=Eaton ePDU 3=User Figure 95. Alarm Code Format Eaton ePDU G3 Operation Manual P-164000277—Rev 5... -
Page 137: Type Code 0 Or 1 (Os Or System)
Not enough memory in HEAP 01286 Duration of the acquisition of Teridian is too long 01282 HID object Id not in list of data saved in EEPROM 02561 *Not used 02562 *Not used Eaton ePDU G3 Operation Manual P-164000277—Rev 5... -
Page 138: Type Code 2 Or 3 (Epdu Or User)
Type 2 alarms and events also provide the state of optional connected equipment. Type 3 alarms and events are triggered from user actions. Eaton ePDU G3 Operation Manual P-164000277—Rev 5... - Page 139 Maintenance and Alarms Figure 97 provides an example of a Type Code 2 ePDU alarm number code. Number code 211402: Eaton ePDU Critical Overcurrent L2 Phase 2 1 1 4 0 2 Type code 2 = Eaton ePDU Index code = 02 Identi cation code = 114 Figure 97.
- Page 140 Input 2 Voltage No Threshold No section voltage threshold has been triggered. 215100 ePDU Input 2 Low Voltage Warning The specified section voltage reading is less than the value configured as the low voltage warning threshold. Eaton ePDU G3 Operation Manual P-164000277—Rev 5...
- Page 141 Daisy Chain Communication OK No communication failure detected on Daisy Chain 251100 Daisy Chain Communication Alarmed Communication failure detected on Daisy Chain 231000 ePDU Outlet Current No Threshold No outlet current threshold has been triggered. Eaton ePDU G3 Operation Manual P-164000277—Rev 5...
- Page 142 The specified user logged out by FTP. 302000 User failed to log FTP The specified user failed to log by FTP. 302100 Ethernet card restart in USB mode The Ethernet card has been restarted in USB mode. Eaton ePDU G3 Operation Manual P-164000277—Rev 5...
- Page 143 The eNMC module settings file has been uploaded from the USB. 302400 ePDU settings file uploaded from USB The ePDU settings file has been uploaded from the USB. Eaton ePDU G3 Operation Manual P-164000277—Rev 5...
-
Page 144: Service And Support
Chapter 10 Service and Support If you have any questions or problems with the Eaton Enclosure Power Distribution Unit (ePDU) G3, call your Local Distributor or the Help Desk at one of the following telephone numbers and ask for an ePDU technical... -
Page 145: Warranty
(30) months from the date of shipment. For units that are registered online at www.eaton.com/PQ/Register, the warranty is extended to thirty-six (36) months from the date of purchase, or fortytwo (42) months from the date of shipment. - Page 146 Product is sold, Company shall have no obligation under this Warranty. Also during such time, the period of this Warranty shall continue to run and the expiration of this Warranty shall not be extended upon payment of any overdue or unpaid amounts. Eaton ePDU G3 Operation Manual P-164000277—Rev 5...
- Page 147 OBTAINING WARRANTY SERVICE: In the USA, call the Customer Reliability Center 7x24 at 800.356.5737 . Outside of the USA, contact your local Eaton product sales or service representative, or call the Customer Reliability Center in the USA at 919.845.3683. For comments or questions about this Warranty, write to the Customer Quality Representative, 8609 Six Forks Road, Raleigh, North Carolina 27615 USA.
- Page 148 Warranty Eaton ePDU G3 Operation Manual P-164000277—Rev 5...
Need help?
Do you have a question about the ePDU G3 and is the answer not in the manual?
Questions and answers