
Related Manuals for CYP CSC-V102P


Summary of Contents for CYP CSC-V102P
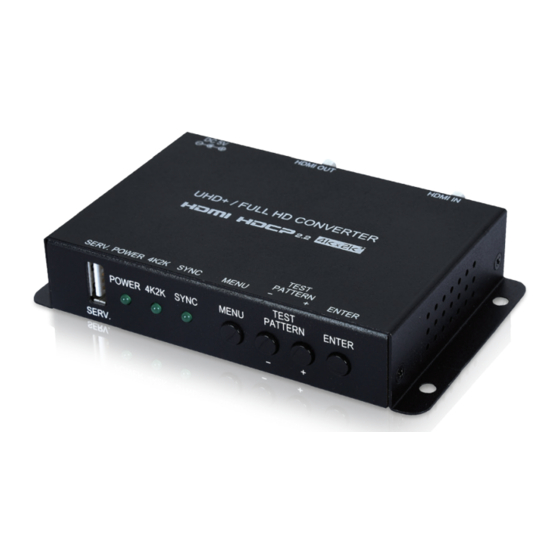
- Page 1 CSC-V102P 4K UHD HDMI to HDMI Scaler with EDID Management Operation Manual Operation Manual...
- Page 3 DISCLAIMERS The information in this manual has been carefully checked and is believed to be accurate. Cypress Technology assumes no responsibility for any infringements of patents or other rights of third parties which may result from its use. Cypress Technology assumes no responsibility for any inaccuracies that may be contained in this document.
-
Page 4: Revision History
SAFETY PRECAUTIONS Please read all instructions before attempting to unpack, install or operate this equipment and before connecting the power supply. Please keep the following in mind as you unpack and install this equipment: • Always follow basic safety precautions to reduce the risk of fire, electrical shock and injury to persons. -
Page 5: Table Of Contents
CONTENTS 1. Introduction ............1 2. Applications .............1 3. Package Contents ..........1 4. System Requirements ........2 5. Features ............2 6. Operation Controls and Functions ....3 6.1 Front Panel ..........3 6.2 Rear Panel ..........4 6.3 OSD Menu ..........5 6.4 EDID Management ......... 12 7. -
Page 6: Introduction
1. INTRODUCTION This HDMI to HDMI scaler with EDID management is designed to convert sources between 4K and 1080p to enable greater compatibility with the native resolutions of available displays. 4K sources may be scaled to 1080p, or bypassed, and 1080p sources may be scaled to 4K, or bypassed, all while maintaining the original frame rates. -
Page 7: System Requirements
4. SYSTEM REQUIREMENTS • HDMI input source equipment such as a media player, video game console or set-top box. • HDMI receiving equipment such as an HDTV, monitor, or audio amplifier. • The use of “Premium High Speed HDMI” cables is highly recommended. -
Page 8: Operation Controls And Functions
6. OPERATION CONTROLS AND FUNCTIONS 6.1 Front Panel TEST POWER 4K2K SYNC MENU PATTERN ENTER SERV. 2 3 4 SERV. This port is reserved for firmware and EDID update use only. POWER: This LED will illuminate to indicate the unit is on and receiving power. -
Page 9: Rear Panel
6.2 Rear Panel DC 5V HDMI IN HDMI OUT HDMI IN: Connect to HDMI source equipment such as a media player, game console or set-top box. Note: If no valid HDMI input source is detected, the unit will output a blue 720p60 signal to allow continued access to the OSD menu. HDMI OUT: Connect to an HDMI TV, monitor or amplifier for digital video and audio output. -
Page 10: Osd Menu
6.3 OSD Menu All functions of this unit are controlled by using the OSD (On Screen Display) which is activated by pressing the Menu button on the front of the unit. Use the + (PLUS), − (MINUS), and ENTER buttons to navigate the OSD menu. - Page 11 OUTPUT 2ND LEVEL 3RD LEVEL DESCRIPTION Up 4K2K Video Gain Level 1 (Weak) Set the level of video gain processing to (Only available when Level 2 apply to 1080p sources “Input 1080p” is not set LEVEL 3 when scaled to 4K. to PASS THROUGH.) Level 4 Level 5...
- Page 12 2ND LEVEL 3RD LEVEL DESCRIPTION Display Information Enable or disable the source/sink Information Display that shows when the source changes. OSD Timeout Set the OSD menu’s timeout period. 5 Sec Note: This does not 10 Sec change the display 15 Sec length of the OSD 20 Sec Information Display.
- Page 13 TEST PATTERN 2ND LEVEL 3RD LEVEL DESCRIPTION WHITE COLOR Pattern Select the test pattern to display. (Only available when Red Color “Mode” is set to ON.) Green Color Blue Color Magenta Color Yellow Color Cyan Color Color Bar Ramp Toggle Resolution 720×480p@60 Select the resolution...
- Page 14 TEST PATTERN 2ND LEVEL 3RD LEVEL DESCRIPTION HDCP Enable or disable the use of HDCP while (Only available when outputting a test “Mode” is set to ON.) pattern. Note: The version of HDCP used depends on the capability of the connected display.
- Page 15 TEST PATTERN 2ND LEVEL 3RD LEVEL DESCRIPTION Auto Timing Select 3840×2160p@30 (Cont.) 4096×2160p@24 4096×2160p@25 4096×2160p@30 3840×2160p@50 3840×2160p@60 4096×2160p@50 4096×2160p@60 INFORMATION 2ND LEVEL 3RD LEVEL DESCRIPTION Resolution Input Displays the current system information Resolution Output [Informational Display] concerning resolution, HDCP Output HDCP, and firmware Firmware Version version.
- Page 16 LOAD EDID 2ND LEVEL 3RD LEVEL DESCRIPTION Are You Sure? Allows updating the currently selected USER EDID. (Refer to Section 6.4.) FACTORY SETTING 2ND LEVEL 3RD LEVEL DESCRIPTION Are You Sure? Selecting “Yes” will return the unit to its factory default settings.
-
Page 17: Edid Management
6.4 EDID Management • EDID Selection The current EDID may be changed by entering the EDID menu in the OSD and selecting and changing to a new EDID. After selecting a new EDID, the unit will ask for confirmation to enact the change. There are 6 pre-defined Internal EDIDs, an External EDID which passes the EDID from the connected display, and 3 User EDIDs which are updatable. -
Page 18: Connection Diagram
7. CONNECTION DIAGRAM Media Player HDMI Input Power Supply DC 5V HDMI IN HDMI OUT HDMI Output UHDTV... -
Page 19: Specifications
8. SPECIFICATIONS 8.1 Technical Specifications HDMI Bandwidth 600MHz/18Gbps Input Port 1×HDMI Output Port 1×HDMI Control Interface 1×USB (Type-A) Power Supply 5V/2.6A DC (US/EU standards, CE/FCC/UL certified) ESD Protection Human Body Model: ±8kV (Air Discharge) ±4kV (Contact Discharge) Dimensions 108mm×25mm×75mm (W×H×D) [Case Only] 128mm×29mm×75mm (W×H×D) [All Inclusive]... -
Page 20: Video Specifications
8.2 Video Specifications Support Resolutions/Timing (Hz) 640×480p@60/72/75/85 720×400p@70/85 720×480i@59/60 720×480p@59/60 720×576i@50 720×576p@50 800×600p@56/60/72/75/85 848×480p@60 1024×768p@60/70/75/85 1152×864p@70/75/85 1280×720p@23/24/25/29/30/50/59/60 1280×768p@60/60 (RB)/75/85 ... -
Page 21: Acronyms
Support Resolutions/Timing (Hz) 2560×1600p@60 (RB) 2048×1080p@23/24/25/29/30/50/59/60 3840×2160p@23/24/25/29/30 (4:2:2) 3840×2160p@50/59/60 (4:2:0) 3840×2160p@23/24/25/29/30/50/59/60 (4:4:4) 4096×2160p@23/24/25/29/30 (4:2:2) 4096×2160p@50/59/60 (4:2:0) 4096×2160p@23/24/25/29/30/50/59/60 (4:4:4) 9. ACRONYMS ACRONYM COMPLETE TERM EDID Extended Display Identification Data HDCP High-bandwidth Digital Content Protection... - Page 24 CYPRESS TECHNOLOGY CO., LTD. www.cypress.com.tw...
Need help?
Do you have a question about the CSC-V102P and is the answer not in the manual?
Questions and answers