Advertisement
Quick Links
Advertisement

Related Manuals for Treasure Garden AG25T


Summary of Contents for Treasure Garden AG25T
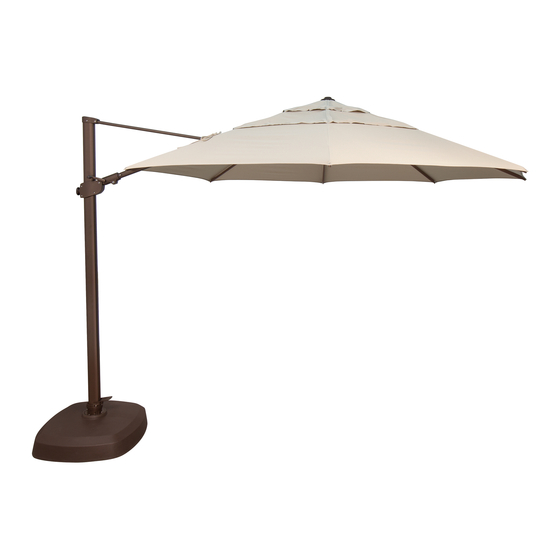
- Page 1 AG25T/AG25TSQ 11.5’ /10’ Cantilever Assembly and Operation Guide...
- Page 2 Thank you for purchasing Treasure Garden’s AG25T Cantilever Umbrella. Please remove all contents from the package, inspect and review checklist. CAUTION: To reduce personal injury and damage to your umbrella, read and follow this assembly and operation guide. We recommend a two-person team for assembly and disassembly.
- Page 3 NOTE: REFER TO SEPARATE BASE-13, BASE-AKZ OR MOUNT KIT MANUAL FOR BASE/MOUNT ASSEMBLY PRIOR TO PROCEEDING. S T E P 1 Umbrella Assembly Two-persons recommended for team lift and to complete assembly. With base cover in place or mount kit installed, lift umbrella up and insert the main frame onto the installed rotating hub (Fig.
- Page 4 S T E P 2 Opening Canopy In the closed position, turn adjustment knob counter clockwise (Fig. 3) and slide the adjustment knob upward (Fig. 4). Turn adjustment knob clockwise to tighten and secure in place. (Fig. 3) (Fig. 4) Insert crank handle into “Open/Close”...
- Page 5 S T E P 3 Tilting Canopy Tilting Front to Back Turn adjustment knob counter clockwise (Fig. 7) and slide car up and downward until desired height and angle is reached (Fig. 8). Tighten the adjustment knob clockwise to lock its position. Note: Do not use tilt function during winds. (Fig.
- Page 6 S T E P 4 360° Rotating Hub Swivel Place your foot on the foot pedal of the rotating hub and step-on the pedal to release rotating lock (Fig. 10). Place hands on the main frame and rotate the umbrella frame in either direction, in 90°...
-
Page 7: Care And Maintenance
Features To ATTACH Umbrella Light: Loosen the light adapter built into the lower hub by turning counter-clockwise (Fig. 14). After loosening, pull down light adapter post (Fig. 15) to attach the umbrella light (Fig. 16 and 17) (sold separately). To REMOVE Umbrella Light and CLOSE adapter: Remove umbrella light, and gently push up the light adapter post back into umbrella runner and tighten turning clockwise (Fig. -
Page 8: Warranty
In the event that warranted factory tornadoes, and storms) are not covered service is required, Treasure Garden will by this warranty. assume the responsibility of the return www.treasuregarden.com ©2018 Treasure Garden, Inc. - All Rights Reserved. 8/18...