
Related Manuals for Ametek Teseo CBA Series


Summary of Contents for Ametek Teseo CBA Series
- Page 1 CBA POWER AMPLIFIER Operation Manual Manual number H012161 Revision: 3 First edition published 26 July 2017...
- Page 2 T +49 2307 26070-0 T +65 6484 2388 sales.cts.de@ametek.com singaporesales.cts@ametek.com service.rf.cts@ametek.com Great Britain Taiwan AMETEK (GB) Ltd. trading as Teseq AMETEK Taiwan Corp. Ltd. 5 Ashville Way, Molly Millars Lane 10F-5, No. 120, Sec 2, Wokingham GongDaoWu Rd., Berkshire RG41 2PL...
-
Page 3: Table Of Contents
Table of Contents INTRODUCTION About this manual Amplifier description SAFETY General Safety symbols and terms Safety precautions INSTALLATION General Connecting the line cord Connecting the chassis ground cable Connecting the RF cables Connecting the Safety interlock PROTECTION CIRCUITS Over Heat Protection Input Protection Power Supply Faults Mismatch Protection... - Page 4 REMOTE CONTROL CONNECTIONS & OPERATIONS. Connectors IEEE 488 Operation RS-232 Operation Ethernet Connection USB Connection Remote Command Set ROUTINE MAINTENANCE General cleaning RF connectors Air-filter cleaning. FAULT FINDING 10.1 General checks 10.2 Fault indications WARRANTY 11.1 Definitions 11.2 Scope 11.3 Terms and conditions 11.4 Transfer of Warranty...
-
Page 5: Introduction
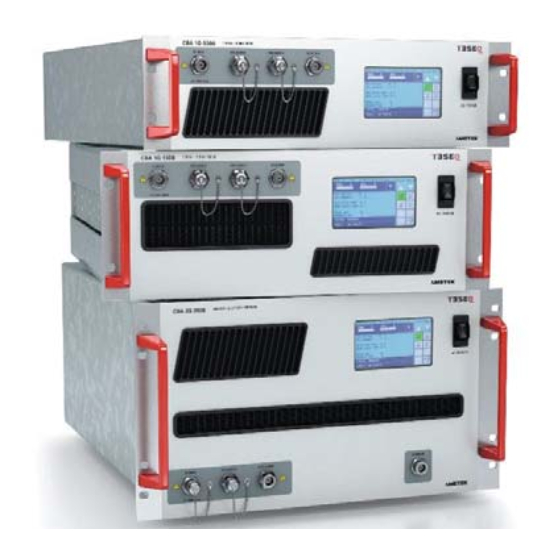
INTRODUCTION About this manual CAUTION! This Operation Manual contains important information for the user of the amplifier. It details important safety information and hazards that can be encountered by the user, and recommends precautions that should be taken to prevent damage to the amplifier or associated equipment. -
Page 6: Safety
SAFETY General The amplifier described in this manual is designed to be used only by qualified personnel. Use of the amplifier in a manner not specified in this manual may impair the protection provided by the amplifier. Before use, inspect the amplifier for damage which may impair safety. -
Page 7: Safety Precautions
Safety precautions Observe all the following precautions to ensure personal safety and prevent damage to the amplifier or equipment connected to it. WARNING! Properly dispose of the amplifier. The RF amplifier modules in this equipment contain Beryllium Oxide, and other components contain PTFE. - Page 8 CAUTION! Avoid static discharges The RF input and output connections are static-sensitive and should not be subjected to static discharge. CAUTION! Use the correct line supply source It is essential that the amplifier operates from a line supply source that does not apply voltages and frequencies between the line supply conductors (or between either line supply conductor and ground) that are outside the range detailed in the specification sheet.
-
Page 9: Installation
INSTALLATION General CAUTION! Exercise care when lifting. Amplifier models that are very heavy have a caution label on the top cover. Appropriate lifting practices should be observed during transportation, installation, or removal of the amplifier from its mounting position. When mounted in a rack, the amplifier must not be supported by the front panel fixing holes alone. -
Page 10: Connecting The Line Cord
Connecting the line cord CAUTION! It is essential that the amplifier operates from a line source that does not apply voltages and frequencies between the line conductors (or between either line conductor and ground) that are outside the range detailed in the specification sheet. -
Page 11: Protection Circuits
If you do not need this function, fit the supplied BNC shorting-link in place. Failure to do this will result in the amplifier latching in an “Interlock Open” status which switches the amplifier into standby mode. PROTECTION CIRCUITS Over Heat Protection The CBA RF components produce heat and are air cooled by fans. -
Page 12: Amplifier Operation
AMPLIFIER OPERATION CAUTION! Ensure that all the installation procedures detailed in Section 3 are complete before operating the amplifier. CAUTION! Ensure that before connecting or turning the RF source ON, the input-source peak output level is set to less than the maximum level detailed adjacent to the RF input connector(s). -
Page 13: Cooling Fan Operation
Cooling Fan Operation Once the amplifier has been turned on, the power supply fan will start along with the rear panel cooling fans. The CBA B series uses a forced air cooling system where air is drawn in to the front grill and exhausted out of the rear of the amplifier. Temperature sensitive fan circuits are used for optimal audible noise when the amplifier is in use. -
Page 14: Flt/Rst
Once pressed the OPRT/STBY button will illuminate green. This will indicate the DC power supply has energised supplying voltage to the power modules and the amplifier is in, Operate mode (RF On) FLT/RST The Fault/Reset (FLT/RST) will illuminate red when a fault is detected. Once the fault is removed/fixed depressing the FLT/RST will clear the fault indication so that normal operation of the amplifier can... -
Page 15: Gpib
GPIB The GPIB address can be changed by pressing the GPIB button. Pressing the button will cycle through the available addresses. INDICATORS & FUNCTIONS General Note: The front panel touch screen shows the amplifier status for both local and remote-control conditions. Touch Screen Indication Display Indication Display Function... -
Page 16: Connections
CONNECTIONS General The CBA series has an RF In, RF Out and a built in dual directional coupler with N- Type forward and reflected connections. These are available in two configurations, either all on the front or all on the rear of the amplifier. The CBA series are equipped with either a N-Type or a 7/16 RF output connecter (model dependent, see applicable datasheet) but the same standard shall still apply;... -
Page 17: Rf Output N-Type Or 7/16 (Model Dependent)
RF output N-Type or 7/16 (Model Dependent) WARNING! High RF voltages can occur on the inner conductor of the RF-out connector, which could cause RF burns if touched. Do not expose the centre pin to static discharge. The nominal RF output impedance of the amplifier is 50 ohms, but it will safely drive a load with an input impedance other than 50 ohms (resistive or reactive), but will deliver less power. -
Page 18: Safety Interlock
Safety interlock Rear Panel mounted BNC jack receptacle. 50Ω impedance. +5 Volts (current limited) This connector is supplied with a shorting-link for use when the safety interlock function is not required. IEEE-488 Convector 24 Way IEEE Bulkhead Connector. Signal Signal Data IO1 Data IO5 Data IO2... -
Page 19: Rs232 Connection
RS232 Connection Pin Female D-Type Signal Data Carrier Detected Receive (RX) Transmit (TX) Data Terminal Ready Signal Ground Data Set Ready Request to Send Clear to send Ring Indicator 7.10 USB Connection USB-B device connector Signal VDC (5V) Receive (RX) Transmit (TX) Data Terminal Ready 7.11... -
Page 20: Remote Control Connections & Operations
REMOTE CONTROL CONNECTIONS & OPERATIONS. Connectors IEEE 488.2 24 Way IEEE connector RS232 9 pin female D-type RJ45 with signalling LED’s USB-B device connector IEEE 488 Operation The Teseq Amplifiers can be operated remotely from a computer having an IEEE-488 interface. -
Page 21: Ethernet Connection
Configure the selected Port as per the below settings. RS-232 / USB Configuration Settings RS-232 Bits per second 9600 9600 Data Bits Parity None None Stop Bits Flow Control None None To place the amplifier in remote operation type in a valid command such as “STATUS”. -
Page 22: Remote Command Set
Remote Command Set Amplifier Status Commands MODEL Display Unit Model Display Unit Serial Number *IDN? Model, S/N, Firmware Version *RST Restarts the Amplifier STATUS Display Amplifier Status Message FAULT Display Amplifier Fault RESET, RE Reset Amplifier Fault *SCREENSHOT Takes a screenshot of the display Amplifier Operate Commands ON, OP, OPRT, RFOP, RFON Turns the Amplifier On... - Page 23 Amplifier RF Power Metering Commands POWERFWD Report FWD Power (Watts) POWERFWDDB Report FWD Power (dBm) POWERRFL Report RFL Power (Watts) POWERRFLDB Report RFL Power (dBm) Report Power (FWD, RFL) Amplifier Gain Control GAIN Display Gain Level SETGAINxxx Set specific gain level ZEROATTN Set Gain to 100% FULLATTN...
-
Page 24: Routine Maintenance
ROUTINE MAINTENANCE General cleaning For cleaning the front panel, use an anti-static foam cleaner and a soft lint-free cloth or tissue. Using abrasive materials or strong solvents may damage the surface finish or the front panel overlay. RF connectors If the RF connectors are used frequently, or left disconnected for long periods, there is a tendency for dirt and oxide deposits to build up. -
Page 25: Fault Finding
FAULT FINDING 10.1 General checks These are simple checks the user can perform to establish the cause of any amplifier malfunction. The following procedures are by no means comprehensive, and do not disclose any obscure fault with the amplifier or any system it may form a part of. Amplifier Won’t Power Up at Mains Switch on. -
Page 26: Fault Indications
Amplifier not responding to remote commands Ensure that the remote connector is mated properly. Ensure that the ‘REMOTE’ indicator is illuminated on the touch screen. If not, send a, “OPRT” command. Ensure that there is no damage to the remote connector or cable, especially around where the cable enters the connector. - Page 27 Ensure that for amplifier models with multiple line-input connectors, all connectors are connected to the line supply. Ensure that for models with more than one power supply, that all the rear panel circuit breakers are set to the ON position. Note: If the supply fault indicator is due to a high-temperature condition, cool the power-supply by leaving the amplifier in, “STANDBY”...
-
Page 28: Warranty
WARRANTY Teseq Ltd. Warrants that this product is free from defects in materials and workmanship for a period of: Three years on standard products one year on specifically designed products 11.1 Definitions “Standard” means TESEQ commercial product which, from time to time, appears in its official marketing literature. -
Page 29: Transfer Of Warranty
This warranty does not cover damage from customer accidents, misuse, abuse, misapplication, operation with incorrect AC voltage, operation with faulty associated equipment, unauthorised use by third parties other than the original customer, modification or alteration without prior factory approval, service by an unauthorised Service Centre and performance deterioration which will occur due to normal usage. -
Page 30: Repair Form
Works Order No: Please use this form for ALL amplifiers being returned for repair. Please give as many details as possible. Teseq GmbH Teseq Inc / AMETEK CTS Landsberger Straße 255 52 Mayfield Avenue 12623 Berlin Edison, New Jersey, 08837, USA... -
Page 31: Fig 1, 3U Front Panel & Outline Drawing
DRAWING SPECIFICATIONS 13.1 Fig 1, 3U front Panel & Outline Drawing CBA Manual: H012161 Rev: 3... -
Page 32: Fig 2, 4U Front Panel & Outline Drawing
13.2 Fig 2, 4U Front Panel & Outline Drawing CBA Manual: H012161 Rev: 3... -
Page 33: Fig 3, 6U Front Panel & Outline Drawing
13.3 Fig 3, 6U Front Panel & Outline Drawing CBA Manual: H012161 Rev: 3... -
Page 34: Fig 4, 10U Front Panel Drawing
13.4 Fig 4, 10U Front Panel Drawing This configuration consists of a 7U power amplifier draw & 3U power supply draw CBA Manual: H012161 Rev: 3... - Page 35 CBA Manual: H012161 Rev: 3...
-
Page 36: Datasheet Specifications
DATASHEET SPECIFICATIONS http://www.teseq.co.uk/products/CBA-1G-030B.php http://www.teseq.co.uk/products/CBA-1G-070B.php http://www.teseq.co.uk/products/CBA-1G-150B.php http://www.teseq.co.uk/products/CBA-1G-300B.php http://www.teseq.co.uk/products/CBA-1G-600B.php http://www.teseq.co.uk/products/CBA-1G-1200B.php http://www.teseq.co.uk/products/CBA-3G-050B.php http://www.teseq.co.uk/products/CBA-3G-100B.php http://www.teseq.co.uk/products/CBA-3G-300B.php http://www.teseq.co.uk/products/CBA-3G-500B.php http://www.teseq.co.uk/products/CBA-6G-035C.php http://www.teseq.co.uk/products/CBA-6G-075C.php http://www.teseq.co.uk/products/CBA-6G-040B.php http://www.teseq.co.uk/products/CBA-6G-080B.php http://www.teseq.co.uk/products/CBA-6G-120B.php CBA Manual: H012161 Rev: 3...
Need help?
Do you have a question about the Teseo CBA Series and is the answer not in the manual?
Questions and answers