Lutron Electronics Grafik Eye GRX-4000 Series Installer's Manual
Installing, operating and maintaining with xp series switching panels
Hide thumbs
Also See for Grafik Eye GRX-4000 Series:

Related Manuals for Lutron Electronics Grafik Eye GRX-4000 Series


Summary of Contents for Lutron Electronics Grafik Eye GRX-4000 Series
- Page 1 Attention Contractors... LUTRON 4000 Series Installer’s Guide A Step-by-Step Guide for Installing, Operating and Maintaining a Complete Lutron GRX-4000 Series System with XP Series Switching Panels...
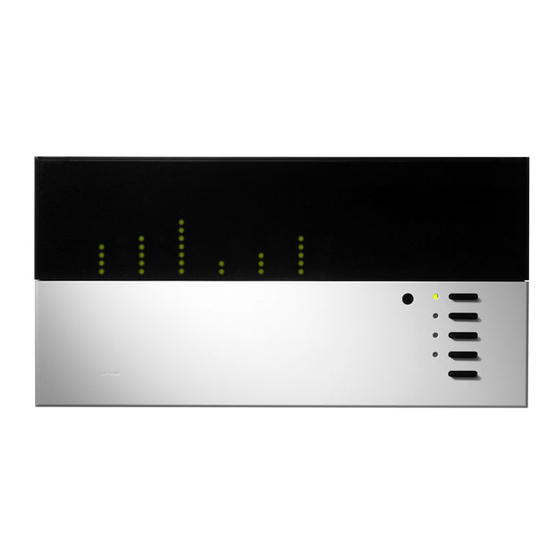
- Page 2 Overview GRX-4000 Series Control Unit GRAFIK Eye XP Series Panel TERMINAL BLOCKS SWITCHING MODULE PANEL COVER CLASS 2 TRANSFORMERS Link Power (Pins Data (Pins elec ircui Circ elec elec isplay Load 4 Non- 5 Elec. Unassig Control and Zone CIRCUIT SELECTOR Using circuit Using Zone Low End...
-
Page 3: Table Of Contents
Table of Contents Step-by-Step Instructions Install System Page Set Up System Page STEP 1: Mount Wallboxes ........2 STEP 13: Assign Zones.........14 STEP 2: Mount Panels........2,3 STEP 14: Set Up Scenes on the GRX-4000..15 STEP 3: Wire System......... 4,5 STEP 15: Set Up Accessory Controls....16,17 STEP 4: Set Address Switches......6... -
Page 4: Step 1: Mount Wallboxes
Mount Wallboxes and Panels STEP 1: Mount Wallboxes Control Wallbox Use wallboxes with a minimum depth of 2-3/4" GRX-CIR Mounts in Ceiling with special mounting ring (provided) (70mm) for Accessory Controls and 3-1/2" (89mm) for GRX-4000 Series Control Units. GRX-4S-DW Lutron # 241-399 (provided) Multigang installations may require spacers between GRX-AV‘s... - Page 5 Mount Wallboxes and Panels STEP 2: Mount Panels (cont.) Suggested Surface Mount Suggested Recess Mount CEILING CEILING FEED AND LOAD FEED AND LOAD CIRCUIT WIRING CIRCUIT WIRING CLASS 2 (SELV) CLASS 2 (SELV) WIRING TO WIRING TO DISTRIBUTION DISTRIBUTION CONTROLS CONTROLS PANEL PANEL...
-
Page 6: Step 3: Wire System
Wire System STEP 3: Wire System GRX Wiring 2 #12 AWG (2.5mm ) FROM TERMINALS 1 TO 1, AND 2 TO 2 FOR PANEL TO PANEL WIRING, INCLUDE AN ADDITIONAL 1 #18 AWG (1.0mm BETWEEN PANELS FROM TERMINALS 5 TO 5. 2 #18 AWG (1.0mm ) TWISTED SHIELDED PAIR FROM TERMINALS 3 TO 3, AND 4 TO 4 - BELDEN #9461 OR ALPHA #2211 ARE #22 AWG AND ARE RECOMMENDED. -
Page 7: Step 3: Wire System
Wire System STEP 3: Wire System (cont.) Suggested wiring when panels are close together Suggested wiring when panels are far apart Load 16A Max. Splice Neutrals in Trough Load 16A Max. Hot/Live Neutral Wire (N) Large Small Switched Hot/Live Wire (H) Neutral Wire (SH) Distance... -
Page 8: Step 4: Set Address Switches
Set Address Switches STEP 4: Set Address Switches 1 2 3 4 5 6 Control Action Address Function Factory Set No switches for addressing. Go to Step 6 if no other types of LUTRON LUTRON Accessory Controls. NTGRX-1S GRX-4000 Series 1 2 3 4 Control 1 Must set switches BEFORE... -
Page 9: Step 5: Set Function Switches
Set Function Switches STEP 5: Set Function Switches 1 2 3 4 5 6 Accessory Control Function Set by Switches Function Set on Back of Control with Front Factory Set Buttons (See Step 17) Factory Set Activate Scenes 1-4 Activate Scenes 5-8 Activate Scenes 9-12 Activate Scenes 13-16 Activate Scenes on... -
Page 10: Step 6: Install Controls
Install Controls and Activate Loads STEP 6: Install Controls Control Control Mounting Adapter M CONTROL CONTROL ADAPTER LINK MOUNTING SCREWS MOUNTING SCREWS Screws Screws Link After completing steps 4 and 5, mount controls. Refer to detailed mounting instructions packaged with each control. -
Page 11: Step 8: Activate Controls
Activate Controls STEP 8: Activate Controls Power OK (Pins 1,2) Link Status Data OK (Pins 3,4) Once all controls are installed and wiring verified, turn ELECT IRCUIT the control wiring feed circuit breaker ON. Check that the Power OK LED at the top of the ‘Power OK’... -
Page 12: Step 9: Assign Load Types
Assign Load Types STEP 9: Assign Load Types Assigning Load Types is done using the Circuit Circuit Selector Selector located in each XP Series panel. Link Status Power OK (Pins 1,2) Press button 5 repeatedly until Load Type lights. Data OK (Pins 3,4) Use buttons 1 and 2 to view present load type of each ELECT IRCUIT... -
Page 13: Step 10: Address Grx-4000 Control Units
Address GRX-4000 Control Units STEP 10: Address GRX-4000 Control Units Push the scene 1 button on a GRX-4000 Series Control Unit. The scene 1 LED should go on. Address Control Unit as follows: A. Push and hold top and bottom scene buttons until ZONE 1 ZONE 2 ZONE 3... -
Page 14: Step 11: Remove Bypass Jumpers
Remove Bypass Jumpers STEP 11: Remove Bypass Jumpers BYPASS JUMPERS— Replace whenever a load Repeat Step 7 if load wiring has been modified. is serviced. Turn circuit breakers OFF. Danger - Do not remove or replace bypass jumpers while power is ON. Loosen both screws of each bypass jumper. -
Page 15: Step 12: Check System
Check System STEP 12: Check System Until zones are assigned in Step 13, all circuits will be controlled by the first zone of the GRX-4000 Series Control Unit addressed to ‘A1’. Locate zone 1 of this ‘A1’ control (referred to as A1 1 in the Circuit Selector) and use it to check that all circuits turn ON and OFF ZONE 1 ZONE 2... -
Page 16: Step 13: Assign Zones
Assign Zones STEP 13: Assign Zones A. Press and hold buttons 1 and 5 until ELECT ALUE Link Status Power OK (Pins 1,2) lights. Data OK (Pins 3,4) B. Press button 5 repeatedly until ELECT IRCUIT Using Circuit Schedule lights. C. -
Page 17: Step 14: Set Up Scenes On The Grx-4000
Set Up Scenes on the GRX-4000 STEP 14: Set Up Scenes on the GRX-4000 A. Lift the cover flap on a GRX-4000 Series Control Unit (flap hinges up). B. Press the Scene 1 button. C. Press buttons of each zone to create a scene. -
Page 18: Step 15: Set Up Accessory Controls
Set Up Accessory Controls STEP 15: Set Up Accessory Controls STEP A: Place Control to ‘Talk’ in Set-Up Mode All Accessory Controls (except NTGRX-1S) must be set up to make a Control Unit(s) “listen” to button presses on the Accessory Control. Control Action (only 1 at a time) -
Page 19: Step 15: Set Up Accessory Controls
Set Up Accessory Controls STEP 15: Set Up Accessory Controls (cont.) STEP B: Make Control Unit “Listen” STEP C: Take Control Out of Set-Up Mode Control Action Control Action (only 1 at a time) (only 1 at a time) GRX-4000 Press and hold another Control Unit’s Scene 1 GRX-4000 Press and hold first and fifth buttons of the original... -
Page 20: Step 16: Set Normal/Emergency Switch
Set Normal/Emergency Switch STEP 16: Set Normal/Emergency Switch (Non-Essential/Essential) Circuit Selector in Circuit Selector in Note: Normal (Non-Essential) Emergency (Essential) This step is only performed if there are any panels Panel Lighting Panel with Emergency (Essential) Lighting Circuits on the job. Link Status Power OK (Pins 1,2) Link Status... - Page 21 Congratulations! Your state of the art system is now ready to operate! Now: • Place a copy of the Circuit and Control Directories in each XP Panel. • Replace the cover(s) securely. • Give the customer a copy of this guide. (The rest of this guide is reference material.) Lutron is very interested in your comments on this Installer’s Guide and on its products.
-
Page 22: Xp Series Panels
Reference Sheet Look Inside an XP XP Series Switching Panels The XP Series Switching Panel has 1 to 12 Switching Modules and a Circuit Selector to set up Zone Assignments and Load Types. LOAD WIRING 16A MAX PER Each Switching Module has four switching SWITCHING MODULE OUTPUT mechanisms. -
Page 23: Accessory To Control Unit To Panel
Accessory to Control Unit Reference Sheet to Panel Wiring Correct Wiring Technique ACCESSORY CONTROL SERIES PANEL GRX-4000 ACCESSORY CONTROL SERIES PANEL GRX-4000 ACCESSORY CONTROL GRX-4000 ACCESSORY CONTROL TO OTHER PANEL OR GRX-4000 SERIES CONTROL UNITS OR ACCESSORY WIRING MUST BE DAISY-CHAINED, NOT BRANCHED OR HOME RUN. CONTROLS 1 to 1 Wiring XP SERIES PANEL... -
Page 24: Panel To Panel
Reference Sheet Panel to Panel Wiring 1 to 1 Wiring TO GRX-4000 SERIES CONTROL UNITS AND TO NEXT ACCESSORY CONTROLS XP SERIES PANEL SHIELD SHIELD 1 2 3 4 5 1 2 3 4 5 Power OK (Pins 1,2) Link Status Power OK (Pins 1,2) Link Status Data OK (Pins 3,4) -
Page 25: Circuit Selector Functions
Reference Sheet Circuit Selector Functions Circuit Selector Functions Circuit Selector listens to the GRX-4000 Series ‘Power OK’ indicates ‘Data OK’ blinks when Control Unit(s) and then tells the circuits whether to whether 24VFW is the Circuit Selector is be ON or OFF. present to terminal 2 or receiving data from the not. -
Page 26: Troubleshooting Guide Page
Reference Sheet Troubleshooting Guide Troubleshooting Guide Link Status Power OK Circuit Selector Data OK Switching ‘Power OK’ ‘Data OK’ Circuit # Symptom Module Display GRX LEDs Possible Cause/Solutions Normal “Heartbeat” Blinking • All LEDs show OK, see below for Operation as (~1 per sec) other suggestions Reference... - Page 27 Reference Sheet Troubleshooting Guide Troubleshooting Guide (cont.) After checking LED diagnostics, use this chart: Symptom Possible Cause/Solutions • GRX-4000 Series Control Units are not addressed. Accessory Control will not go into Set Up Mode • Terminals 3 and 4 miswired. •...
-
Page 28: Circuit Directory
Reference Sheet Circuit Directory Panel Circuit Customer Circuit Non-Dim Actual Load Zone Location Ckt. # Description Load Type 3 Phase, 4 Wire Shown Ckt. # Assignments Circuit Rating is 16 Amps cont. (Room or (Fixture Name) Address Zone HP @ 120V, HP @ 277V Area) Last... -
Page 29: Control Directory
Reference Sheet Control Directory Control Directory - GRX-4000 Series Control Units (8 max/link) Area: Area: Area: Area: LUTRON LUTRON LUTRON LUTRON Zone Zone Description Zone Zone Description Zone Zone Description Zone Zone Description Area: Area: Area: Area: LUTRON LUTRON LUTRON LUTRON Zone Zone Description... -
Page 30: Maintenance
Reference Sheet Maintenance Maintenance XP Series Panels GRX-4000 Series Control Units and Accessory Controls Danger - Any liquid entering the panel may reach internal components, cause Clean front surface of control with a soft towel personal injury, damage the equipment, moistened with a mild soap solution (non- and void the warranty. -
Page 31: Glossary Of Terms
Reference Sheet Glossary of Terms Glossary of Terms Accessory Control - GRAFIK Eye control wired to a Scene - (or Preset) - Predetermined light intensity for GRX-4000 (or GRX-3000) Series Control Unit to one or more lights, creating a lighting effect that select scenes, raise and lower specific zones or can be recalled by pressing a single button. - Page 32 (800) 523-9466 (U.S.A., Canada, and the Caribbean) (610) 282-3800 (Other areas) Our address on the web is http://www.lutron.com Lutron Electronics Co., Inc., reserves the right to make improvements or changes in its products without prior notice. Although every attempt is made...
Need help?
Do you have a question about the Grafik Eye GRX-4000 Series and is the answer not in the manual?
Questions and answers