
Subscribe to Our Youtube Channel
Related Manuals for Badger Meter HR-LCD Pulse


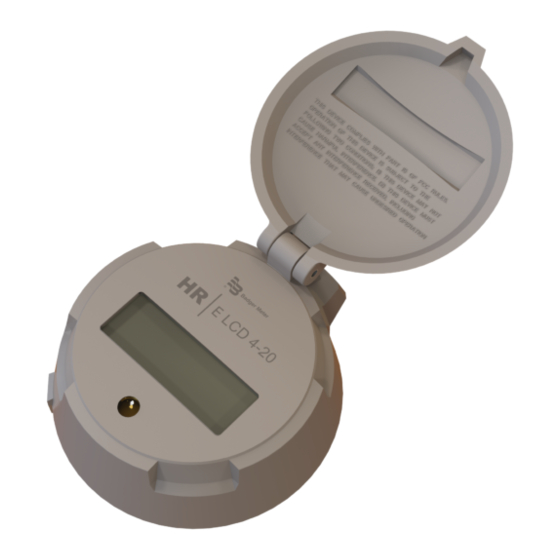
Summary of Contents for Badger Meter HR-LCD Pulse
- Page 1 High Resolution LCD Register HR-LCD Pulse, HR-LCD 4-20 scaled/unscaled Programming Manual REG-PM-02658-EN-01 (May 2018)
- Page 2 High Resolution LCD Register , HR-LCD Pulse, HR-LCD 4-20 scaled/unscaled Page ii REG-PM-02658-EN-01 May 2018...
-
Page 3: Table Of Contents
Programming Manual CONTENTS Introduction . . . . . . . . . . . . . . . . . . . . . . . . . . . . . . . . . . . . . . . . . . . . . . . . . . . . . . . . . . . . . . . . . . . . . . . . . 5 System Requirements . - Page 4 High Resolution LCD Register , HR-LCD Pulse, HR-LCD 4-20 scaled/unscaled Page iv REG-PM-02658-EN-01 May 2018...
-
Page 5: Introduction
LCD registers using the HR-E LCD Programmer software . Instructions for installing the Programmer software can be found in "Appendix" on page Audience and Purpose This manual is intended to be used by utilities for programming Badger Meter high resolution registers . SYSTEM REQUIREMENTS A computer with a Windows® 7 (or newer) operating system is required for programming HR LCD registers . -
Page 6: Ir Head Bracket
IR Head Bracket IR HEAD BRACKET To facilitate reading and programming multiple registers, the IR head bracket is recommended . The bracket is easy to attach and remove, and allows hands-free alignment of the programming cable IR head with the register IR port . Attaching the Bracket to a Register 1 . -
Page 7: Using The Programmer Software
Using the Programmer Software USING THE PROGRAMMER SOFTWARE Use the Programmer software to view and change the parameters that are currently programmed into the register, and program new parameters, if needed . You can also clear the register reading . OTEE: If you need help installing the software, see the instructions "Installing the Programmer Software"... -
Page 8: Performing A Read
Using the Programmer Software 4 . When the Programmer screen opens, select the correct COM port for the IR cable using the IR Port drop-down menu . OTEE: If the correct COM port is not selected, the software will be unable to read the register . -
Page 9: Register Types
Using the Programmer Software Register Types When you Read the register using the IR cable, the software automatically detects the register type . The device type and serial number display at the top of the screen . Software parameters that display vary depending on the device type . Examples of completed Programmer screens for both register types are displayed here . -
Page 10: Change Current Settings
Using the Programmer Software Change Current Settings To change the register settings and set a new default value for any of the data fields, follow this procedure . 1 . Click the drop-down menu to the right of the field to display a list of values . 2 . -
Page 11: Programmer Parameters
Programmer Parameters PROGRAMMER PARAMETERS The Programmer fields are described in this section . The descriptions apply to both register types unless otherwise indicated . The HR LCD Pulse register is used in the examples unless otherwise indicated . Serial # Field The Serial # (number) field (Figure 15) is a read-only field that displays the factory-assigned serial number . -
Page 12: Meter Model/Size Field
Programmer Parameters Meter Model/Size Field The Meter Model/Size field (Figure auto-populates based on the Meter Type selected . Click the drop-down menu to the right of the data field to select a Meter Model . Meter Sizes corresponding to the Meter Models in the drop-down menu are shown in the table below Figure 17 . -
Page 13: Billing Units Field
Programmer Parameters Billing Units Field The Billing Units field displays the default units for which the customer is billed, and is indicated by dashed lines above and below the totalizer reading on the register display (Figure 19) . The default is based on the Unit of Measure selected: Unit of Measure Default Billing Unit Gallons, liters, imperial gallons... -
Page 14: Rate Of Flow Units Field
Programmer Parameters Rate of Flow Units Field The Rate of Flow Units field displays the unit by which the rate of flow is measured . The factory-programmed default is Gallon . Click the drop-down menu to the right of the data field to select a Rate of Flow Units . The options are gallon, cubic meter, liters, cubic feet and imperial gallon as shown in Figure 22 . -
Page 15: View Indicators
26) deletes ALL readings for the selected meter . MPORTANT If you select this option, a pop-up message displays (Figure 27), asking for a password to confirm the deletion. Contact Badger Meter Technical Support for the password. Figure 27: Password required Figure 26: Clear all readings... -
Page 16: 4-20 Ma Parameters
Programmer Parameters 4-20 mA Parameters OTEE: This field does not apply to the HR-LCD Pulse register . The 4-20 mA Parameters field (Figure displays the parameters of the analog control signal . The 4-20 mA output signal is directly proportional to the meter rate of flow . For default measurement resolution values, see the Measurement Resolution charts in the High Resolution LCD Registers User Manual, available at www.badgermeter.com . -
Page 17: Unscaled Output Parameters
Programmer Parameters Unscaled Output Parameters OTEE: This field does not apply to the HR-LCD Pulse register . Unscaled Output Parameters field (Figure 30) represents • The Number of Pulses field, which displays the number of unscaled output pulses, per Unit of Measure, from the register . -
Page 18: Exiting The Software Application
Exiting the Software Application EXITING THE SOFTWARE APPLICATION To exit and close the software application, click the X in the top right corner of the software screen as shown in Figure 31 . Figure 31: Click the X to exit software Page 18 REG-PM-02658-EN-01 May 2018... -
Page 19: Appendix
Appendix APPENDIX May 2018 REG-PM-02658-EN-01 Page 19... -
Page 20: Installing The Programmer Software
Installing the Programmer Software INSTALLING THE PROGRAMMER SOFTWARE Follow these steps for installing the software . 1 . Double-click the setup.exe file to begin installation . The Welcome screen displays . Figure 32: Software Installer Wizard Welcome screen 2 . Click Next . The Select Installation Folder screen displays . Figure 33: Software files location 3 . - Page 21 Installing the Programmer Software Figure 34: Ready to install 4 . Click Next to start installation . A progress bar displays briefly (Figure 35) . Then the Installation Complete screen displays (Figure 36) . Figure 35: Progress bar shows installation in progress 5 .
-
Page 22: Com Port
COM Port COM PORT The Programmer software communicates with the register through the register IR port using the IR programming and data profile cable (IR cable) . You must identify the correct communication (COM) port for the IR cable to make sure the software can communicate with the register . - Page 23 Programming Manual INTENTIONAL BLANK PAGE May 2018 REG-PM-02658-EN-01 Page 23...
- Page 24 The Americas | Badger Meter | 4545 West Brown Deer Rd | PO Box 245036 | Milwaukee, WI 53224-9536 | 800-876-3837 | 414-355-0400 México | Badger Meter de las Americas, S.A. de C.V. | Pedro Luis Ogazón N°32 | Esq. Angelina N°24 | Colonia Guadalupe Inn | CP 01050 | México, DF | México | +52-55-5662-0882 Europe, Eastern Europe Branch Office (for Poland, Latvia, Lithuania, Estonia, Ukraine, Belarus) | Badger Meter Europe | ul.
Need help?
Do you have a question about the HR-LCD Pulse and is the answer not in the manual?
Questions and answers