Table of Contents
Advertisement
Quick Links
INSTALLATION AND OPERATION
The Discover Protein Hydrolysis is only compatable with Discover firmwave versions 201A14 or later.
The current firmware version on the Discover can be found by pressing EDIT and using the arrow keys
to select System Info.
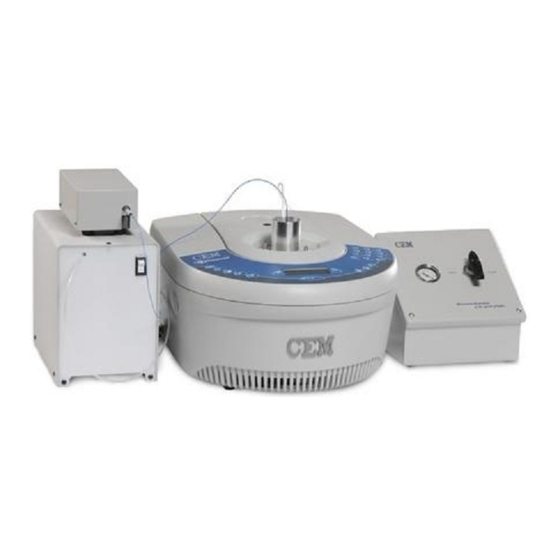
Figure 1. Instrument Connection Ports (COM2 indicated in red; Pressure Port indicated in yellow.)
1.
PRESSURE SENSOR
1.1.
Connect the 9-pin sensor connector from the valve panel into the pressure port (9-pin
receptacle) on the rear of the Discover (Figure 1).
2.
FIBER-OPTIC TEMPERATURE PROBE
2.1.
Connect the end of the serial cable labeled "To Temperature Box" to the temperature control
box. Connect the other end of the cable to COM2 on the read of the Discover (Figure 1).
2.2.
Connect the blue fiber-optic temperature probe to the temperature control box, taking care not
to bend the probe.
DISCOVER PROTEIN
HYDROLYSIS
INSTRUCTIONS
HARDWARE ASSEMBLY AND SETUP
NOTE
600313
Rev. 5
10/6/2008
Advertisement
Table of Contents

Related Manuals for CEM Discover Protein Hydrolysis


Summary of Contents for CEM Discover Protein Hydrolysis
- Page 1 INSTALLATION AND OPERATION INSTRUCTIONS NOTE The Discover Protein Hydrolysis is only compatable with Discover firmwave versions 201A14 or later. The current firmware version on the Discover can be found by pressing EDIT and using the arrow keys to select System Info.
- Page 2 EXTERNAL AIR COOLING 3.1. On the lower rear side of the Discover install the pressure regulator to the Discover using the ¼” polyethylene tubing (Figure 1). 3.2. Connect the other side of the pressure regulator to a source of compressed air and set the pressure regulator to 20 PSI.
- Page 3 1.1.7. Set Run Time, then press ENTER. (2:30 is recommended but may be adjusted). 1.1.8. Set Hold Time, then press ENTER. (15:00 is recommended but may be adjusted.) NOTE Run Time is the time it takes for the Discover to reach the maximum temperature. The Hold Time is the time the Discover maintains the maximum temperature.
- Page 4 Figure 4. Vessel Assembly. 2.6. Insert the thermowell into the hole in the center of the condensation shield. Thread the vessel cap on hand tight (Figure 4). 2.7. Using the wrench set, seal the vessel by tightening the vessel cap onto the vessel body an additional 1/4 to 3/8 turn (Figure 4).
- Page 5 Figure 6. Valve Handle Positions. Perform five vacuum evacuation/nitrogen purge cycles. 3.1. With the pressure regulator set to 15 psi, turn the valve handle to the “Nitrogen” position for a period of 15 seconds. 3.2. Turn on the vacuum pump. Turn the valve handle to the “Vacuum” position. 3.3.
- Page 6 Complete Valve Panel Assembly 908275 Reaction Vessel Top with 2 Ports 148460 Reaction Vessel Bottom 324015 Microvial Tray Insert 324020-P Condensation Shield 324030 Fiber-Optic Temperature Probe 314325 Thermowell Assembly (Qty 2) 430676 Discover Protein Hydrolysis Operations Manual 600313 Wrench Set SP-1367...
Need help?
Do you have a question about the Discover Protein Hydrolysis and is the answer not in the manual?
Questions and answers