
Related Manuals for CEM DT-986H


Summary of Contents for CEM DT-986H
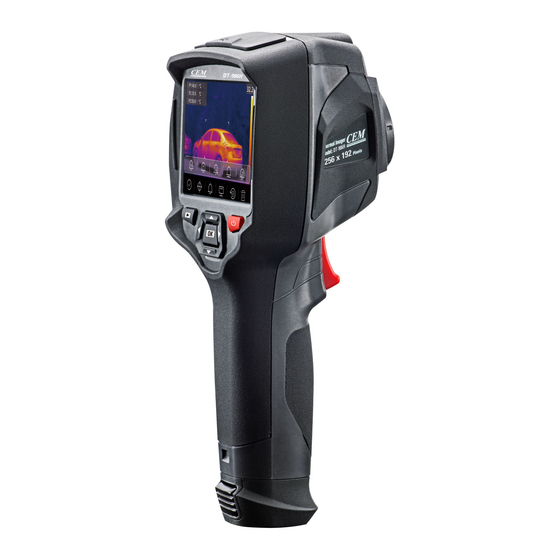
- Page 1 Operating Instruction for 256 x 192 Pixels Thermal Imager Please read this manual before switching the unit on. Important safety information inside.
-
Page 3: Table Of Contents
Operating Instruction for Thermal Imager Page Content 1.Introduction................. 2.Safety Information............... 3.Specifications................4.Structure Description..............5.Before You Start................5-1.How to Charge the Battery............5-2.Power On................. 5-3.Power Off................5-4.Desktop................... 5-5.Focus..................5-6.Shutter..................5-7.Temperature Measurement............5-8.Emissivity Adjustment............. 5-9.Reflected Temperature............5-10.Thermal Imager Reporter Software......... 6.Menus..................6-1.Main Menu................6-2.Image Mode................ - Page 4 Operating Instruction for Thermal Imager Page Content 6-8.Camera Menu................6-8-1.Save Image................ 6-8-2.Add Text Note..............6-8-3.Change Measure Parameters..........6-8-4.Add Analyse Tools.............. 6-8-5.Change Image Mode............6-8-6.Change Color..............6-9.Video Menu................6-10.Files Browser................ 6-10-1.Analyse an Image............. 6-10-2.Play a Video..............6-10-3.View Image Info............... 6-10-4.Delete a File..............6-11.USB Mode................
-
Page 5: Introduction
Operating Instruction for Thermal Imager 1.Introduction • The Thermal Imager is handheld imaging camera used for predictive maintenance, equipment troubleshooting and verification. • Focus the len to the object, Then the thermal and visual images are displayed on the LCD and can be saved to a Micro SD Memory card. - Page 6 Operating Instruction for Thermal Imager • Do not get water or salt water on the battery, or permit the battery to get wet. • Clean the case with a damp cloth and a weak soap solution. Do not use abrasives, isopropyl alcohol, or solvents to clean the case or lens/screen.
-
Page 7: Specifications
Operating Instruction for Thermal Imager 3.Specifications Imaging and Optical Data Field of View (FOV)/Minimum Focus Distance 56°x 42°/0.5m Spatial Resolution (IFOV) 3.75mrad Thermal Sensitivity/NETD <0.1°C at 30°C (86°F)/100mK Image Frequency 25Hz Focus Mode Focus Free Zoom 1-16x continuous, digital zoom. Focal Length 3.2mm Focal Plane Array (FPA)/Spectral Range... - Page 8 Operating Instruction for Thermal Imager Digital Camera Built-in Digital Camera 2 Megapixels Built-in Digital Lens Data FOV 65° Data Communication Interfaces Interfaces USB-Type C Data transform between camera and PC; Live video between camera and PC Wifi 802.11, transfer images and realtime video stream Power System Battery Li-ion battery, 4 hours operating time...
-
Page 9: Structure Description
Operating Instruction for Thermal Imager 4.Structure Description 1-Visual Camera 6-LCD Display and Touch Screen 2-Infrared Camera Lens 7-Images Browse Button 3-Dust Cover Lanyard Hole 8-Power/Lock Button 4-Trigger 9-Menu/Select Button 5-Interface and Cover 10-Up/Down/Right/Left Button 5.1-Type-C USB/Charge 11-Battery 5.2-Micro SD Card Slot 12-Triangular Bracket Fixed Hole... -
Page 10: Before You Start
Operating Instruction for Thermal Imager 5.Before You Start 5-1.How to Charge the Battery • Before you use the Thermal Imager for the first time, charge the battery for three and three-half hours. • The battery status shows on the six-segment charge indicator. •... -
Page 11: 5-3.Power Off
Operating Instruction for Thermal Imager 5-3.Power Off • When Thermal Imagers power on, Push and hold the Power/Lock “ ” Button for two seconds, then popup the power off menu, press “OK” to power off the device. • Push and hold the Power/Lock “ ”... -
Page 12: 5-5.Focus
Operating Instruction for Thermal Imager 5-5.Focus • To adjust focus, clockwise or Anti-clockwise rotates the IR Lens. • When target comes into focus, it shows a sharper image. • When the target moves out of focus, the thermal image becomes blurry. Focus to get clear image Note: Correct focus is important in all imaging applications. -
Page 13: 5-8.Emissivity Adjustment
Operating Instruction for Thermal Imager 5-8.Emissivity Adjustment • The correct emissivity value is important to make the most accurate temperature measurement. • Emissivity of a surface can have a large effect on the apparent temperatures that the Thermal Imager observes. •... -
Page 14: 5-9.Reflected Temperature
Operating Instruction for Thermal Imager 5-9.Reflected Temperature • Using the offset factor, the reflection is calculated out due to the low emissivity and the accuracy of the temperature measurement with infrared instruments is improved. • In most cases, the reflected temperature is identical to the ambient air temperature. •... -
Page 15: Menus
Operating Instruction for Thermal Imager 6.Menus The menus, together with buttons, are access for image, measurement, Emiss, Palette, temperature measurement range, take photo and video, review, and settings. 6-1.Main Menu • Press “Menu/OK” Button or touch the screen, the main menu will be poped up. •... - Page 16 Operating Instruction for Thermal Imager Thermal Imager has 5 kinds of image modes for display: Thermal, Picture in Picture, Camera, Auto Fusion, Measuring Distance. Thermal: Sisplays only infrared image. Visible: Displays only visible image. Picture in Picture: Display fusion image of infrared and visible images.
- Page 17 Operating Instruction for Thermal Imager Zoom Mode: In this mode, the image can be zoom in/out continuously. In the Zoom mode, Press Left key or slide the zoom bar to zoom in the image; Press right Key or slide the zoom bar zoom out the image.
-
Page 18: 6-3.Image Palette
Operating Instruction for Thermal Imager 6-3.Image Palette • The Image Palette lets you change the false-color presentation of the infrared images on display or captured. • A variety of palettes are available for specific applications. • The standard palettes offer an equal, linear presentation of colors that allow for best presentation of detail. Standard Palette 1.In main menu, press “Palette”... -
Page 19: 6-4.Image Adjustment
Operating Instruction for Thermal Imager Zone Alarm: The temperature between the high alarm and the low alarm set value will be colored to orange. Visible Zone: The temperature between the high alarm and the low alarm set value will be colored to the palette, other part of the image will displayed as visible image. -
Page 20: 6-4-2.Histgram Mode And Auto Mode
Operating Instruction for Thermal Imager • Lock the low level and adjust the high level of the temperature range: • Lock the high level and adjust the low level of the temperature range: 6-4-2.Histgram Mode and Auto Mode • Auto Mode: level and span are decided by the thermal image of minimum temperature and maximum temperature, The relationship between temperature and color is linear. -
Page 21: 6-5.Measurement Menu
Operating Instruction for Thermal Imager 6-5.Measurement Menu 1.In main menu, press “Measurement” icon button, highlight “Measurement”. 2.Press “Up” button, popup Image submenu which contains 5 kinds of Measurement tools. 3.Press “Left” or “Right” button, or touch the Measurement tools icons, highlight the Measurement tool which you want to choose. -
Page 22: 6-6-1.Ambient Temperature Composation
Operating Instruction for Thermal Imager 6-6-1.Ambient Temperature Composation • In Ambient temperature submenu, press “Left” and “Right” arrow to change the temperature values. • Ambient temperature will affect the measurement of the thermal imager, it can be composite from 0 degree to 50 degree. -
Page 23: 6-6-3.Atmospheric Humidity
Operating Instruction for Thermal Imager 6-6-3.Atmospheric Humidity • In Atmospheric humidity submenu, press “Left” and “Right” arrow to change the temperature values. • Water droplets in the air can absorb infrared rays, The wet air can affect the measurement of the temperature’s accurate, the compensation humidity can be set from 10%~100%. -
Page 24: 7-6-6.Emissivity
Operating Instruction for Thermal Imager 6-6-6.Emissivity • In emissivity submenu, press “Left” and “Right” arrow to change the emissivity values. • “Emiss” sets object emissivity, the value range is 0.01~1.00. 6-7.Settings Menu 1.In main menu, press “Settings” icon button, highlight “Settings”. 2.The Settings menu will display. - Page 25 Operating Instruction for Thermal Imager Brightness: Drag the slider bar to adjust the LCD brightness. WIFI: • Press “ ” “ ” to turn on the wifi, the wifi model worked on access mode, so it is need to set the SSID and Password to allow other device connect to it.
-
Page 26: 6-7-2.Measure Setting
Operating Instruction for Thermal Imager Auto Power Off • Thera are four options in auto power off menu, as follows: “OFF”, “5Min”, “10Min”, “15Min”, “30Min”. • When press the touch screen or keyboard, the timer of Auo Power Off will be cleared and re-timed. Info: The info menu contains all of the product information, such as: Software Version, Serial Number and so on. - Page 27 Operating Instruction for Thermal Imager Distance Unit • Change the distance unit between “m” and “ft”, “m” means meter, ft means Foot. • 1(ft)=0.3048(m); 1(m)=3.2808399(ft). Temperature Unit • Temperature Unit have three types to choose: °C,°F and K. • Conversion relationship: °F=1.8 x °C+32, K=273.15+°C. Temperature Range •...
-
Page 28: 6-7-3.Reset
Operating Instruction for Thermal Imager 6-7-3.Reset Format Memory Format Memory operation will format all the Picture Gallery, the device setting is not affected. Format Memory? Factory Settings Factory Settings of the Thermal Imager is as follow: Item Parameter Value Measurement Center Spot Measurement Factory Setting Hot Spot Measurement... -
Page 29: 6-8.Camera Menu
Operating Instruction for Thermal Imager 6-8.Camera Menu • Thermal Imager has photo and video functions. • In photo function, the Imager can save thousands of images. • Every image resolution is 1280x960, format is “.jpg”, and stores infrared data and visible data in an image. •... -
Page 30: 6-8-3.Change Measure Parameters
Operating Instruction for Thermal Imager 6-8-3.Change Measure Parameters Touch the “Parameters” icon, it can change the image’s measure parameters: Emissivity, ambient temperature, humidity, reflect temperature, infrared compensation, distance. 6-8-4.Add Analyse Tools Touch the “Measurement” icon, it can add or change the analyse tools in the image: point analyse, area analyse, line analyse. -
Page 31: 6-8-6.Change Color
Operating Instruction for Thermal Imager 6-8-6.Change Color Touch the “Pallete” icon, it can change the image color. 6-9.Video Menu The Thermal Imager has “.mp4” video capture. 1. In desktop, press Trigger button and hold for about 2 seconds, start video capture with voice. 2. -
Page 32: 6-10-1.Analyse An Image
Operating Instruction for Thermal Imager 6-10-1.Analyse an Image • When current file type is image, press “ ” to enter image analysis mode. • Which can change the measure parameters, analyse tools, image mode and color on the image. 6-10-2.Play a Video When current file type is video, press “... -
Page 33: 6-11.Usb Mode
Operating Instruction for Thermal Imager 6-11.USB Mode • Connect USB cable to device, popup the menu as follow: USB CONNECTED • There are two modes for USB, Storage and PC Camera. press up or down button to switch mode. -
Page 34: Fault Diagnosis And Exclusion
Operating Instruction for Thermal Imager 7.Fault Diagnosis and Exclusion • If you encounter any problems while using the thermal imager, overhaul according to the following table. • If the problem persists, disconnect the power and contact with the company’s technical support department. Phenomenon of the fault Cause of the fault Solution... -
Page 35: Android/Ios App Thermview
Operating Instruction for Thermal Imager 8.Android/iOS APP Thermview 8-1.Software Install and Uninstall 8-1-1.System Required Android mobile phone: Android 4.0 above, with USB OTG Support iOS: iPhone4 above 8-1-2.Thermoview App Install Android: Search “Thermview” on Google Play and install it. iOS: Search “Thermview” on Apple Store and install it. 8-2.Thermview Function 8-2-1.Import Pictures 1.Enable WIFI function on the thermal device. - Page 36 Operating Instruction for Thermal Imager 1.Image Mode Click “ ” icon to select image mode, there are four mode for you to select. IR Mode: only infrared picture displayed. Visible Mode: only visible picture displayed. IR Fusion Mode: The infrared picture is fusioned with visible picture. Visible Fusion Mode: full screen fusion, the visible picture is fusioned with infrared picture.
-
Page 37: 8-2-3.Report And Share
Operating Instruction for Thermal Imager 4.Save and Exit Click “ ” to save and return to the main page of the APP. 8-2-3.Report and Share 1.Report Click “ ” icon to report as a “.pdf” file. 2.Share Click “ ” icon to share the Infrared picture with Email, Cloud or Message and so on. -
Page 38: Pc Software
Operating Instruction for Thermal Imager 9.PC Software 9-1.System Required • Window XP or higher version of Windows system, please make sure you have installed Net Framework 2.0 or Net Framework 3.5 (Include 2.0)when you install PCIMeter software. • If not, please find and install our Microsoft. NET_Framework_v2.0.exe that provided to you. •... - Page 40 Operating Instruction for Thermal Imager Rev.210527...
Need help?
Do you have a question about the DT-986H and is the answer not in the manual?
Questions and answers
Good day, I need the PC software to download, my computer have no disc reader. I receve the thermal imager whith a CD.