Table of Contents
Advertisement
Advertisement
Table of Contents

Subscribe to Our Youtube Channel
Related Manuals for Magicfx SPARXTAR SPARK FX


Summary of Contents for Magicfx SPARXTAR SPARK FX
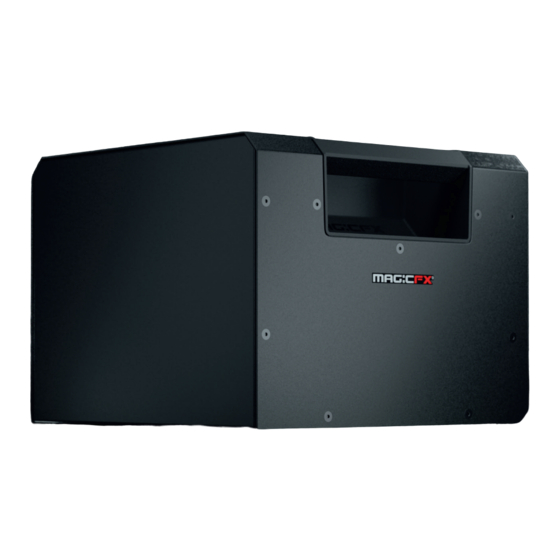
- Page 1 USER AND INSTALLATION MANUAL ENGLISH SPARXTAR. ® PART01213 SPARK FX rev 01-01...
-
Page 2: Disclaimer
Should you detect any errors or inaccuracies in the manual, we would be grateful if you would inform us. This helps us to further improve our documentation. MAGICFX® SPARXTAR — User and Installation Manual... -
Page 3: Table Of Contents
Spark safely! 2.1 General safety rules Rigging Noise level 2.4 Safety symbols 2.5 Safety warnings Let’s spark! 3.1 Install the machine Mount on a truss 3.3 (Re)fill the hopper 3.4 Connect power and setup DMX 3.5 Setup multiple machines in a sequence with DMX Let’s spark! 3.7 Clean up Troubleshooting Maintenance Correct disposal EC Declaration of Conformity MAGICFX® SPARXTAR — User and Installation Manual... -
Page 4: Foreword
This document contains the original instructions in English. In case you require other languages please contact MAGIC FX. REVISION TABLE Document nr Revision Date Description Authored by Checked by PART01213 01-00 8-1-2019 Initial release PART01213 01-01 26-3-2019 Software update MAGICFX® SPARXTAR — User and Installation Manual... -
Page 5: Meet The Magicfx ® Sparxtar
The maximum continuous duration of the effect is 40 seconds. After this period the effect will stop automatically. With a full hopper a MAGICFX SPARXTAR can deliver ®... -
Page 6: Technical Data
DMX512-A (ANSI E1.11) RDM (ANSI E1.20) Control Connectors Neutrik 5-pole male/ female XLR ® Configuring Configure Options On Device & RDM Usage Consumable(s) MAGICFX SPARXTAR Powder ® Consumable Consumption < 20 g/min Technical data MAGICFX® SPARXTAR — User and Installation Manual... -
Page 7: Product Identification
Start address + 1 2 - 512 Effect trigger DMX addresses The safety address cannot be the same as (one of) the operational address(es). Operating of these addresses results in the following: MAGICFX® SPARXTAR — User and Installation Manual 7... -
Page 8: Display Panel
PREV NEXT SELECT Display panel The display panel is located on the backside of the MAGICFX SPARXTAR. Check the ® following menu structure for all options in the menu. Use the buttons for navigation and selection. The left-hand LED blinks red when DMX is active. The right-hand LED continuously lights red when an error is present. - Page 9 (blows powder out of the output pipe) Main Menu Factory Defaults (YES/NO) Error History Type (Alarm/Error) Serial Number Unique ID Information Software Version Software CRC Bootloader CRC Build Date Uptime (DDDD:HH:MM:SS) Effect Time (DDDD:HH:MM:SS) Menu structure MAGICFX® SPARXTAR — User and Installation Manual...
-
Page 10: Rdm Capability
RDM can be used for configuration and status monitoring while DMX512 takes care of the default controlling. For RDM you will need a RDM compatible controller. The following RDM parameters are supported by the MAGICFX SPARXTAR. ® Parameter ID... -
Page 11: Spark Safely
• Are not situated in the vicinity of a source of vibration. GENERAL SAFETY RULES • Only authorised persons may work with the MAGICFX SPARXTAR. ® • Do not use the MAGICFX SPARXTAR if there are people or animals in the direct ®... -
Page 12: Safety Symbols
MAGICFX SPARXTAR. ® Make sure there are no substances or gasses present that can be WARNING ignited by the emitted powder and sparks from the MAGICFX ® SPARXTAR. Using a damaged or an improper installed machine can lead to WARNING death, serious injury or property damage. - Page 13 Obscured air inlets can result in injuries, fire and damage to the machine when the machine is used. Always keep the machine dry and do not let any liquids such as NOTICE rain or snow wet the machine. MAGICFX® SPARXTAR — User and Installation Manual...
-
Page 14: Let's Spark
Making sure that the direct output will be free from persons and animals. Making sure there are no objects near the machine and within the output distance that can be damaged or catch fire by the emitted powder and sparks from the MAGICFX SPARXTAR. ® MAGICFX® SPARXTAR — User and Installation Manual... -
Page 15: Mount On A Truss
Use a MAGICFX BASEPLATE II for mounting on top of an upright ® NOTICE truss, see the User and Installation manual of the MAGICFX ® BASEPLATE II (PART01575). Screw two clamps into threaded holes on the bottom of the machine. Use two M10 twenty clamps for truss mounting (product code MFX3103) and place the pair in x or in y direction. - Page 16 Mount the clamps firmly on a truss. Secure the MAGICFX SPARXTAR onto the truss. ® MAGICFX® SPARXTAR — User and Installation Manual...
- Page 17 Making sure there are no objects near the machine and within the output distance that can be damaged or catch fire by the emitted powder and sparks from the MAGICFX SPARXTAR. ® MAGICFX® SPARXTAR — User and Installation Manual 17...
-
Page 18: Re)Fill The Hopper
Make sure that the hopper interior is dry and free from foreign NOTICE material at all times. Do not use the machine when the hopper interior is wet. Remove any moist and/or clumped powder. Remove any foreign material. 18 MAGICFX® SPARXTAR — User and Installation Manual... - Page 19 Open the powder bag(s) and fill the hopper with powder (maximum of two bags). Close and lock the lid of the hopper. MAGICFX® SPARXTAR — User and Installation Manual...
-
Page 20: Connect Power And Setup Dmx
Chapter 1. 6. Optionally see Section 3.5 for adding more machines to the same sequence. Always plug in a DMX Terminator into the DMX output. Using a NOTICE DMX Terminator improves signal reliability. 20 MAGICFX® SPARXTAR — User and Installation Manual... -
Page 21: Setup Multiple Machines In A Sequence With Dmx
Using a DMX Terminator improves signal reliability. Do not connect more units to a single electrical circuit than the CAUTION installed fuse is able to handle. (Calculate the summed load with the electrical data from Chapter 1) MAGICFX® SPARXTAR — User and Installation Manual... -
Page 22: Let's Spark
Effect trigger. The maximum continuous duration of the effect is 40 seconds. NOTICE After this period the effect will stop automatically. To start the effect again you must disable and re-enable the Effect trigger. MAGICFX® SPARXTAR — User and Installation Manual... -
Page 23: Clean Up
Pay special attention to residues and dust inside the hopper. Clean NOTICE the hopper interior and lid thoroughly (e.g. with a small brush). Consult the MSDS from our website for detailed safety instructions WARNING for handling and working with the powder. MAGICFX® SPARXTAR — User and Installation Manual... -
Page 24: Troubleshooting
Always contact MAGIC FX if any malfunctions or errors occur that cannot be solved with the instructions as described in this manual. MAINTENANCE To achieve the maximum service life of the MAGICFX SPARXTAR you must regularly ® clean the MAGICFX SPARXTAR and test if it is functioning correctly. -
Page 25: Correct Disposal
Please contact your local authority for further details of your nearest designated collection point. Penalties may be applicable for incorrect disposal of this waste, in accordance with your national legislation. MAGICFX® SPARXTAR — User and Installation Manual... -
Page 26: Ec Declaration Of Conformity
Original declaration of conformity Translation of the original declaration of conformity Name manufacturer : MAGIC FX B.V. Address : Schouwrooij 27, 5281 RE BOXTEL Country : The Netherlands : B. Veroude Date : 17-12-2018 Signature MAGICFX® SPARXTAR — User and Installation Manual... - Page 28 WWW.MAGICFX.EU...
Need help?
Do you have a question about the SPARXTAR SPARK FX and is the answer not in the manual?
Questions and answers