Table of Contents
Advertisement
Quick Links
Download this manual
See also:
User Manual
Advertisement
Table of Contents

Related Manuals for Digisol DG-WM2003SIE


Summary of Contents for Digisol DG-WM2003SIE
- Page 1 DG-WM2003SIE User Manual V1.0 2018-12-14 As our products undergo continuous development the specifications are subject to change without prior notice.
- Page 2 Please check with your local distributors for latest information. No part of this document can be copied or reproduced in any form without written consent from the company. Trademark DIGISOL is a trademark of Digisol Systems Ltd. All other trademarks are the property of the respective manufacturers.
-
Page 3: Table Of Contents
DG-WM2003SIE User Manual INDEX 1. Hardware and Operation Mode Instruction……………..……………………..………………………………4 1.1. LED indicator:…………………………………………..………………………………………………………..…….4 1.2. AP Interface:………………………………………………………..………………………………………………..…4 1.3. Power Supply:……………………………………………………………..……………………………………………5 1.3.1. PoE Adapter Power Supply:……………………………………..…………………...………………...5 1.3.2. PoE Switch Power Supply…………………………........………..………..5 1.4. AP installation:......................…..6 2. Connect Wireless AP with PC:…………………………………………………..…..………………………………………7 3. Login………………………………………………………………………..………………………………………………………….8 4. -
Page 4: Hardware And Operation Mode Instruction
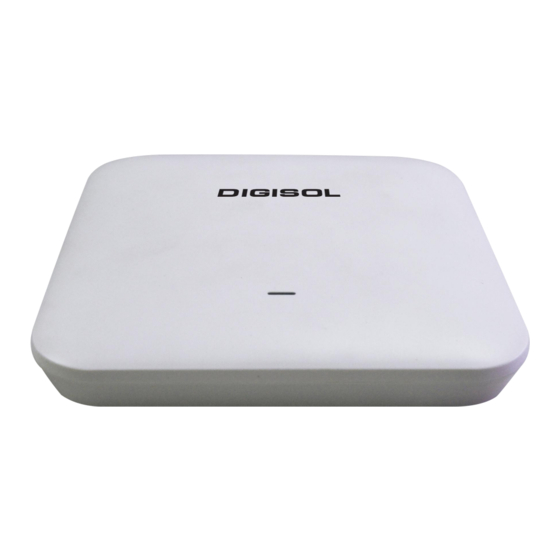
Before using this access point, please check if there is anything missing in the package, and contact your dealer of purchase to claim for missing items: DG-WM2003SIE Ceiling Mount Access Point DC 12V Power Adapter Patch Cord ... -
Page 5: Power Supply
DG-WM2003SIE User Manual 1.3. Power Supply 1.3.1 PoE Adapter Power Supply: The connection diagram shown as P1, internet cable connect to PoE adapter’s LAN Port, Ceiling AP’s WAN port connect to PoE adapter’s PoE Port, then PC will access into ceiling AP through cable or wireless. -
Page 6: Ap Installation
DG-WM2003SIE User Manual 1.4. AP Installation For the Ceiling Wireless AP, will be installed under ceiling based on following steps:... -
Page 7: Connect Wireless Ap With Pc
You can connect the PC with wireless AP by Wireless SSID and LAN cable: The diagram of wireless connection showed as follow: Pls note: the default SSID is DG-WM2003SIE, SSID’s password is blank P3. Connect the PC to AP using WiFi as shown above... -
Page 8: Login
DG-WM2003SIE User Manual 3. Login 1. Connect the Ceiling AP with computer by wired or wireless 2. The default IP address of this wireless AP is 192.168.1.200. Configure the PC’s local connection IP address as 192.168.1.X (X is number from 2 to 254), subnet mask is 255.255.255.0. - Page 9 DG-WM2003SIE User Manual 3. Input 192.168.1.200 into browser, login page will appear, the default login password: admin. P7: Login Page...
-
Page 10: Web Gui Interface Setting
DG-WM2003SIE User Manual 4. WEB GUI interface Setting 4.1. Home After login, the Device Status and home page will be showed P8: Home This page will show the device default operation mode, Device Information, Device Description, LAN Information, 2G WiFi, Flow (2G WiFi) bps and Hardware/Firmware version. - Page 11 DG-WM2003SIE User Manual P10: Device Description In LAN Information you can find the IP Mode, IP and MAC Address of the AP as shown in P11 P11: Lan Information In WiFi Information you can find the Status, SSID, Channel, Encryption and MAC Address of AP as...
-
Page 12: Wizard Configuration
DG-WM2003SIE User Manual 4.2. Wizard Configuration Wizard: It instruct users to configure wireless AP’s operation mode based on needs, there are four operation mode including Gateway, Repeater, WISP, Wireless AP. Please confirm the operation mode first before starting the configuration. - Page 13 DG-WM2003SIE User Manual P16: Wireless setting in Gateway mode Clicking next will complete the Gateway mode setting and show following picture: Please Note: The equipment will restart for the changes to take effect. P17: Settings complete in Gateway mode When return to Home page, will show Wireless router’s SSID, Internet connection, LAN connection...
-
Page 14: Wifi Repeater Mode
DG-WM2003SIE User Manual P18: Status in Gateway mode 4.2.2. WiFi Repeater mode 1. Login the Web management page, click “Wizard” then “WiFi Repeater” 2. Scan AP and select the AP’s SSID want to bridge then input the AP’s key, click next to complete. -
Page 15: Wisp Operation Mode
DG-WM2003SIE User Manual Clicking next will complete the Gateway mode setting and show following picture: Please Note: The equipment will restart for the changes to take effect. When return to Home page, it shows Repeater mode data, will show fail or success, and user can configure this data if required. - Page 16 DG-WM2003SIE User Manual Select the appropriate wireless AP and configure the correct WAN setting in WISP operation mode, then next to complete. P23: WAN setting in WISP mode P24: Wireless setting in WISP mode In next step configure the SSID then complete and back to home, will show the connection fail or success, where you can configure the data based on request: Please Note: The equipment will restart for the changes to take effect.
-
Page 17: Ap Operation Mode
DG-WM2003SIE User Manual P25: Status in WISP mode 4.2.4. AP Operation mode Configure the LAN setting and in the next tab set the wireless SSID, follow the screenshot below: P26: LAN setting in AP mode... -
Page 18: Wifi
DG-WM2003SIE User Manual P27: Wireless setting in AP mode Clicking next will complete the AP mode setting and show following picture: Please Note: The equipment will restart for the changes to take effect. P28: Status in AP mode 4.3. WiFi Setting In WiFi setting you can set the 2.4G, MAC ACL, Wifi Timer off and Advanced settings. - Page 19 DG-WM2003SIE User Manual 2G Wifi In this part, will show the 2.4G Basic Setting and Virtual AP setting as shown below P29: 2G WiFi setting WiFi Status: On mean SSID on, Off mean SSID off. WiFi Analyzer: Mainly to analyze the AP’s signal strength and channel, to make user more easy to choose the channel with less wireless AP and to avoid the Wireless Interference.
- Page 20 DG-WM2003SIE User Manual MAC ACL: Allow or deny the users access into this device based on MAC address. P32: MAC ACL Setting WiFi Timer Off: Enable WiFi Timer Off to turn off the SSID in the specified time. P33: WiFi Timer Off Advanced This page, will show the regional info, mode, RF Power, Max user access, etc.
-
Page 21: Network
DG-WM2003SIE User Manual 4.4. Network In network, you can configure LAN setting,tag VLAN and setup Cloud Server as follow: LAN Settings mainly includes Static IP, Get IP from AC and Get IP from Gateway. P35: LAN Setting In VLAN part, you need a VLAN switch and make sure the multi SSID is enable, then input the VLAN ID to different SSID. -
Page 22: Manage
DG-WM2003SIE User Manual P37: Cloud Server Settings 4.5. Manage It shows the Configure part, Reboot part, Modify password, System time, Logs, Upgrade firmware. Configure:- You can save the config or restore the previously saved config or reset the device to its default config and enable Telnet. - Page 23 DG-WM2003SIE User Manual P39: Reboot Modify Password: Can modify the password. Default password is admin. P40: Modify Password Upgrade: Browse the firmware file and click on upgrade. Wait till the upgrade is successful. The device will reboot automatically after successful firmware upgrade.
- Page 24 DG-WM2003SIE User Manual P41: Firmware Upgrade Time: Here you can check the system time, enable NTP Server and select the Time Zone. P42: Time Log: Here you can find the AP’s log, you can also enable Remote Log Service. P43: Log...
-
Page 25: Share Internet And Obtain Ip Address Automatically
DG-WM2003SIE User Manual 5. Share Internet and Obtain IP address automatically Set computer’s TPC/IP as Obtain an IP address automatically, Obtain DNS server address automatically as following picture showed. The computer will obtain the IP address from router or base station to get Internet. -
Page 26: Troubleshooting
DG-WM2003SIE User Manual Troubleshooting The Failure phenomenon and solution. If the problems are not listed, please contact the local service or call the Toll Free service. We are willing to offer the service. Failure phenomenon Solution Pls make sure the PoE module connection is right. POE... - Page 27 DG-WM2003SIE User Manual...
Need help?
Do you have a question about the DG-WM2003SIE and is the answer not in the manual?
Questions and answers