Table of Contents
Advertisement
Quick Links
Download this manual
See also:
User Manual
Advertisement
Table of Contents

Related Manuals for Digisol DG-WM2005SI


Summary of Contents for Digisol DG-WM2005SI
- Page 1 RANGER SERIES 300Mbps CEILING MOUNT ACCESS POINT DG-WM2005SI 300 Mbps V1.0 2014-05-19...
-
Page 2: Fcc Interference Statement
Trademarks: DIGISOL is a trademark of Smartlink Network Systems Ltd. All other trademarks are the property of the respective manufacturers. -
Page 3: Package Contents
Package Contents The following items should be present in your package: DG-WM2005SI Ceiling Mount Access Point DC 12V Power Adapter Patch Cord Installation Guide CD Make sure that the package contains above items. If any of the listed items is damaged or missing, please contact your retailer immediately. -
Page 4: System Requirements
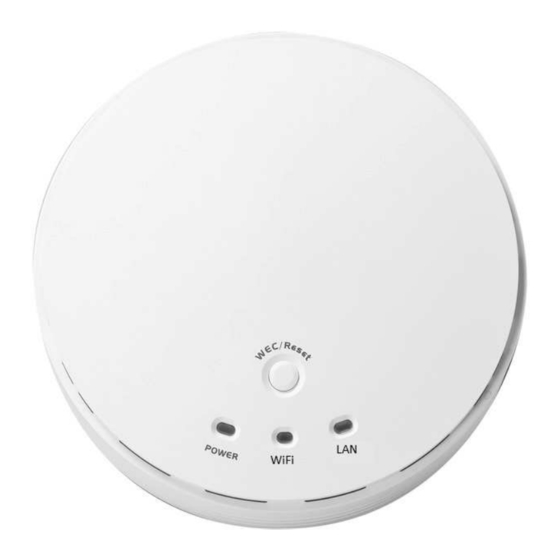
System requirements The following system requirements are recommended:. An Ethernet based cable or DSL modem Windows, Macintosh or Linux based operating system CD-ROM drive IE 6.0 or higher, Chrome 2.0, Firefox 3.0, Safari 3.0 Product View Below shown is the product view indicating the LED status. Description When the device is booted up and ready: When WEC/Reset is triggered (with button pressed):... -
Page 5: Rear View
Rear View Receptor for PoE-PD Power Ethernet Adapter Port Hardware Installation Warning Do not use the product in high humidity or high temperatures. Do not use the same power source for the Product as other equipment. Only use the power adapter that comes with the package. -
Page 6: Mounting On The Ceiling/Wall
Mounting on the Ceiling/Wall This device is designed for easily mounted on the ceiling or wall with a simple mount bracket. Before mounting it to the expected location, please make proper configuration for the device setting and run the PoE Ethernet cable to the location in advance. - Page 7 Attached this device to mounting bracket by rotating it clock wisely to click into place. Installation completed.
-
Page 8: Button Definition
Button Definition There is one multi-function push button "WEC/Reset" in this device. According to different button pressed duration, the device will take specific reaction. For ease of interacting with the device, you can also check the Status LED to determine when to release the button. The Reset/WEC button's behavior is defined below: Function Button... - Page 9 There are two alternative AP modes defined for the device to operate with WEC (Wireless Easy Connection) feature. One is Master Mode (by default), and the other is Slave Mode. To change the AP mode from one to the other, you have to: 1.
-
Page 10: Getting Started
Getting Started Before you can install this product to designated location and make it operate properly, you have to configure the device setting to fit in your network environment. Hardware Preparation: Connect an Ethernet cable between this device and the computer that you will operate to set up the device. - Page 11 Software Preperation Most computers are connecting to a local network with dynamic IP (DHCP) setting. To access the web UI of the device, you have to change your computer's TCP/IPv4 settings into a static IP setting for the Ethernet Interface. You can refer to Appendix A for how to assign a Static IP address you your computer.
-
Page 12: Easy Set Up Via Web Ui
Easy Set up via Web UI You can browse web UI to configure the device. Firstly you need to launch the Setup Wizard browser first and then the Setup Wizard will guide you step-by-step to finish the basic setup process. Activate the setup wizard Type in the IP Address (http://192.168.123.50) Type the default password "admin"... - Page 13 Press "Next" to start the Setup Wizard. Configure with Setup Wizard Step 1 You can change the password of administrator here.. Step 2 LAN IP Address.You have to change the IP address of this device according to your network configuration.
- Page 14 Step 3-1 Wireless settings.You can specify the Wireless setting for VAP1. Step 3-2 Wireless settings. Specify VAP1's wireless authentication and encryption.
- Page 15 Step 4 Check the information again. Step 5 System is applying the setting. Step 6 Click finish to complete it.
-
Page 16: Use Wec Button To Setup Wireless Profiles
Use WEC button to setup wireless profiles WEC (Wireless Easy Connection) is an easy configuration feature that is similar to well-known WPS function. It can be used to duplicate one device's wireless configuration to the other AP devices from the same manufacture by clicking one button for both devices. - Page 17 Step Button Description 1. Make sure AP1 is in Master Mode (WiFi LED should be “Green” color, if not, you have to Set AP1 in Master Mode, toggle its AP mode via pressing the WEC and configure it via web button for 9~10 seconds) Login in to AP1 web UI and configure the wireless settings as what you want (LAN IP,...
- Page 18 One Master and a series of connected Slaves This device also support universal repeater function, you can easily extend the wireless network with a series repeaters that are wireless concatenated to build up the wireless network without running Ethernet cables to each repeater. As illustrated in above figure, if you intend to deploy 4 APs (AP1 ~ AP4) to create a "Staff"...
- Page 19 Step Button Description 1. Make sure AP1 is in Master Mode (WiFi LED should be “Green” color, if not, you have to Set AP1 in Master Mode, toggle its AP mode via pressing the WEC and configure it via web button for 8 seconds) 2.
- Page 20 Although such wireless repeater function is available, there are limitations for such topology. First, the available bandwidth for AP2 ~ AP4 will be decayed due to it is connected to it peer AP wirelessly. It depends on the data rate and environment.
-
Page 21: Frequently Asked Questions
Frequently Asked Questions...
Need help?
Do you have a question about the DG-WM2005SI and is the answer not in the manual?
Questions and answers