
Summary of Contents for t.a.c. Xenta OP
- Page 1 AH02: West _STATUS TEMPERATURES ALARMS ® ® ® ® ® TAC Xenta Handbook 0-004-7506-4 (EN), 2001-08-08...
- Page 3 TAC representative. You may also want to send an e-mail to helpdesk@tac.se. This edition, -4, applies to TAC Xenta OP version VMX 3.2 or later. The procedure for de-installation of the OP has been clarified and put in a separate section, 2.7.
- Page 4 TAC Xenta OP Handbook Foreword Copyright © 2001 TAC AB. This document, as well as the product it refers to, is only intended for licensed users of the product and the document. TAC AB owns the copyright of this document and reserves the right to make changes, additions or deletions.
-
Page 5: Table Of Contents
Contents TAC Xenta OP Handbook Subject to modification. Contents Introduction ........................7 TAC Xenta OP ............................7 This manual ............................7 More information ..........................8 Connection and Basic Functions ................... 9 Description ............................. 9 Connecting to TAC Xenta 100 ......................10 Connecting to TAC Xenta 300/401 .................... - Page 6 TAC Xenta OP Handbook Contents Technical data ....................... 31 Index ............................33 This manual contains a total of 36 pages. 6 (36), 0-004-7506-4 (EN) TAC AB, 2001-08-08...
-
Page 7: Introduction
1 Introduction Introduction 1.1 TAC Xenta OP TAC Xenta OP is a small operator panel designed to be used together with TAC Xenta 100, 300, 401 and 901 units. The operator panel gives the user access to parameters and alarms without communicating with a central system. -
Page 8: More Information
• the “TAC Menta User’s manual” Stand-alone TAC Xenta 300/3000 controllers and I/O modules can be commissioned by using the Service menu of TAC Xenta OP (which is not the same as the local OP service menu). This procedure is de- scribed in the TAC Xenta 300 and 401 Handbook. -
Page 9: Connection And Basic Functions
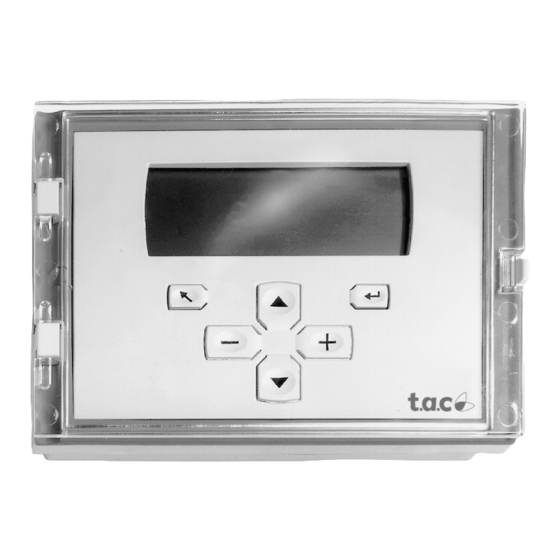
2 Connection and Basic Functions Connection and Basic Functions 2.1 Description The TAC Xenta OP Operator panel has an LCD display with 4*20 characters and six push buttons. A modular socket or four screw terminals are used for communication and for connecting the power supply. -
Page 10: Connecting To Tac Xenta 100
2.2 Connecting to TAC Xenta 100 Normally the TAC Xenta OP is connected to the modular jack on the lower side of the Wall Module. In this way the Xenta OP will get power supply from the TAC Xenta 100 unit. -
Page 11: Connecting To Tac Xenta 300/401
Service pin Modular socket on the OP TAC Xenta OP connectors and contrast potentiometer The contrast of the display can be adjusted with the potentiometer on the rear of the operator panel. (The Service pin is available from the rear if, in special cases, the network configuration procedure requires this. -
Page 12: Keys
TAC Xenta OP Handbook 2 Connection and Basic Functions 2.4 Keys The TAC Xenta OP keys: – is used to step up one level in the directory hierarchy (“Home”). There may be several levels in the hierarchy. The cursor will return to the line selected the last time this level was active. -
Page 13: Local Functions Of The Op Service Menu
TAC Xenta OP Handbook 2 Connection and Basic Functions 2.5 Local functions of the OP Service menu For simple hardware check of the OP and for certain system param- eters there is a local Service menu in the operator panel. The OP... - Page 14 TAC Xenta OP Handbook 2 Connection and Basic Functions Selecting the language of the OP messages means that the operator can switch between different languages for 5. National text those messages that are generated in the OP. Select language No reply ...
-
Page 15: Selecting The Op Communication Mode
TAC Xenta OP Handbook 2 Connection and Basic Functions 2.6 Selecting the OP communication mode Xenta 100: ON/OFF When delivered, the OP is set for Base unit (TAC Xenta 300, 400) communication. To change the communication mode, you have to call up the OP Service menu and go to the 10.OP mode menu, where the... - Page 16 TAC Xenta OP Handbook 2 Connection and Basic Functions To turn OFF the Xenta 100 mode Press enter to 1 (Disconnect and then) connect the OP; wait for a couple of access Xenta 100 seconds for the Base unit message to appear.
-
Page 17: De-Installing The Op
TAC Xenta OP Handbook 2 Connection and Basic Functions 2.7 De-installing the OP If the OP is to be de-installed from the network, it should be restored to the original factory setting to avoid problems, if used in another network. -
Page 18: Tool: Lonmaker
TAC Xenta OP Handbook 2 Connection and Basic Functions 2.7.2 Tool: LonMaker 1 Check in the OP Service menu – 10. OP mode that Bindable is set to “TAC” or, in OP version < 3.11 to “OFF”. 2 Start the LonMaker Browser. -
Page 19: Dialogs With Tac Xenta 100
3.2 Connecting to TAC Xenta 100 Note! The very first time a TAC Xenta OP is connected to a Xenta network, the TAC Xenta 100 communication mode is, by default, in the Off state. Please refer to the end of chapter 2 for the necessary procedures to change the communication mode. - Page 20 TAC Xenta OP Handbook 3 Dialogs with TAC Xenta 100 Wait for the display Xenta 100 is: Configured Press <DOWN> to continue Press the key and wait for a display looking like: Xenta 103v1.00-10 103/A/v10003 units as SI [^] NV index? 000 The first two lines, showing software versions, are displayed the first time only.
-
Page 21: Setting The Node State In Tac Xenta 100
Configured Configured/Unconfigured are normally set by a binding tool, in a network configuration and by TAC Xenta OP in a stand-alone configuration. See also the TAC Xenta Network guide. 3.4 Reading/checking NVs in TAC Xenta 100 When connection has been established (section 3.2) a NV (Network Variable) index can be selected by the use of the –... -
Page 22: Initiate Service Pin Message
TAC Xenta OP Handbook 3 Dialogs with TAC Xenta 100 Input variables appear further down in the list: Example: Select NV 013 to get the Application Mode: 13 nviApplicMode Auto nvi indicates that this is an input value. The cursor is visible and allows the value to be changed from the OP. -
Page 23: Dialogs With Tac Xenta 300 And 401
Cyrillic characters The TAC Xenta OP/RU model has the capability of displaying Cyrillic characters. The TAC Menta User’s manual describes how you switch the charac- ter files of the OP. -
Page 24: Find And Change A Setpoint
TAC Xenta OP Handbook 4 Dialogs with TAC Xenta 300 and 401 4.2 Find and change a setpoint This example starts with the first screen showing all TAC Xenta 300/ 401 controllers in the network and shows how to find and change the supply air setpoint in “AH02 West”:... -
Page 25: View/Acknowledge Alarms
TAC Xenta OP Handbook 4 Dialogs with TAC Xenta 300 and 401 4.3 View/acknowledge alarms To make the operator aware of unacknowledged alarms in the alarm list the abbreviated application/base unit name (“AH02” in our exam- ples) will flash. When the item “Alarms” has been found and selected... -
Page 26: Change The Time Channels
TAC Xenta OP Handbook 4 Dialogs with TAC Xenta 300 and 401 If a TAC Xenta controller is connected to a supervisory system like TAC Vista, another indication may appear in the alarm list. An asterisk (*) in front of the signal name means that the alarm is blocked, that is, information about changes between alarm on and alarm off will not be sent to TAC Vista. - Page 27 TAC Xenta OP Handbook 4 Dialogs with TAC Xenta 300 and 401 To get to the next schedule controlling AH02 press once. AH02: Time schedule 1234567 08:00–12:00 As the cursor is positioned under “08”, must be pressed twice to move the cursor to “12”. Use to change the off hour to –...
-
Page 28: Access Code
TAC Xenta OP Handbook 4 Dialogs with TAC Xenta 300 and 401 Special cases If you want the time channel to be turned off for the whole day and night and use the 24 hour clock, you indicate this by 00:00-00:00 and with the AM/PM clock (please refer to section 4.1) -
Page 29: Edit Access Code
TAC Xenta OP Handbook 4 Dialogs with TAC Xenta 300 and 401 4.6 Edit access code To change the code that gives the operator access to the medium or high level items, the access level code for the level to be changed must first be entered as described above. -
Page 30: Daylight Saving
TAC Xenta OP Handbook 4 Dialogs with TAC Xenta 300 and 401 4.8 Daylight saving TAC Xenta 300 has built-in support for the European standard day- light saving. However, the OP can be used to set other conditions. To change the Daylight saving period, the following menu is used. -
Page 31: Technical Data
TAC Xenta 901 ......modular jack or screw terminal Standards: Emission............... EN 50081-1 Immunity ..............EN 50082-1 Part number: Operator terminal TAC Xenta OP ........ 0-073-0907 Operator terminal TAC Xenta OP/RU ......0-073-0923 Mounting kit panel TAC Xenta OP ......0-073-0904 TAC AB, 2001-08-08 0-004-7506-4 (EN), 31 (36) - Page 32 TAC Xenta OP Handbook 5 Technical data Blank page. 32 (36), 0-004-7506-4 (EN) TAC AB, 2001-08-08...
-
Page 33: Index
TAC Xenta OP Handbook Index Index Special characters override 29 override indicator (->) 29 * 26 hhAmm 23 ** 27 hhPmm 23 -> 29 Holiday chart 27 push buttons 12 24 hour clock 23, 28 Inch-Pound 20 returned 25 access code 28... - Page 34 TAC Xenta OP Handbook Index Blank page. 34 (36), 0-004-7506-4 (EN) TAC AB, 2001-08-08...
- Page 36 Head office Finland UK, Ireland Poland Singapore For more information, come Sweden (358) 9 584 25 00 (44) 1582 81 67 00 (48) 58 782 00 11 (65) 748 23 93 and visit us on the Web at: (46) 40 38 68 50 China Office Germany, Austria, Norway...
Need help?
Do you have a question about the Xenta OP and is the answer not in the manual?
Questions and answers