Advertisement
Table of Contents
- 1 Table of Contents
- 2 About Your Gauge
- 3 Quick Start
- 4 Getting Started
- 5 Taking Measurements - Using 'Measure
- 6 Taking Measurements - Using 'LOG Manual
- 7 Taking Measurements - Using 'LOG Interval
- 8 Elcometer 319/2 Dewpoint Meter Dock
- 9 Gauge Set up
- 10 Maintenance
- 11 Spare Parts and Accessories
- 12 Technical Specifications
- 13 Related Equipment
- Download this manual
Advertisement
Table of Contents

Related Manuals for Elcometer 319/2


Summary of Contents for Elcometer 319/2
- Page 1 Elcometer 319/2 Dewpoint Meter Operating Instructions...
- Page 2 The Elcometer 319/2 Dewpoint Meter has been tested in accordance with EU regulations governing electro-magnetic compliance and meets the required directives. Note: Gauge readings may be affected if the unit is operated within a radio frequency electromagnetic strength of greater than 3 V/m.
-
Page 3: Table Of Contents
Elcometer 319/2 Dewpoint Meter Dock ........ -
Page 4: About Your Gauge
Our products cover all aspects of coating inspection, from development, through application to post application inspection. Your Elcometer 319/2 Dewpoint Meter is a world beating product. With the purchase of this product you now have access to the worldwide service and support network of Elcometer. For more information visit our website at www.elcometer.com... - Page 5 Factors like sun, shadow, the shape and the mass of the object to be coated can create unexpected thermal behaviour on the surface. The memory in your Elcometer 319/2 Dewpoint Meter can be used to record climatic conditions during a coating job.
- Page 6 Software (Model T only) • Operating instructions The Elcometer 319/2 Dewpoint Meter is packed in a cardboard package. Please ensure that this packaging is disposed of in an environmentally sensitive manner. Please consult your local Environmental Authority for further guidance.
-
Page 7: Quick Start
2 QUICK START The Elcometer 319/2 Dewpoint Meter is ready to start measuring as soon as it has been unpacked. 1. Fit batteries (see page 6). 2. Switch on. 3. Scroll to Measure and then press OK to start measuring. -
Page 8: Getting Started
3 GETTING STARTED 3.1 FITTING BATTERIES Your gauge is powered by three batteries. The condition of the batteries is indicated by a battery status symbol [ ] displayed on the measurement screens. The more segments displayed, the better the condition of the battery. When the battery is low, the symbol starts blinking to indicate that the batteries have to be changed. - Page 9 3.2 WHAT THE BUTTONS DO Scrolls up/down Switches gauge on/off through menus Selects highlighted menu item or function Switches light on/off Press the LIGHT button to switch the light on and off. The light illuminates the surface being measured and switches off automatically after approximately 40 seconds.
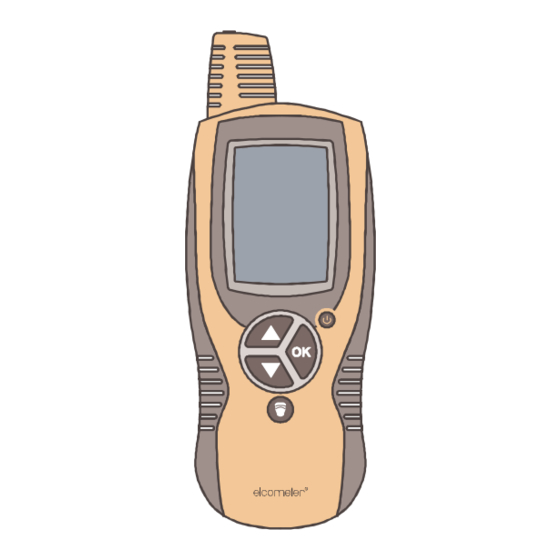
- Page 10 3.3 THE SENSORS The sensors for humidity, air temperature and surface Surface temperature temperature are located in the casing at the top of the gauge. Humidity and For accurate readings: air temperature • Do not obstruct airflow through the slots in the casing around the humidity and air temperature sensors.
-
Page 11: Taking Measurements - Using 'Measure
4 TAKING MEASUREMENTS - USING ‘MEASURE’ Follow this procedure to start measuring immediately without logging the results into your gauge memory. If you want to log results, refer to page 10 and page 13. 1. If required, check the limits for the alarm in the Setup menu (see “Limits” on Log manual Log interval page 19). -
Page 12: Taking Measurements - Using 'Log Manual
5 TAKING MEASUREMENTS - USING ‘LOG MANUAL’ Follow this procedure to take measurements manually and log the results into your gauge memory. Each time a measurement is taken, the readings are written into the Measure batch selected. Log interval 1. From MENU, scroll to Log manual and then press OK. Setup The LOG MANUAL menu is displayed. - Page 13 2. Scroll to the batch you want to use and then press OK. The BATCH menu is displayed with the batch name or number at the top. Limits If CLOSED is shown at the top of the display, the batch cannot be used. Back CLOSED indicates that the batch has already been used for interval logging.
- Page 14 value remains stable (the trend indicator [ ] between the parameter and the reading indicates if the value is increasing [ ] or decreasing [ 5. If you want to freeze the measurements on the display, scroll to Hold and then press OK.
-
Page 15: Taking Measurements - Using 'Log Interval
6 TAKING MEASUREMENTS - USING ‘LOG INTERVAL’ Follow this procedure to take measurements at set time intervals and log the results into your gauge memory. Each time a measurement is taken, the readings are written Measure into the batch selected. Log interval 1. - Page 16 90° . Back Note: Because holding the surface temperature sensor against a surface for long periods of time is impractical, it is advisable to use the optional Elcometer 319/2 Dewpoint Meter Dock. The Dock has magnetic feet which will hold the...
- Page 17 See “Elcometer 319/2 Dewpoint Meter Dock” on page 16 for more information. 5. Scroll to Log and then press OK. The measurement screen is displayed. If the battery symbol [ ] is blinking, replace the batteries before continuing - see “Fitting batteries”...
-
Page 18: Elcometer 319/2 Dewpoint Meter Dock
7 ELCOMETER 319/2 DEWPOINT METER DOCK The Elcometer 319/2 Dewpoint Meter Dock is supplied as standard with the Model T and has two functions: PC: The Dock provides a cabled USB interface between the gauge and a PC. This allows... - Page 19 7.2 INSTALLING ELCOMASTER™ SOFTWARE 1. Place the CD in your PC. The software installation wizard should run automatically. If it does not run automatically: • Choose Start > Run • Type D:AutoCIS (where ‘D’ is the letter of your CD drive) •...
-
Page 20: Gauge Set Up
8 GAUGE SET UP From MENU, scroll to Setup and press OK to configure and view the following set up options: 8.1 INTERVAL Interval is the time period between measurements during automatic logging (Log interval). Int. Log. Each interval time (10s, 1m, 2m, etc.) is paired with the number of days the 6 days measurements can be logged, taking into account the amount of free memory and 12 days... - Page 21 8.2 LIMITS Limits are the lowest (Lo) and highest (Hi) acceptable values for the measured parameters. Measurement values outside these limits will trigger the alarm if the limits are ‘on’. 75 % 33 C The limits set here are used when measuring without logging (Measure). Limits are Ta -10 -- C also used when measuring in Log Manual and Log Internal modes, when no limits...
- Page 22 8.4 ° C / ° F Use this option to set the temperature unit that is to be used. Scroll to the required unit and then press OK. Note : If units are set to ° C in the gauge and readings are collected in a batch, then units in the gauge are changed to °...
-
Page 23: Maintenance
Elcometer supplier. Your gauge does not contain any user-serviceable components. In the unlikely event of a fault, the gauge should be returned to your Elcometer supplier or directly to Elcometer. Contact details can be found on the outside cover of these operating instructions and at... -
Page 24: Spare Parts And Accessories
10 SPARE PARTS AND ACCESSORIES The following spare parts and accessories are available from your local Elcometer supplier or direct from Elcometer: Elcometer 319/2 Dewmeter Dock-unit complete with: T31920289 • Magnetic surface temperature probe • USB cable • Hexagonal wrench •... -
Page 25: Technical Specifications
11 TECHNICAL SPECIFICATIONS HUMIDITY Accuracy at 23° C ± 3%rh Measurement resolution 0.5% Measurement range 0%rh to 100%rh TEMPERATURE Ta (AIR) Accuracy ± 0.5° C / 1° F Measurement resolution 0.1 ° C / 0.1° F Measurement range -20° C to 80° C / -4° F to 175° F TEMPERATURE Ts (SURFACE) Accuracy ±... - Page 26 Measurement resolution 0.1° C / 0.1° F Measurement range -30° C to 60° C / -22° F to 140° F DISPLAY Graphical display with backlight Operating temperature range -20° C to 60° C / -4° F to 140° F MEMORY Memory size, manual logging 6000 records Record content...
- Page 27 Data storage Two types. Manual and interval (automatic) Data recall Gauge displays average, min/max for each batch Download to PC possible via optional adaptor Battery indicator Yes, detailed Trend indicator Languages 4 languages: English, German, French and Spanish Extra flashlight Built-in bright white LED orientation HARDWARE Case...
-
Page 28: Related Equipment
12 RELATED EQUIPMENT In addition to the Elcometer 319/2 Dewpoint Meter, Elcometer produces a wide range of other climatic condition monitoring equipment and associated paint inspection equipment. Users of the Elcometer 319/2 Dewpoint Meter may also benefit from the following Elcometer products: •...
Need help?
Do you have a question about the 319/2 and is the answer not in the manual?
Questions and answers