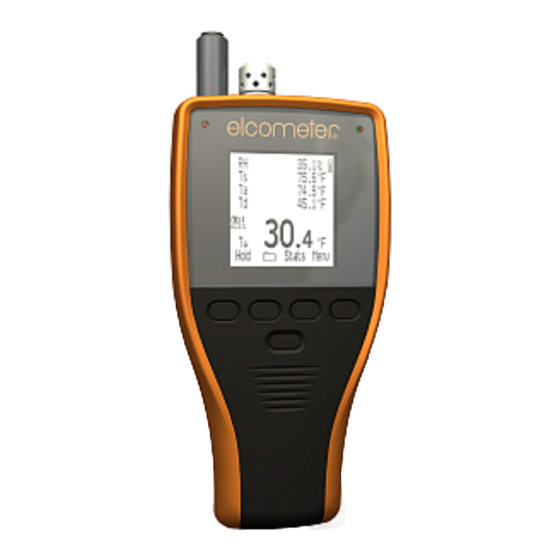
Elcometer 319 Standard Operating Instructions Manual

Elcometer 319 Standard Operating Instructions Manual

Dewpoint meter
Hide thumbs Also See for 319 Standard:

Advertisement

Elcometer 319
Dewpoint Meter
Standard and Top Models
Operating Instructions

Advertisement

Table of Contents
loading
Need help?

Need help?

Do you have a question about the 319 Standard and is the answer not in the manual?

Questions and answers

Subscribe to Our Youtube Channel

Summary of Contents for Elcometer 319 Standard

  • Page 1 Elcometer 319 Dewpoint Meter Standard and Top Models Operating Instructions...
  • Page 2 Bluetooth SIG QDID = B014393. , ElcoShip ® and ElcoMaster ® are registered trademarks of Elcometer Limited. ® and Bluetooth ® are trademarks owned by Bluetooth SIG Inc and licensed to Elcometer Limited. All other trademarks acknowledged. © Copyright Elcometer Limited 2009-2010.
  • Page 3: Table Of Contents

    CONTENTS Section Page About your gauge ............. . 2 Quick start .
  • Page 4: About Your Gauge

    The Elcometer 319 Dewpoint Meter is a world beating product. With the purchase of this gauge you now have access to the worldwide service and support network of Elcometer. For more information visit our website at www.elcometer.com.
  • Page 5 1.1 FEATURES Model Feature page Standard User-adjustable high and low limits for all parameters + alarm Trend indicators on all parameters User-configurable display with large easy-to-see main reading Multiple languages Built-in high power magnets to attach the gauge to ferrous objects Statistical analysis of readings Individual readings review Date and time stamping of all reading data...
  • Page 6 Please consult your local Environmental Authority for further guidance. To maximise the benefits of your new Elcometer 319 Dewpoint Meter please take some time to read these Operating Instructions. Do not hesitate to contact Elcometer or your Elcometer supplier if you have any questions.
  • Page 7: Quick Start

    2 QUICK START see page 22 see page 19 see page 16 see page 26 Note: ‘Batch’ is displayed on [T] models only...
  • Page 8: Getting Started

    3 GETTING STARTED 3.1 POWER SUPPLY Your gauge is powered by batteries or by a USB cable when it is connected to a computer. An icon in the top right of the display indicates which power supply is being used Attention: The USB power supply cannot be used to charge batteries.
  • Page 9 FITTING BATTERIES The batteries are located under the cover at the rear of the gauge. To replace the batteries, remove the retaining screw and the cover and fit high quality alkaline dry batteries (2x AA / LR6) taking care to ensure correct battery polarity.
  • Page 10 3.2 THE CONTROLS Your gauge is controlled by five keys: • Upper row of four keys: These are Softkeys whose function changes according to the text and symbols on the bottom row of the display. • Lower single key: Press to switch the gauge on; press and hold to switch off (also see “Auto Switch Off”...
  • Page 11 3.5 THE SENSORS The sensors for humidity, air temperature and surface temperature are Surface located at the top of the gauge. temperature Note: The surface temperature sensor is flexibly mounted. This will reduce Air temperature the risk of damage if the gauge is dropped. and humidity FOR ACCURATE READINGS •...
  • Page 12 3.6 THE READING SCREEN While the instrument is measuring, the display may show the following information and symbols. Refer to the page number (xx) for more information: Parameter (25) Trend - value Alarm (21) increasing/ decreasing (13) Battery power & USB power [T] (7) condition (7) Bluetooth enabled [T] (24)
  • Page 13 Main Reading - see page 25. To increase the size of the Main Reading, reduce the number of parameters displayed on the reading screen (the illustrations shows reading screens from the Elcometer 319 Top model).
  • Page 14 3.7 THE MENUS MENU SETUP TIME & DATE Delete Last Reading Units Set Time & Date Backlight Languages Set Date Format SET DATE FORMAT Thermometer Mode Auto Switch Off DD/MM/YYYY Set Limits Time & Date MM/DD/YYYY DISPLAY View Time & Date Beep Volume YYYY/MM/DD Select Readings...
  • Page 15: Taking Readings

    Follow this procedure to take readings manually with the option to save your reading data into the rolling memory of your gauge. Users of the Elcometer 319 Top model can also save reading data into batch memory [T] - see page 14. Before you start: •...
  • Page 16 4.2 SAVING READING DATA INTO BATCH MEMORY [T] Follow this procedure to take readings manually (manual logging) or automatically at set time intervals (interval logging) and log the reading data into a batch in your gauge memory. Before you start, if you intend to take measurements over a long period of time: •...
  • Page 17 4. To save your reading data into the batch: • Manual logging: Press Save or Hold>Save (depending upon the Manual Logging [T] setting - see page 26) • Interval logging: Your reading data are saved automatically at the set interval. 5.
  • Page 18: Batching [T]

    5 BATCHING [T] This section describes the functions available by pressing Batch from the reading screen. Note: When a batch is already open, the Batch softkey is replaced by To access or initiate a function, scroll to the required function and press Sel. To return immediately to the reading screen at any stage, press and hold Back/Esc.
  • Page 19 If a delayed start time is set, is displayed during this time period. Logging starts after the delayed start time, is displayed and readings are taken at the set interval. To return to the Batch menu, press Esc. Open Existing Batch: Opens an existing batch ready to input more data by manual or interval logging.
  • Page 20 The Review Batch screen is displayed. The screen lists: Batch number, number of readings, date and time batch was created, date and time of last reading, batch type and interval (interval logged batches only). To view the statistics for the batch, press Stats (see “Statistics” on page 19). To view the readings for the batch, press Rdgs.
  • Page 21: Statistics

    6 STATISTICS Your gauge can display a statistical analysis of reading data saved into the rolling memory of your gauge. Users of the Elcometer 319 Top model can also display a statistical analysis of reading data logged into batch memory [T].
  • Page 22 CLEARING STATISTICS AND READING DATA IN ROLLING MEMORY 1. With the reading screen displayed, press Stats. The statistics are displayed. 2. Press Clear and then press Yes to confirm or No to decline. 6.2 STATISTICS AND THE BATCH MEMORY [T] VIEWING STATISTICS AND READING DATA IN BATCH MEMORY (Manual Logging or Interval Logging with Stats displayed) 1.
  • Page 23: Limits

    6.3 STATISTICS VALUES The statistics calculated by your gauge are given in Table 1. Table 1: Calculated statistics values Number of Readings The current number of sets of reading data saved in a batch. The average of a group of readings; the sum of the individual Mean readings divided by the number of readings.
  • Page 24: The Menu

    • the parameter icon flashes (even if it has been deselected to be shown on the display) • an alarm symbol is displayed next to the parameter. • if the readings are being logged into batch memory [T] a reading which exceeds a high limit is marked and a reading which exceeds a low limit is marked by When the value of the parameter returns within limits the alarm status is cleared automatically.
  • Page 25 temperature probe is not fitted when Thermometer Mode is toggled ‘on’, the gauge will display an error reading ‘---’. Set Limits: Toggles limits on/off and adjusts limits for all measured and calculated parameters. The Set Limits menu is displayed. Any low and high limit values toggled ‘on’ are listed. To toggle a limit on/off or adjust its value, scroll to the parameter and press Sel.
  • Page 26: Gauge Setup

    To view the information, scroll to the parameter of choice and press Sel. Gauge Information - Elcometer model #, gauge identity, language, language version, software versions Contact - details of Elcometer offices worldwide and, if applicable, the contact details for the supplier or local distributor.
  • Page 27 To select the language, scroll to the required language and press Sel. Auto Switch Off: Select the time delay before your gauge switches off automatically. To select the time delay, scroll to the required value (Off, 1 minute to 10 minutes) and press Ok. To return to the Setup menu, press Esc.
  • Page 28 Note: If a reading exceeds limits during measurement, it will be shown flashing on the display, even if it has been deselected from the list of reading shown on the display. Manual Logging [T]: Select how readings are saved when taking readings manually (manual logging). The Manual Logging menu is displayed.
  • Page 29: Using External Temperature Probes

    To adjust the brightness of the backlight, scroll to Backlight Brightness and press Sel. Scroll to the brightness required (Low, Medium, High) and press Sel. When finished, press Back. 10 USING EXTERNAL TEMPERATURE PROBES Your gauge can be fitted with an external temperature probe. An external probe is used typically for taking measurements: •...
  • Page 30: Transferring Readings To A Computer [T]

    10.2 PREPARING YOUR GAUGE FOR USE WITH AN EXTERNAL PROBE Attention: The external temperature probe can be capable of measuring temperature in excess of the physical operating range of the gauge. When using your gauge with an external temperature probe, take care to avoid exposing your gauge to excess temperatures.
  • Page 31 ElcoMaster and ElcoMaster Mobile are on the CD supplied with your gauge and they can also be downloaded, together with any subsequent upgrades, from the Elcometer website www.elcometer.com Your gauge is also fully compatible with ElcoShip - see www.elcoship.com for further details.
  • Page 32: Personalised User Screen

    11.3 TRANSFERRING READING DATA USING A BLUETOOTH CONNECTION 1. Switch on your gauge and ensure the Reading Screen is displayed. 2. Enable Bluetooth communications - see “Bluetooth [T]” on page 24. When Bluetooth is enabled, a Bluetooth symbol is displayed on the right side of the display. During transfer of data between your gauge and your PC, the Bluetooth symbol flashes.
  • Page 33: Maintenance

    Display of the user screen can be toggled ‘on’ or ‘off’ (Menu>Setup>User Screen) - see “User Screen” on page 26. 12.1 CREATING THE USER SCREEN 1. Install and run ElcoMaster software. 2. Connect the gauge to the PC using the USB cable (optional equipment for [S] gauges) or Bluetooth [T].
  • Page 34 Elcometer supplier. Your gauge does not contain any user-serviceable components. In the unlikely event of a fault, the gauge should be returned to your Elcometer supplier or directly to Elcometer. The warranty will be invalidated if the gauge has been opened.
  • Page 35: Spare Parts And Accessories

    14 SPARE PARTS AND ACCESSORIES The following spare parts and accessories are available from your local Elcometer supplier or direct from Elcometer: External Temperature Probe - Surface Mount, Magnetic T31920162 External Temperature Probe - Liquids T9996390- Protective Pouch T99921192 USB Cable...
  • Page 36 This variation may be greater than ±1°C for Twb and ±1%/10mb for SH. OPERATING RANGE • Surface temperature (built-in probe) -20°C to 80°C (-4°F to 176°F) • External temperature (Elcometer external probe)Ts -40°C to 200°C (-40°F to 392°F) • Air temperature -20°C to 80°C (-4°F to 176°F) •...
  • Page 37 • Relative humidity 0.1% • Specific humidity 0.1 g/kg (0.1gr/lb) MEMORY • Rolling 10 sets of readings • Batch [T] Up to approximately 36 000 sets of readings in up to 999 batches PHYSICAL • Gauge dimensions 174 mm x 75 mm x 35 mm (6.8” x 3” x 1.4”) •...
  • Page 38: Related Equipment

    16 RELATED EQUIPMENT In addition to the Elcometer 319 Dewpoint Meter, Elcometer produces a wide range of other climatic condition monitoring equipment and associated paint inspection equipment. Users of the Elcometer 319 Dewpoint Meter may also benefit from the following Elcometer products: •...
  • Page 39: Index

    Selecting Interval or Manual Adjusting Display Protection Film Batching Batteries Condition indicator Keys Fitting ElcoMaster Maximising life Personalised user screen Battery life Elcometer Language, choosing Beep Volume Addresses in gauge Lights Bluetooth ElcoShip Limits Configuring Exit Batching Setting Transferring readings...
  • Page 40 Manual Logging Mean Saving reading data Units, choosing Measuring Into batch memory USB Cable Memory Into rolling memory Spare Batch Sensors USB power supply Rolling Set Delayed Start User screen Menu 12, 22 Set Interval Creating Mobile devices, transferring data Setup Switching on/off Setup Backlight...

This manual is also suitable for:

319 top

Table of Contents

Save PDF