Table of Contents
Advertisement
Advertisement
Table of Contents

Subscribe to Our Youtube Channel
Related Manuals for Elcometer 319


Summary of Contents for Elcometer 319
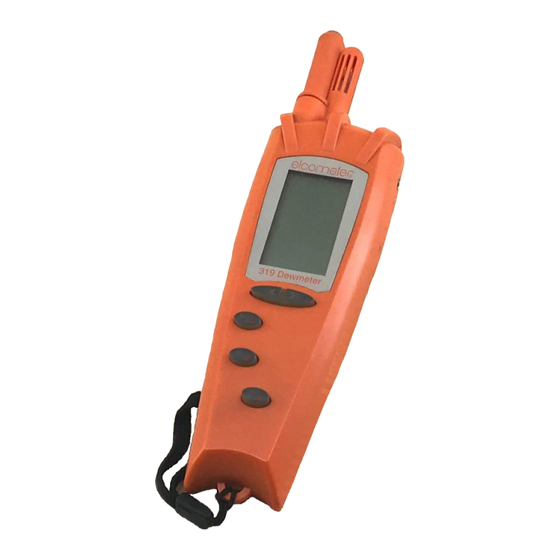
- Page 1 Elcometer 319 Dewpoint Meter Operating Instructions...
- Page 2 The Elcometer 319 Dewmeter has been tested in accordance with EU regulations governing electro- magnetic compliance and meets the required directives. Note: Gauge readings may be affected if the unit operated within radio frequency electromagnetic strength of greater than3 V/m.
-
Page 3: Table Of Contents
CONTENTS Section Page About your gauge ........2 1.1 Climatic conditions ....3 1.2 Standards ......3 1.3 What the box contains . -
Page 4: About Your Gauge
Our products cover all aspects of coating inspection, from development through application to post application inspection. Your Elcometer 319 Dewmeter is a world beating product. With the purchase of this product you now have access to the worldwide service and... -
Page 5: Climatic Conditions
The memory in your Elcometer 319 will record climatic conditions during a coating job. 1.2 Standards Your Elcometer 319 Dewmeter can be used in... - Page 6 The Elcometer 319 Dewmeter is packed in a cardboard and foam package. Please ensure that this packaging is disposed of in an environmentally sensitive manner. Please consult your local Environmental Authority for further guidance. To maximise the benefits of your new Elcometer 319 Dewmeter please take some time to read these Operating Instructions.
-
Page 7: Quick Start
2 QUICK START 1. Fit batteries (see page 6). 2. Press to switch on. 3. Humidity and Temperature are shown on the display. alarm menu link Humidity Temperature Temperature type 4. If required, press to change the type of temperature displayed: Ambient Surface Dewpoint Delta T... -
Page 8: Getting Started
3 GETTING STARTED 3.1 Fitting batteries 3 x LR6 (AA) batteries Alkaline batteries must be disposed of carefully to avoid environmental contamination. Please consult your local Environmental Authority for information on disposal in your region. Do not dispose of any battery in fire. The condition of the batteries is indicated by a symbol on the display - see “What the symbols mean”... -
Page 9: What The Buttons Do
3.3 What the buttons do Scrolls left through items on the display. 319 Dewmeter Scrolls right through HOLD items on the display. Press both arrow buttons together to access memory gauge configuration. HOLD Freezes the measurements on the display. If the memory is switched on, press this button twice to store the measurements in memory. -
Page 10: What The Symbols Mean
3.4 What the symbols mean Menu Indicates that the alarm menu link display is showing menu information, not readings. Indicates that ∆T is Alarm alarm menu link less than 3°C. When ∆T rises above 3.5°C, the alarm switches off. Link Indicates that alarm menu... - Page 11 Temper- Reading of alarm menu link ature temperature in °C or °F. Temperature type is shown by the symbol below. Temper- Ambient alarm menu link ature Surface type Dewpoint Delta T (∆T) dd.mm.yy (when Date alarm menu link set to °C) mm.dd.yy (when set to °F) a.The bottom line of the display displays other...
-
Page 12: The Sensors
4 THE SENSORS sensors Surface humidity, temperature temperature surface temperature are located in the Humidity probe at the top of and air temperature the gauge. For accurate readings: • Do not obstruct airflow through the slots in the probe around the humidity and temperature sensors. -
Page 13: Taking A Reading
For instructions on storing readings in gauge memory see the next section. 7 USING YOUR GAUGE MEMORY The memory in your Elcometer 319 Dewmeter can store up to 99 datasets. Each dataset comprises of one set of measurements: • relative humidity •... -
Page 14: Switching Memory On
7.1 Switching memory on To use the memory in your gauge, the memory must be switched ‘on’. If the link symbol visible on the display, the memory is already switched on. If the link symbol is not visible: Press Display shows MEMORY oFF MEMORY oN HOLD... -
Page 15: Printing Readings
Press Display shows Readings in dataset a.If RECALL does not appear, memory is empty. b.XX = dataset number (1- 99). 7.4 Printing readings The stored data can be printed on the (optional) HP-IR printer: Press Display shows MEMORY oN RECALL HOLD PRINT 4. -
Page 16: Exporting Readings
7.5 Exporting readings The stored data can be exported to a computer using the optional interface cable and EDTS software - see “Data transfer software (EDTS )” on page 18 for additional instructions: Press Display shows MEMORY oN RECALL HOLD EXPORT 4. -
Page 17: Clearing (Deleting) Readings
7.6 Clearing (deleting) readings To clear the stored data from the memory: Press Display shows MEMORY oN RECALL HOLD CLEAR HOLD a.If RECALL does not appear, memory is empty. The most recent dataset will be deleted. To delete all datasets quickly, press and hold HOLD When all Datasets have been cleared or pressed, the gauge returns to the measurement... -
Page 18: Gauge Set Up
8 GAUGE SET UP Set up allows you to configure the following gauge parameters: • display cycle • time and date • units • display contrast • power saving mode To access gauge set up, the memory must be switched off. If the link symbol is not visible on the display, the memory is already switched off. - Page 19 To access gauge set up: Press Display shows Settings MEMORY oFF set up HOLD CYCLE 0 - 10 HOLD YEAR 0 - 99 HOLD MONTH 1 - 12 HOLD 1 - 31 HOLD HOUR 0 - 23 HOLD MINUTE 0 - 10 HOLD UNITS °C or °F...
-
Page 20: Data Transfer Software (Edts )
To use the software you will need an interface cable and EDTS software. The cable is available from your local Elcometer supplier or directly from Elcometer. The software is available free of charge from the downloads section of the Elcometer website www.elcometer.com EDTS... -
Page 21: Maintenance
Your gauge does not contain any user- serviceable components. In the unlikely event of a fault, the Dewmeter should be returned to your Elcometer supplier or directly to Elcometer. Contact details can be found: • On the outside cover of these operating instructions. -
Page 22: Surface Temperature Probes
Always make sure to align the probe connector correctly. 12 SPARE PARTS AND ACCESSORIES The following spare parts and accessories are available from your local Elcometer supplier or direct from Elcometer: Rh Calibration Check Kit T31912969 Rh Check Capsule, 33%... -
Page 23: Technical Specifications
13 TECHNICAL SPECIFICATIONS Air Temperature Sensor type Range -20°C to +60°C (-4°F to +140°F) Accuracy ±0.3°C (±0.6°F) Surface Temperature Sensor type K-type thermocouple Range 1 -30°C to +60°C (-22°F to +140°F) Range 2 +60°C to +300°C (140°F to +572°F) Accuracy ±1.0°C (±... -
Page 24: Related Equipment
In addition to the Elcometer 319 Dewmeter, Elcometer produces a wide range of other climatic condition monitoring equipment and associated paint inspection equipment. Users of the Elcometer 319 Dewmeter may also benefit from the following Elcometer products: • Elcometer Surface...
Need help?
Do you have a question about the 319 and is the answer not in the manual?
Questions and answers