Table of Contents
Advertisement
Advertisement
Table of Contents

Related Manuals for Rational VarioCooking Center 112


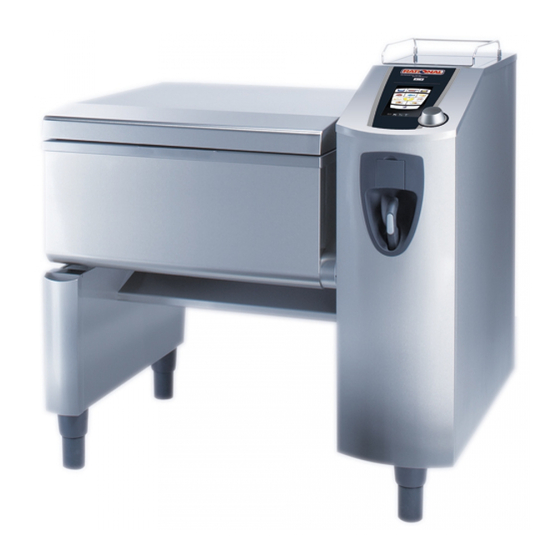
Summary of Contents for Rational VarioCooking Center 112
- Page 1 Installation Manual...
-
Page 2: Safety Instructions
Safety instructions Explanation of pictogram Danger! Attention! Caution! Immediate dangerous situation, Possibly dangerous situation, that Possibly dangerous situation, that that can endanger severe injury possibly can endanger severe can endanger minor injury. or death. injury or death. Corrosive substances Fire hazard! Danger of burning! Danger! Information... -
Page 3: Check Upon Receipt
Check upon receipt Check for any transport damage. In case of a doubt inform immediatly your dealer or carrier. Dealer & Installer data Dealer Installer Quote! This will be requested in the event of a query. Appliance model Appliance serial number Installed by: Date of installation: Maintenance... -
Page 4: After Sales, Warranty, Disposal
After sales, Warranty, Disposal After Sales In case of service being necessary it is advisable first of all to get in touch with your dealer. His address and phone number should be completed during the installation on the previous page. Warranty The manufacturer's obligation is limited to any spare part found defective and which may be advanced to a quality defect. -
Page 5: Table Of Contents
Table of content Safety instructions Check upon receipt Dealer & Installer data After sales, Warranty, Disposal Table of content Handling: Take the unit off the pallet Handling: Unit without pallet Handling: Size for carrying Installation: Recommended minimum clearance Installation: Opening the unit Levelling: 211 or 311 units Levelling: 112 units Power supply: Common information... -
Page 6: Handling: Take The Unit Off The Pallet
Handling: Take the unit off the pallet Take care! Observe the weight of the units. Use carrying aid to avoid injuries. Wear appropriate ppe's Type 112: 168 kg (Vitro + cabinet) Type 112+: 186 kg (Vitro + cabinet) Type 211: 195 kg (Vitro) Type 211+:... -
Page 7: Handling: Unit Without Pallet
Handling: Unit without pallet Models 112, handling by hand Pict. 1 We recommend you to handle the unit from the axis of the pan and from the rear gully under the lid axis. Models 112, handling with pallet jack. To carry the unit with a pallet jack, take care to lift the unit from the front or from the rear, not from the sides. -
Page 8: Handling: Size For Carrying
Handling: Size for carrying We highly recommend you to transport the unit as far as you can on a pallet jack. Center of gravity Pict. 1 Required passage width with pallet: Models 112 / 211 / 311 1010 mm / 40" Devices maximum size: Pict. -
Page 9: Installation: Recommended Minimum Clearance
Installation: Recommended minimum clearance Engineer access 50 mm / 2" We recommend a distance of 500 mm (20”) on the right hand side of the unit for carrying out mainte- nance work. Fig. 1 50 mm / 2" 500 mm 20"... -
Page 10: Installation: Opening The Unit
Installation: Opening the unit Acessing the unit: Step 1 This step is valid for all kind of units Pict.1 (1) Pull off central dial (2) Loosen screw (3 mm hex socket) (3) Now you can remove the control panel. The control panel is connected with a cable mass. -
Page 11: Levelling: 211 Or 311 Units
Levelling: 211 or 311 units We built our units by level. That means the pan is in accordance with the frame. Once you have levelled the frame, the pan should be levelled also. The levelling is done exclusively by adjusting the foots of the unit. - Page 12 Levelling: 211 or 311 units Step 5 Check the pan is laying on both stop collars, thus are factory adjusted. If it is necessary to adjust the stops of the pan take care of following: Pict. 5 > The base frame must be fully levelled. It is useless adjusting the pans stops as long as the base frame isn't properly levelled.
-
Page 13: Levelling: 112 Units
Levelling: 112 units We built our units by level. That means the pan is in accordance with the frame. Once you have levelled the frame, the pan should be levelled also. The levelling is done exclusively by adjusting the foots of the unit. Proceed as follows: Step 1 Units are delivered with the foots fully screwed. -
Page 14: Power Supply: Common Information
Power supply: Common information Requirement Power supply cable: You need to ensure, depending on the • Electrical connection data see page 17 national and local regulations, that each of our devices are separately connected through a • For appliance connections, precise dimensions 30mA RCD circuit breaker . -
Page 15: Power Supply: Type Of The Unit
Power supply: Type of the unit Name plate: Description Models description: • 112, 211, 311 • 112+, 211+, 311+ ("+" Stands for pressure models) Power supply 3NAC - 400V Power consumption Water pressure Serial number of the VarioCooking Center ©. For any technical support it is mandatory to remind this number. -
Page 16: Power Supply
Power supply Danger ! When connecting the unit check the power supply voltage matches the one the unit was built for. See the unit plate. Observe colour coding of the wires. Wrong connection can cause electric shock or damage of the unit. -
Page 17: Connected Loads
Connected loads Caution: As written on page 14, the unit has to be connected through a 30 mA circuit breaker. 3 NAC 400 V 112 with 211 with 311 with vitro vitro vitro Power (kW)* Current consumption (A) Fuse (A) Cross section recommended (mm²) 3 NAC 400 V Dynamic... -
Page 18: Connected Loads
Connected loads 3 AC 400 V 112 with 211 with 311 with vitro vitro vitro Power (kW)* Current consumption (A) Fuse (A) Cross section recommended (mm²) 3 AC 440 V 112 with 211 with 311 with vitro vitro vitro Power (kW)* Current consumption (A) Fuse (A) Cross section... - Page 19 Connection load Concerning the cross section of the cables Power consuption in special mode Current consumption, recommended fuses and cross-sections are depending also on: Show-mode* Reduced 230 W • Local prescriptions • Cable length & quality Show mode* On 115 W •...
-
Page 20: Water Connection
Water connection Common information Our units comply with NF EN 1717: 2001-05 regula- We recommend to install an individual shut-off valve tions, which are recognised by the SVGW and DVGW. for each appliance A soft water connection is not necessary. If regard- We do not talk here about local specific laws. -
Page 21: Drain Connection
Drain connection Feature of the VarioCooking Center ® Fixed connection with odour lock is permissible; thanks to a ventilated drain line which is integrated in our units A connection set for the drain is available (Water supply and drain). Ø40 mm ") Set ref. -
Page 22: Water Discharge: Discharge To A Gutter
Water discharge: Discharge to a gutter Observation: Pict. 1 A gutter installation is not necessary for our units. If despite that your client wants this, please observe the following: Requirements Min 3 % • Drain pipe must have the same diameter as the output pipe of the unit, no reduction in diameter should be inserted. -
Page 23: First Startup
First startup Adjusting the installation heigh Pict. 1 If the altitude of installation is higher than the unit default value (0-299m) it is necessary to modify and Installation Altitude validate. • Modify the altitude (300 m steps) • Do not forget to validate Please check and configure Installation altitude 0 m - 299m... -
Page 24: Installation Options
Installation Options Floor fixing plate It is possible to fix units to the floor using the optional set"Set for floor fixing" 60.72.905 Pict 1 Attention! When installing 211 - 311 models with pressure on the standard foots, we highly recommend to fix the foots to the floor. - Page 25 Installation Options Set for base frame Units ordered with option base frame will be deliv- ered with standard legs. The mounting of the base frame must be done on site. Pict. 1 211/311 Pict. 2 Mounting instructions is supplied with the base frame.
- Page 26 Installation Options Option rear drain (Only for 112 and 112+ models) Models 112 only can be delivered with the drain outlet at the rear side of the unit, in case the standard output position of the drain is too low. This option is not factory assembled.
- Page 27 Installation Options Energy optimization System, Sicotronic If equipped with this option the unit is pre-wired for connection to an energy optimization system (Typ Sicotronic). Connect your Energy optimization system following the wiring diagram supplied with the VarioCooking Center ® Connection locations: Models 112 Pict.1 Models 211/311...
-
Page 28: Conversion Table
Conversion table °dH °f °e mmol/l gr/gal(US) mval/kg 1 °dH 1,79 1,25 17,9 0,1783 1,044 0,357 1 °f 0,56 0,70 10,0 0,584 1 °e 1,43 14,32 0,14 0,84 0,286 1 ppm 0,056 0,07 0,01 0,0584 0,02 1 mmol/l 0,001 0,0007 0,00058 1 gr/gal (US) 0,96 1,71... -
Page 29: Unit Dimensions Variocooking Center 112
Unit dimensions VarioCooking Center ® 160 (6.3) 1224 (48 1/5) -VarioCooking Center 112+ (30 1/2) (28 7/8) 1168 (46) -VarioCooking Center 112 304 (12) 12 (0.5) 1147 (45 1/8) (27) 91 (3 3/5) 1220 (48) 800 (31 1/2) 210 (8 1/4) -
Page 30: Variocooking Center ® 211
Unit dimensions VarioCooking Center ® - 30 -... -
Page 31: Variocooking Center ® 311
Unit dimensions VarioCooking Center ® - 31 -... - Page 32 English We reserve the rights to make any technical improvments! We assume no liability for typing errors. If you notice a mistake in this manual do not hesitate to advise us! Photocopy this page, enter your remarks in reference to the exact page and send it by fax.
Need help?
Do you have a question about the VarioCooking Center 112 and is the answer not in the manual?
Questions and answers