Table of Contents
Advertisement
Quick Links
Advertisement
Table of Contents

Related Manuals for Elation SATURA PROFILE


Summary of Contents for Elation SATURA PROFILE
- Page 1 SATURA PROFILE™ user manual...
- Page 2 +31 45 546 85 66 | +31 45 546 85 96 fax | www.elationlighting.eu | info@elationlighting.eu Elation Professional Mexico | AV Santa Ana 30 | Parque Industrial Lerma, Lerma, Mexico 52000 +52 (728) 282-7070 D O C U M E N T V E R S I O N...
-
Page 3: Table Of Contents
C O N T E N T S General Information Limited Warranty (USA Only) Safety Guidelines Maintenance Guidelines Fixture Overview Installation Guidelines Optional Static Gobo Animation Wheel Installation System Menu DMX Channel Functions And Values Error Codes Specifications Optional Accessories... -
Page 4: General Information
BOX CONTENTS Omega Brackets (x2) powerCON Cable Safety Cable CUSTOMER SUPPORT Contact ELATION Service for any product related service and support needs. Also visit forums.elationlighting.com with questions, comments or suggestions. ELATION SERVICE USA - Monday - Friday 8:00am to 4:30pm PST 323-582-3322 | Fax 323-832-9142 | support@elationlighting.com... -
Page 5: Limited Warranty (Usa Only)
B. For warranty service, send the product only to the Elation Professional factory. All shipping charges must be pre-paid. If the requested repairs or service (including parts replacement) are within the terms of this warranty, Elation Professional will pay return shipping charges only to a designated point within the United States. -
Page 6: Safety Guidelines
S A F E T Y G U I D E L I N E S This fixture is an extremely sophisticated piece of electronic equipment. To guarantee a smooth operation, it is important to follow all instructions and guidelines in this manual. The manufacturer of this device is not responsible for injury and/or damages resulting from the misuse of this fixture due to the disregard of the information printed in this manual. - Page 7 S A F E T Y G U I D E L I N E S DO NOT TOUCH the fixture housing during operation. Turn OFF the power and allow approximately 15 minutes for the fixture to cool down before serving. DO NOT shake fixture, avoid brute force when installing and/or operating fixture.
-
Page 8: Maintenance Guidelines
Regular inspections are recommended to insure proper function and extended life. There are no user serviceable parts inside this fixture, please refer all other service issues to an authorized Elation service technician. Should you need any spare parts, please order genuine parts from your local Elation dealer. -
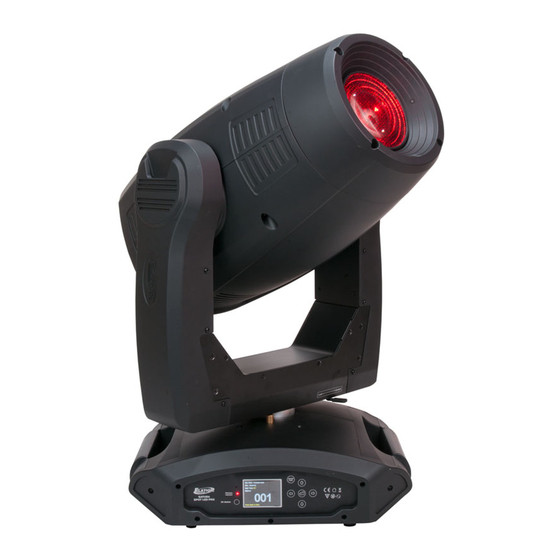
Page 9: Fixture Overview
F I X T U R E O V E R V I E W Lens LCD Menu Function Display MODE/ESC Button LEFT Button DOWN Button RIGHT Button ENTER Button UP Button Carrying Handle(s) RJ45 Input RJ45 Output 3pin DMX Output 3pin DMX Input 5pin DMX Output 5pin DMX Input... -
Page 10: Installation Guidelines
I N S T A L L A T I O N G U I D E L I N E S FLAMMABLE MATERIAL WARNING Keep fixture minimum 5.0 feet (1.5m) away from flammable materials and/or pyrotechnics. ELECTRICAL CONNECTIONS A qualified electrician should be used for all electrical connections and/or installations. USE CAUTION WHEN POWER LINKING OTHER MODEL FIXTURES AS THE POWER CONSUMPTION OF OTHER MODEL FIXTURES MAY EXCEED THE MAX POWER OUTPUT ON THIS FIXTURE. - Page 11 I N S T A L L A T I O N G U I D E L I N E S OMEGA BRACKETS INSTALLATION Insert the Omega Brackets into the matching holes on the bottom of the fixture. Secure the Omega Brackets to the fixture by turning each quick-lock fastener ¼...
- Page 12 I N S T A L L A T I O N G U I D E L I N E S RIGGING Overhead rigging requires extensive experience, including amongst others calculating working load limits, installation material being used, and periodic safety inspection of all installation material and the fixture.
- Page 13 LEDs. This issue is not specific only to ELATION lighting fixtures, it is a common issue with lighting fixtures from all manufacturers. Although there is no true way to fully prevent this issue from happening, the guidelines below can prevent any potential damage from occurring if followed.
-
Page 14: Optional Static Gobo Animation Wheel Installation
OPTIONAL STATIC GOBO ANIMATION WHEEL INSTALLATION 1. Place fixture on a flat surface and lock head in an upright position with TILT lock engaged. 2. Remove (2x) Phillips screws securing top and bottom head panel covers, remove both covers. - Page 15 OPTIONAL STATIC GOBO ANIMATION WHEEL INSTALLATION 3. Remove (4x) #2 Philips screws securing 2 wire harness connectors, then carefully unplug both connectors. 4. Remove (2x) #2 Philips screws securing the effect module. 5. Because the internal lens assembly passes through the effect module tray, it needs to be lifted out and away from the effect module in order to remove it.
- Page 16 OPTIONAL STATIC GOBO ANIMATION WHEEL INSTALLATION 6. With the internal lens assembly lifted, carefully remove the effect module from fixture. 7. Loosen (2x) #2 Allen set-screws securing the belt gear spindle. This will reduce the belt tension on the Static Gobo wheel gear spindle. 8.
- Page 17 OPTIONAL STATIC GOBO ANIMATION WHEEL INSTALLATION 9. Because the internal lens assembly impedes the removal path of the Static Gobo wheel, disengage the TILT lock and invert the head. This will lower the internal lens assembly out and away, providing a clear path to remove the Static Gobo wheel. 10.
-
Page 18: System Menu
S Y S T E M M E N U The fixture includes an easy to navigate system menu. The control panel (see image below) located on the front of the fixture, provides access to the main system menu and is where all necessary system adjustments are made to the fixture. - Page 19 ELATION SATURA PROFILE S Y S T E M M E N U Supports Software Versions: ≥ 1.0.2 Features are subject to change without any prior written notice. MAIN MENU SUB MENU OPTIONS / VALUES DESCRIPTION (Default Settings in BOLD)
- Page 20 Select Signal Art-Net on IP10 Select Art-Net IP010 sACN Select sACN ELATION© SATURA PROFILE S Y S T E M M E N U Supports Software Versions: ≥ 1.0.2 Features are subject to change without any prior written notice. MAIN MENU...
- Page 21 SYSTEM MENU CHANGE WITH SOFTWARE UPDATE VERSION ≥1.0.10 See highlighted menu items below which have been updated with this software update. Features are subject to change without any prior written notice. MAIN MENU SUB MENU OPTIONS / VALUES DESCRIPTION (Default Settings in BOLD) Set Dmx Address A001~AXXX DMX Address Setting...
- Page 22 Supports Software Versions: ≥ 1.0.10 Features are subject to change without any prior written notice. MAIN MENU SUB MENU OPTIONS / VALUES DESCRIPTION (Default Settings in BOLD) Reset All Reset All Motors Reset Pan&Tilt Reset Pan/Tilt Reset Reset Colors Reset Color Wheel Function Reset Gobos Reset Gobos...
- Page 23 FUNCTION - Auto Program Define fixture mode (Master or Alone) for running Auto Programs. Select desired internal programs under “Select Program”, set the number of steps under “Edit Program”, and edit individual scenes under “Edit Scenes”. PERSONALITY - Status Settings - Address Via DMX When ON, define the desired DMX address via an external controller.
- Page 24 PERSONALITY – Service Setting - RDM PID Select various submenus via RDM. RDM stands for "Remote Device Management", which provides the ability to control the device remotely while connected to a DMX-bus. ANSI E1.20-2006 by ESTA specifies the RDM standard as an extension of the DMX512 protocol. Manual settings like adjusting the DMX starting address are no longer needed.
- Page 25 USER MODE SET – Edit User Mode Create user defined channel orders allowing the fixture to match the channel order of other fixtures on the market for easier operation. A total of three user modes may be configured: User Mode A, User Mode B, and User Mode C. EDIT PROGRAM –...
- Page 26 EDIT PROGRAM – Record Controller – Working With Built-In Program [continued] 2. Automatic Program Run • Select “Function Mode”. • Press ENTER to confirm. • Select “Auto Program”. • Press ENTER to confirm. • Select “Master” or “Alone”. • Press ENTER to confirm. •...
- Page 27 EDIT PROGRAM – Record Controller – Working With Built-In Program [continued] 5. Automatic Scene Recording • Select “Edit Program”. • Press ENTER to confirm. • Select “Edit Scenes”. • Select desired scene numbers. A maximum of 250 scenes can be programmed. •...
-
Page 28: Dmx Channel Functions And Values
D M X C H A N N E L F U N C T I O N S A N D V A L U E S ELATION SATURA PROFILE™ DMX Channel Values / Functions (54 DMX Channels) Supports Software Versions: ≥ 1.0.2 Features are subject to change without any prior written notice. - Page 29 MODE / CHANNEL VALUE FUNCTION BASIC STAND EXTEND ROTATING GOBOS, CONTINUOUS ROTATION [GOBO WHEEL 1] OPEN 10-19 Rotating Gobo 1 20-29 Rotating Gobo 2 30-39 Rotating Gobo 3 40-49 Rotating Gobo 4 50-59 Rotating Gobo 5 60-69 Rotating Gobo 6 70-89 Gobo 1 Shake SLOW to FAST 90-109...
- Page 30 DMX VALUES FOR OPTIONAL STATIC GOBO / ANIMATION WHEEL KIT See highlighted DMX values below which support the control of the optional Static GOBO / Animation Wheel Kit. Please contact ELATION CUSTOMER SUPPORT for more details. STATIC / FIXED GOBOS [GOBO WHEEL 2]...
- Page 31 MODE / CHANNEL VALUE FUNCTION BASIC STAND EXTEND ROTATING PRISM, PRISM / GOBO MACROS 0-63 OPEN 64-127 3-FACET Rotating Prism 128-135 Prism / Gobo Macro 1 136-143 Prism / Gobo Macro 2 144-151 Prism / Gobo Macro 3 152-159 Prism / Gobo Macro 4 160-167 Prism / Gobo Macro 5 168-175...
- Page 32 MODE / CHANNEL VALUE FUNCTION BASIC STAND EXTEND FROST 0-127 OPEN 128-255 100% Frost IRIS 0-191 MAX to MIN Diameter 192-223 Pulse Closing FAST to SLOW 224-255 Pulse Closing SLOW to FAST IRIS FINE 0-255 Iris FINE Adjustment FOCUS 0-255 Continuous Adjustment from FAR to NEAR FOCUS FINE 0-255...
- Page 33 MODE / CHANNEL VALUE FUNCTION BASIC STAND EXTEND BLADE #4 0-255 OPEN to CLOSE BLADE #4 FINE [16 BIT] 0-255 OPEN to CLOSE FINE Adjustment BLADE #4 ROTATION 0-255 ROTATION BLADE #4 ROTATION FINE [16 BIT] 0-255 ROTATION FINE Adjustment ALL (4) BLADES ROTATION 0-255 All (4) Blade Rotation...
- Page 34 MODE / CHANNEL VALUE FUNCTION BASIC STAND EXTEND LAMP ON/OFF, RESET, INTERNAL PROGRAMS 0-19 GOBO Change Normal 20-29 COLOR Change to Any Position 30-39 GOBO Change to Any Position 40-59 NO FUNCTION 60-79 NO FUNCTION 80-84 ALL Motors Reset 85-87 SCAN Motor Reset 88-90 COLOR Motors Reset...
-
Page 35: Error Codes
E R R O R C O D E S When power is applied, the unit will automatically enter a “Reset/Test” mode. This mode brings all the internal motors to a home position. If there is an internal problem with one or more of the motors an error code will flash in the display in the form of “XXer”... - Page 36 ELATION SATURA PROFILE E R R O R C O D E S Error Codes are subject to change without any prior written notice. ERROR CODES DESCRIPTION Movement is not located in the default position after the reset. PAN Er...
-
Page 37: Specifications
S P E C I F I C A T I O N S SOURCE 440W Cool White 15,000 Lumen LED Engine 50,000 Hour Average LED Life* *May vary depending on several factors including but not limited to: Environmental Conditions, Power/Voltage, Usage Patterns (On-Off Cycling), Control, and Dimming. EFFECTS Motorized Zoom 4-Blade Framing Shutter System... - Page 38 COLORS AND GOBOS **IMPORTANT NOTICE REGARDING GOBO DIMENSIONS AND CUSTOM GOBOS OD = Outside Diameter | ID = Image Diameter Due to varying manufacturing processes, it is highly recommended to provide a gobo and holder sample from the fixture to 3rd party custom gobo vendors for accurate sizing. Specifications and improvements in the design of this unit and this manual are subject to change without any prior written notice.
-
Page 39: Optional Accessories
O P T I O N A L A C C E S S O R I E S ORDER CODE ITEM TRIGGER CLAMP Heavy Duty Wrap Around Hook Style Clamp DRCSATPRO Dual Touring Road Case for SATURA PROFILE 501020103010 Optional Static Gobo / Animation Wheel Kit AC3PDMX5PRO 5 ft. (1.5m) 3pin PRO DMX Cable AC5PDMX5PRO 5 ft.
Need help?
Do you have a question about the SATURA PROFILE and is the answer not in the manual?
Questions and answers