Table of Contents
Advertisement
Quick Links
Advertisement
Table of Contents

Related Manuals for Elation SNIPER PRO


Summary of Contents for Elation SNIPER PRO
- Page 1 SNIPER PRO™ user manual ...
- Page 2 Elation Professional USA | 6122 S. Eastern Ave. | Los Angeles, CA. 90040 323-582-3322 | 323-832-9142 fax | www.elationlighting.com | info@elationlighting.com Elation Professional B.V.
-
Page 3: Table Of Contents
C O N T E N T S General Information Warranty Safety Instructions and Guidelines Discharge Lamp Warning Fixture Overview Lamp Installation Instructions Fixture Installation Fixture Menu DMX Channel Functions And Values Cleaning and Maintenance Technical Specifications Optional Accessories SNIPER PRO™ User Manual... -
Page 4: General Information
Please do not return this unit to your dealer without first contacting customer support at the number listed below. Please do not discard the shipping carton in the trash. Please recycle whenever possible. BOX CONTENTS (1) powerCON TRUE1 Cable SNIPER PRO™ User Manual... - Page 5 You may also visit us on the web at www.elationlighting.com any comments or suggestions. For service related issue please contact Elation Professional®. ELATION SERVICE USA - Monday - Friday 8:00am to 5:00pm PST...
-
Page 6: Warranty
No accessories should be shipped with the product. If any accessories are shipped with the product, Elation Professional® shall have no liability what so ever for loss and/or or damage to any such accessories, nor for the safe return thereof. -
Page 7: Safety Instructions And Guidelines
KEEP FLAMMABLE MATERIALS AWAY FROM FIXTURE! INDOOR / DRY LOCATIONS USE ONLY! DO NOT EXPOSE FIXTURE TO RAIN AND MOISTURE! NEVER LOOK DIRECTLY INTO THE LIGHT SOURCE! RETINA INJURY RISK - MAY INDUCE BLINDNESS! SENSITIVE PERSONS MAY SUFFER AN EPILEPTIC SHOCK! SNIPER PRO™ User Manual... - Page 8 Consistent operational breaks will ensure the fixture will function properly for many years to come. Use the original packaging and materials to transport the fixture in for service. SNIPER PRO™ User Manual...
-
Page 9: Discharge Lamp Warning
R E P L A C E M E N T Please note that due to the nature of the Phillips™ Platinum 14R Lamp and the optical path of the Elation SNIPER PRO™ fixture, the lamp MUST BE replaced at 2,000 hours. -
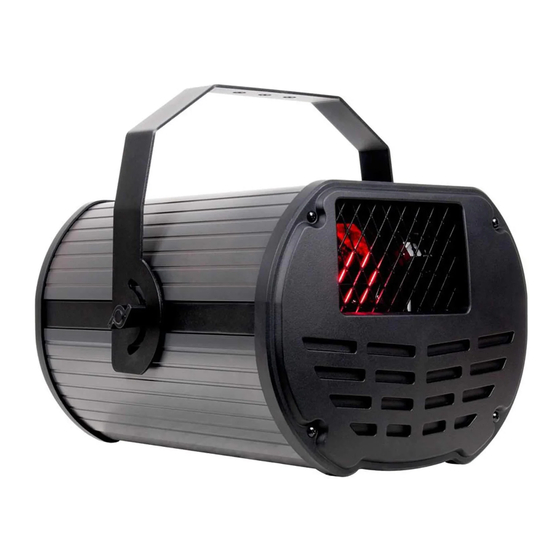
Page 10: Fixture Overview
F I X T U R E O V E R V I E W Adjustable Mounting Yoke LCD Menu Function Display MENU, DOWN, UP, ENTER Buttons Safety Cable Attachment Hook Fuse powerCON TRUE 1 IN/OUT 3/5pin DMX IN/OUT Lamp Cover Plate Lens SNIPER PRO™ User Manual... -
Page 11: Lamp Installation Instructions
R E P L A C E M E N T Please note that due to the nature of the Phillips™ Platinum 14R Lamp and the optical path of the Elation SNIPER PRO fixture, the lamp MUST BE replaced at 2,000 hours. - Page 12 . e l a t i o n l i g h t i n g . c o m LAMP INSTALLATION PROCEDURE 1. Remove (2) screws on the lamp cover plate as indicated below. SNIPER PRO™ User Manual...
- Page 13 . e l a t i o n l i g h t i n g . c o m LAMP INSTALLATION PROCEDURE - continued 2. Remove the lamp cover plate to access the lamp. 3. Gently remove (2) Wires connected to spade terminals on base of lamp. SNIPER PRO™ User Manual...
- Page 14 4. Gently push the base of the lamp DOWN to release. 5. Once lamp is released, grab the lamp base with your thumb and index finger and gently pull the lamp OUT towards and AWAY from the fixture. SNIPER PRO™ User Manual...
- Page 15 6. Using a clean cloth or gloves, gently install the new lamp into the fixture using your thumb and index finger, making sure the spade terminals on the base of the lamp are facing straight UP. SNIPER PRO™ User Manual...
- Page 16 7. Seat the bottom edge of the lamp first; push the base of the lamp DOWN until the lamp locks into place, making sure lamp is properly seated into place. 8. Gently attach the (2) Wires to spade terminals securely on the base of the lamp. SNIPER PRO™ User Manual...
- Page 17 . e l a t i o n l i g h t i n g . c o m LAMP INSTALLATION PROCEDURE - continued 9. Replace the lamp cover plate back into place and secure the (2) screws. 10. Power fixture ON and make sure the lamp strikes ON. SNIPER PRO™ User Manual...
- Page 18 Please remember the Phillips ™ Platinum 14R Lamp is NOT a hot-restrike lamp therefore, therefore you must wait approximately 15 minutes before you can attempt to restrike the lamp once it has been turned off. SNIPER PRO™ User Manual...
-
Page 19: Fixture Installation
MINIMUM distance to lighted objects must be 16.5 feet (5m) MAXIMUM temperature of external surface 185 F (85 ° ° MINIMUM distance of inflammable materials from surface 1.6 feet (0.5m) Keep fixture at least 5.0 feet (1.5m) away from any flammable materials, decorations, pyrotechnics, etc. SNIPER PRO™ User Manual... - Page 20 Improper installation can result in bodily injury. S A F E T Y C A B L E ALWAYS ATTACH A SAFETY CABLE TO THE FIXTURE WHENEVER INSTALLING IN A SUSPENDED ENVIRONMENT TO ENSURE THE FIXTURE WILL NOT DROP IF CLAMP FAILS. SNIPER PRO™ User Manual...
- Page 21 Safety Cable. The fixture provides a built-in rigging point for a Safety Cable on the back of the fixture as illustrated below. Be sure to only use the designated rigging point for the Safety Cable. SNIPER PRO™ User Manual...
-
Page 22: Fixture Menu
You may exit the main menu at any time without making any adjustments by pressing and holding the MENU button for 3 seconds. INFORMATION DISPLAYED DURING INITIAL POWER ON When the fixture is initially powered ON, the display shows the following information: SNIPER ELATION SNIPER PRO™ User Manual... - Page 23 B: 1.0 C: 1.0 D :1.0 Displays Software Version of Fixture Version ≥ Ab:1.0 Bb:1.0 Cb:1.0 Db:1.1 Defaults No, Yes Return All Settings Back to Factory Default Reset All, Pan/Tilt, Effect Select which Motors to Reset. Function SNIPER PRO™ User Manual...
- Page 24 To exit the OFFSET ADJUSTMENTS MENU press and hold the MENU button for at least 3 seconds, until the display shows ELATION SNIPER. SHUTTER AND BEAM POSITION AFTER EXITING OFFSET ADJUSTMENTS MENU The SHUTTER and BEAM POSITION after exiting the OFFSET ADJUSTMENT MENU will depend on the DMX STATE setting (“Blackout”...
-
Page 25: Dmx Channel Functions And Values
PAN Scope MAX to MIN TILT SHAKING 0-255 TILT Shaking Movement SLOW to FAST TILT SCOPE 0-255 TILT Scope MAX to MIN CYAN 0-255 CYAN 0 to 100% MAGENTA 0-255 MAGENTA 0 to 100% YELLOW 0-255 YELLOW 0 to 100% SNIPER PRO™ User Manual... - Page 26 Color 12 / Color 13 114-118 Color 13 119-123 ANIMATION EFFECT 124-127 ANIMATION Shake from SLOW to FAST 128-133 *Clockwise Color Wheel Rotation from FAST to SLOW 134-192 STOP 193-196 *Counterclockwise Color Wheel Rotation from SLOW to FAST 197-255 SNIPER PRO™ User Manual...
- Page 27 OPEN 140-181 FAST OPEN to SLOW CLOSE 182-189 OPEN 190-231 FAST CLOSE to SLOW OPEN 232-239 OPEN 240-247 RANDOM STROBE 248-255 OPEN DIMMER INTENSITY 0-255 Dimmer Intensity 0 to 100% FOCUS 0-255 FOCUS 0 to 100% SNIPER PRO™ User Manual...
- Page 28 179-186 Pattern Macro 21 187-195 Pattern Macro 22 196-203 Pattern Macro 23 204-212 Pattern Macro 24 213-220 Pattern Macro 25 221-229 Pattern Macro 26 230-237 Pattern Macro 27 238-246 Pattern Macro 28 247-255 Pattern Macro 29 SNIPER PRO™ User Manual...
- Page 29 *Counterclockwise Rotation SLOW to FAST PRISM 0-63 STOP 64-127 8-FACET PRISM 128-191 3-FACET 192-255 LINEAR PRISM PRISM ROTATION 0-127 PRISM Indexing 128-189 *Clockwise PRISM Rotation FAST to SLOW 190-193 STOP 194-255 *Counterclockwise PRISM Rotation SLOW to FAST SNIPER PRO™ User Manual...
- Page 30 COLOR Motor Reset 91-93 GOBO Motor Reset 94-96 SHUTTER & DIMMER Motors Reset 97-99 OTHER Motors Reset 100-109 ENABLE BLACKOUT WHILE PAN/TILT MOVEMENT 110-119 ENABLE BLACKOUT WHILE COLOR CHANGE 120-129 ENABLE BLACKOUT WHILE GOBO CHANGE 130-255 NO FUNCTION SNIPER PRO™ User Manual...
-
Page 31: Cleaning And Maintenance
Regular inspections are recommended to insure proper function and extended life. There are no user serviceable parts inside this fixture, please refer all other service issues to an authorized Elation service technician. Should you need any spare parts, please order genuine parts from your local Elation dealer. -
Page 32: Technical Specifications
Multiple Unit Power Linking (max 3 @120V / 7 @230V) 104°F (40°C) Max Ambient Temperature APPROVALS / RATINGS CE | IP20 Please Note: Specifications and improvements in the design of this unit and this manual are subject to change without any prior written notice. SNIPER PRO™ User Manual... - Page 33 . e l a t i o n l i g h t i n g . c o m w w w . e l a t i o n l i g h t i n g . c o m COLORS AND GOBOS SNIPER PRO™ User Manual...
-
Page 34: Dimensional Drawings
Please Note: Specifications and improvements in the design of this unit and this manual are subject to change without any prior written notice. DIMENSIONAL DRAWINGS Please Note: Specifications and improvements in the design of this unit and this manual are subject to change without any prior written notice. SNIPER PRO™ User Manual... -
Page 35: Optional Accessories
24” (610mm) 60 lbs. (27 kg) Rated Safety Cable AC3PDMX5PRO 5 ft. (1.5m) 3pin PRO DMX Cable AC5PDMX5PRO 5 ft. (1.5m) 5pin PRO DMX Cable NEU088 3 ft. (1m) powerCON TRUE1 Power Link Cable Additional Cable Lengths Available SNIPER PRO™ User Manual...
Need help?
Do you have a question about the SNIPER PRO and is the answer not in the manual?
Questions and answers