Table of Contents
Advertisement
Quick Links
Advertisement
Table of Contents

Subscribe to Our Youtube Channel
Related Manuals for Elation SMARTY MAX


Summary of Contents for Elation SMARTY MAX
- Page 1 ™ user manual...
- Page 2 +31 45 546 85 66 | +31 45 546 85 96 fax | www.elationlighting.eu | info@elationlighting.eu Elation Professional Mexico | AV Santa Ana 30 | Parque Industrial Lerma, Lerma, Mexico 52000 +52 (728) 282-7070 D O C U M E N T V E R S I O N...
-
Page 3: Table Of Contents
C O N T E N T S General Information Warranty Returns (USA Only) Safety Guidelines Discharge Lamp Warning Maintenance Guidelines Fixture Overview Colors, Gobos, Animation Gobo Size Gobo Replacement Lamp Replacement Fixture Installation System Menu DMX Channel Functions and Values Error Codes Specifications Optional Accessories... -
Page 4: General Information
BOX CONTENTS Omega Brackets (x2) IP65 Power Cable CUSTOMER SUPPORT Contact ELATION Service for any product related service and support needs. Also visit forums.elationlighting.com with questions, comments or suggestions. ELATION SERVICE USA - Monday - Friday 8:00am to 4:30pm PST 323-582-3322 | Fax 323-832-9142 | support@elationlighting.com... -
Page 5: Warranty Returns (Usa Only)
(double-box and foam) that provides ample product protection for ground and/or air freight transit, and must be shipped freight pre-paid and insured to ELATION in Los Angeles, CA or an ELATION Authorized Service Center. The RMA number must be clearly written on the outside of the return box, and a brief description of the problem and the RMA number must be documented and included in the box. -
Page 6: Safety Guidelines
This fixture is a sophisticated piece of electronic equipment. To guarantee a smooth operation, it is important to follow all instructions and guidelines in this manual. Elation Professional is not responsible for injury and/or damages resulting from the misuse of this fixture due to the disregard of the information printed in this manual. - Page 7 S A F E T Y G U I D E L I N E S RISK GROUP 3 - RISK OF EXPOSURE TO ULTRAVIOLET UV RADIATION! FIXTURE EMITS HIGH INTENSITY WAVELENGTH OF ULTRAVIOLET UV LIGHT FROM THE UV COLOR FILTER. WEAR PROPER EYE AND SKIN PROTECTION.
-
Page 8: Discharge Lamp Warning
D I S C H A R G E L A M P W A R N I N G This fixture is fitted with a DISCHARGE LAMP, which is highly susceptible to damage if improperly handled. NEVER touch the lamp with your bare hands, as the oil from your hands will shorten the life of the lamp. -
Page 9: Maintenance Guidelines
Regular inspections are recommended to insure proper function and extended life. There are no user serviceable parts inside this fixture, please refer all other service issues to an authorized Elation service technician. Should you need any spare parts, please order genuine parts from your local Elation dealer. -
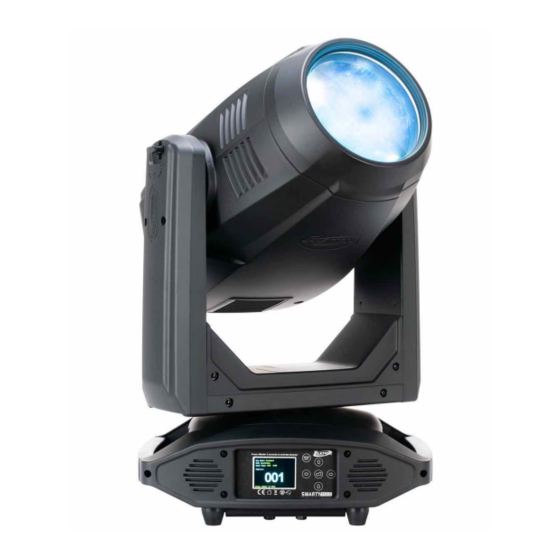
Page 10: Fixture Overview
F I X T U R E O V E R V I E W 1. Lens 2. TILT Lock 3. LCD Control Menu Display 4. MODE/ESC Button 5. LEFT Button 6. ENTER Button 7. DOWN Button 8. RIGHT Button 9. -
Page 11: Colors, Gobos, Animation
C O L O R S , G O B O S , A N I M A T I O N Color Wheel Color Flags Cyan Green Magenta Yellow Yellow Purple Cyan Orange Magenta Light Green Pink UV Filter Blue INTERCHANGEABLE-ROTATING GLASS GOBO WHEEL 1 STATIC-FIXED METAL GOBO WHEEL 2... -
Page 12: Gobo Size
Extended testing of custom gobo designs is highly recommended prior to use. Contact ELATION SERVICE for further information. ELATION SERVICE USA - Monday - Friday 8:00am to 5:00pm PST... -
Page 13: Gobo Replacement
G O B O R E P L A C E M E N T Tilt Lock Pan Lock 1. Before removing covers, place fixture on a stable flat surface in an INDOOR DUST FREE location. Ensure moving head is locked into a neutral upright position with both PAN and TILT locks engaged. 2. - Page 14 G O B O R E P L A C E M E N T 3. Locate the two slotted brackets which secure the GOBO Wheel Module to the frame, each held with two Phillips-head screws. Loosen the (4x) Phillips-head screws, which will allow the slotted brackets to slide up.
- Page 15 G O B O R E P L A C E M E N T 5. Impeding the removal of the GOBO Wheel Module is the Zoom Lens, which is set within the lens housing aperture. Position the moving head down so the lens is facing down as well. This will allow gravity to drop the Zoom Lens out of the aperture.
- Page 16 G O B O R E P L A C E M E N T 7. REPLACING A ROTATING GOBO Locate the tab of the spring, and with a precision pick (or similar tool), carefully press retaining spring inward to relieve tension. 8.
-
Page 17: Lamp Replacement
L A M P R E P L A C E M E N T To ensure a proper/safe lamp change, carefully read all the following instructions. USE ONLY GENUINE ORIGINAL PHILIPS™ LAMPS. OTHER BRAND LAMPS WILL CAUSE DAMAGE AND WILL VOID FIXTURE WARRANTY! DISCONNECT THE MAIN POWER SUPPLY BEFORE REPLACING LAMP! FIXTURE MUST COOL FOR 60 MINUTES BEFORE REPLACING LAMP! NEVER TOUCH LAMP WITH BARE HANDS, ALWAYS WEAR GLOVES! - Page 18 L A M P R E P L A C E M E N T LAMP LIFE OF PHILIPS PLATINUM 400L FLEX = UP TO 4,000 HOURS Lamp hours are calculated in real time by a smart algorithm combining periods of full output and periods of hibernation with the shutter closed.
- Page 19 L A M P R E P L A C E M E N T LAMP INSTALLATION PROCEDURE 4. Remove the (2x) spade receptacle-terminals connected to the lamp base. 5. Loosen the large black slotted screw holding down the hinged lamp retention clip bar. Pull the bar out away and push to the side.
- Page 20 L A M P R E P L A C E M E N T LAMP INSTALLATION PROCEDURE 7. Gently grab lamp base with thumb and index finger and pull lamp out from fixture. 8. Using thumb and index finger, gently install the new lamp. Position lamp so it is seated properly, then swing down the retention clip, squeezing the ends to lock/secure the lamp into place.
- Page 21 L A M P R E P L A C E M E N T LAMP HOURS RESET PROCEDURE 1.! Activate the main menu by pressing MODE/ESC and toggle to “Information”. 2.! Press ENTER and press UP or DOWN to toggle to “Time Information”. 3.! Press UP or DOWN to toggle to “LampTime Password”...
-
Page 22: Fixture Installation
F I X T U R E I N S T A L L A T I O N FLAMMABLE MATERIAL WARNING Keep fixture minimum 5.0 feet (1.5m) away from flammable materials and/or pyrotechnics. ELECTRICAL CONNECTIONS A qualified electrician should be used for all electrical connections and/or installations. MINIMUM DISTANCE TO OBJECTS/SURFACES MUST BE 49.2 FEET (15 METERS) MINIMUM DISTANCE OF INFLAMMABLE MATERIALS... - Page 23 F I X T U R E I N S T A L L A T I O N OMEGA BRACKETS INSTALLATION Insert the Omega Brackets into the matching holes on the bottom of the fixture. Secure the Omega Brackets to the fixture by turning each quick-lock fastener ¼ turn clockwise; making sure the fastener is completely locked.
- Page 24 LEDs. This issue is not specific only to ELATION lighting fixtures, it is a common issue with lighting fixtures from all manufacturers. Although there is no true way to fully prevent this issue from happening, the guidelines below can prevent any potential damage from occurring if followed.
-
Page 25: System Menu
S Y S T E M M E N U The fixture includes an easy to navigate system menu. The control panel (see image below) located on the front of the fixture, provides access to the main system menu and is where all necessary system adjustments are made to the fixture. - Page 26 ELATION SMARTY MAX SYSTEM MENU - Supports Software Versions: ≥ 1.3.1 Features are subject to change without notice. *Rotation direction (Clockwise or Counterclockwise) of effects depends on orientation of the fixture head and Pan/Tilt settings. MAIN MENU SUB MENU OPTIONS / VALUES...
- Page 27 ELATION SMARTY MAX SYSTEM MENU - Supports Software Versions: ≥ 1.3.1 Features subject to change without notice. *Rotation direction (Clockwise or Counterclockwise) of effects depends on orientation of the fixture head and Pan/Tilt settings. MAIN MENU SUB MENU OPTIONS / VALUES...
- Page 28 FIXTURE SOFTWARE CAN NOT BE DOWNGRADED! DOWNLOAD FIXTURE SOFTWARE TO PC ONLY! (NO MAC SUPPORT) PLEASE CONTACT ELATION SERVICE FOR FURTHER INFORMATION. 1. Copy fixture software update file from a PC computer to a compatible USB flash drive. Make sure only the fixture software update file is stored on the USB flash drive.
- Page 29 S Y S T E M M E N U PERSONALITY - Display Setting – Key Lock When ON, Control Panel buttons lock automatically after exiting main menu for 15 seconds. To unlock, keep MODE/ESC button pressed for 3 seconds. PERSONALITY - Reset Default ONLY QUALIFIED TECHNICIANS SHOULD PERFORM THIS FUNCTION! This function restores all fixture settings to the factory default settings.
- Page 30 S Y S T E M M E N U EDIT PROGRAM – Rec. Controller The fixture features an integrated DMX-recorder by which you can transmit the programmed scenes from your DMX-controller to the moving head. Adjust the desired scene numbers via the encoder (from –...
- Page 31 S Y S T E M M E N U EDIT PROGRAM – Record Controller – Working with Built-In Program [continued] To start an Auto Program, proceed as follows: 1. Slave Setting Select “Function Mode”. Press ENTER to confirm. Select “Set to Slave”. Press ENTER to confirm.
- Page 32 S Y S T E M M E N U EDIT PROGRAM – Record Controller – Working with Built-In Program [continued] 5. Automatic Scene Recording Select “Edit Program”. Press ENTER to confirm. Select “Edit Scenes”. Select desired scene numbers. A maximum of 250 scenes can be programmed. Press ENTER to confirm.
-
Page 33: Dmx Channel Functions And Values
D M X C H A N N E L F U N C T I O N S A N D V A L U E S ELATION SMARTY MAX™ DMX Channel Values / Functions (44 Total DMX Channels) Supports Software Versions: ≥... - Page 34 Standard Extended Value Function Default Snap COLOR WHEEL 0-10 Open 11-19 20-28 Green 29-37 Yellow 38-46 Purple 47-55 Cyan 56-64 Orange 65-73 Magenta 74-82 Light Green 83-91 Pink 92-100 UV FILTER 101-109 110-118 119-127 Blue 128-180 Color Scroll CW FAST → SLOW Stop 182-234 Color Scroll CCW SLOW →...
- Page 35 Standard Extended Value Function Default Snap ROTATING GOBOS [GOBO WHEEL 1] 0-10 BEAM Open 11-21 SPOT Open 22-31 Rotating Gobo 1 32-41 Rotating Gobo 2 42-51 Rotating Gobo 3 52-61 Rotating Gobo 4 62-71 Rotating Gobo 5 72-81 Rotating Gobo 6 82-91 Rotating Gobo 7 92-101...
- Page 36 Standard Extended Value Function Default Snap FIXED GOBOS [GOBO WHEEL 2] Open 8-14 Gobo 1 15-21 Gobo 2 22-28 Gobo 3 29-35 Gobo 4 36-42 Gobo 5 43-49 Gobo 6 50-56 Gobo 7 57-63 Gobo 8 64-70 Gobo 9 71-77 Gobo 10 78-84 Gobo 11...
- Page 37 Standard Extended Value Function Default Snap ROTATING PRISM, PRISM / GOBO MACROS 0-63 Open 64-95 8 Facet Prism 96-127 6 Facet Linear 128-135 Macro1 136-143 Macro2 144-151 Macro3 152-159 Macro4 160-167 Macro5 168-175 Macro6 176-183 Macro7 184-191 Macro8 192-199 Macro9 200-207 Macro10 208-215...
- Page 38 Standard Extended Value Function Default Snap FOCUS 0-255 Focus Adjustment from NEAR to FAR FOCUS FINE 0-255 Focus Fine Adjustment from NEAR to FAR ZOOM Zoom Adjustment from NARROW to WIDE 0-255 ZOOM FINE 0-255 Zoom Fine Adjustment AUTO FOCUS 0-50 Auto Focus Off 51-100...
- Page 39 Standard Extended Value Function Default Snap ANIMATION WHEEL Open 1-127 Animation Track 1 128-255 Animation Track 2 ANIMATION WHEEL, INDEX ROATIONI 0-127 Animation Wheel Indexing 128-189 Animation Wheel Rotation CW from FAST to SLOW 190-193 NO Rotation 194-255 Animation Wheel Rotation CW from SLOW to FAST SPEED of CMY &...
- Page 40 Standard Extended Value Function Default Snap CONTROL 0-19 Color Change Normal 20-29 Color Change to Any Position 30-39 Color and Gobo Change to Any Position 40-49 Lamp ON 50-59 Lamp OFF 60-66 Lamp Power 370W 67-73 Lamp Power 470W 74-79 Lamp Power 480W 80-84 All Motor Reset...
-
Page 41: Error Codes
E R R O R C O D E S When power is applied, the unit will automatically enter a “Reset/Test” mode. This mode brings all the internal motors to a home position. If there is an internal problem with one or more of the motors an error code will flash in the display in the form of “XXer”... -
Page 42: Specifications
S P E C I F I C A T I O N S SOURCE Philips™ MSD Platinum 400L Flex 480W Lamp Up To 4,000 Hour Lamp Life* *Test lab conditions. May vary depending on several factors including but not limited to: Environmental Conditions, Power/Voltage, Usage Patterns (On-Off Cycling), Control, Dimming, and Lamp Mode. -
Page 43: Dimensional Drawings
DIMENSIONAL DRAWINGS 389.8mm (15.34in) 445.3mm (17.53in) 386.3 (15.17in) 284.4mm (11.19in) 107mm (4.21in) 49.2mm(1.93in) Specifications and improvements in the design of this unit and this manual are subject to change without notice. -
Page 44: Optional Accessories
ORDER CODE ITEM ZB-MSD PLATINUM 400L FLEX Philips Platinum 400L Flex Lamp * * * pending * * * Road Case for Smarty Max TRIGGER CLAMP Heavy Duty Wrap Around Hook Style Clamp AC5PDMX5PRO 5 ft. (1.5m) 5pin PRO DMX Cable CAT6PRO5 5 ft. - Page 45 FCC STATEMENT This device complies with Part 15 of the FCC Rules. Operation is subject to the following two conditions: (1) this device may not cause harmful interference, and (2) this device must accept any interference received, including interference that may cause undesired operation. FCC RADIO FREQUENCY INTERFERENCE WARNINGS &...
Need help?
Do you have a question about the SMARTY MAX and is the answer not in the manual?
Questions and answers