Table of Contents
Advertisement
Available languages
Available languages
Quick Links
π
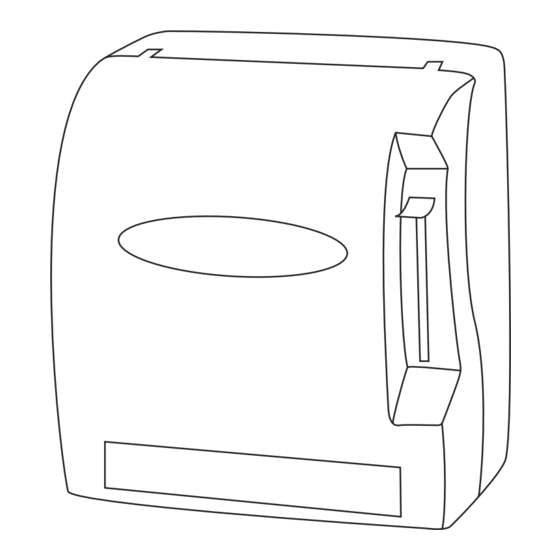
H-1131
ROLL PAPER TOWEL
DISPENSER
TOOLS NEEDED
Drill
1.
Remove snap-in key from the hardware packet.
2. Align snap-in key with lock on the bottom of the
dispenser and push in until it snaps into place.
(See Figure 1).
Figure 1
1. Open cover to expose inside of decorator strip
window.
2. Slide decorator strip into place, making sure the
decorator strip is held by the plastic guides.
(See Figure 3)
3. Close cover firmly and lock.
PAGE 1 OF 9
1-800-295-5510
uline.com
Drill Bit
Phillips Screwdriver
Dispenser x 1
Metal Key x 1
OPTIONAL SNAP-IN KEY INSTRUCTIONS
DECORATOR STRIP INSTALLATION INSTRUCTIONS
PARTS
Plastic Snap-In
Key x 1
3. Rotate snap-in key clockwise to open the dispenser.
(See Figure 2)
Figure 2
Figure 3
Decorator Strip
Para Español, vea páginas 4-6.
Pour le français, consulter les pages 7-9.
Wall Anchor x 5
Screw x 5
Decorator Strip Window
0218 IH-1131
Advertisement
Table of Contents

Related Manuals for U-Line H-1131


Summary of Contents for U-Line H-1131
- Page 1 Para Español, vea páginas 4-6. Pour le français, consulter les pages 7-9. π H-1131 1-800-295-5510 uline.com ROLL PAPER TOWEL DISPENSER TOOLS NEEDED Drill Drill Bit Phillips Screwdriver PARTS Dispenser x 1 Metal Key x 1 Plastic Snap-In Wall Anchor x 5...
-
Page 2: Mounting Instructions
MOUNTING INSTRUCTIONS NOTE: Recommended mounting height is 45" Figure 4 from the floor to bottom of dispenser. NOTE: Ensure that proper mounting hardware is used for appropriate wall composition as enclosed hardware may not be compatible with your wall surface. Insert the key into the lock opening on the bottom of dispenser and rotate clockwise until the cover pops open. -
Page 3: Loading Instructions
LOADING INSTRUCTIONS 1. Open dispenser cover completely. 3. Drape the paper over the black rubber roller and (See Figure 5) close the cover firmly until it locks. (See Figure 9) 2. Push a roll of product into the holders and release Figure 9 when the core becomes engaged. - Page 4 π H-1131 01-800-295-5510 uline.mx DESPACHADOR DE TOALLAS DE PAPEL EN ROLLO HERRAMIENTAS NECESARIAS Taladro Broca de Desarmador Phillips Taladro PARTES 1 Despachador 1 Llave 1 Llave a 5 Taquetes 5 Tornillos Metálica Presión de Plástico INSTRUCCIONES PARA LA LLAVE A PRESIÓN OPCIONAL Retire la llave a presión del paquete de herrajes.
-
Page 5: Instrucciones De Montaje
INSTRUCCIONES DE MONTAJE NOTA: La altura de montaje recomendada es Diagrama 4 de 1.14 m (45") desde el suelo hasta la parte inferior del despachador. NOTA: Asegúrese de utilizar herrajes de montaje adecuados para la composición de pared apropiada dado que los herrajes que se incluyen podrían no ser compatibles con la superficie de su pared. -
Page 6: Instrucciones De Carga
INSTRUCCIONES DE CARGA 1. Abra por completo la cubierta del despachador. 3. Coloque el papel sobre el rodillo de goma negra (Vea Diagrama 5) y cierre la cubierta con firmeza hasta que quede asegurada. (Vea Diagrama 9) 2. Inserte un rollo de producto en los soportes y suelte cuando el centro se active. - Page 7 π H-1131 1-800-295-5510 uline.ca DISTRIBUTEUR POUR ROULEAU DE SERVIETTES EN PAPIER OUTILS REQUIS Perceuse Mèche pour Tournevis cruciforme perceuse PIÈCES Distributeur x 1 Clé en métal Clé à Dispositifs Vis x 5 enclenchement d'ancrage x 5 en plastique x 1 INSTRUCTIONS RELATIVES À...
-
Page 8: Instructions De Montage
INSTRUCTIONS DE MONTAGE REMARQUE : La hauteur de montage Figure 4 recommandée est de 1,1 m (45 po) du plancher au bas du distributeur. REMARQUE : Veillez à utiliser un matériel d'installation adéquat adapté à votre mur. Le matériel d'installation fourni pourrait ne pas être compatible avec la surface de votre mur. Insérez la clé... - Page 9 INSTRUCTIONS DE CHARGEMENT 1. Ouvrez complètement le couvercle du distributeur. 3. Tendez le papier par-dessus le rouleau en (Voir Figure 5) caoutchouc noir et fermez le couvercle solidement jusqu'à ce qu'il s'enclenche en position. 2. En poussant, placez un rouleau dans les supports (Voir Figure 9) puis relâchez dès que le rouleau central est engagé.
Need help?
Do you have a question about the H-1131 and is the answer not in the manual?
Questions and answers