Table of Contents
Advertisement
Installation/Operation and Service Parts Manual
3765 Champion Boulevard
Winston-Salem, NC 27105
(336) 661-1992 Fax: (336) 661-1660
Toll-free: (800) 858-4477
2674 N. Service Road, Jordan Station
Ontario, Canada L0R 1S0
(905) 562-4195 Fax: (905) 562-4618
Toll-free: (800) 263-5798
Rotary-type
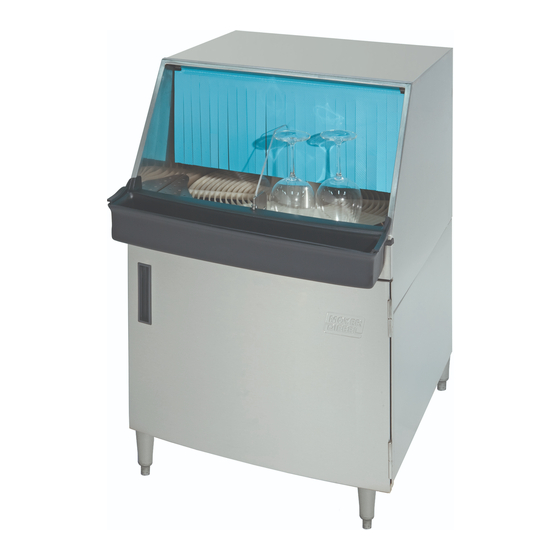
Conveyor Glasswasher
Model:
DFM7.5
Clockwise Rotation
Issue Date: 9.7.17
Manual P/N 0514427 rev. B
For machines beginning with S/N G160520081
Printed in the USA
Advertisement
Chapters
Table of Contents

Related Manuals for Moyer Diebel DFM7.5


Summary of Contents for Moyer Diebel DFM7.5
- Page 1 Installation/Operation and Service Parts Manual Rotary-type Conveyor Glasswasher Model: DFM7.5 Clockwise Rotation Issue Date: 9.7.17 Manual P/N 0514427 rev. B For machines beginning with S/N G160520081 Printed in the USA 3765 Champion Boulevard 2674 N. Service Road, Jordan Station Winston-Salem, NC 27105...
- Page 2 National Service Department In Canada: In the USA: Toll-free: 800/ 263-5798 Toll-free: 800/ 858-4477 Tel: 905/ 562-4195 Tel: 336/ 661-1992 Fax: 905/ 562-4618 Fax: 336/ 661-1660 email: service@moyerdiebellimited.com email: service@moyerdiebel.com ATTENTION: The glasswasher model no., serial no., voltage, Hz and phase are needed to identify your machine and to answer questions.
- Page 3 Product Registration REGISTER YOUR PRODUCT to ACTIVATE YOUR WARRANTY. 4:34 PM Three ways to register: • Use your mobile device to scan the QR code located on the front panel of your machine or enter our URL http://www.moyerdw.us/DF. • Visit our website at: http://www.moyerdiebel.com/service/ for the USA http://www.championindustries.com/warranty-registration for Canada •...
- Page 4 PRODUCT REGISTRATION BY FAX COMPLETE THIS FORM AND FAX TO: (336) 661-1660 in the USA 1-(800) 204-0109 in Canada PRODUCT REGISTRATION CARD Model Serial # Date of Installation: Company Name: Address: (Street) Province Postal Code Telephone #: ( Contact: Installation Company: Address: Telephone #: Contact:...
- Page 5 1 (800) 858-4477 in the USA or by calling 1 (800) 263-5798 in Canada. Revision Revised Serial Number Revision Date Pages Effectivity Description 8.26.16 G160520081 Released DFM7.5 version 1.9.17 Changed shut-off assy part no. to P/N 0714437 9.7.17 Changed item no. 24 P/N to 0514413...
-
Page 6: Limited Warranty
(a) 120 days after shipment, or (b) 90 days after installation, whichever occurs first. In the event that Moyer Diebel elects to repair, the labor and work to be performed in connection with the warranty shall be done during regular working hours by The Company's authorized service technician. -
Page 7: Table Of Contents
Table of Contents Table of Contents Revision History ........................ i Limited Warranty ......................ii Specifications ........................iv Installation ..................1 Unpacking ....................1 Utility Connections ..................3 Chemicals ....................4 Flow Diagram ................... 6 Quick Operation Guide ................7 Operation ..................8 Assembling the Glasswasher ............... -
Page 8: Specifications
Specifications... -
Page 9: Installation
Installation Installation Unpacking Move the glasswasher to its permanent location. Open the door and remove the box marked "LEGS". The box contains (4) 6" [152cm] screw-in legs. These legs are threaded tightly into the base of the machine. Remove (2) 1/2-13 x 2" bolts holding the glasswasher to the pallet. - Page 10 Installation Installation Unpacking (continued) Use two people to move the machine in order to install the legs. Have one person behind the glasswasher tilt it back as the person in front twists the machine to the right. This makes the front left leg mounting hole accessible. Screw one of the legs tightly into place.
-
Page 11: Utility Connections
Installation Utility Connections The installation of this machine must be performed by personnel who will follow all safety, electrical, 6 ft. plumbing, and sanitation codes. (1.5M) 25" [635] Plan View HOT WATER CONNECTION: 26-1/4" [667] 140-160°F/60-71°C ½" IPS 6¼" [156] Flow Pressure 25-95 PSI [173-655 kPa] 7¾"... -
Page 12: Chemicals
Installation Installation (continued) Chemicals Glassware cleaning chemicals A qualified chemical supplier should supply liquid detergent, sanitizer and rinse-aid for the glasswasher. The glasswasher manufacturer does not sell glassware washing chemicals. A chemical's formulation and strength vary depending on the chemical supplier; therefore, the specifications given below are approximations only. - Page 13 Installation Priming the Chemical Injectors and Approximate Chemical Settings Each chemical injector can be adjusted using its prime button and concentration adjusting screw. These controls are located on the right side of the control box located in the lower compartment of the glasswasher.
-
Page 14: Flow Diagram
Operation Flow Diagram The diagram below shows the major components of the DFM7 glasswasher and the flow of water and chemicals during normal operation. -
Page 15: Quick Operation Guide
Operation... -
Page 16: Operation
Operation Operation Assembling the Glasswasher Make sure the power switch is in the OFF postion. Install the wash arms and rinse spray arms. The spray arms have locating notches in the end of each arm. Push the spray arm straight into the hub. Do not twist. Install the conveyor assembly as follows: Insert the conveyor into the wash chamber keeping the rear raised. -
Page 17: Cleaning
Cleaning Cleaning Instructions NOTE: The cleaning instructions are attached to the inside of glasswahser front door. Daily Cleaning or after 8 hours of Operation: Make sure that any glasses on the conveyor are clean, then remove them from the conveyor. Push the on-off/flush switch on the right-hand side of the glasswasher control box to the "OFF"... -
Page 18: Weekly Cleaning Or 56 Hours Of Operation
Cleaning Cleaning Instructions (continued) Weekly Cleaning, after 7 days or 56 hours of Operation Complete 1-11 in the Daily Cleaning section on the previous page. Remove chemical supply containers if they are stowed inside the glasswasher, wipe any chemical spills with a damp cloth. Detergent and sanitizer (Chlorine) are corrosive on metal and must be removed as much as possible. - Page 19 Blank Page This Page Intentionally Left Blank...
-
Page 20: Troubleshooting
Troubleshooting The following troubleshooting guide can help identify a problem and provide a solution. Inspect your glasswasher before you contact an authorized service representative. Problem Cause(s) Solution(s) Glasswasher will not turn ON. Main breaker/fuse box is OFF. Turn breaker/fuse box ON. Disconnect fuse blown/breaker Turn breaker/fuse box ON. - Page 21 Troubleshooting Problem Cause(s) Solution(s) Water sprays our the front of Splash curtain is missing, Re-install the splash curtain or the glasswasher. positioned incorrectly, or damaged. replace the splash curtain. Spray arm(s) are damaged or Replace spray arm(s). missing. Glass(es) interferes with splash Reload glass(es).
- Page 22 Troubleshooting Problem Cause(s) Solution(s) Water temperature below Detergent tank thermostat Increase thermostat setting to 145°F/66°C in detergent tank. tempeature setting low. 145°F/66°C. Thermostat is defective. Authorized Service Agent may replace thermostat. Detergent tank heater is Authorized Service Agent may defective. replace detergent tank heater.
- Page 23 Troubleshooting Problem Cause(s) Solution(s) Water flows into glasswasher FLowing water supply line Incoming water pressure when ON/OFF switch is in the pressure measured at the must be 5 PSI/35 kPa on OFF position. glasswasher exceeds 95 PSI pressure gauge located on (655 kPA).
- Page 24 Blank Page This Page Intentionally Left Blank...
-
Page 25: Service Replacement Parts
Service Replacement Parts Service Replacement Parts Illustration List Page Base Assembly ....................18 Conveyor, Guides, Curtains ................20 Wash Hubs, Spray Arms ................22 Conveyor Stop Switch ................... 24 Drive Motor Assembly..................26 Vacuum Breaker Assembly ................28 Wash Pump and Piping ................. 30 Inlet Plumbing .................... -
Page 26: Base Assembly
Base Assembly... - Page 27 Base Assembly Item Part Description Qty. 112519 PLUG, CAP 1" 0501885 DOOR CATCH, MAGNETIC 0713746 SCRAP SCREEN, WASH TANK (Includes Item 19) 0501873 LEG 6" 0712692 DOOR ASSY. 111561 HANDLE, DOOR 0510884 SCREW, 1/4-20 X 1/2" TRUSS HEAD 0712647 BRACKET, DOOR 0501412 SCREW, 10-32 X 3/8"...
-
Page 28: Conveyor, Guides, Curtains
Conveyor, Guides, Curtains... - Page 29 Conveyor, Guides, Curtains Item Part Description Qty. 0313603 HUB, CONVEYOR 0312695 BLOCK, CONVEYOR GUIDE 0312604 TRAY, CONVEYOR 0506886 GEAR, DRIVE 0506885 CONVEYOR 0312610 ROD,CURTAIN, 3/8" D X 24" L 0512549 CURTAIN...
-
Page 30: Wash Hubs, Spray Arms
Wash Hubs, Spray Arms upper rinse spray arm upper wash spray arm notch on right notch in center lower rinse spray arm lower wash spray arm notch on left notch in center... - Page 31 Wash Hubs, Spray Arms Item Part Description Qty. 0501613 WASH ARM 0501738 RINSE ARM 0501608 O-RING 0501610 TOP MANIFOLD 0301622 BOTTOM MANIFOLD 0501476 FLAT WASHER, 1/4" 0501422 BOLT, 1/4-20 X 1-1/2" 0501412 SCREW, 10-32 X 3/8" 0500813 BOTTOM MANIFOLD INLET TUBE 0502663 BRAIDED HOSE, 3/8"...
-
Page 32: Conveyor Stop Switch
Conveyor Stop Switch... - Page 33 Conveyor Stop Switch Item Part Description Qty. 0512556 PLATE, DIVIDER 0713771 SHUT-OFF ARM ASSY. 0501412 SCREW 10-32 X 3/8" 0513768 BUSHING, SHAFT SHUT-OFF ARM 0513775 O-RING 0512559 SPRING 0513770 SHAFT, CONVEYOR SHUT-OFF 106558 PIN, COTTER 0513769 0313773 BRACKET, SHUT-OFF ARM LS ---- 0313774 BRACKET, SHUT-OFF ARM RS...
-
Page 34: Drive Motor Assembly
Drive Motor Assembly... - Page 35 Drive Motor Assembly Item Part Description Qty. 0506886 GEAR, DRIVE 0507264 SLINGER, WATER 0501923 SPRING, EXTENSION 0512713 BUSHING, SNAP 0501412 SCREW 10-32 X 3/8" 0307617 COVER, DRIVE MOTOR HOUSING 0512532 MOTOR, DRIVE 230VAC 0712712 HOUSING, DRIVE MOTOR...
-
Page 36: Vacuum Breaker Assembly
Vacuum Breaker Assembly... - Page 37 Vacuum Breaker Assembly Item Part Description Qty. 0502665 HOSE,1/2" I.D. BRAIDED 0503679 CLAMP, 7/16" GEAR 0502653 BARB, HOSE 3/8" MPT X 1/2" 90° 100500 BREAKER, VACUUM 1/2" 0508366 KIT, REPAIR VACUUM BREAKER 0502651 COUPLER, HOSE 1/2" MPT X 1/2" 0312684 SUPPORT, PLUMBING 0501476 WASHER, FLAT 1/4"...
-
Page 38: Wash Pump And Piping
Wash Pump and Piping... - Page 39 Wash Pump and Piping Item Part Description Qty. 0512679 MOTOR CAPACITOR 6.3uF, 370VAC 0512531 PUMP/MOTOR COMPLETE 230V/50-60Hz/1Ph 0512678 PUMP KIT (INCLUDES ITEMS 4-6) 0512677 SEAL, PUMP 0512680 IMPELLER, PUMP 0512746 O-RING, WASH PUMP 0507320 HOSE 1" I.D. X 1-1/4" OD 0502563 CLAMP ,HOSE #6 0502668...
-
Page 40: Inlet Plumbing
Inlet Plumbing To Vacuum Breaker To Detergent Tank Cold Water Valve Hot Water Valve Water solenoid detail... - Page 41 Inlet Plumbing Item Part Description Qty. 0502783 VALVE, SOLENOID 230VAC/60 HZ 0503802 TEE, 3/8" MPT 0503801 ADAPTER, 3/8" FEM X 1/2" 0507324 VALVE, CHECK 3/8" 0502768 VALVE, STOP 0502653 BARB, HOSE 3/8" X 1/2' 90° 0503679 CLAMP, GEAR 7/16" 0502665 HOSE, BRAIDED 1/2"...
-
Page 42: Sanitizer Plumbling
Sanitizer Plumbing... - Page 43 Sanitizer Plumbing Item Part Description Qty. 0502665 HOSE, BRAIDED 1/2" I.D. X 3/4" O.D. 0503679 CLAMP, GEAR 7/16" 0502663 HOSE, BRAIDED 3/8" I.D. X 5/8" O.D. 0502652 TEE, 1/2" X 1/2" X 3/8" 0503669 FITTING, BARB INJECTOR 0501519 TIE, CABLE 4" 0502666 TUBING, CHEMICAL 1/8"...
-
Page 44: Detergent Tank Assembly
Detergent Tank Assembly 37 38... - Page 45 Detergent Tank Assembly Item Part Description Qty. 0312592 COVER, STEAM 0312591 COVER, DETERGENT TANK 0712641 SCREEN, DETERGENT TANK 0700948 STANDPIPE, DETERGENT TANK 201669 LOCKNUT, 1/4 NPT, NICKLE PLATE 0501397 SCREW, SET 6-40 X 3/16" SOCKET SST 0703673 COLLAR (SET SCREW INCLUDED) 0512554 ROD, FLOAT 0503670...
-
Page 46: Control Box Assembly
Control Box Assembly SANI... - Page 47 Control Box Assembly Item Part Description Qty. 0503647 STRAIN RELIEF BUSHING (LARGE) 0512713 STRAIN RELIEF BUSHING (1/2") 0501404 SCREW, 10-32 X 3/8" ROUND HEAD, BRASS 0501493 WASHER, LOCK #10 EXT. TOOTH BRASS 0512185 BOLT, HEX FLANGE 1/4-20 X 3/8" SST 0501533 NUT, 10-32 BRASS 0501472...
-
Page 48: Options And Accessories
Options And Accessories... - Page 49 Options and Accessories Options and Accessories Item Part Description Qty. 0708986 TUBE SCRAPER 0501826 TUBE BRUSH 0501633 JET REAMER (COMES WITH DRILL) Item Part Description Qty. 0510571 NOZZLE, WASHDOWN 0505320 1/2" HOSE WASHER 0501833 1/2" X 10' HOSE ASSY. 0506643 FAUCET ---- 0503801...
-
Page 50: Electrical Schematic
Electrical Schematic...
Need help?
Do you have a question about the DFM7.5 and is the answer not in the manual?
Questions and answers