Table of Contents
Advertisement
Available languages
Available languages
Quick Links
Simply Engineered Better
For machines beginning with
serial no. D3694 and above
February, 2003
P. O. Box 4183
Winston-Salem, North Carolina 27115-4149
336/661-1992
Fax: 336/661-1660
Technical Manual
Manual técnico
International Door
Dishwasher
Lavavajillas Tipo Puerta
Internacional
No. de serie del aparato
Machine Serial No.
Manual
2674 N. Service Road
Jordan Station, Ontario, Canada L0R 1S0
905/562-4195
Moyer Diebel
Model
I-MHM5
High Temperature
with Built-in Booster
Alta temperatura
con calentador de
temperatura integrado
113495
P/N
Rev C
Fax: 905/562-4618
Advertisement
Table of Contents
Troubleshooting

Related Manuals for Moyer Diebel D3694


Summary of Contents for Moyer Diebel D3694
- Page 1 Simply Engineered Better Technical Manual For machines beginning with Manual técnico serial no. D3694 and above International Door Dishwasher Lavavajillas Tipo Puerta Internacional Model I-MHM5 High Temperature with Built-in Booster Alta temperatura con calentador de temperatura integrado No. de serie del aparato Machine Serial No.
- Page 3 REVISONS Revision History Revision Revised Serial Number Comments Date Pages Effectivity 07/01/02 D3694 Issue of manual and replacement parts lists Historial de revisiones Fecha de Páginas Número de Comentarios revisión modificadas serie vigente 07/01/02 Todas D3694 Edición del manual y...
-
Page 4: Table Of Contents
CONTENTS CONTENTS INTRODUCTION ......................... 1 Model Number ........................2 Standard Equipment ......................2 Options ..........................2 Electrical Power Requirements ..................2 INSTALLATION ........................... 3 Unpack the Dishwasher ...................... 3 To Change from Straight-through Operation to Corner Operation ........4 Electrical Connections ......................5 Plumbing Connections ...................... - Page 5 CONTENTS LIST OF FIGURES (Cont.d) Figure 9 – Detergent Signal Connection Point ................9 Figure 10 – Detergent Probe Injection Point, 1/2" ............... 10 Figure 11 – Rinse Aid Injection Point, 1/8" NPT ................. 10 Figure 12 – Solid State Control Board ..................25 Figure 13 –...
- Page 6 CONTENTS INDICE INTRODUCCIÓN ......................... 1 Número de modelo ......................2 Equipo estándar ........................2 Opciones ..........................2 Requisitos sobre la alimentación eléctrica ................2 INSTALACIÓN..........................3 Desembalaje del lavavajillas ....................3 Cambio de funcionamiento frontal a funcionamiento lateral ..........4 Conexión eléctrica ......................
- Page 7 CONTENTS LISTA DE FIGURAS (cont.) Figura 9 – Punto de conexión de la señal de detergente ............... 9 Figura 10 – Punto de inyección del tubo de detergente, 1/2 plgs..........10 Figura 11 – Punto de inyección auxiliar de enjuague, 1/8 plgs. NPT .......... 10 Figura 12 –...
- Page 8 THIS PAGE INTENTIONALLY LEFT BLANK...
-
Page 9: Introduction
Moyer Diebel o a las agencia de servicios autorizada. number, part descriptions and quantity. Cuando presente una solicitud de partes de repuesto, sírvase suministrar el número de modelo, el número... -
Page 10: Model Number
INTRODUCTION Número de modelo Model Number The I-MH is a high temperature (180°F/82°C) El I-MH es un lavavajillas de higienización con un sanitizing dishwasher with booster. calentador de temperatura (180°F/82°C). Standard Equipment includes: El equipo estándar incluye: • Manual tank fill •... -
Page 11: Installation
INSTALLATION INSTALACIÓN INSTALLATION Desembalaje del lavavajillas Unpack the dishwasher CUIDADO: CAUTION: Tenga cuidado al levantar la máquina Care should be taken when lifting the para evitar que se dañe. machine to prevent damage. NOTA: NOTE: La instalación de su máquina debe The installation of your machine cumplir con todas las normas de must meet all applicable health... -
Page 12: To Change From Straight-Through Operation To Corner Operation
INSTALLATION To Change from Cambio de funcionamiento frontal a funcionamiento lateral Straight-through Operation to Corner Operation El lavavajillas I-MH se envía desde fábrica para que se utilice en la modalidad de funcionamiento frontal. The I-MH dishwasher is shipped from the factory Las siguientes instrucciones explican los pasos a for straight-through operation. -
Page 13: Electrical Connections
INSTALLATION INSTALACIÓN (cont.) INSTALLATION (Cont.) Conexiones eléctricas Electrical Connections Advertencia: Warning: Las conexiones eléctricas y a tierra Electrical and grounding connections deben cumplir con todas las normas must comply with all applicable de electricidad que correspondan. Electrical Codes. Advertencia: Warning: Cuando esté... -
Page 14: Figure 6 - Main Terminal Block
INSTALLATION Electrical Connections Conexiones eléctricas (cont.) (Cont.) Consulte la figura 5 Refer to Fig. 5 Figure 5 Hinged Control Panel Panel de control con bisagras 3. Remove (2) lower screws from the front panel 3. Retire los (2) tornillos inferiores del panel of the machine to expose the electrical controls. -
Page 15: Plumbing Connections
INSTALLATION INSTALACIÓN (cont.) INSTALLATION (Cont.) Conexión de cañerías Plumbing Connections NOTA: NOTE: Las conexiones de cañerías deben Plumbing connections must comply cumplir con todos las normas de with all applicable sanitary and conexión de cañerías y de sanidad plumbing codes. que correspondan. -
Page 16: Drain Connections
INSTALLATION Water Connections Conexión de agua (cont.) (Cont.) 4. Se debe instalar una válvula de cierre manual 4. A manual shut-off valve (supplied by (suministrada por otros proveedores) en la others) should be installed in the supply cañería de suministro para poder realizar el line in order to service the machine. -
Page 17: Chemical Connections
INSTALLATION INSTALACIÓN (cont.) INSTALLATION (Cont.) Conexión para productos Chemical Connections químicos NOTE: NOTA: Consult a qualified chemical Consulte a un proveedor de supplier for your chemical needs. productos químicos capacitado para satisfacer sus necesidades relativas a productos químicos. 1. Se suministra un punto de conexión eléctrico de 1. - Page 18 INSTALLATION Conexión para productos Chemical Connections (Cont.) químicos (cont.) 3. A 1/2" detergent probe injection point is 3. Se suministra un punto de inyección del tubo provided at the rear and left side of the de detergente de 1/2 plg. En la parte posterior al dishwasher.
-
Page 19: Initial Start-Up
INITIAL START-UP ARRANQUE INICIAL INITIAL START-UP Complete la instalación Complete the installation Una vez que se hayan terminado de realizar las After plumbing and electrical connections are made, conexiones eléctricas y de cañerías, siga los pasos follow the steps below to complete the installation que aparecen a continuación para completar la of your dishwasher. - Page 20 INITIAL START-UP Fill the dishwasher Llene el lavavajillas with water de agua (cont.) (Cont.) Los controles están ubicados en POWER FILL la parte frontal del lavavajillas. CYCLE The controls are located A- Interruptor On/Off on the front of the dishwasher. (encendido/apagado) A- On/Off power switch B- Luz de En ciclo...
- Page 21 INITIAL START-UP ARRANQUE INICIAL INITIAL START-UP (Cont.) (Cont.) Check wash and final rinse Verifique las temperaturas del water temperatures agua de lavado y enjuague final POWER FILL CYCLE Push the On/Off power switch Oprima el interruptor On/Off "Up" to the on position. The hacia “arriba”...
- Page 22 INITIAL START-UP Verifique las temperaturas Check the wash and final rinse del agua de lavado y enjuague water temperatures (Cont.) final (cont.) POWER FILL CYCLE The final rinse water tempera- La temperatura del agua de ture should be a minimum of enjuague final debe ser EXTENDED WASH 180°F/82°C during the final...
- Page 23 INITIAL START-UP ARRANQUE INICIAL INITIAL START-UP (Cont.) (cont.) Complete the initial start-up Complete el arranque inicial Check all the plumbing for leaks. Also, check the Verifique que no existan goteras en las cañerías. drain plumbing for leaks and be sure that the drain Además, verifique las cañerías de desagüe para will handle the drain water flow from the dish- asegurarse de que no existan goteras y de que el desagüe...
-
Page 24: Operation
OPERATION OPERATION Refer to the Initial Start-up section, Steps 1-5, on pages 16-20, to place your dishwasher into service. To operate your dishwasher, perform the action in the left hand column; check the result in right hand column. Action Result 1. -
Page 25: Funcionamiento
OPERATION FUNCIONAMIENTO Consulte la sección Arranque inicial, pasos 1-5 en las páginas 16-20, para poner en servicio su lavavajillas. Para hacerlo funcionar, siga los pasos de la columna del lado izquierdo; verifique el resultado en la columna del lado derecho. Paso Resulto 1. -
Page 26: Maintenance
MAINTENANCE MANTENIMIENTO MAINTENANCE La limpieza regular de su máquina es la mejor Cleaning your machine is the best maintenance that forma de mantenimiento. Las partes que no se lavan you can provide. Components that are not regularly y limpian en forma regular no cumplen con su flushed and cleaned do not perform well. -
Page 27: Troubleshooting
TROUBLESHOOTING TROUBLESHOOTING Perform the seven checks listed below in the event that your dishwasher does not operate as expected. 1. All switches are ON 2. Drain-overflow assemby is in place and seated 3. Wash and rinse nozzles are clean 4. Wash and rinse pipe assemblies are installed correctly 5. - Page 28 TROUBLESHOOTING TROUBLESHOOTING (Cont.) CONDITION CAUSE SOLUTION Insufficient pumped Clogged pump intake screen ..Clean spray pressure Clogged spray pipe ......Clean Scrap screen full ......Must be kept clean and in place Low water level in tank ....Check drain-overflow assembly Pump motor rotation incorrect ..
-
Page 29: Localización Y Solución De Problemas
TROUBLESHOOTING LOCALIZACIÓN Y SOLUCIÓN DE PROBLEMAS Confirme los siguientes siete pasos que se enumeran a continuación si su lavavajillas no funciona como lo esperaba. 1. Todos los interruptores están en la posición ON (encendido) 2. El ensamblaje de desagüe-exceso de flujo está fijo y en su lugar 3. - Page 30 TROUBLESHOOTING LOCALIZACIÓN Y SOLUCIÓN DE PROBLEMAS (Cont.) CONDICIÓN CAUSA SOLUCIÓN La presión de rociado El filtro de ingreso de la bomba ....Límpielo de bomba no es suficiente está tapado El caño de rociar está tapado ....Límpielo El filtro de desperdicios está lleno ... Debe permanecer limpio y en su lugar El nivel de agua en el tanque es bajo ..
-
Page 31: Servicio Básico
BASIC SERVICE Estado Sólido Solid State I-MH (“Solid State”) I-MH Operating Instructions Instrucciones de Operación Automatic Operation Operación automática 1. Check that drain is closed and screens are 1. Verifique que el desagüe esté cerrado y que los clean and in place. filtros estén en su lugar. - Page 32 BASIC SERVICE Troubleshooting Timer Tablero de Circuito Del Medidor Circuit Board de Tiempos. Sugerencias para la Localización de averías 1.1 Checking General Condition 1.1 Verificación de la Condición General Before testing the inputs and outputs, you should first check that the board is receiving power. Antes de verificar las energías de entrada y salida, usted debe primero verficar si el tablero está...
-
Page 33: Figure 12 - Solid State Control Board
BASIC SERVICE 4. Check the results on the voltmeter: • T9, marcado “FLOAT SW” (por el interruptor • If switch is opened – the meter should read el flotador) between 4.7 to 5.3 DC volts. 4. Verifique los resultados en el voltímetro: •... -
Page 34: Figure 13 Float Switch
BASIC SERVICE Model I-MH uses a float switch and circuit board to El Modelo I-MH usa un interruptor del flotador y un tablero de circuito para controlar el llenado del control tank fill and tank heat. tanque y el calor del tanque. For Model I-MH, the built-in booster heat circuit is also controlled by the float switch. -
Page 35: Replacement Parts List
REPLACEMENT PARTS REPLACEMENT PARTS... -
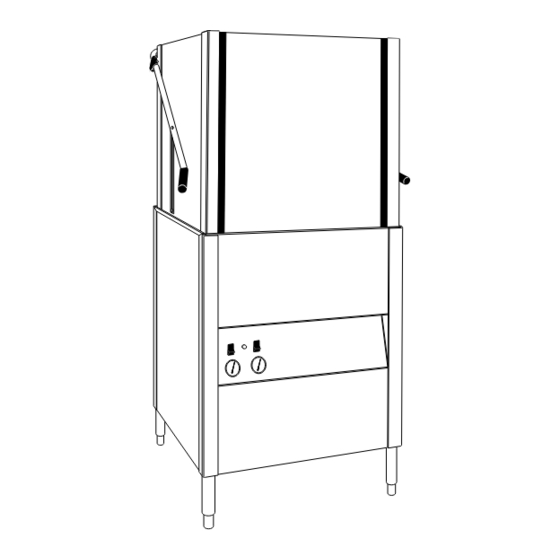
Page 36: Figure 15 - Doors And Panels
REPLACEMENT PARTS Figure 15 - Doors and Panels puertas y paneles... - Page 37 REPLACEMENT PARTS DOORS, PANELS AND GAUGES puertas y paneles Fig. 15 Part Item No. Part Description Qty. 325405 Side Door ..................327131 Front Door ..................321929 RH Panel, No Cut Out ..............321933 Panel, Instrument ................112389 Decal, Control Panel ..............322074 Panel, Front Lower ................
- Page 38 REPLACEMENT PARTS FRONT OF HOOD Figure 16 - Door Guides, Stops, and Lift Bracket guías para puertas, topes, abrazadera de sustentación...
-
Page 39: Figure 16 - Door Guides, Stops, And Lift Bracket
REPLACEMENT PARTS DOOR GUIDES, STOPS, AND LIFT BRACKET GUÍAS PARA PUERTAS, TOPES, ABRAZADERA DE SUSTENTACIÓN Fig. 16 Part Item No. Part Description Qty. 108053 Plug, Cornerpost ................107966 Nut, Grip 10-32 w/Insert ..............327104 Bracket, Door Lift ................100007 Screw 10-32 x 3/8" Truss Head ............. 327103 Door Lift Bracket ................ -
Page 40: Figure 17 - Door Handle, Spring Assembly And Safety Switch
REPLACEMENT PARTS Figure 17 - Door Handle, Spring Assembly, and Safety Switch manilla de la puerta, ensamblaje de resortes e interruptor de seguridad... - Page 41 REPLACEMENT PARTS DOOR HANDLE, SPRING ASSEMBLY, AND SAFETY SWITCH manilla de la puerta, ensamblaje de resortes e interruptor de seguridad Fig. 17 Part Item No. Part Description Qty. 112723 Bolt 5/16-18 x 15 Hex Head ............. 108066 Spring, Extension ................107397 Block, Spring Hook ................
- Page 42 REPLACEMENT PARTS Figure 18 - Track Assembly ensamblaje de los rieles...
-
Page 43: Figure 18 - Track Assembly
REPLACEMENT PARTS TRACK ASSEMBLY ensamblaje de los rieles Fig. 18 Part Item No. Part Description Qty. 0309469 Guide, Right Hand ................0309472 Track, Rear ..................0309468 Guide, Left Hand ................0309470 Support, Rack .................. 0309471 Track, Front ..................106727 Screw (10-32 x 5/8 Flat Hd) ............107966 Nut, grip (10-32 w/Nylon Insert) ............ - Page 44 REPLACEMENT PARTS Figure 19 - Wash/Rinse Spray Piping tuberías de rociado de lavado/enjuague...
- Page 45 REPLACEMENT PARTS WASH/RINSE SPRAY PIPING tuberías de rociado de lavado/enjuague Fig. 19 Part Item No. Part Description Qty. 324526 Rinse Manifold Weldment ..............113027 Connector, Rinse Arm ............... 113028 Top Rinse Arm Connector ..............0507445 Spindle, Wash Arm ................109864 Support, Wash Arm ................
-
Page 46: Replacement Parts
REPLACEMENT PARTS AFTER S/N D3857 PRIOR TO S/N D3858 Figure 20 - Wash/Rinse Spray Arm Assembly ensamblaje del brazo de rociar de lavado/enjuague... -
Page 47: Figure 20 - Wash/Rinse Spray Arm Assembly
REPLACEMENT PARTS WASH/RINSE SPRAY ARM ASSEMBLY ensamblaje del brazo de rociar de lavado/enjuague Fig. 20 Part Item No. Part Description Qty. 0507443 Spindle, Rinse Arm ................0508376 Nozzle, Rinse Arm(Prior to S/N D3857) .......... 113514 Bearing, Rinse Arm(Replaces 112164) ..........414111 Rinse Arm Assy. - Page 48 REPLACEMENT PARTS Figure 21 - Drain Assembly and Scrap Screens ensamblaje de desagüe y de los filtros para desperdicios...
- Page 49 REPLACEMENT PARTS DRAIN ASSEMBLY AND SCRAP SCREENS ensamblaje de desagüe y de los filtros para desperdicios Fig. 21 Part Item No. No. Part Description Qty. 112393 Knob, Drain Lift ................112394 Rod Assy, Drain Lift ................ 112392 Guide, Drain Lift ................100097 Screw (10-32 x 1/2"...
- Page 50 REPLACEMENT PARTS Figure 22 - Wash Tank Heat and Thermostats calentador del tanque de lavado y termostatos...
-
Page 51: Figure 22 - Wash Tank Heat And Thermostats
REPLACEMENT PARTS WASH TANK HEAT AND THERMOSTATS calentador del tanque de lavado y termostatos Fig. 22 Part Item No. Part Description Qty. 113622 Thermometer 4 ft. gas filled (replaces 108391) ....... 109069 Thermostat w/Cap 110-220°F ............201041 Washer ....................201029 Nut, Lock 1/2"... - Page 52 REPLACEMENT PARTS Figure 23 - Electric Booster Assembly and Thermostats ensamblaje del calentador de temperatura eléctrico y termostatos...
-
Page 53: Figure 23 - Electric Booster Assembly And Thermostats
REPLACEMENT PARTS ELECTRIC BOOSTER ASSEMBLY AND THERMOSTATS ensamblaje del calentador de temperatura eléctrico y termostatos Fig. 23 Part Item No. Part Description Qty. 100740 Bolt 5/16-18 x 1 Hex Head ............... 102376 Washer, Flat 5/16 x 3/4 x 1/16 ............108954 Nut, Grip 6-32 w/Insert .............. - Page 54 REPLACEMENT PARTS CUSTOMER WATER PRESSURE GAUGE CUSTOMER WATER INLET FINAL RINSE TEMP GAUGE Figure 24 - Fill Piping Assembly ensamblaje de las tuberías de llenado...
-
Page 55: Figure 24 - Fill Piping Assembly
REPLACEMENT PARTS FILL PIPING ASSEMBLY ensamblaje de las tuberías de llenado Fig. 24 Part Item No. Part Description Qty. 110768 Line Strainer Brass ................102444 Street Ell 3/4" NPT Brass ..............102651 Nipple 3/4" x 2" Brass ..............111437 Valve 3/4" NPT Hot Water ..............100184 Nipple 3/4"... - Page 56 REPLACEMENT PARTS Figure 25 - Pump Assembly ensamblaje de la bomba...
-
Page 57: Figure 25 - Pump Assembly
REPLACEMENT PARTS PUMP ASSEMBLY ensamblaje de la bomba Fig. 25 Part Item No. Part Description Qty. 324580 Strainer ....................107966 Nut, Grip 10-32 w/Nylon Insert ............104203 Clamp, Hose ..................104165 Clamp, Hose ..................107340 Clamp, Hose ..................112383 Hose Pump, Discharge ..............0508515 Hose, Suction .................. - Page 58 REPLACEMENT PARTS POWER FILL CYCLE EXTENDED WASH RINSE WASH Figure 26 - Control Panel and Gauges panel de control y medidores...
-
Page 59: Figure 26 - Control Panel And Gauges
REPLACEMENT PARTS CONTROL PANEL AND GAUGES panel de control y medidores Fig. 26 Part Item No. Part Description Qty. 111980 Circuit Breaker, Switch, On-Off (5A) ..........112391 Lite, Amber (In-Cycle) ..............0509228 Switch, Rocker (Fill-Extended Wash) ..........113622 Thermometer, 4 ft. gas filled (replaces 108391)....... 112086 Overlay, Wash 150°F ................ -
Page 60: Figure 27 - Control Cabinet
REPLACEMENT PARTS Figure 27 - Control Cabinet amario de control... - Page 61 REPLACEMENT PARTS IMH CONTROL CABINET amario de control Fig. 27 Part Item No. No. Part Description Qty. 900911 Kit*Timer Board (Prior to S/N D3857) .......... 113597 Timer Board (After S/N D3858) ............. 111904 Contactor, Booster Heater (40A, 3 Pole) ........111904 Contactor, Wash Tank Heater (40A, 3 Pole) ........
- Page 62 REPLACEMENT PARTS Figure 28 - Dishracks and PRV bandejas para vajillas y PRV...
- Page 63 REPLACEMENT PARTS DISHRACKS AND PRV bandejas para vajillas y PRV Fig. 28 Part Item No. Part Description Qty. 101273 Rack (Flat Bottom) ................101285 Rack (Peg) ..................107550 Pressure Reducing Valve ..............
- Page 64 ELECTRICAL SCHEMATICS THIS PAGE INTENTIONALLY LEFT BLANK...
-
Page 65: Electrical Schematics
ELECTRICAL SCHEMATICS ELECTRICAL SCHEMATICS... - Page 66 PER LOCAL ELECTRICAL CODE DOOR SWITCH RELAY NOTE 1: L1 L2 L3 CONNECT TO L2 IF 220/1, CONFIGURE XFMR TAPS FOR 220 RINSE AID SIGNAL RELAY CONNECT TO L2 IF 220/3, CONFIGURE XFMR TAPS FOR 220 EXTENDED WASH RELAY ON SINGLE PHASE CONNECT TO N IF 380-415/3, CONFIGURE XFMR TAPS FOR 220 TANK FILL RELAY CONNECT TO L2 IF 440/3, CONFIGURE XFMR TAPS FOR 440...
Need help?
Do you have a question about the D3694 and is the answer not in the manual?
Questions and answers