Table of Contents

Related Manuals for KERN ABP


Summary of Contents for KERN ABP
- Page 1 KERN & Sohn GmbH Ziegelei 1 Phone: +49-[0]7433- 9933-0 D-72336 Balingen Fax: +49-[0]7433-9933-149 E-Mail: info@kern-sohn.com Internet: www.kern-sohn.com Operating manual Analytical balance KERN ABP Version 1.0 2018-08 ABP-BA-e-1810...
-
Page 2: Table Of Contents
KERN ABP Version 1.0 2018-08 Operating manual Analytical balance Contents Technical data ....................5 Declaration of conformity ................7 Appliance overview ..................8 Components ..........................8 Keyboard ..........................10 3.2.1 Numeric entry ........................... 11 Display ............................. 12 Basic Information (General) ................ 15 Proper use .......................... - Page 3 Switching between counting and weighing mode ..............72 14.2 Percent determination......................73 14.2.1 Settings ..........................73 14.2.2 Setting the display ........................ 75 14.2.3 Performing calculation of percentage .................. 76 14.2.4 Change settings ........................76 14.2.5 Switching between percentage and weighing mode ............77 ABP-BA-e-1810...
- Page 4 Interface commands......................106 15.7 Communication parameters ....................110 15.7.1 Select standard setting ....................... 110 15.7.2 User defined settings (display example for KERN YKB-01N ..........111 15.8 Issue functions ........................113 15.8.1 Automatic data output / Auto Print function ................ 113 15.8.2 Continuous data output ......................
-
Page 5: Technical Data
1 Technical data KERN ABP 100-4M ABP 100-5DM Item no./ Type TABP 100-4M-A TABP 100-5DM-A Readability (d) 0.0001 g 0.00001 g / 0.0001 g Weighing range (max) 120 g 52 g / 120 g Minimum load (Min) 0.01 g 0.001 g Verification value (e) 0.001 g... - Page 6 KERN ABP 200-4M ABP 200-5DM ABP 300-4M Item no./ Type TABP 200-4M-A TABP 200-5DM-A TABP 300-4M-A Readability (d) 0.0001 g 0.00001 g / 0.0001 g 0.0001 g Weighing range (max) 220 g 102 g / 220 g 320 g Minimum load (Min) 0.01 g...
-
Page 7: Declaration Of Conformity
The parts to be counted are being scattered 2 Declaration of conformity The current EC/EU Conformity declaration can be found online in: www.kern-sohn.com/ce For verified weighing scales (= weighing scales assessed for conformity) a declaration of conformity is included in the scope of delivery. ABP-BA-e-1810... -
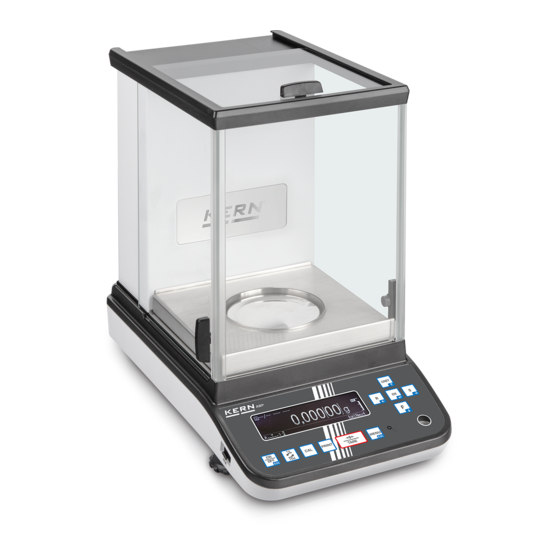
Page 8: Appliance Overview
3 Appliance overview 3.1 Components Models d = 0.0001 g Mode. d = 0.00001 g/0.0001 g Pos. Description Keyboard Bubble level Display Windshield Weighing pan Fastening point ionizer (optional) Glass wind screen USB host port Levelling screw ABP-BA-e-1810... - Page 9 Models d = 0.00001 g/0.0001 g Pos. Description Serial interface (RS232) USB device Port for ionizer Connector for AC adapter Fastening point for anti-theft device Fastening lug for anti-theft chain or wire Port for power pack External electronics box ABP-BA-e-1810...
-
Page 10: Keyboard
"Print" (weighing mode) Taring Call setup "Zero [TARE] Zeroing Setting / Taring" • Call up menu • Call application [MENU] specific settings • Call Statistics Call Setup Menu Ionizer on/off Ionizer [Ionizer] (Factory option) (Factory option) Confirm [OK] input ABP-BA-e-1810... -
Page 11: Numeric Entry
Flashing digit (0 – 9) or Navigation button reduce character (, [blank], -, A – Z) Digit selection to the right Navigation button Navigation button Digit selection to the left Confirm entry Navigation button Cancel input ABP-BA-e-1810... -
Page 12: Display
Display of weighing result in current weighing unit Measuring Stability display Value Net weight Tare weight Gross weight Hold function enabled Zero indicator Negative weighed value Net weight during formulating Tolerance marker Capacity display The non-verified value is given in brackets in verified scales. ABP-BA-e-1810... - Page 13 Statistics Error reports Adjustment required (PSC-function) Inadequate power supply Defective USB-connection Display example setting mode: After pressing the MENU-key in weighing mode the display will change to setting mode. Example of illustration: For calling system settings see chap. 11.1.3 ABP-BA-e-1810...
- Page 14 System Settings System Settings Level 1 Settings <Print> Settings <Save data> Settings <Communication> Settings <Adjustment> Settings <User> History The last 10 menu steps will be displayed. Level 1 For further information about the operation of the display, see chap. 11.1 ABP-BA-e-1810...
-
Page 15: Basic Information (General)
The balance may only be used according to the described conditions. Other areas of use must be released by KERN in writing. 4.3 Warranty Warranty claims shall be voided in case •... -
Page 16: Monitoring Of Test Resources
In KERN's accredited DKD calibration laboratory test weights and balances may be calibrated (return to the national standard) fast and at moderate cost. 5 Basic Safety Precautions 5.1 Pay attention to the instructions in the Operation Manual... -
Page 17: Packaging / Return Transport
Reattach possibly supplied transport securing devices. Secure all parts such as the glass wind screen, the weighing platform, power unit etc. against shifting and damage. Put network adapter and accessories in the small box Lift scale with both hands ABP-BA-e-1810... - Page 18 ABP-BA-e-1810...
-
Page 19: Unpacking, Setup And Commissioning
7.2 Unpacking and checking Remove device and accessories carefully from packaging, remove packaging material and place device at the planned work place. Check if that there has been no damage and that all packing items are present. ABP-BA-e-1810... - Page 20 Carrier weighing pan Centring ring (Models d = 0.0001 g only) Protective cover Mains adapter Holder for adapter cable (Models d = 0.0001 g only) Operating manual External electronics box Guard plate Windshield Multi-function weighing platform Support multi-function weighing platform ABP-BA-e-1810...
-
Page 21: Placing
Pull off protective film and attach as shown on image. 2. Installation of weighing plate Models d = 0.0001 g Attach centering ring, carrier of weighing plate and weighing plate in order. Attach the safety hood ABP-BA-e-1810... - Page 22 Mode. d = 0.00001 g/0.0001 g Attach centering ring, carrier of weighing plate and weighing plate in order. Attach the safety hood Place the guard plate carefully in the weighing chamber ABP-BA-e-1810...
- Page 23 Pay due attention to centring! Remove standard weighing plate as shown on image. Application examples: Adjustment will be required after exchanging the weighing platform, for instructions see chap. 8 Standard weighing platform Support multi-function weighing platform ABP-BA-e-1810...
-
Page 24: Mains Connection
Check, whether the voltage acceptance on the scales is set correctly. Do not connect the scales to the power mains unless the information on the scales (sticker) matches the local mains voltage. Only use KERN original mains adapter. Using other makes requires consent by KERN. Important: Before starting your weighing balance, check the mains cable for ... -
Page 25: Turning On The Power
(see warming up time chap.1). During this warming up time the balance must be connected to the power supply (mains, accumulator or battery). The accuracy of the balance depends on the local acceleration of gravity. Strictly observe hints in chapter Adjustment. ABP-BA-e-1810... -
Page 26: Connection Of Peripheral Devices
Before connecting or disconnecting of additional devices (printer, PC) to the data interface, always disconnect the balance from the power supply. With your balance, only use accessories and peripheral devices by KERN, as they are ideally tuned to your balance. - Page 27 In order to prevent that adjustment is starting during a measuring sequence, press the ON/OFF key immediately when the following display appears. This will cancel the adjustment and you can proceed with the measuring sequence. Sometime later adjustment will be requested again by the flashing weight symbol ABP-BA-e-1810...
-
Page 28: Time-Controlled Automatic Adjustment
Select setting [on] or [off] and confirm using the OK-key. Select [Setting] to enter time. Use the navigation keys to enter time and confirm using the OK-key. Repeat these operating steps to set the time for <Timer 2> / <Timer 3>. ABP-BA-e-1810... -
Page 29: Manual Adjustment Via Key [Cal-Key]
Press CAL key, adjustment is started. After successful adjustment the balance automatically returns to weighing mode. In case of an adjustment error (e.g. objects on the weighing plate) the display will show an error message, repeat adjustment. ABP-BA-e-1810... -
Page 30: Adjustment Test With Internal Weight
Carry out adjustment as near as possible to the balance’s maximum weight (recommended adjustment weight see chap. 1). Weights of different nominal values may be used for adjustment but are not optimal for technical measuring. Info about test weights can be found on the Internet at: http://www.kern-sohn.com ABP-BA-e-1810... -
Page 31: Adjustment Test With External Weight
Put the required adjustment weight carefully in the centre of the weighing pan. Close wind screen doors completely. Wait until the request for removing the adjustment weight is displayed. The difference to the previous adjustment will be displayed. ABP-BA-e-1810... -
Page 32: Adjustment Log
8.4 Adjustment log If an optional printer is connected and the GLP function enabled, this will be followed by automatic log output after every adjustment. Printout example (KERN YKB-01N): CAL –INTERNAL Mode of adjustment KERN & Sohn GmbH Company TYPE ABP 300-4M... -
Page 33: Regular Inspections
8.5 Regular inspections The ABP series supports regular inspection of your scale. This function may be used to check repeatability, off-centre stress (off-centre load errors) and linearity. The instructions on the display support the implementation of individual steps. Parameter setting: Call up menu: Press and hold the CAL-key for approx. - Page 34 3 sec, the <CAL key> setting menu will appear. Use the navigation keys to select <Periodic inspection> and confirm using the OK-key. Select desired test and confirm using the OK-key. Select <Start> and confirm using the OK-key. Follow the instructions on the display. ABP-BA-e-1810...
-
Page 35: Verification
If the seal mark is destroyed, verification looses its validity. Please observe all national laws and legal regulations. In Germany a re-verification will be necessary. Position of the official seals ABP-BA-e-1810... -
Page 36: Basic Operation
Wait until the stability display appears ( ). Read weighing result. When an optional printer is connected, the weighing value can be edited. Print-out example with enabled GLP function (see chap. 15.8.3): KERN & Sohn GmbH Company TYPE ABP 300-4M Model SN D319300002 Serial no. -
Page 37: Taring
• To delete the stored tare value, remove load from weighing pan and press TARE. • The taring process can be repeated any number of times. The limit is reached when the whole weighing range is exhausted. ABP-BA-e-1810... -
Page 38: Underfloor Weighing
• Never suspend loads that exceed the stated maximum load (max) (danger of breaking) Always ensure that there are no persons, animals or objects that might be damaged underneath the load. NOTICE After completing the underfloor weighing the opening on the bottom of the balance must always be closed (dust protection). ABP-BA-e-1810... -
Page 39: Switch Off The Balance
UNIT-key, see chap. 12.6. When switching-on the balance, the unit in which the balance has been switched off, will be displayed. 10.7 Change readability (1D/10D) (not available for verified models) 1d Display 10d Display ABP-BA-e-1810... -
Page 40: Display Tare / Net / Gross
10.8 Display Tare / Net / Gross In weighing mode press MENU button. Select <Tare/net/gross display> and confirm using the OK-key. To display "Tara / Net / Gross" Select <on> setting and confirm using the OK-key. Setting <on> Setting <off> ABP-BA-e-1810... -
Page 41: Display Decimal Dot As Point Or Comma
Select System Settings and confirm using the OK-key. Select <Decimal point setting> and confirm using the OK-key. Select desired setting [Period] or [Comma] and confirm using the OK-key. Use the ON/OFF button to return into weighing mode ABP-BA-e-1810... -
Page 42: Menu
Use the navigation keys to switch over into the available Change settings settings. Use the navigation key to scroll down. Use the navigation key to scroll up. Confirm setting Acknowledge with or reject with Return to previous Press menu Return to weighing Press mode ABP-BA-e-1810... -
Page 43: Standard Weighing Mode
Numerical input, see chap. 3.2.1. 11.1.1 Standard weighing mode The list of available settings will be displayed How to change settings 1. Tare/net/gross display Use the navigation keys to select the desired , settings and confirm using the OK-key. ABP-BA-e-1810... -
Page 44: Weighing Settings
2. Statistical calculation A submenu will be available by pressing if the icon is displayed. Use the navigation keys to select the desired , setting and confirm using the OK-key. to return to the previous menu 11.1.2 Weighing settings ABP-BA-e-1810... - Page 45 Select the desired settings using the F-key. To change your selection, press the OK-key. , Use the navigation keys to select the desired settings and confirm using the OK-key. Press the F-key to select additional settings and make changes as described above. ABP-BA-e-1810...
-
Page 46: System Settings
Confirm using the OK-key. The framing will indicate the current selection. Use the navigation keys , to select the desired menu block (such as system settings). Confirm selection by pressing the OK-key. The list of available settings will be displayed. ABP-BA-e-1810... - Page 47 (such aus brightness). To change your selection, press the OK-key. , Use the navigation keys to select the desired setting and confirm using the OK-key. Press the F-key to select additional settings and make changes as described above. ABP-BA-e-1810...
-
Page 48: Application Settings
Confirm using the OK-key and the application specific settings will be displayed. The application specific settings are described in the respective chapters, see chap. 14 11.2 Menu overview The menu overview is part of the scale’s scope of delivery and supplied in the form of a separate document. ABP-BA-e-1810... -
Page 49: Resetting The Menu
"Numeric input" and confirm using the OK- key. Either Enter user-defined password Enter standard password [9999] (default setting) Confirm query by pressing the OK-key The balance returns automatically into weighing mode. All user and application specific settings will be reset to default setting. ABP-BA-e-1810... -
Page 50: Menu Lock
Enter standard password [9999] (default setting) Confirm query by pressing the OK-key Use the navigation keys , to enable (on) / disable (off) the function and confirm using the OK-key. 3. Return to weighing mode Press the ON/OFF key ABP-BA-e-1810... -
Page 51: Log Menu Settings
2. Activate function Confirm using the OK-key. Use the navigation keys , to select <Menu setting output> and confirm using the OK-key. Confirm request by pressing the OK-key and printing will start. The balance returns automatically into weighing mode. ABP-BA-e-1810... -
Page 52: Menu History
11.6 Menu history This function is applied to display the last 10 menu steps. Use the navigation keys , to select < > and the last 10 menu steps will be displayed. ABP-BA-e-1810... -
Page 53: Description Of Individual Functions
Use the navigation keys , to select <Zero tracking> and confirm using the OK-key. 2. Enable/disable function Use the navigation keys , to enable (on) / disable (off) the function and confirm using the OK-key. 3. Return to weighing mode Press the ON/OFF key ABP-BA-e-1810... -
Page 54: Auto Tare Function
Use the navigation keys , to select <Auto tare> and confirm using the OK-key. 2. Enable/disable function Use the navigation keys , to enable (on) / disable (off) the function and confirm using the OK-key. 3. Return to weighing mode Press the ON/OFF key ABP-BA-e-1810... -
Page 55: Settings For Stability And Response
The icon will be moving in The icon will be moving the direction of <R>. in the direction of <S>. ABP-BA-e-1810... -
Page 56: Dosing
Select<Filling> and confirm using the OK-key. 2. Enable/disable function Use the navigation keys , to enable (on) / disable (off) the function and confirm using the OK-key. 3. Return to weighing mode Press the ON/OFF key ABP-BA-e-1810... -
Page 57: Standstill Width
2. Set range for stability determination Use the navigation keys , to select Setting and confirm using the OK-key. 0.5d Stability display ( ) very quiet environment 1000d Stability display ( ) busy environment 3. Return to weighing mode Press the ON/OFF key ABP-BA-e-1810... -
Page 58: Weighing Units
A user on the other hand may not have access to all functions. He/she has limited rights that are defined in the user profile. The maximum of users is limited to 10. ABP-BA-e-1810... - Page 59 Use the navigation keys , to enable (on) / disable (off) the function and confirm using the OK-key. Weighing balance returns to menu. From this point onwards you will be logged-in as administrator and authorised to change settings. ABP-BA-e-1810...
- Page 60 Use the navigation keys to , select <User name> and confirm using the OK-key. Enter desired user name (For numeric input see chap.3.2.1) Confirm selection by pressing the OK-key. Weighing balance returns to menu. Here you may change settings as described below. ABP-BA-e-1810...
- Page 61 Use the navigation keys , to select <Password > and confirm using the OK-key. Enter password (For numeric input see chap. 3.2.1 Confirm selection by pressing the OK-key. Weighing balance returns to menu. Here you may change settings as described below. ABP-BA-e-1810...
- Page 62 Use the navigation keys , to select the next menu item such as <Weighing value EXToutp.> and change settings as described above. Repeat this sequence of operations for all five menu items. Return to weighing mode: Press the ON/OFF key ABP-BA-e-1810...
- Page 63 Confirm selection by pressing the OK-key. Weighing balance returns to menu. Here you may change settings as described below. The user name will be displayed on the top right of the display during operation and as long as the respective user profile is enabled. ABP-BA-e-1810...
- Page 64 • A logged-in guest may merely perform weighing. Sequence of operations: Press the ON/OFF-key when list of users is displayed The display will then change to operating mode, the selected user <GUEST> will be enabled and shown on the top of the display. ABP-BA-e-1810...
-
Page 65: Balance Settings
Use the navigation keys , to select <OP mode setting> and confirm using the OK-key. Use the navigation keys , to select the desired setting and confirm using the OK- key. Use the ON/OFF button to return into weighing mode ABP-BA-e-1810... -
Page 66: Balance Identification No
Use the navigation keys , to select <Date output style> and confirm using the OK-key. Use the navigation keys , to set the display format and confirm using the OK-key. Use the ON/OFF button to return into weighing mode ABP-BA-e-1810... -
Page 67: Brightness Of Display
For calling system settings see chap. 11.1.3. Use the navigation keys , to select <Language> and confirm using the OK-key. Use the navigation keys , to select language and confirm using the OK-key Use the ON/OFF button to return into weighing mode ABP-BA-e-1810... -
Page 68: Application Functions
Produce an analysis sample • The balance starts in the mode, in which it has been switched off. • To switch between application and weighing mode press the F-key (not available for statistics, check weighing, minimal weight) ABP-BA-e-1810... -
Page 69: Parts Counting
Use the navigation keys , to select storage location and confirm using the OK- key. If required, change name and confirm using the OK-key. To overwrite a stored single weight continue by referring to chap. 14.1.4 ABP-BA-e-1810... - Page 70 Enter single weight as numeric value In counting mode, press MENU-key. Use the navigation keys , to select <Unit weight> and confirm using the OK-key. Enter known single weight and confirm using the OK-key. ABP-BA-e-1810...
-
Page 71: Setting The Display
14.1.3 Part counting In counting mode, select stored single weight and confirm using the OK-key (chap. 14.1.1). Put empty container on the scale and tare. Fill weighing goods into the container and read the piece quantity. ABP-BA-e-1810... -
Page 72: Change Settings
OK-key. Weight according to selected reference quantity: Load weight and confirm using the OK- key. The changes made will be displayed. To return to counting mode, press the ON/OFF-key 14.1.5 Switching between counting and weighing mode ABP-BA-e-1810... -
Page 73: Percent Determination
The framing will indicate the current selection. Confirm using the OK-key and the application specific settings will be displayed. 100PER1 -3: Loaded reference weight = 100 % ANYPER1, 2: Loaded reference weight = user defined [%] ABP-BA-e-1810... - Page 74 Wait until stability display ( ) has settled, then confirm using the OK-key. The reference will be imported and displayed. Confirm using the OK-key From now on the weight of the sample will be shown in percent based on the reference weight ABP-BA-e-1810...
-
Page 75: Setting The Display
In percentage mode, press the MENU- key. Use the navigation keys , to select <Display with load weight> and confirm using the OK-key. Select <on> or <off> and confirm using the OK-key. Setting <off> Setting <on> ABP-BA-e-1810... -
Page 76: Performing Calculation Of Percentage
The following changes may be made: Product name: Change name and confirm using the OK- key. Reference weight: Load weight and confirm using the OK- key. The changes made will be displayed. To return to percentage mode, press the ON/OFF-key. ABP-BA-e-1810... -
Page 77: Switching Between Percentage And Weighing Mode
For density determination we recommend working with the optionally available density determination set. The set contains all the accessories and aids required for easy and precise density determination. For instructions please see the operating instructions enclosed with the density determination set. ABP-BA-e-1810... -
Page 78: Totalization
Place first good to be weighed on balance. When the standstill control ( ) is complete the weighing value is automatically issued to the optional printer. The displayed value is added into the total adding memory. Afterwards automatic taring will take place. ABP-BA-e-1810... - Page 79 ADDON MODE ADDON MODE N001 = 1.004[1] g 1.004[1] g N002 = 0.999[2] g 0.999[2] g N003 = 0.999[0] g 0.999[0] g N004 = 0.999[1] g 0.999[1] g N005 = 0.994[8] g 0.994[8] g TOTAL = 4.996[2]g TOTAL 4.996[2] g ABP-BA-e-1810...
- Page 80 N002 = 0.999[2] g N003 = 0.999[0] g N003 = 0.999[0] g N004 = 0.999[1] g N004 = 0.999[1] g N005 = 0.994[8] g N005 = 0.994[8] g TOTAL 4.996[2] g Return to add-on mode by pressing the ON/OFF-key. ABP-BA-e-1810...
-
Page 81: Formulation
Wait until stability display ( ) has settled down, then press the OK-key. The weighing result will be issued automatically and added to the add-on memory. Afterwards automatic taring will take place. The balance is ready to weigh-in the second component. ABP-BA-e-1810... - Page 82 Select <on> or <off> and confirm using the OK-key. Sample log Sample log Element No. output <on> Element No. output <off> FORMULATION MODE FORMULATION MODE N001 = 49.998[2]g 49,998[2]g N002 = 19.919[1]g 19,919[1]g N003 = 4.999[9]g 4,999[9]g TOTAL = 74,917[2]g TOTAL = 74.917[2]g ABP-BA-e-1810...
- Page 83 Sample log Sample log Total weight output <on> Total weight output <off> FORMULATION MODE FORMULATION MODE N001 = 49.998[2]g 49,998[2]g N002 = 19.919[1]g 19,919[1]g N003 = 4.999[9]g 4,999[9]g TOTAL = 74.917[2]g To return to recipe mode, press the ON/OFF-key. ABP-BA-e-1810...
-
Page 84: Define And Process Formulations
3. Recipe name (at initial input) To overwrite a saved recipe please refer to chap. 14.1.4 The display used to enter a recipe name will appear during an initial input. Confirm <Recipe name> by pressing the OK- key. ABP-BA-e-1810... - Page 85 Use the navigation keys , to select <Setting> and confirm using the OK-key. Set parameters for component one by one. Component name Enter component name such as milk (max. 20 characters) and confirm using the OK-key ABP-BA-e-1810...
- Page 86 Enter weight and confirm using the OK- Tolerance of components Enter tolerance and confirm using the OK- Repeat step 5 for all components of the recipe To return to recipe mode, press the ON/OFF-key ABP-BA-e-1810...
- Page 87 Wait for stability sign ( Apply the achieved target value by pressing the OK- key. Depending on the setting, the display will be reset to zero either automatically, or by pressing the TARE-key. The balance is ready to weigh the second component. ABP-BA-e-1810...
-
Page 88: Change Recipe
The memory will be deleted. A new formulation may be started. 14.5.3 Change recipe In recipe mode press MENU button. Select <Changing registration> and confirm using the OK-key. Make changes as described in section "Define recipe". ABP-BA-e-1810... -
Page 89: Sample Log (Kern Ykb-01N)
14.5.4 Sample log (KERN YKB-01N): RECIPE FUNCTION NAME Recipe name MIHO-CREME N001 1. Component MILK TGT= 47.000[0] g Setpoint RNG= 0.100[0] g Tolerance WEI= 47.014[1] g Weighed-in quantity DIF= 0.014[1] g Deviation from target value N002 2. Component ALMOND OIL TGT= 95.000[0] g... -
Page 90: Preparing Buffer Solutions
1. Selecting an application see chap. 11.1.4. The available applications will be displayed. Use the navigation keys , to select <Buffer solution preparation>. The framing will indicate the current selection. Confirm using the OK-key. ABP-BA-e-1810... - Page 91 To return to the previous menu, press the MENU-key. 4. Enter volume Enter volume and confirm using the OK-key. The balance is ready for weighing the first component. Displays the component name and the nominal weight. Load weighing container and tare. ABP-BA-e-1810...
- Page 92 Confirm using the OK-key 6. Completing a formulation Once the last component has been applied, the result will be displayed and issued automatically. Finish by pressing the OK-key. The memory will be deleted. A new formulation may be started. ABP-BA-e-1810...
-
Page 93: Sample Preparation
Define sample preparation For selecting application, see chap. 11.1.4 The available applications will be displayed. Use the navigation keys , to select <Sample preparation>. The framing will indicate the current selection. Confirm using the OK-key. ABP-BA-e-1810... - Page 94 Enter tolerance and confirm using the OK-key. Enter molecular weight of component and confirm using the OK-key. Enter quantity of chloride groups and confirm using the OK-key. Save by pressing the OK-key. The values for the samples will be displayed. ABP-BA-e-1810...
-
Page 95: Changing Saved Samples
Current measuring value target weight. Active substance 14.7.1 Changing saved samples In sample mode press MENU button. Select <Register active sample> and confirm using the OK-key. Make changes as described in the previous paragraph. ABP-BA-e-1810... -
Page 96: Statistics
PRINT-key. Each time you save a value it will be logged automatically. 3. Finish statistics Press MENU button. <End Statistical calculation> The result will be issued automatically. ABP-BA-e-1810... - Page 97 Smallest weight value Difference smallest / = 0.0064 greatest weighing value MEAN = 0.99986 g Mean Value = 0.00272 g Standard Deviation = 0,00 % Relative standard deviation = 0,00001 Fraction Calculation: s: Standard Deviation n Number : Weighing Value ABP-BA-e-1810...
-
Page 98: Control Weighing And Target Weighing
2. Activate function Use the navigation keys , to select <Target measurement> and confirm using the OK-key. Select Settings <on> and confirm using the OK-key. 3. Setting target value Select <Setting > and confirm using the OK-key. ABP-BA-e-1810... - Page 99 If required, place empty container on scale and tare. Place weighed goods and wait until the tolerance mark appears. With the help of the tolerance mark check if the weighed goods are under, inside or over the default tolerance. ABP-BA-e-1810...
-
Page 100: Control Weighing (Pass / Fail Evaluation)
By entering the upper and lower limit you can ensure that the weighed weighed good remains exactly within the set tolerance range at all time. If the values of limits are exceeded or not reached this will be indicated by the displayed indicators ABP-BA-e-1810... - Page 101 OK-key. When entering the limit values ensure that the values match logically one with another, i.e. the lower limit value must not be greater than the upper one. To return to control mode, press the ON/OFF-key ABP-BA-e-1810...
-
Page 102: Minimum Sample Weight
No tolerance mark shown. 14.11 Minimum sample weight The default setting for the function "Minimum initial weight" is “locked”. Settings can only be defined locally in connection with a DakkS calibration. For further information please go to KERN-Homepage (www.kern-sohn.com). ABP-BA-e-1810... -
Page 103: Interfaces
KERN- Homepage www.kern-sohn.com, / Downloads. Select the driver version compatible with your system and execute the exe file. We recommend our transfer software ‘Balance Connection KERN SCD 4.0‘ for the import of data to a PC program. ABP-BA-e-1810... -
Page 104: Connect Serial Devices / Connect Programmable Controller (Sps / Plc)
Turn off scale and device. Connect scale to interface of device, using a suitable RS232C cable. Faultless operation requires an adequate KERN interface cable (optional). Turn on scale and device. Adapt communication parameter of scale and device, see chap. Data is issued or received via the PRINT-key or control commands. -
Page 105: Data Transmission Format
4 character: Position 11-14 Final character Separator C/R = 0DH, L/F = 0AH At CR+LF data length will be increased by one position. 2. Stable / unstable weighing value: Positon ASCII 31H 32H Data stable S (53H) unstabl U (55H) ABP-BA-e-1810... -
Page 106: Interface Commands
Cancel output 2. Key operations Command Function POWER Press simulation DIGIT Press simulation PRINT Press simulation TARE Press simulation Press simulation MENU Press simulation Press simulation ENTER Press simulation Press simulation DOWN Press simulation LEFT Press simulation RIGHT Press simulation ABP-BA-e-1810... - Page 107 ?: Nr. 1 - 3 XX.XXXX: Loaded reference weight = 100 % % W ? Percentage calculation (?: No. 1- 3.) Formulation Call function Totalization Call function Density determination of solids Call function Determining density of liquids Call function ABP-BA-e-1810...
- Page 108 5. Adjustment and weighing units Command Function Adjustment ICAL Internal adjustment ECAL External adjustment ECAL.W=XXX.XXXX Enter weight value for external adjustment weight (XXX.XXXX) [g]. Weighing Units Activate the weighing unit, in which can be toggled with the UNIT key. ABP-BA-e-1810...
- Page 109 Display date / time User administration LOGIN=XXXX: YYYY Login XXXX: User name (max 20 characters) YYYY: Password (4 characters) LOGOUT Logout Display currently logged-in user 7. Miscellaneous Command Function TYPE Model Software version Serial number Weighing range (max) Minimum load (Min) ABP-BA-e-1810...
-
Page 110: Communication Parameters
All parameters may be of course also set in a user specific way (See chap. 15.7.2). Menu Standard Extended Type M Type S Type A User setting selection - Setting Manufactu Shimadzu Shimadzu for KERN Mettler Sartorius (Standard) YKB-01N Baud user- 1200 1200 2400 1200 2400 9600... -
Page 111: User Defined Settings
OK-key. Use the ON/OFF button to return into weighing mode 15.7.2 User defined settings (display example for KERN YKB-01N Every communication parameter can be set individually in the menu item "User setting". Call function: Press and hold PRINT-key for approx. 3 sec. - Page 112 Select setting and confirm using the OK-key. No handshake Hardware Handshake HARD Software Handshake SOFT Timer Handshake TIMER 5. Data format Use the navigation keys to select <Data format> and confirm using the OK-key. Select setting and confirm using the OK-key. ABP-BA-e-1810...
-
Page 113: Issue Functions
Not combinable with the continuous data output. Call function: Press and hold PRINT-key for approx. 3 sec. <Print> Confirm using the OK-key. Select Settings <Auto print> and confirm using the OK-key. Select Settings <on> and confirm using the OK-key. ABP-BA-e-1810... -
Page 114: Continuous Data Output
Place weighed goods and wait until the stability display ( ) appears. The weighing value is issued automatically. Remove the weighed good. 15.8.2 Continuous data output icon will be displayed while the function is enabled. Not combinable with automatic data output. ABP-BA-e-1810... - Page 115 If required, place empty container on scale and tare. Place goods to be weighed, The weighing values are issued according to the defined interval. Continuous data output may be cancelled and restarted with the help of the PRINT-key. ABP-BA-e-1810...
-
Page 116: Glp Output Function
OK-key. Use the navigation keys to define the contents for the header and footer one by one, each time confirming by pressing the OK-key. Return to weighing mode Press the ON/OFF button. Enter scale identification number, see chap. 13.3 ABP-BA-e-1810... -
Page 117: Defining Output Details
Barcode ID (max. 22 characters) AAAAA0008 Sample description 175.9320 g Measuring Value You may also define the output details via System Settings (See chap. 11.1.3). The barcode ID may also take place with the help of a barcode reader or a PC keyboard. ABP-BA-e-1810... -
Page 118: Usb Connection
(PC keyboard, barcode reader). Connecting devices: Switch off the balance Connect USB equipment as shown on the diagram Switch on balance. USB-connection USB equipment and application. Save weighing data Data input Data transmission USB Hub and adjustment logs ABP-BA-e-1810... -
Page 119: Edit Weighing Data, Adjustment Logs And Screenshots To Usb Medium
File format USB (txt or CSV) Select file format: Use the navigation keys to select <USB saved data format> and confirm using the OK-key. Confirm desired setting by pressing the OK- key. Return to weighing mode: Press the ON/OFF button. ABP-BA-e-1810... - Page 120 To enable <Screen capture> select Setting <on> and confirm using the OK-key Connect the scale to a PC keyboard by means of an USB hub, as shown on the diagram. Save screenshot by pressing [Shift] + [Print] to USB stick. ABP-BA-e-1810...
- Page 121 Issue internal memory Call Menu Item <Issue Internal Memory> as described above under "Preparation". Confirm using the OK-key Confirm using the OK-key, data will be issued. Return to weighing mode: Press the ON/OFF button. ABP-BA-e-1810...
-
Page 122: Data Transfer By Means Of Barcode Reader
The available menu items will be displayed. Transfer: All data Without commands No transmission Confirm desired setting by pressing the OK- key. Return to weighing mode: Press the ON/OFF button. Application example for easy log-on (without password entry): ABP-BA-e-1810... -
Page 123: Servicing, Maintenance, Disposal
3. Weighing pan These may be removed as described below and cleaned with a 4. Glass doors commercial glass cleaner. Handle glass doors with care. Attention: Risk of breakage Risk of cuts. Keep away your hands/fingers from the running rail. ABP-BA-e-1810... -
Page 124: Servicing, Maintenance
4. Re-install the glass door in reverse order. To secure the glass door always reattach the plastic handle. 16.2 Servicing, maintenance The appliance may only be opened by trained service technicians who are authorized by KERN. Before opening, disconnect from power supply. ABP-BA-e-1810... -
Page 125: Disposal
• Severe temperature variations in the room or the carried out frequently. instrument No data transfer between • Communication settings are wrong. printer and balance. The menu settings cannot • The menu is locked Remove the menu lock. be changed. ABP-BA-e-1810... -
Page 126: Ionizer (Factory Option)
If water or other foreign matter enters the ionizer, turn off the master switch immediately and disconnect it from the mains. On account of the high voltage technology, handle the ion source and exits with care. Do not take apart or modify the ionizer. ABP-BA-e-1810... - Page 127 The Blue LED [RUN] on the front of the ionizer illuminates to indicate that the instrument is now generating ion for static removal operation. There is sound of operation during an ion generation, it is not failure. ABP-BA-e-1810...
-
Page 128: Technical Data
Device may only be used indoors 18.4 Commissioning Switch on balance Connect network adapter of ionizer to scale, as shown on diagram. Connect network adapter of ionizer to power supply. Turn on ionizer as shown on diagram [on]. The display lights up. ABP-BA-e-1810... - Page 129 Call System Settings and confirm using the OK-key. Use the navigation keys to , to select <Ion irradiation time> and confirm using the OK-key. Confirm desired setting by pressing the OK-key. Return to weighing mode: Press the ON/OFF button. ABP-BA-e-1810...
-
Page 130: Maintenance And Cleaning
Take care that the peaks are not bent. When the internal part of the electric discharge section is dirty, please blow off the dirt inside with an air compressor gun / air duster (dry type, which do not spray cleaning solution while blowing ), etc. ABP-BA-e-1810...
Need help?
Do you have a question about the ABP and is the answer not in the manual?
Questions and answers